background image

2 IT

A

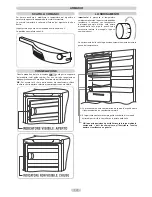
Per invertire il senso di apertura delle porte seguire le indicazioni in relazione al tipo di testata e di cerniera di cui il vostro prodotto è costituito.

INVERSIONE DEL SENSO DI APERTURA DELLE PORTE

Riportare l‘apparecchio in posizione verticale e attendere 2 ore prima di rimetterlo in funzione

Sdraiare o inclinare di 45° il frigorifero, per facilitare 
le operazioni nella parte inferiore dello stesso

Incidere e rompere l'asola sinistra del cruscotto 
nella zona dell'impronta

Se il cruscotto è di altro tipo, rompere la 
membrana, inserire il perno e avvitare la cerniera 
sul lato sinistro del cruscotto 

Avvitare il cruscotto e rimontare l’etichetta 
estetica. Riportare l’apparecchio in posizione 
verticale ed attendere 2 ore prima di rimetterlo in 
funzione

Per effettuare la reversibilità delle maniglie: 
Togliere i tappini estetici sul lato destro delle 
porte

Svitare le maniglie dal lato sinistro e rimontarle 
sul lato destro del prodotto.
Posizionare i tappini sul lato sinistro.

Inserire il perno della cerniera e il distanziale 
nella testata. Rimontare le cerniere e le porte 
operando dal basso verso l’alto

Rimuovere il tappo sulla parte sinistra e inserirlo 
sulla parte destra delle testatine centrali e 
inferiore.

In presenza di questa tipologia di cruscotto, asportare 
l’etichetta e svitare le viti, quindi estrarre parzialmente 
il cruscotto.

Svitare la cerniera superiore destra ed invertire la 
posizione del perno, quindi rimontarla sul lato sinistro

Togliere la cerniera inferiore destra svitando le viti, il 
perno e le rondelle, quindi togliere la porta inferiore 

Rimuovere lo zoccolo inferiore, estraendo i 3 
tappini protettivi e allentando le apposite viti 

Forare lo zoccolo nella zona dell’impronta sinistra 

1) rompere la 
membrana

2) Inserire il perno

B

Riportare l‘apparecchio in posizione verticale e attendere 2 ore prima di rimetterlo in funzione

Summary of Contents for CPLA335K

Page 1: ...IGORÍFICO de pág 13 a pág 15 ES FRIGORÍFICO da pág 16 à pág 18 PT ΨΥΓΕΙΟ α ό σελ 19 έως σελ 21 EL LODÓWKA od str 22 do str 24 PL CHLADNIČKA od strany 25 do strany 27 CZ KOELKAST pag 28 t m pag 30 NL JÄÄKAAPPI sivut 31 33 FI KJØLESKAP fra side 34 til side 36 NO KYLSKÅP från sida 37 till sida 39 SV KØLESKAB fra s 40 til s 42 DA ...

Page 2: ... cella frigo In questi casi è necessario ruotare la manopola frigo su numeri più bassi La presenza di un lieve strato di brina o di gocce d acqua durante il funzionamento è da considerarsi normale E importante mantenere sempre pulito il condotto di scarico ed evitare di porre i cibi a contatto con la parete della cella NB In questa posizione è possibile trovare la targa matricola contenente i dati...

Page 3: ... estetici sul lato destro delle porte Svitare le maniglie dal lato sinistro e rimontarle sul lato destro del prodotto Posizionare i tappini sul lato sinistro Inserire il perno della cerniera e il distanziale nella testata Rimontare le cerniere e le porte operando dal basso verso l alto Rimuovere il tappo sulla parte sinistra e inserirlo sulla parte destra delle testatine centrali e inferiore In pr...

Page 4: ...3 IT ...

Page 5: ...compartment In this case it is necessary to turn the knob to lower settings A small amount of frost or drops of water on the back of the fridge compartment when the fridge is working is normal Make sure the water outlet is always clean Make sure foods do not touch the back or sides of the fridge compartment NB This is the rating plate If you need to contact our Service Department in the event of f...

Page 6: ...panel in the insert area With another panel type break the plastic membrane and screw the hinge on the left hand side of the panel Screw the panel back on and place the outer label back on Put the appliance in the upright position and wait two hours before turning it on To reverse the handles remove the outer caps from the right hand side of the doors Unscrew the handles from the left hand side an...

Page 7: ...rn the appliance back in vertical position and wait 2 hours before operating it 2 hours Position the door and the hinge first then screw the latter to the product Screw the hook on the right side of the compartment Unscrew the hook located on the left side of the compartment Remove the outer caps as shown in the figure 6 GB ...

Page 8: ...Z STUDIO 03 2006 41017588 ...

Reviews: