36
36
BURNERS
These parts must be cleaned using a sponge and soapy water or other suitable non-
abrasive products. Dry with a soft cloth.
Warning! Not dishwasher safe.
If left on the surface for a length of time, acidic substances such as lemon juice, tomato
sauces and passata, vinegar and other similar products will damage the surface and dull
its shine.
It is very important to check that the burner flame spreader and the cap have been correctly
positioned. Failure to do so can cause serious problems.
Check that the electrode/s “
S
” (figs. 3.2, 3.4, 3.5, 3.6) next to each burner is/are always
clean to ensure trouble-free sparking.
Check that the probe/s “
T
” (figs. 3.2, 3.4, 3.5, 3.6) next to each burner is/are always clean
to ensure correct operation of the safety valves.
Both the probe and ignition plug must be very carefully cleaned.
Note: To avoid damage to the electric ignition do not use it when the burners are not
in place.
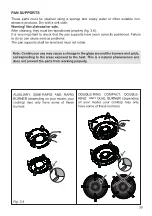
CORRECT REPLACEMENT OF THE AUXILIARY, SEMI-RAPID AND RAPID
BURNER (depending on your model, your cooktop may only have some of
these burners - see pages 24, 25, 26)
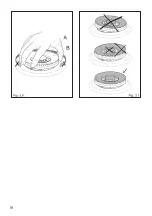
It is very important to check that the burner flame distributor “
F
” and the cap “
C
” have been
correctly positioned (see figs. 3.2, 3.3) - failure to do so can cause serious problems.
CORRECT REPLACEMENT OF THE DOUBLE-RING COMPACT AND
DOUBLE-RING BURNER (depending on your model, your cooktop may only
have some of these burners - see pages 24, 25, 26)
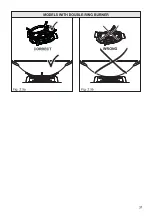
The burner must be correctly positioned; failure to do so can cause serious problems.
Fit the flame spreader to the housing as shown by the arrows (see figs. 3.4, 3.5).
The burner correctly positioned must not rotate (fig. 3.6).
Then position the cap “
A
” and the ring “
B
” (figs. 3.6, 3.7).
Note: Continuous use may cause a change in the glaze around the burners and grids,
corresponding to the areas exposed to the heat. This is a natural phenomenon and
does not prevent the parts from working properly.


