background image

36

37

HU

DIGITÁLIS KIJELZÃ

A kijelzŒ rendszer

folyamatosan tájékoztatást

ad a gép aktuális helyzetérŒl.

1) MOSÁSI HÃMÉRSÉKLET

Egy program kiválasztásakor

felgyullad a megfelelŒ

jelzŒlámpa, amely a

maximális lehetséges mosási

hŒmérsékletet mutatja.

Egy kisebb hŒmérsékletnek a

speciális gombbal történŒ

kiválasztásakor felgyullad a

megfelelŒ jelzŒlámpa.

Megjegyzés: A hŒmérsékletet

a SZENNYEZETTSÉG

MÉRTÉKÉNEK a kiválasztása

elŒtt kell beállítani.

2) AJTÓZÁR LÁMPA

A „START/SZÜNET” gomb

lenyomása után a lámpa

elŒször villog, majd pedig

folyamatosan ég, és a mosás

végéig égve marad.

A mosás vége után 2 perccel

a lámpa kialszik, ami azt jelzi,

hogy ki lehet nyitni a

mosógép ajtaját.

3) CENTRIFUGÁLÁSI SEBESSÉG

A program kiválasztása után

az adott programhoz

megengedett maximális

centrifugálási sebesség

jelenik meg a kijelzŒn.  A

centrifuga-gomb minden

egyes lenyomásával 100

fordulat/perc értékkel

csökkenthetŒ a centrifugálási

sebesség.  A megengedett

minimális centrifugálási

sebesség 400 fordulat/perc,

de a centrifuga-gomb

ismételt lenyomásával a

centrifugálási mıvelet ki is

hagyható.

4) KÉSLELTETETT INDÍTÁS

LÁMPA

A késleltetett indítás

beállításakor ez a lámpa

villog.

5) CIKLUSIDÃTARTAM

A program kiválasztásakor a

kijelzŒ automatikusan

mutatja a ciklus idŒtartamát,

ami a választott opcióktól

függŒen változhat.

A program beindulása után

Ön folyamatos tájékoztatást

kap a mosás végéig

hátralévŒ idŒrŒl.

RO

AFISAJ “DIGITAL”

Sistemul de afisare cu
indicatoare permite
informarea constanta asupra
starii masinii de spalat:

1) TEMPERATURA DE SPALARE
Atunci cand este selectata,
indicatorul corespunzator se
va aprinde pentru a indica
temperatura maxima
posibila.
Selectarea unei temperaturi
mai mici cu ajutorul butonului
special va face ca
indicatorul respectiv sa se
aprinda.
Observatie: Temperatura
trebuie sa fie ajustata inainte
de a selecta GRADUL DE
MURDARIRE.

2) INDICATOR BLOCARE USA
Dupa ce a fost apasat
butonul START/PAUSE, lumina
clipeste apoi ramane aprinsa
pana la finalul programului
de spalare.
La 2 minute dupa programul
de spalare, lumina se stinge
iar usa poate fi deschisa.

3) VITEZA DE CENTRIFUGARE
Dupa ce a fost selectat
programul, viteza maxima de
centrifugare permisa pentru
programul respectiv va
apare pe afisaj. Apasarea
butonului pentru selectarea
vitezei de centrifugare va
reduce viteza cu cate 100
rpm de fiecare data cand
este apasat. Viteza minima
permisa este de 400 rpm sau
se poate trece peste selectia
vitezei prin apasarea acestui
buton in mod repetat.

4) INDICATOR START INTARZIAT
Acest indicator clipeste
atunci cand a fost setata
functia de pornire intarziata.

5) DURATA PROGRAMULUI
Atunci cand un program este
selectat, pe afisaj va apare
automat durata programului,
care poate varia in functie
de optiunea selectata.
Dupa ce programul a pornit,
veti fi informati in
permanenta asupra timpului
ramas pana la incheierea
programului.

L

{

1

3

{

2

4

{

5

7

4

1

2

3

6

5

{

{

{

{

EN

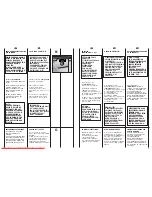
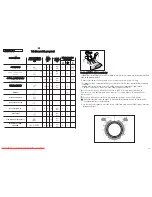
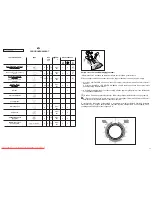
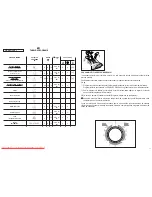
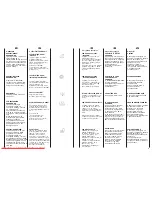
“DIGITAL” DISPLAY

The display’s indicator
system allows you to be
constantly informed about
the status of the machine:

1) WASH TEMPERATURE
When a programme is
selected the relevant
indicator will light up to show
the maximum possible wash
temperature.
Selecting a lower
temperature using the
special button will cause the
corresponding indicator to
light up.
Note: The temperature must
be adjusted before
selecting DEGREE OF
SOILING.

2) DOOR LIGHT
Once the START/PAUSE
button has been pressed
the light first flashes then
stops flashing and remains
on until the end of the wash.
2 minutes after the end of
the wash the light goes off
to show that the door can
now be opened.

3) SPIN SPEED
Once the programme has
been selected, the
maximum spin speed
allowed for that programme
appears on the display.
Pressing the spin button will
reduce the speed by 100
rpm each time the button is
pressed. The minimum
speed allowed is 400 rpm, or
it is possible to omit the spin
by pressing the spin button
repeatedly.

4) DELAY START LIGHT
This flashes when delay start
has been set.

5) CYCLE DURATION
When a programme is
selected the display
automatically shows the
cycle duration, which can
vary, depending on the
options selected.
Once the programme has
started you will be kept
informed constantly of the
time remaining to the end of
the wash.

PL

WYÂWIETLACZ “DIGIT”

System sygnalizacji

wyÊwietlacza stale informuje

nas o pracy pralki:

1) TEMPERATURA PRANIA

W momencie wyboru

programu automatycznie

pojawi si´, za pomocà

odpowiedniej  kontrolki

,maksymalna temperatura

prania .

JeÊli za pomocà

odpowiedniego przycisku,

wybierzemy ni˝szà

temperatur´ zaÊwieci si´

kontolka odpowiadajàca tej

temperaturze.

Uwaga: Modyfikowanie

temperatury nale˝y

wykonaç przed wyborem

POZIOMU ZABRUDZENIA

2) Kontrolka DRZWICZEK

Po wciÊni´ciu przycisku

START/PAUZA na poczàtku

kontrolka drzwiczek miga a

potem pali si´ nieprzerwanie

do koƒca cyklu prania. Po 2

minutach od zakoƒczenia

cyklu kontrolka gaÊnie i w

tedy mo˝na otworzyç

drzwiczki

3) OBROTY WIRÓWKI

Po wybraniu programu na

wyÊwietlaczu poka˝e si´

maksymalna ustawiona

pr´dkoÊç wirowania.

Ka˝de wciÊni´cie przycisku

wirówki zmniejsza  pr´dkoÊç

wirowania o 100 obr/min.

Minimalna pr´dkoÊç

wirowania to 400 obr/min.

Ewentualnie mo˝na

wy∏àczyç wirowanie

wciskàc kilkakrotnie przycisk

wirówki

4) KONTROLKA

OPÓèNIONEGO STARTU

Kontrolka miga kiedy jest

ustawiony opóêniony start.

5) D¸UGOÂå CYKLU

W momencie ustawienia

programu d∏ugoÊç cyklu

wyÊwietli si´ automatycznie.

D∏ugoÊç ta jest ró˝na w

zale˝noÊci od wybranych

opcji. Po rozpocz´ciu cyklu

pralka informuje na bie˝àco

o czasie pozosta∏ym do

koƒca cyklu.

DISPLEJ „DIGIT“

Signalizaãní systém displeje
neustále informuje o ãinnosti
praãky:

1) TEPLOTA PRANÍ
V momentu zvolení programu
se automaticky zobrazí
maximální moÏná teplota
praní a rozsvítí se pfiíslu‰ná
kontrolka.
Pfii zvolení niωí teploty pomocí
pfislu‰ného tlaãítka se také
rozsvítí pfiíslu‰ná kontrolka.
Upozornûní: Teplota musí b˘t
nastavena pfied zvolením
funkce STUPE≈ ZNEâI·TùNÍ.

2) KONTROLKA DVͤEK
Po stisknutí tlaãítka
„START/PAUSA“ zaãne
kontrolka blikat a následnû
svítí aÏ do konce praní.
Po uplynutí dvou minut od
ukonãení praní kontrolka
zhasne a praãku mÛÏete
otevfiít.

3) OTÁâKY ODST¤EëOVÁNÍ
Po zvolení pracího programu
se na displeji objeví maximální
povolená rychlost
odstfieìování pro dan˘
program. KaÏd˘m dal‰ím
stisknutím tlaãítka
odstfieìování se rychlost sníÏí
o 100 g/m. Nejniωí povolená
rychlost je 400 ot/min.
Odstfieìování je moÏné zru‰it
opûtovn˘m stisknutím tlaãítka
na volbu odstfiedování. 

4) KONTROLKA „ODLOÎEN¯
START“
Tato kontrolka svítí tehdy, kdyÏ
je nastavené posunutí
spu‰tûní pracího programu.

5) DÉLKA CYKLU
V momentu zvolení pracího
programu se automaticky
zobrazí délka cyklu, která se
mÛÏe mûnit v závislosti od
jednotliv˘ch zvolen˘ch funkcí.

CZ

Downloaded From WashingMachine-Manual.com Manuals

Summary of Contents for GO 5110 D

Page 1: ...ctions A Au ut to om ma at tiic ck ká á p pr ra aö ök ka a I In ns st tr ru uk kc cj ja a o ob bs sä äu ug gi i Használati utasítás Instructiuni de utilizare EN CZ PL HU RO Downloaded From WashingMachine Manual com Manuals ...
Page 2: ... present their new washing machine the result of years of research and market experience through direct contact with Consumers You have chosen the quality durability and high performance that this washing machine offers Candy is also able to offer a vast range of other household appliances washing machines dishwashers washer dryers cookers microwave ovens Traditional ovens and hobs refrigerators a...

Page 3: ...alii in functionare EN INDEX Introduction General points on delivery Guarantee Safety Measures Technical Data Setting up and Installation Control Description Table of Programmes Selection Detergent drawer The Product Washing Cleaning and routine maintenance Faults Search PL SPIS TREÉCI Wstëp Uwagi ogólne dotyczåce dostawy Gwarancja Érodki bezpieczeñstwa Dane techniczne Instalacja pralki Opis panel...

Page 4: ...he case contact your nearest Candy Centre PL R RO OZ ZD DZ ZI IA AÄ Ä 1 1 UWAGI OGÓLNE DOTYCZÅCE DOSTAWY W momencie dostawy sprawdã czy poniãsze elementy zostaäy dostarczone wraz z pralkå A INSTRUKCJA UÃYTKOWANIA B KARTA GWARANCYJNA C WYKAZ PUNKTÓW SERWISOWYCH na karcie gwarancyjnej D ZATYCZKA E KOLANKO WËÃA WYLEWOWEGO P PR RZ ZE EC CH HO OW WU UJ J J JE E W W B BE EZ ZP PI IE EC CZ ZN NY YM M M M...

Page 5: ...chnical Assistance Service PL R RO OZ ZD DZ ZI IA AÄ Ä 2 2 GWARANCJA Niniejsze urzådzenie jest dostarczane z kartå gwarancyjnå pozwalajåcå bezpäatnie korzystaç z pomocy technicznej i serwisu w okresie gwarancyjnym K KA AP PI IT TO OL LA A 2 2 ZÁRUKA Pro poskytnutí kvalitního záruãního a pozáruãního servisu uschovejte v echny doklady o koupi a pfiípadn ch opravách v robku Doporuãujeme Vám po dobu zá...

Page 6: ... PR RZ ZE ED D P PR RZ ZY YS ST TÅ ÅP PI IE EN NI IE EM M D DO O J JA AK KI IE EJ JK KO OL LW WI IE EK K C CZ ZY YN NN NO OÉ ÉC CI I C CZ ZY YS SZ ZC CZ ZE EN NI IA A L LU UB B K KO ON NS SE ER RW WA AC CJ JI I U UR RZ ZÅ ÅD DZ ZE EN NI IA A N NA AL LE EÃ ÃY Y Wyjåç wtyczkë z gniazdka sieciowego Zakrëciç kran odpowiadajåcy za dopäyw wody Firma Candy wyposaãa w uziemiene wszystkie produkowane u sie...

Page 7: ... attention must be paid so as to ensure that there is no obstruction to the bottom vents Lift the appliance in pairs as illustrated in the diagram In the case of failure and or incorrect operation turn the washing machine off close the water inlet tap and do not tamper with the appliance Contact a Candy Technical Assistance Centre for any repairs and ask for original Candy spare parts Avoidance of...

Page 8: ...E EK K S SE E Z ZÁ ÁK KL LA AD DN NÍ ÍM MI I Ú ÚD DA AJ JI I PATRZ TABLICZKA ZNAMIONAWA LÁSD A GÉPTÖRZSLAPOT CITITI PE PLACUTA MASINII EN CHAPTER 4 MAXIMUM WASH LOAD DRY NORMAL WATER LEVEL POWER INPUT ENERGY CONSUMPTION PROG 90 C POWER CURRENT FUSE AMP SPIN r p m WATER PRESSURE SUPPLY VOLTAGE TECHNICAL DATA PL R RO OZ ZD DZ ZI IA AÄ Ä 4 CIËÃAR PRANIA SUCHEGO POZIOM NORMALNY WODY NAPIËCIE ZASILANIA...

Page 9: ...hout the packaging base Cut tube holding straps Unscrew the central screw A unscrew the 4 lateral screws B and remove the cross piece C Lean the machine forward and remove the plastic bags containing the two polystyrene blocks at the sides pulling downwards Press the plug to be found in the envelope with the instructions into the hole WARNING DO NOT LEAVE THE PACKAGING IN THE REACH OF CHILDREN AS ...

Page 10: ...o bends or contractions along the tube It is better to connect the discharge hose to a fixed outlet of a diameter greater than that of the outlet tube and at a height of min 50 cm If is necessary to use the plastic sleeve supplied PL Umieéciç wyciszajacy materiaä tak jak pokazano na rysunku Podäåczyç do kranu wåã doprowadzajåcy wodë Urzådzenie musi byç podäåczone do sieci wodociågowej za pomocå no...

Page 11: ...it until it stands firmly on the ground c Lock the foot in position by turning the nut anti clockwise until it comes up against the bottom of the machine Ensure that the knob is on the OFF position and the load door is closed Insert the plug After installation the appliance must be positioned so that the plug is accessible PL Wypoziomuj urzàdzenie za pomocà 4 nó ek a a Przekrëciç w kierunku zgodny...

Page 12: ...rature button Start Delay button Aquaplus button Pre wash button Spin Speed button Digital Display Degree of soiling button Timer knob for wash programmes with OFF position Buttons indicator light Detergent drawer R RO OZ ZD DZ ZI IA AÄ Ä 6 6 OPIS ELEMENTÓW PANELU STEROWANIA Otwarte drzwiczki Kontrolka blokada drzwiczek Przycisk start Przycisk atwe prasowanie Przycisk Wybór temperatury Przycisk op...

Page 13: ...t the end of cycle turn the programme selector to OFF EN OPIS ELEMENTÓW PANELU STEROWANIA OTWARTE DRZWICZKI Aby otworzyç drzwiczki nale y pociàgnàç za ràczk naciskajàc jà od wewnàtrz U UW WA AG GA A U UR RZ ZÅ ÅD DZ ZE EN NIIE E J JE ES ST T W WY YP PO OS SA AÃ ÃO ON NE E W W S SP PE EC CJ JA AL LN NY Y S SY YS ST TE EM M Z ZA AB BE EZ ZP PIIE EC CZ ZA AJ JÅ ÅC CY Y K KT TÓ ÓR RY Y Z ZA AP PO OB B...

Page 14: ... washing wait 2 minutes until the safety device unlocks the door When you have carried out the manoeuvre close the door press START button and the appliance will continue working where it left off CANCELLING THE PROGRAMME To cancel the programme set the selector to the OFF position Select a different programme Re set the programme selector to the OFF position EN PL PRZYCISK START Nale y go wcisnàç...

Page 15: ...D WASH after the final rinse the fabrics are left in water until it is time to unload and the button indicator blinking When you are ready to unload press the Crease Guard button this will drain and spin ready for emptying If you do not want to spin the clothes and activate drain only Turn the programme selector to the OFF position Select programme drain only Switch on the appliance again by press...

Page 16: ...cedure Set the required programme Press the button once to activate it h00 appears on the display and then press it again to set a 1 hour delay h01 appears on the display the pre set delay increases by 1 hour each time the button is pressed until h24 appears on the display at which point pressing the button again will reset the delay start to zero Confirm by pressing the START PAUSE button the lig...

Page 17: ...ased so that the detergent dissolves perfectly ensuring an efficient cleaning action The amount of water is also increased during the rinse procedure so as to remove all traces of detergent from the fibres This function has been specifically designed for people with delicate and sensitive skin for whom even a very small amount of detergent can cause irritation or allergy You are advised to also us...

Page 18: ... would like to set For not damage the fabrics it is not possible to increase the speed over that automatically suitable during the selection of the program It is possible to modify the spin speed in any moment also without to pause the machine NOTE THE MACHINE IS FITTED WITH A SPECIAL ELECTRONIC DEVICE WHICH PREVENTS THE SPIN CYCLE SHOULD THE LOAD BE UNBALANCED THIS REDUCES THE NOISE AND VIBRATION...

Page 19: ...temperature must be adjusted before selecting DEGREE OF SOILING 2 DOOR LIGHT Once the START PAUSE button has been pressed the light first flashes then stops flashing and remains on until the end of the wash 2 minutes after the end of the wash the light goes off to show that the door can now be opened 3 SPIN SPEED Once the programme has been selected the maximum spin speed allowed for that programm...

Page 20: ...se the corresponding indicator to light up Note The degree of soiling can vary automatically depending on the temperature selected DEGREE OF SOILING BUTTON By selecting this button active only on COTTON and MIXED FIBRES programmes there is a choice of 3 levels of wash intensity depending on how much the fabrics are soiled Once the programme and wash temperature have been selected the degree of soi...

Page 21: ...RN THE PROGRAMME SELECTOR TO THE OFF POSITION Press the Start Pause button to start the selected cycle The programme carries out with the programme selector stationary on the selected programme till cycle ends Switch off the washing machine by turning the selector to OFF NOTE THE PROGRAMME SELECTOR MUST BE RETURN TO THE OFF POSITION AT THE END OF EACH CYCLE OR WHEN STARTING A SUBSEQUENT WASH CYCLE...

Page 22: ...tion is available with a spin speed button Only with the Prewash button selected Programmes with Prewash button available Pressing the wash temperature button makes it possible to wash at any temperature below the maximum allowed 1 For the programmes shown you can adjust the duration and intensity of the wash using the degree of soiling button Resistant fabrics Cotton linen Cotton mixed resistant ...

Page 23: ...tím tlaãítka teplota praní je moÏné prát pfii jakékoliv teplotû která je niÏ í neÏ maximální povolená teplota 1 U jednotliv ch programÛ je moÏné pomocí tlaãítka stupeÀ zneãi tûní regulovat ãas a intenzitu praní O Od do olln né é t tk ka an niin ny y Bavlna len Bavlna smësné odolné Barevné S Sm më ës sn né é a a s sy yn nt te et tiic ck ké é t tk ka an niin ny y Bavlna smësné a syntetické tkaniny V ...

Page 24: ...ziom Zabrudzenia regulowaç d ugoÊç i intensywnoÊç prania Jedynie przy w àczonym przycisku PRANIE WST PNE Programy z aktywnà opcjà PRANIE WST PNE Wciskajàc przycisk Temperatury mo na zmniejszaç temperatur prania w stosunku do maksymalnej ustawionej PROGRAM dla materia ów M Ma at te er riia aä äy y w wy yt tr rz zy ym ma aä äe e baweäna len baweäna len mieszane wytrzymaäe kolory M Ma at te er riia a...

Page 25: ...ndelkezésre álló programok A Mosási hŒmérséklet gomb lenyomása a megengedett maximális hŒmérséklet alatt bármilyen hŒmérsékleten történŒ mosást tesz lehetŒvé A centrifugálás sebessége csökkenthetŒ a ruhadarabok címkéjén található útmutató betartása érdekében vagy a nagyon finom textíliák esetében teljesen kikapcsolható a centrifugálás ami a centrifuga választókapcsolójával végezhetŒ el 5 5 2 5 1 5...

Page 26: ...e selectat Programe disponibile cu prespalare Apasarea butonului pentru selectarea temperaturii de spalare face posibila spalarea la orice temperatura sub cea maxima permisa Viteza de rotire poate fi de asemenea redusa pentru a tine cont de recomandarile de pe eticheta rufelor sau pentru tesaturi delicate renuntati la stoarcere complet optiune asigurata de butonul de viteza de stoarcere 5 5 2 5 1 ...

Page 27: ...nd to the water levels A gentle spin will mean that the fabrics become less creased 3 SPECIAL DELICATE FIBRES This is a new wash cycle which alternates washing and soaking and is particularly recommended for very delicate fabrics The wash cycle and rinses are carried out with high water levels to ensure best results PL R RO OZ ZD DZ ZI IA AÄ Ä 8 8 WYBÓR PROGRAMU Pralka posiada 4 róãne grupy progra...

Page 28: ... allows a complete washing cycle to be carried out in approximately 30 minutes with up to a maximum load of 2 kg and a temperature of 40 C When selecting the 32 minute rapid programme please note that we recommend you use only 20 of the recommended quantities shown on the detergent pack SPECIAL HAND WASH This washing machine also has a gentle Hand Wash programme cycle This programme allows a compl...

Page 29: ...h a considerable energy saving The Mix Wash programme has a temperature of 40 C and alternate dynamic phases the basket that turns to static phases fabrics in soak in phase of rest with a duration programme that almost reaching the 3 hours The energy consumption for the complete cycle is only 850 W h Important the first washing of new coloureds fabrics must be done separately in every case never m...

Page 30: ...do prania wstëpnego Przegródka jest przeznaczona na specjalne dodatki do prania érodki zmiëkczajåce wodë zapachowe krochmal wybielacze Przegródka 2 2 jest przeznaczona na proszek do prania zasadniczego U UW WA AG GA A P PA AM MI IË ËT TA AJ J Ã ÃE E N NI IE EK KT TÓR RE E É ÉR RO OD DK KI I P PI IO OR RÅ ÅC CE E S SÅ Å T TR RU UD DN NE E D DO O U US SU UN NI IË ËC CI IA A W W T TA AK KI IM M P PR ...

Page 31: ...zips and hooks are closed loose belts and long tapes on dressing gowns are knotted runners from curtains are removed attention is paid to garment labels when sorting any tough stains should be removed prior to washing using stain removers only recommended on label PL R RO OZ ZD DZ ZI IA AÄ Ä 1 10 0 PRODUKT W WA AÃ ÃN NE E Ciëãkich pledów narzut na äoãka lub innych ciëãkich wyrobów nie naleãy odwir...

Page 32: ...lecting Prewash for slight to normally soiled laundry IS A HOT WASH REQUIRED Pretreat stains with stain remover or soak dried in stains in water before washing to reduce the necessity of a hot wash programme Save up to 50 energy by using a 60 C wash programme PL R RO OZ ZD DZ ZI IA AÄ Ä 1 11 1 PORADY DLA KLIENTA Kilka wskazówek dotyczåcych ekonomicznego i przyjaznego érodowisku uãycia urzådzenia M...

Page 33: ... Let us suppose that the washing consists of HEAVILY SOILED COTTON tough stains should be removed with suitable stain removal It is advisable not to wash a load made up entirely of articles in towelling fabric which absorb a lot of water and become too heavy Open the detergent drawer P Put 120 g in the main wash compartment marked 2 Put 50 ml of the desired additive in the additives compartment Cl...

Page 34: ...n the power supply while the machine is operating a special memory stores the selected programme and when the power is restored it continues where it left off When the programme has ended the word End will appear on the display Wait for the door lock to be released about 2 minutes after the programme has finished Switch off the machine by turning the programme selector to the OFF position Open the...

Page 35: ...long periods when the machine is left standing CLEANING OF DRAWER COMPARTMENTS Although not strictly necessary it is advisable to clean the detergent bleach and additives compartments occasionally Remove the compartments by pulling gently Clean with water Put the compartments back into place PL R RO OZ ZD DZ ZI IA AÄ Ä 1 12 2 CZYSZCZENIE I RUTYNOWA KONSERWACJA PRALKI Do czyszczenia zewnëtrznej obu...

Page 36: ...rn the filter anticlockwise till it stops in vertical position Remove and clean After cleaning replace by turning the notch on the end of the filter clockwise Then follow all procedures described above in reverse order REMOVALS OR LONG PERIODS WHEN THE MACHINE IS LEFT STANDING For eventual removals or when the machine is left standing for long periods in unheated rooms the drain hose should be emp...

Page 37: ...v v n na a O Od dt té ék ka aj jí íc cí í v vo od da a p po o m má ác ch há án ní í m må åï ïe e b bÿ ÿt t c ch hl la ad dn në ëj jä äí í d dí ík ky y p pü üí ít to om mn no os st ti i z ze eo ol li it tå å v ve e s sm më ës si i N Ne eo ov vl li iv vn ní í t to o ú úö öi in nn no os st t m má ác ch há án ní í N Na a z zá áv vë ër r p pr ra an ní í s se e n na a p pr rá ád dl le e m må åï ïe e o o...

Page 38: ...ë ëp pu ujjå åc cy y e ef fe ek kt t W Wo od da a z z p pä äu uk ka an niia a m mo oã ãe e b by yç ç m më ët tn na a z z u uw wa ag gii n na a o ob be ec cn no oé éç ç z za aw wiie es siin ny y z ze eo olliit tó ów w N Niie e w wp pä äy yw wa a t to o n na a s sk ku ut te ec cz zn no oé éç ç s sa am me eg go o p pä äu uk ka an niia a O Ob be ec cn no oé éç ç b biia aä äe eg go o p pr ro os sz zk k...

Page 39: ... eroarea 4 Stekerul nu este introdus in priza Intrerupatorul generalnu este apasat Nu exista energie electrica Sigurante defecte Hubloul deschis Vezi cauzele 1 Robinetul de apa inchis Selectorul de programe nu este corect pozitionat Tubul de evacuare indoit Prezenta corpuri straine in filtru Pierderea garniturii puseintre robinet si tubul de admisie a apei Masina de spalat nu a evacuat inca apa Bu...

Page 40: ...dní charakteristiku Z zastrzezeniem prawa do modyfikacji technicznych i ewentualnych bäëdów drukarskich A gyártó minden felelosséget elhárít az ebben a füzetben esetleg eloforduló nyomdahibákkal kapcsolatban A gyártó a lényeges jellemzok megváltoztatása nélkül fenntartja a termékek szükség szerinti módosításának jogát Producatorul isi declina orice responsabilitate in cazul unor greseli de tiparir...

Page 41: ...nacza e sprzet ten nie mo e byç traktowany tak samo jak inne Êmieci domowe Musi zostaç oddany do najbli szego punktu zbiórki i utylizacji zu ytych urzàdzeƒ elektrycznych i elektronicznych Utylizacja musi byç wykonana zgodnie z aktualnymi przepisami o utylizacji tego typu Êmieci Aby uzyskaç dok adne informacje na temat post powania w sprawie tego typu Êmieci prosz skontaktowaç si z odpowiednim biur...

Reviews: