11
IT
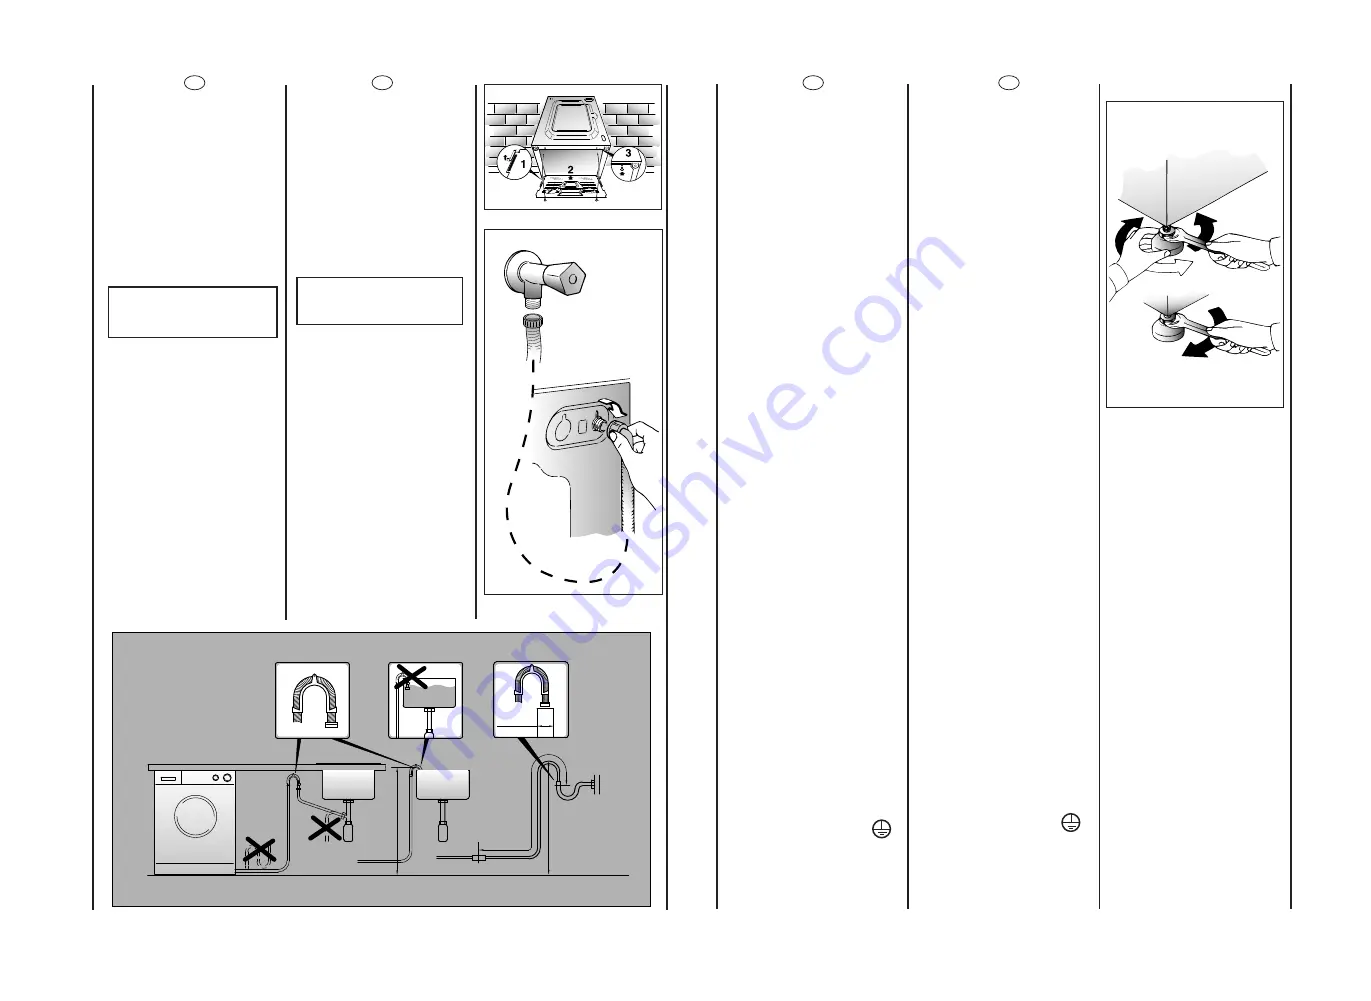
Livelli la macchina con i 4
piedini:
a)
Girare in senso orario il
dado per sbloccare la vite
del piedino.
b)
Ruotare il piedino e farlo
scendere o salire fino ad
ottenere la perfetta
aderenza al suolo.
c)
Bloccare infine il piedino
riavvitando il dado in senso
antiorario, fino a farlo aderire
al fondo della lavatrice.
Si assicuri che la manopola
sia in posizione “OFF” e l’oblò
sia chiuso.
Inserisca la spina.
ATTENZIONE:
nel caso si renda necessario
sostituire il cavo di
alimentazione, assicurarsi di
rispettare il seguente
codice-colore durante il
collegamento dei singoli fili:
BLU
- NEUTRO (N)
MARRONE
- FASE (L)
GIALLO-VERDE - TERRA ( )
L’apparecchio deve essere
posto in modo che la spina
sia accessibile ad
installazione avvenuta.
EN
Use the 4 feet to level the
machine with the floor:
a)
Turn the nut clockwise to
release the screw adjuster of
the foot.
b)
Rotate foot to raise or
lower it until it stands firmly on
the ground.
c)
Lock the foot in position
by turning the nut anti-
clockwise until it comes up
against the bottom of the
machine.
Ensure that the knob is on the
“OFF” position and the load
door is closed
Insert the plug.
ATTENTION:
should it be necessary to
replace the supply cord,
connect the wire in
accordance with the
following colours/codes:
BLUE
- NEUTRAL (N)
BROWN
- LIVE (L)
YELLOW-GREEN
- EARTH ( )
After installation, the
appliance must be
positioned so that the plug is
accessible.
A
B
C
10
min 50 cm
max 85 cm
+2,6 mt max
max 100 cm
min 4 cm
EN
Fix the sheet of corrugated
material on the bottom as
shown in picture.
Connect the fill hose
to the tap.
The appliance must be
connected to the water
mains using new hose-sets.
The old hose-sets should not
be reused.
IMPORTANT:
DO NOT TURN THE TAP
ON AT THIS TIME.
Position the washing
machine next to the wall.
Hook the outlet tube to the
edge of the bath tub,
paying attention that there
are no bends or
contractions along the tube.
It is better to connect the
discharge hose to a fixed
outlet of a diameter greater
than that of the outlet tube
and at a height of min. 50
cm. If is necessary to use the
plastic sleeve supplied.
The appliance must not be
installed behind a lockable
door, a sliding door or a door
with a hinge on the opposite
side to that of the washer
dryer.
IT
Applichi il foglio di polionda
sul fondo come mostrato in
figura.
Allacci il tubo dell’acqua al
rubinetto.
L’apparecchio deve essere
connesso alla rete idrica
solo con i nuovi tubi di
carico forniti in dotazione. I
vecchi tubi di carico non
devono essere riutilizzati.
ATTENZIONE:
NON APRA IL RUBINETTO
Accosti la lavatrice al muro
facendo attenzione che
non vi siano curve o
strozzature, allacci il tubo di
scarico al bordo della
vasca.
o meglio a uno scarico fisso;
altezza minima 50 cm, di
diametro superiore al tubo
della lavatrice.
In caso di necessità utilizzare
la curva rigida in dotazione.
L’apparecchio non deve
essere installato dietro una
porta richiudibile a chiave,
una porta scorrevole o una
porta con cerniera sul lato
opposto a quello della
lavasciuga.
Summary of Contents for GO W 485 DS
Page 1: ...Istruzioni per l uso User instructions IT EN GO W 485 DS ...
Page 27: ......


