background image

05 GB - IE

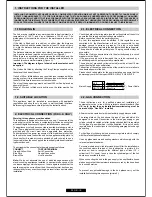
1. INSTRUCTIONS FOR THE INSTALLER

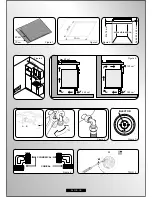
The hob may be installed in any worktop which is heat resistant to a 
temperature  of  100°C,  and  has  a  thickness  of  25-45  mm.  The 
dimensions of the insert to be cut out of the worktop are in shown in


Figure 2.

If  the  Hob  is  fitted  next  to  a  cabinet  on  either  side,  the  distance 
between the Hob and the cabinet must be at least 15 cm 

(see Figure 

4)

; while the distance between the hob and the rear wall must be at 

least 5,5 cm.
The distance between the hob and any other unit or appliance above it 
(e.g. An extractor hood) must be no less than 70 cm

 (Figure 4)

.

When there is an accessible space between the built-in hob and the 
cavity  below,  a  dividing  wall  made  of  insulating  material  should  be 
inserted (wood or a similar material)

 (Figure 3).

Important - The diagram in figure 1 shows how the sealant should 
be applied.

The Hob unit is fitted by attaching the Fixing Clamps supplied, using 
the holes at the base of the unit.

If a hob of 60 cm is fitted above an oven which is not equipped with fan 
cooling system it is recommended that openings are created within 
the built in furniture to ensure correct air circulation.
The size of these openings must be at least 300 cm2 and placed as 
shown in 

Figure 5.

When a 75 cm hob is fitted over a built in oven, the latter must be fan 
cooled.

2. ELECTRICAL CONNECTION 

(FOR U.K. ONLY)

Warning - this appliance must be earthed

This appliance is designed for domestic use only. Connection to the 
main supply must be made by a competant electrician, ensuring that 
all current regulations concerning such installations are observed.
The appliance must only be connected to a suitably rated spur point, a 
3 pin 13 amp plug/socket is not suitable. A double pole switch must be 
provided  and  the  circuit  must  have  appropriate  fuse  protection. 
Further details of the power requirement of the individual product will 
be found in the users’ instruction and on the appliance rating plate. In 
the case of built-in product you are advised, should you wish to use a 
longer cable than the one supplied, that a suitably rated heat resistant 
type must be used.

The wiring must be connected to the mains supply as follows:

CONNECT


TO SPUR TERMINAL

Green & Yellow Wire 

Earth Connection

Blue Wire 

Neutral Connection

Brown Wire 

Live Connection

Note:

  We  do  not  advocate  the  use  of  earth  leakage  devices  with 

electric  cooking  appliances  installed  to  spur  points  because  of  the 
«nuisance tripping» which may occur. You are again reminded that the 
appliance must be correctly earthed, the manufacturer declines any 
responsibility for any event occurring as a result of incorrect electrical 
installation.

INSTALLING A DOMESTIC APPLIANCE CAN BE A COMPLICATED OPERATION WHICH IF NOT CARRIED OUT CORRECTLY, CAN SERIOUSLY 
AFFECT CONSUMER SAFETY. IT IS FOR THIS REASON THAT THE TASK SHOULD BE UNDERTAKEN BY A PROFESSIONALLY QUALIFIED 
PERSON WHO WILL CARRY IT OUT IN ACCORDANCE WITH THE TECHNICAL REGULATIONS IN FORCE. IN THE EVENT THAT THIS ADVICE IS 
IGNORED AND THE INSTALLATION IS CARRIED OUT BY AN UNQUALIFIED PERSON, THE MANUFACTURER DECLINES ALL RESPONSIBILITY 
FOR ANY TECHNICAL FAILURE OF THE PRODUCT WHETHER OR NOT IT RESULTS IN DAMAGE TO GOODS OR INJURY TO INDIVIDUALS.

1.1 BUILDING IN

1.2. SUITABLE LOCATION

This  appliance  must  be  installed  in  accordance  with  applicable 
regulations  and  should  only  be  used  in  well-ventilated  locations. 
Before using this appliance carefully study the instruction book.

2.1. ELECTRICAL CONNECTION 

Check the data on the rating plate, located on the outside of the unit, to 
ensure that the supply and input voltage are suitable.
Before connection, check the earthing system.
By  Law,  this  appliance  must  be  earthed.  If  this  regulation  is  not 
complied  with,  the  Manufacturer  will  not  be  responsible  for  any 
damage  caused  to  persons  or  property.  If  a  plug  is  not  already 
attached, fit a plug appropriate to the load indicated on the rating plate. 
The earth wire is coloured yellow/green. The plug should always be 
accessible.
Where the Hob is connected direct to the electricity supply, a circuit 
breaker must be fitted.
If  the  power  supply  cord  is  damaged  this  is  to  be  replaced  by  a 
qualified engineer so as to prevent any potential risk.
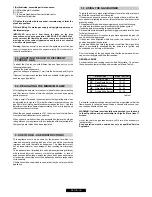
The earth wire ( green and yellow coloured ) must be at least 10 mm 
longer than the live and neutral wires.
The section of the cable used must be of the correct size in relation to 
the absorbed power of the hob.
Please check rating plate for the power details and ensure that the 
power supply cord is of the type H05RR-F, H05VV-F, H05V2V2-F.

LIVE
EARTH
NEUTRAL

L

N

Power Cable

Brown Wire

Green/Yellow Wire
Blue Wire

Mains Supply

2.2. GAS CONNECTION

These  instructions  are  for  qualified  personnel,  installation  of 
equipment must be in line with the relevant national standard.

 (For 

U.K.  only:  by  law  the  gas  installation\commissioning  must  be 
carried out by a "Gas Safe"  installer)

All work must be carried out with the electricity supply disconnected.

The  rating  plate  on  the  hob  shows  the  type  of  gas  with  which  it  is 
designed  to  be  used.  Connection  to  the  mains  gas  supply  or  gas 
cylinder should be carried out after having checked that it is regulated 
for the type of gas with which it will be supplied. If it is not correctly 
regulated see the instructions in the following paragraphs to change 
gas setting

For liquid gas (cylinder gas) use pressure regulators which comply 
with the relevant national standards.

Use only pipes,washers and sealing washers which comply with the 
relevant national standards.

To  prevent  any  potential  damage  to  the  hob  please  carry  out  the 
installation following this sequence (picture 6):

For some models a conic link is furnished to outfit for the installation in 
the  countries  where  this  type  of  link  is  obligatory;  in  picture  8  it  is 
pointed  out  how  to  recognize  the  different  types  of  links  (CY  = 
cylindrical, CO = conic). In every case the cylindrical part of the link 
has to be connected to the hob.

When connecting the hob to the gas supply via use offlexible hoses 
please ensure that the maximum distance covered by the hose does 
not exceed 2 metres.

Summary of Contents for HOBS

Page 1: ...CUISSON NOTICE D EMPLOI FR UND BEDIENUNGSANLEITUNG INSTALLATIONS DE ENCIMERAS INSTRUCCIONES DE USO ES INSTRUKCJE U YCIA I MONTA U PL OCAK KULLANIM KLAVUZU TR NAVODILA ZA UPORABO VGRADNJO IN PRIKLJU I...

Page 2: ...i n De La Llama M nima 3 Utilizaci n De La Placa Instrucciones Para El Usuario 3 1 Utilizaci n Del Quemador De Gas 4 Mantenimiento Y Limpieza 5 Servicio T cnico 6 Protecci n Del Medioambiente ES 17 17...

Page 3: ...lt Kir lys gban 2 1 Elektromos bek t s 2 2 G zbek t s csak az Egyes lt Kir lys gban 2 3 A t zhelylap be ll t sa k l nb z g zt pusokhoz 2 4 A minim lis l ngm ret be ll t sa 3 A t zhelylap haszn lata F...

Page 4: ...cessible space Figure 3 Min 10 mm Sp da 25 a 45 mm Figure 2 Figure 1 2 60 cm 2 240 cm 2 120 cm 2 180 cm Figure 5 Figure 4 1 2 GAS CONICAL C A B CYLINDRICAL CONICAL INJECTOR Figure 6 Figure 7 Figure 8...

Page 5: ...IONS IN FORCE IN THE EVENT THAT THIS ADVICE IS IGNOREDAND THE INSTALLATION IS CARRIED OUT BYAN UNQUALIFIED PERSON THE MANUFACTURER DECLINESALL RESPONSIBILITY FORANYTECHNICALFAILURE OF THE PRODUCT WHET...

Page 6: ...Manufacturer will not be responsible for any damage or loss resulting from improper use This appliance is not intended for use by persons including children with reduced physical sensory or mental ca...

Page 7: ...e functionality of the hob Our After Sales Service Centre can provide spare parts if required 5 AFTERCARE Before calling out a Service Engineer please check the following that the plug is correctly in...

Page 8: ...5 fois par heure L installateur doit installer la VMC conform ment aux r gles en vigueur dans le pays d installation PHASE TERRE NEUTRE L N C ble lectrique d alim Fil Marron Fil Vert jaune Fil Bleu Al...

Page 9: ...condes avant d allumer le br leur ce qui permettra l air ventuellement pr sent dans les tuyaux de s chapper Pour les appareils quip s d allumage lectronique effectuer les op rations suivantes Pousser...

Page 10: ...squ un point de recyclage des d chets lectriques et lectroniques La collecte de ce produit doit se faire en accord avec les r glementations environnementales concernant la mise au rebut de ce type de...

Page 11: ...dostate nou ventilaci udr en m voln ch p irozen ch otvor nebo instalac odsava e Intenzivn a dlouhodob pou it spot ebi e m e vy adovat extra ventilaci jako je otev en okna nebo zv en v konu ventil toru...

Page 12: ...tek s typem plynu za nov podle instalovan ho Plynu 3 POU IT VARN DESKY Tento spot ebi se mus pou vat pouze k el m pro kter byl navr en a to pro va en v dom cnosti Jak koli jin pou it je nespr vn a m...

Page 13: ...sb rn m sto nebo do recykla n ho st ediska k recyklaci elektrick ch a elektronick ch za zen Likvidace mus b t provedena v souladu s ohledem na ivotn prost ed Pro podrobn j informace o likvidaci a rec...

Page 14: ...er Elektroventilator muss eine Leistung aufweisen die ausreicht um den 3 bis 5 fachen Luftvolumen der K che pro Stunde auszutauschen Beachten Sie bitte die im jeweiligen Land geltenden Standardregeln...

Page 15: ...inschlie lich Kinder mit eingeschr nkten physischen sensorischen oder geistigen F higkeiten betrieben werden Kinder oder unf hige Personen d rfen das Ger t nur dann unbeaufsichtigt benutzen wenn sie h...

Page 16: ...Kundendienst rufen Dieses Ger t ist entsprechend der EU Richtlinie 2002 96 CE ber Elektro und Elektronik Altger te WEEE gekennzeichnet Bitte sorgen Sie daf r dass das Ger t ordnungsgem entsorgt wird...

Page 17: ...na El ventilador el ctrico tiene que poder cambiar el aire de la cocina entre 3 y 5 veces en una hora El instalador ha de tener en cuenta los est ndares nacionales pertinentes 2 1 CONEXI N EL CTRICA C...

Page 18: ...ue puedan derivarse de una utilizaci n inadecuada Este electrodom stico no est pensado para que lo utilicen personas incluidos ni os con discapacidad f sica sensorial o ps quica o que carezcan de expe...

Page 19: ...stico El aparato ha de depositarse en un centro de recogida para el reciclaje del equipo el ctrico y electr nico Desh gase del electrodom stico cumpliendo las normativas locales sobre eliminaci n de r...

Page 20: ...n Instalator powinien przestrzega obowi zuj cych w danym kraju przepis w 2 1 POD CZENIE DO SIECI ELEKTRYCZNEJ Upewni si e napi cie w sieci odpowiada napi ciu podanemu na tabliczce znamionowej znajduj...

Page 21: ...nie ponosi odpowiedzialno ci za wszelkie szkody spowodowane niew a ciwym u ytkowaniem urz dzenia Niniejsze urz dzenie nie jest przeznaczone do u ywania przez osoby w tym dzieci o obni onej sprawno ci...

Page 22: ...turalnego skutk w wynikaj cych z niew a ciwego usuwania odpad w Symbol umieszczony na produkcie wskazuje e niniejszy produkt nie mo e by usuwany razem z odpadami gospodarstwa domowego Nale y go przeka...

Page 23: ...ucu yerle tirilmelidir Elektrikli so utucu saatte 3 5 kez havay tamamen sirk le edebilecek kapasitede olmal d r Montaj uzman ilgili ulusal standartlar izlemelidir 2 1 ELEKTR K BA LANTISI nitenin d na...

Page 24: ...n olabilir retici uygunsuz ve sak ncal kullan mlardan kaynaklanan zarar ve ziyandan sorumlu olmayacakt r Bu cihaz yanlar nda g venliklerinden sorumlu olacak veya onlara cihaz n kullan m yla ilgili ger...

Page 25: ...r lmas na yard m etmi olacaks n z r n n zerindeki sembol bu r n n evsel at klarla ayn ekilde ele al namayaca n ifade etmektedir Bunun yerine elektrikli ve elektronik cihazlar n geri d n t r lmesine y...

Page 26: ...1 100 25 40 2 15 4 5 5 70 4 3 1 60 300 2 5 75 3 13 26 RU 1 1 1 2 2 1 10 HO5RR F H05VV F HO5V2V F L N 2 2 Gas Safe 8 CY 2 6 2...

Page 27: ...2 3 7 7 1 1 2 1 2 1 2 2 3 2 4 9 3 4 3 3 1 5 0 27 RU cm AUX SR R UR QC 12 18 18 24 24 26 24 28 24 28 A...

Page 28: ...S67 HBGPL2X 1 1 1 1 8 75 636 3 220 240 50 60 15 595 x 510 833 4 QC R SR AUX S67 HBGPL2X 1 1 1 1 1 9 25 673 3 220 240 50 60 15 595 x 510 881 4 5 2002 96 WEEE 6 28 RU AUX 50 mm QC 135 mm UR 110 mm SR 75...

Page 29: ...lahko na zunanji zid ali na okno namestite elektri ni ventilator e je prostor opremljen z odprtinami za zra enje Elektri ni ventilator mora biti tako zmogljiv da omogo a izmenjavo zraka v prostoru v c...

Page 30: ...e gorilnika nekaj dni niste uporabljali pred pri iganjem po akajte nekaj sekund kar omogo i uhajanje zraka ki je morda prisoten v ceveh Pri kuhalnih plo ah opremljenih z elektronskim v igom pa pritisn...

Page 31: ...m ni dovoljeno ravnati kot z obi ajnimi gospodinjskimi odpadki Izdelek odpeljite na ustrezno zbirno mesto za predelavo elektri ne in elektronske opreme Odstranjevanje mora biti opravljeno skladno z lo...

Page 32: ...stra o aumentando la velocit di ventole di raffreddamento se possibile Se non vi la possibilit di installare una cappa un aspiratore pu essere installato su una parete esterna o su una finestra affinc...

Page 33: ...ttenere una fiamma approssimativamente di 3 4 mm di lunghezza dopodich riposizionare la manopola Nel caso in cui l alimentazione sia di tipo GPL la vite per regolare la fiamma ideale deve essere ruota...

Page 34: ...n pu essere considerato come un normale rifiuto domestico Pu invece essere consegnato in punti di raccolta adeguati per lo smaltimento di apparecchi elettrici o elettronici Lo smaltimento deve essere...

Page 35: ...ecess ria uma ventila o adicional como por exemplo a abertura de uma janela ou o aumento da velocidade da ventoinha de exaust o el ctrica caso esteja instalada uma Se n o puder ser instalado um extrac...

Page 36: ...acesso do queimador empurre o bot o de comando para dentro e rode o para a esquerda Se os queimadores n o tiverem sido utilizados durante alguns dias espere alguns segundos antes de acender o queimado...

Page 37: ...ta deste produto O s mbolo no produto indica que este produto n o pode ser eliminado com os res duos dom sticos De facto ele tem de ser entregue nos pontos de recolha apropriados para reciclagem de eq...

Page 38: ...AT VAGYSZEM LYI S R L SEKET 1 1 BE P T S 1 2 ALKALMAS HELYSZ N A k sz l ket az rv nyes szab lyoknak megfelel en kell telep teni s csak j l szell ztetett helyis gekben szabad haszn lni A k sz l k haszn...

Page 39: ...set ben az elj r s a k vetkez nyomja be s ford tsa el az ramutat j r s val ellenkez ir nyba balra a gombot a gy jt s jelig a szikraad gomb benyom s val gy jtsa be a g z g t Az automatikus gy jt ssal e...

Page 40: ...l sre vonatkoz helyi k rnyezetv delmi szab lyokkal sszhangban kell elv gezni A term k kezel s vel visszanyer s vel s jrahasznos t s val kapcsolatos r szletes inform ci k rt k rj k vegye fel a kapcsola...

Page 41: ...SAU DEFEC IUNI 1 1 INCORPORARE 1 1 AMPLASARE Acest aparat trebuie instalat n conformitate cu reglemet rile n vigoare i trebuie amplasat n loca ii n care este asigurat o bun ventilare nainte de a utili...

Page 42: ...invers acelor de ceasornic c tre simbolul de aprindere Aprinde i arz torul prin ap sarea butonului pentru aprindere Pentru plitele cu aprindere automat pur i simplu ap sa i butonul corespunz tor arz t...

Page 43: ...amente noi de acela i tip Autorit ile locale trebuie s asigure spa iile necesare pentru colectarea selectiv a de eurilor precum i func ionalitatea acesotra Contacta i societatea de salubrizare sau com...

Page 44: ...41 0 62 1 20 1 90 P Kw 0 50 0 66 0 80 0 94 0 96 Rodzaj gazu Type de gaz Gassoort Gasart G2 350 Cisnienie gazu Pression gaz Gasdruck 13 mbar Max kW Min kW AUX SR R UR QC 1 00 1 75 2 50 3 50 3 50 0 23 0...

Page 45: ...rt Type de gaz Tipo de g s T Gaz type Gaz Tipi G20 Pressione gas Gas pressure Pression gaz Gasdruck Presion gas Press o g s Tlak plina Ci nienie gazu G z nyom sa Gaz Bas nc 20 mbar Max kW Min kW AUX S...

Page 46: ...0 94 0 89 Wichtig sterreich Deutschland und der Schweiz AT DE CH G30 31 50 mbar 3B P Beim Gastyp G30 31 50 mbar 3B P dagegen m ssen die Gasd sen Art Nr 35000238 benutzt werden Bitte bestellen Sie die...

Page 47: ......

Page 48: ...olmamak kayd yla r nde de i iklik yapma hakk n sakl tutar RU SL Proizvajalec ni odgovoren za napake v tej knji ici ki bi nastale ob tisku ali prepisu Pridr ujemo si pravico izvajanja potrebnih spreme...

Reviews: