4-19
Sending Fa
xes (MF
6550/MF
6560/MF6
580
Only)
5
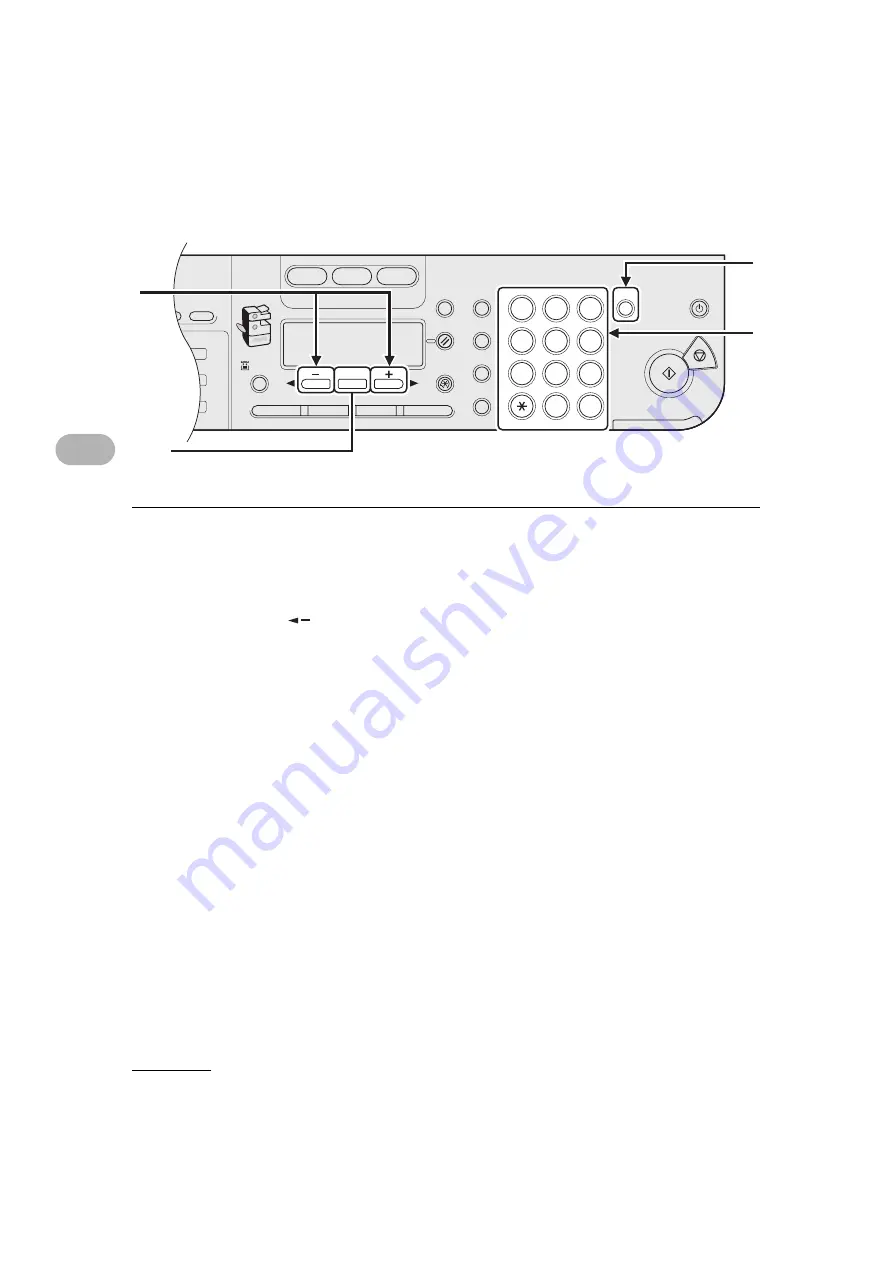
Confirm that <TEL NUMBER ENTRY> is displayed, then press [OK].
6
Press [Clear] repeatedly to go back to the wrong digit.
You can also use [
].
To delete all the numbers, press and hold [Clear].
7
Enter a new number with the numeric keys, then press [OK].
04
08
2
Address
Book
Paper
Select
COPY
FAX
SCAN
Image Quality
Density
Enlarge/Reduce
OK
Two-Sided
System
Monitor
View
Settings
Reset
Collate
GHI
@./
PQRS
Tone
JKL
ABC
TUV
MNO
DEF
Clear
ON/OFF
Stop
Start
Processing/
Data
Error Power
WXYZ
SYMBOLS
Additional
Functions
2 on 1
Frame Erase
ded
al
1
4
7
2
5
8
0
#
3
C
6
9
[OK]
5
6
7
Summary of Contents for 0564B001
Page 2: ......
Page 49: ...1 18 Before Using the Machine ...
Page 57: ...2 8 Document Handling ...
Page 71: ...3 14 Print Media ...
Page 109: ...4 38 Sending Faxes MF6550 MF6560 MF6580 Only ...
Page 119: ...6 8 Copying ...
Page 151: ...11 24 Maintenance ...
Page 167: ...12 16 Troubleshooting ...
Page 212: ...14 9 Appendix Z Zoom ratio 6 6 Preset zoom 6 6 Zoom designation 6 7 ...
Page 213: ...14 10 Appendix ...


