75
Troubleshooting
*1 To resume printing, you can also press the
OK
button on the machine instead of selecting
Continue
on the camera.
*2 The ink absorber absorbs ink used during cleaning, for example. If this message appears, you will
need to call for servicing to replace the absorber and to check the machine for proper operation.
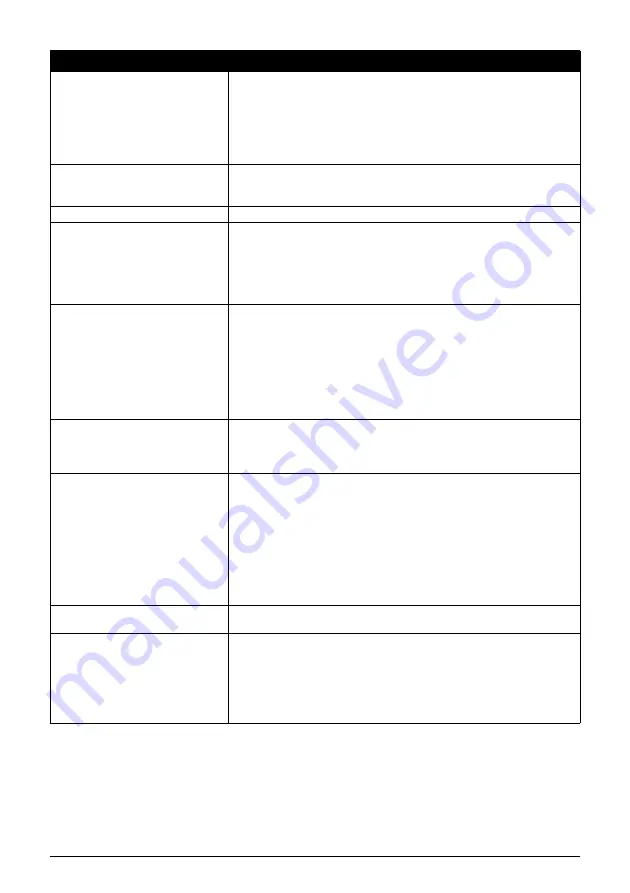
“Paper Error”
z
The Front Feeder is selected on the machine. Load the paper in the Auto
Sheet Feeder, press the
Paper Feed Switch
to select the Auto Sheet Feeder
as the paper source, then select
Stop
in the display on your camera and try
printing again.
For details, see “Changing the Paper Source” on page 11.
z
The paper size setting specified on the machine is not supported by your
camera. Specify a paper size that is supported by your camera.
“Paper jam”
Select
Stop
in the display on your camera to stop printing.
Remove the jammed paper, load new paper, press the
OK
button on the
machine, and reprint.
“Printer cover open”
Close the Scanning Unit (Printer Cover) on the machine.
“No Print Head”
The Print Head is not installed or is defective.
Follow the directions described in the
Easy Setup Instructions
to install the Print
Head.
If the Print Head is already installed, remove the Print Head and then reinstall it.
If the error is still not resolved, the Print Head may be damaged. Contact your
Canon service representative.
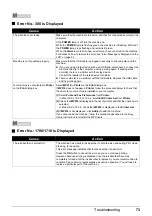
“Waste tank (ink absorber
*2
) full”/
“ink absorber
*2
full”
This error message indicates that the ink absorber is nearly full.
The machine has a built-in ink absorber to hold the ink used during Print head
cleaning, for example.
You can continue printing by selecting
Continue
*1
on the display on your
camera.
However, because printing is disabled once the ink absorber becomes
completely full and until the ink absorber is replaced, you are recommended to
contact a Canon service representative as early as possible. (You will need to
replace a particular part of the machine.)
“No ink”
An ink tank is not installed properly, or is out of ink.
Confirm the error message displayed on the LCD and take the appropriate
action to resolve the error. For details, see “Error Message Is Displayed on the
LCD” on page 57.
“Ink Error”
An ink tank that was once empty is installed.
Replace the ink tank and close the Scanning Unit (Printer Cover).
Printing with an ink tank that was once empty may damage the machine.
If you want to continue printing in this condition, you need to release the function
for detecting the remaining ink level. Press and hold the
Stop/Reset
button for
at least 5 seconds, and then release it.
* With this operation, releasing the function for detecting the remaining ink
level is memorized. Please be advised that Canon shall not be liable for any
machine malfunction or damage caused by refilled ink tanks.
See “Replacing an Ink Tank” on page 34.
“Hardware Error”
An ink tank error has occurred. Replace the ink tank. See “Replacing an Ink
Tank” on page 34.
“Printer error”
An error requiring servicing may have occurred. (Machine’s
POWER
lamp
flashes green and
Alarm
lamp flashes orange alternately.)
Disconnect the cable between the machine and the camera, turn off the
machine, and unplug the power cord of the machine from the power supply.
After a while, plug the power cord of the machine back in, turn on the machine,
and then reconnect the camera to the machine.
If the same error occurs, contact your Canon service representative.
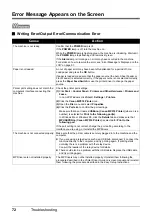
Error Message On Camera
Action


