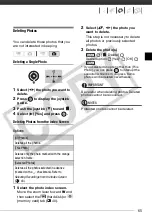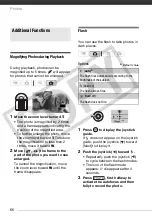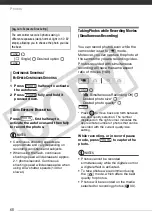
background image

53


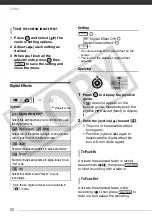
mode: Activate the selected 

effect while recording or in record 
pause mode.

 mode: Activate the selected effect 

and then press 

 to record the 

photo.

NOTES

• When you apply a fader, not only the 

picture but also the sound will fade in or 
out. When you apply an effect, the 
sound will be recorded normally.

• The camcorder retains the last setting 

used even if you turn off the digital 
effects or change the recording 
program.

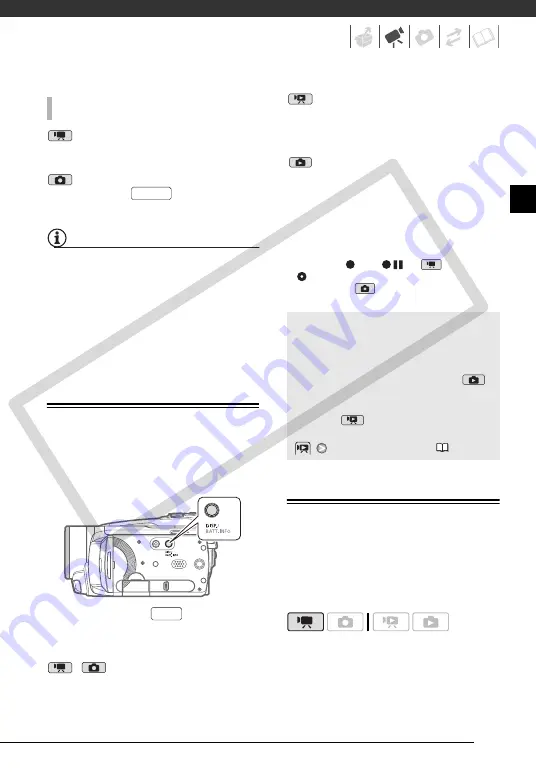
On-Screen Displays and Data Code

You can turn most on-screen displays 
on or off.

Repeatedly press 

 to turn the 

on-screen displays on/off in the 
following sequence:

,  

mode:

• All displays on
• Most displays off*

 mode:

• All  displays  on
• Data code only
• All displays off

 mode:

• All  displays  on
• Regular displays only (removes the 

histogram and information icons)

• All displays off

*

The following icons will appear even when 

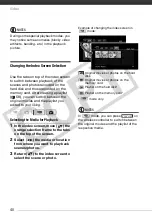
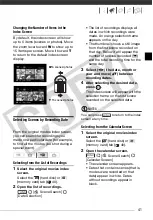
all other on-screen displays are turned off: 

The icons 

 and 

 (in 

 mode), the 

 icon and AF frames when the autofocus 

is locked (in 

 mode), screen markers 

(both recording modes).

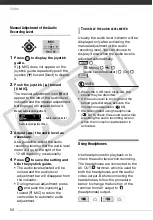
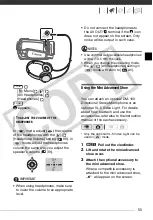
Audio Recording Level

You can adjust the audio recording level 
of the built-in or an external 
microphone. You can display the audio 
level indicator while recording.

T

O


ACTIVATE


AN


EFFECT

PHOTO

DISP.

About the Data Code

With every scene or photo recorded, 
the camcorder keeps a data code 
(date/time of recording, information 
about the camera setup, etc.). In 


mode, this information is displayed on 
the bottom bar and as information 
icons; in 

 mode, you can select 

the information to be displayed with the 


 [Data Code] setting (

95).

CO

PY

Summary of Contents for 2704B001

Page 1: ...English HD Camcorder Instruction Manual Français Caméscope HD Manuel d instruction Español Videocámara HD Manual de Instrucciones PUB DIM 879B COPY ...

Page 2: ... is encouraged to try to correct the interference by one or more of the following measures Reorient or relocate the receiving antenna Increase the separation between the equipment and receiver Connect the equipment into an outlet on a circuit different from that to which the receiver is connected Consult the dealer or an experienced radio TV technician for help The cable with the ferrite core prov...

Page 3: ...l 11 Polarization The CA 570 Compact Power Adapter is equipped with a polarized 2 prong plug a plug having one blade wider than the other The 2 prong polarized plug will fit into the power outlet only one way This is a safety feature If you are unable to insert the plug fully into the outlet try reversing the plug If the plug still fails to fit contact your electrician to replace your obsolete out...

Page 4: ...her controls may result in damage and will often require extensive work by a qualified technician to restore the product to its normal operation e If the product has been dropped or the cabinet has been damaged f When the product exhibits a distinct change in performance This indicates a need for service 19 Replacement Parts When replacement parts are required be sure the service technician has us...

Page 5: ...crosoft Windows and Windows Vista are trademarks or registered trademarks of Microsoft Corporation in the United States and or other countries Macintosh and Mac OS are trademarks of Apple Inc registered in the U S and other countries HDMI the HDMI logo and High Definition Multimedia Interface are trademarks or registered trademarks of HDMI Licensing LLC AVCHD and the AVCHD logo are trademarks of M...

Page 6: ...y 6 times the number of pixels More than twice the number of scanning lines Full HD 1080 refers to Canon camcorders compliant with high definition video composed of 1 080 vertical pixels scanning lines What is Cinema Mode Give your recordings a cinematic look by using the Cine Mode recording program 47 Combine this recording program with the 24 fps progressive frame rate PF24 to get the enhanced e...

Page 7: ...oy your recordings with family and friends 81 You also have the following options You can easily play back video recorded on the memory card by inserting the memory card directly into AVCHD compatible TV sets and HDD or DVD recorders that feature an SD SDHC memory card slot4 For details refer to the instruction manual of your TV or digital video recorder You can play back AVCHD discs of your recor...

Page 8: ...important recordings Canon shall not be liable for any loss or corruption of data Do not subject the camcorder to vibrations or strong impacts The hard disk is a high precision device Vibrations strong impacts or dropping the camcorder may result in permanent data loss Keep the drop sensor activated whenever possible The drop sensor 99 detects when the camcorder is dropped and activates a protecti...

Page 9: ... the camcorder at high altitudes Turning on or using the camcorder in places with low atmospheric pressure such as at altitudes higher than 3 000 m 9 800 ft may result in hard disk damage Initialize the hard disk when movies cannot be recorded played back normally As movies are recorded and deleted over time hard disk fragmentation may occur which may reduce performance Initialize the hard disk sh...

Page 10: ...e Wireless Controller and Accessories 26 Adjusting the Position and Brightness of the LCD Screen 27 Basic Operation of the Camcorder 27 The Button Mode or Flexible Recording 28 Joystick and Joystick Guide 28 Using the Menus 30 First Time Settings 30 Setting the Date and Time 30 Changing the Language 31 Changing the Time Zone 31 Using a Memory Card 31 Memory Cards Compatible for Use with the Camcor...

Page 11: ...ng Scenes 45 Advanced Functions 45 Special Scene Recording Programs 46 Changing the Shutter Speed and Aperture 47 Cinema Mode Giving a Cinematic Look to your Recordings 48 Self Timer 48 Manual Exposure Adjustment and Automatic Backlight Correction 49 Manual Focus Adjustment 50 White Balance 51 Image Effects 52 Digital Effects 53 On Screen Displays and Data Code 53 Audio Recording Level 54 Using He...

Page 12: ...pturing a Photo from the Playback Scene 70 Protecting Photos 70 Copying Photos 71 Other Functions You Can Use when Taking Photos 72 Printing Photos 72 Printing Photos Direct Print 73 Selecting the Print Settings 75 Trimming Settings 76 Print Orders External Connections 78 Terminals on the Camcorder 79 Connection Diagrams 81 Playback on a TV Screen 82 Saving and Backing Up Your Recordings 82 Backin...

Page 13: ...u 92 Setup Menus 101 Trouble 101 Troubleshooting 107 List of Messages 116 Do s and Don ts 116 Handling Precautions 120 Maintenance Others 121 Using the Camcorder Abroad 122 General Information 122 System Diagram 123 Optional Accessories 127 Product Codes 128 Specifications 130 Index COPY ...

Page 14: ...ng terms are used in this manual Screen refers to the LCD and the viewfinder screen only Hard disk and HDD are used interchangeably to refer to the camcorder s built in hard disk drive Media is used to refer collectively to either the built in hard disk or an external memory card The photos included in this manual are simulated pictures taken with a still camera Unless indicated otherwise illustra...

Page 15: ...nu options as they are displayed on screen In tables in this manual the default value is shown in boldface For example On Off The camcorder s operating mode is determined by the position of the mode dial In this manual indicates that a function is available and indicates that the function is not available When no operating mode icons are given the function is available in all operating modes In th...

Page 16: ...cludes the instruction manual of the software electronic version on PDF file Supplied Accessories CA 570 Compact Power Adapter incl power cord BP 807 Battery Pack WL D88 Wireless Controller Lithium Button Battery CR2025 for Wireless Controller CTC 100 S Component Cable Red Green Blue plugs Software CD ROM1 and Installation Guide PIXELA ImageMixer 3 SE STV 250N Stereo Video Cable Yellow Red White p...

Page 17: ...are button 73 86 DISP on screen display button 42 53 BATT INFO button 22 Speaker 39 Memory card slot 32 USB terminal 80 HDMI OUT terminal 79 81 AV OUT terminal 79 COMPONENT OUT terminal 79 MIC terminal 56 Strap mount 25 Grip belt Instant AF sensor 94 Flash 66 Stereo microphone COPY ...

Page 18: ...l Recording movies 34 Taking photos 61 Playing back movies 38 Viewing photos 63 DC IN terminal 23 Remote sensor 25 LCD screen 26 Joystick 28 FUNC button 28 90 play pause button 38 START STOP button 34 fast reverse button 38 Zoom out W wide angle button 36 fast forward button 38 Zoom in T telephoto button 36 stop button 38 BLC backlight correction button 48 Mini advanced shoe 55 Zoom lever 36 PHOTO...

Page 19: ... attachment unit Remove the battery pack to find it START STOP button 34 FUNC button 28 90 MENU button 29 92 PLAYLIST button 58 Navigation buttons frame reverse button 39 fast reverse button 39 play button 38 pause button 38 stop button 38 PHOTO button 61 Zoom buttons 36 SET button frame advance button 39 fast forward button 39 DISP on screen display button 42 53 COPY ...

Page 20: ...on 22 Instant AF 94 MF Manual focus 49 Remaining battery time 22 While recording during playback Scene counter hours minutes seconds Record pause mode Total number of scenes Remaining recording time On the hard disk On the memory card Image stabilizer 94 24F progressive frame rate 22 Backlight correction 49 Drop sensor off 99 Audio level indicator 53 Microphone attenuator 95 Mini advanced shoe 55 ...

Page 21: ...s 49 Remaining battery time 22 Number of available photos On the hard disk On the memory card Image stabilizer 94 Self timer 48 AF frame 94 Camcorder shake warning 94 Focus and exposure lock 61 Flash 66 Histogram 67 Current photo Total number of photos Photo number 98 Protected photo mark 70 Date and time of recording Manual focus 49 File size Manual exposure 48 Photo size 62 Aperture value 46 Shu...

Page 22: ...aining recording time in minutes for 5 seconds If the battery pack is exhausted the battery information may not be displayed Remaining recording time When there is no more free space on the recording media END built in hard disk or END memory card will be displayed and the recording will stop 24F progressive frame rate Select the 24F progressive frame rate 47 to give your recordings a cinematic lo...

Page 23: ...ges 123 124 1 Connect the power cord to the compact power adapter 2 Plug the power cord into a power outlet 3 Connect the compact power adapter to the camcorder s DC IN terminal 4 Attach the battery pack to the camcorder Press the battery pack softly into the battery attachment unit and slide it up until it clicks in place 5 Charging will start when the camcorder is turned off the indicator is off...

Page 24: ...d compact power adapter to voltage converters for overseas travels or special power sources such as those on aircraft and ships DC AC inverters etc NOTES The battery pack will be charged only when the camcorder is off If remaining battery time is an issue you can power the camcorder using the compact power adapter so the battery pack will not be consumed Charged battery packs continue to discharge...

Page 25: ...eless controller may not work properly when the remote sensor is situated under strong light sources or direct sunlight If the wireless controller does not work check that Wireless Remote Control is not set to Off 98 Otherwise replace the battery Accessories Fasten the grip belt Adjust the grip belt so that you can reach the zoom lever with your index finger and the button with your thumb Pass the...

Page 26: ...d using extremely high precision manufacturing techniques with more than 99 99 of the pixels operating to specification Less than 0 01 of the pixels may occasionally misfire or appear as black red blue or green dots This has no effect on the recorded image and does not constitute a malfunction only LCD Backlight You can set the brightness of the screen to normal or bright This changes the brightne...

Page 27: ...Start function can also be used in mode Press the button again to return to the flexible recording mode the button s light is off You can access the menus and change settings to your preference Even in flexible recording mode the camcorder can help you with the settings For example you can use the Special Scene recording programs 45 to set at once all the optimal settings to match special recordin...

Page 28: ...enu Option Following is an example of selecting a FUNC menu option in a recording mode 1 Press 2 Select the icon of the function you want to change from the left side column Menu items not available will appear grayed out 3 Select the desired setting from the available options at the bottom bar The selected option will be highlighted in orange With some settings you will need to make further selec...

Page 29: ...ndicates the menu setting currently selected Menu items not available appear grayed out Move the orange selection bar to the tabs at the top of the screen to select a different menu step 3 5 Select the desired option and press to save the setting 6 Press You can press to close the menu at any time NOTES A small font size is used in menu screens so you can see all options and current settings in on...

Page 30: ... the date and time setting may be lost In such case recharge the built in lithium battery 119 and set the time zone date and time again The date appears in a year month day format only in the first setup screen In subsequent screen displays the date and time will appear as month day year for example Jan 1 2008 12 00 AM You can change the date format 99 You can also change the date and time later o...

Page 31: ...r However depending on its Speed Class you may not be able to record movies on the memory card Refer to the table on page 32 As of June 2008 the movie recording function has been tested using SD SDHC memory cards made by Panasonic Toshiba and SanDisk We recommend using memory cards with a Speed Class 4 or higher NOTES About the SD Speed Class The SD Speed Class is a standard that indicates the min...

Page 32: ...TANT Memory cards have front and back sides that are not interchangeable Inserting a memory card facing the wrong direction can cause a malfunction of the camcorder NOTES To remove the memory card Push the memory card once to release it When the memory card springs out pull it all the way out 1 Movies cannot be recorded when the recording mode is set to MXP 24 Mbps or FXP 17 Mbps 2 On some memory ...

Page 33: ...dings are repeatedly added and deleted and can eventually result in reduced performance Options Menu Initialize HDD or Mem Card Initialization method Yes OK Press to cancel the complete initialization while it is in progress All recordings will be erased and the recording media can be used without any problem IMPORTANT Initializing the recording media will permanently erase all recordings Lost ori...

Page 34: ...SS indicator is on or flashing Failing to do so may result in permanent data loss or damage to the hard disk memory card Do not subject the camcorder to vibrations or strong impacts Do not open the memory card slot cover Do not disconnect the power source or turn off the camcorder Do not change the position of the mode dial Be sure to back up your recordings regularly 82 especially after making im...

Page 35: ...tware ImageMixer 3 to back up such scenes The camcorder uses a variable bit rate VBR to encode video so the actual recording times will vary depending on the content of the scenes The camcorder retains the last setting used even if you set the camcorder to mode Using the Viewfinder When recording in bright places it may be difficult to use the LCD screen In such case change the brightness of the L...

Page 36: ...zoom speed will be constant at Speed 3 The zoom speed will be faster in record pause mode than when actually recording Approximate recording times Default value Recorded in 1 920 x 1 080 resolution Movies recorded using other recording modes are recorded in 1 440 x 1 080 resolution Recording mode MXP FXP XP SP LP Recording media 60 GB Hard disk 5 hr 30 min 7 hr 50 min 10 hr 50 min 18 hr 22 hr 55 m...

Page 37: ...rder is ready to record You can also press to resume recording using the viewfinder with the LCD panel closed IMPORTANT Do not disconnect the power source during standby mode while the indicator is lit in orange NOTES If you close the LCD panel under some circumstances for example while the ACCESS indicator is flashing or a menu is being displayed the camcorder may not enter standby mode Check tha...

Page 38: ...operations on the camcorder while the scene is being deleted You will not be able to delete the last scene this way if after the scene was recorded you changed the operating mode or turned the camcorder off Playing Back the Video 1 Set the mode dial to 2 Turn on the camcorder The scene index screen appears after a few seconds 3 Move the selection frame to the scene you want to play back When you h...

Page 39: ... enter the special playback modes you can use the buttons on the LCD panel or wireless controller 19 There is no sound during the special playback modes Fast playback During normal playback press or Press again to increase the playback speed to approximately 5x 15x 60x the normal speed Slow playback In playback pause mode press or Press again to increase the playback speed 1 8 1 4 the normal speed...

Page 40: ...edited to your liking Selecting the Media for Playback 1 In the index screen move the orange selection frame to the tabs on the top of the screen 2 Select the media or location from where you want to play back scenes photos 3 Return to the index screen to select the scene or photo Example of changing the index screen in mode NOTES In mode you can press on the wireless controller to switch between ...

Page 41: ...ngs were made An orange selection frame appears on the day The thumbnail shows a still image from the first scene recorded on that day Below it will appear the number of scenes recorded and the total recording time for the same day 3 Select the date month or year and move between recording dates 4 After selecting the desired date press The index screen will appear with the selection frame on the f...

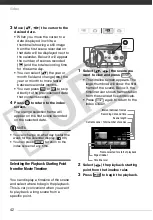
Page 42: ...y to start the week for the calendar display 99 You can press to return to the index screen at any time Selecting the Playback Starting Point from the Movie Timeline You can display a timeline of the scene and select where to begin the playback This is very convenient when you want to play back a long scene from a specific point 1 Select the scene you want to view and press The timeline screen app...

Page 43: ... 89 1 Select the original movies or the photo index screen mode Select the hard disk or memory card tab 40 mode Move the zoom lever toward W to display the index screen 2 Open the selection screen Select Individual Scenes or Individual Photos The selection screen appears 3 Move between the scenes or photos in the index screen and press to select an individual scene photo A checkmark will appear on...

Page 44: ...covered Back up important scenes before deleting them 82 Observe the following precautions while the ACCESS indicator is on or flashing while scenes are being deleted Do not subject the camcorder to vibrations or strong impacts Do not open the memory card slot cover Do not disconnect the power source or turn off the camcorder Do not change the position of the mode dial NOTES Deleting a scene from ...

Page 45: ... may not be as good as in other modes Advanced Functions FUNC FUNC Portrait The camcorder uses a large aperture achieving a focus on the subject while blurring other distracting details Sports Use this mode to record sports scenes such as tennis or golf Night Use this mode to record in dimly lit places Snow Use this mode to record in bright ski resorts It prevents the subject from being underexpos...

Page 46: ...vement Use low aperture values larger lens opening to softly blur the background in a portrait use high aperture values smaller lens opening to get a wider depth of field giving a sharp focus all throughout a landscape Options Default value Programmed AE Desired recording program When you select Shutter Priority AE or Aperture Priority AE a numeric value will appear next to the recording program i...

Page 47: ...itial zoom position When setting a numeric value aperture or shutter speed the number displayed will flash if the aperture or shutter speed is not appropriate for the recording conditions In such case select a different value Cinema Mode Giving a Cinematic Look to your Recordings Give your recordings a cinematic look by using the Cine Mode recording program Combine this recording program with the ...

Page 48: ... Backlight Correction At times backlit subjects may appear too dark underexposed or subjects under very strong lights may appear too bright or glaring overexposed To correct this you can manually adjust the exposure or use the automatic backlight correction POINTS TO CHECK Select a recording mode other than Fireworks Manual Exposure Adjustment 1 Press to display the joystick guide If Exposure does...

Page 49: ...rk well on the following subjects In such case focus manually Reflective surfaces Subjects with low contrast or without vertical lines Fast moving subjects Through wet windows Night scenes POINTS TO CHECK Adjust the zoom before you start the procedure 1 Press to display the joystick guide If Focus does not appear on the joystick guide repeatedly push the joystick toward Next to display it 2 Push t...

Page 50: ...nstead with the following procedure 1 Point the camcorder at a white object zoom in until it fills the whole screen and press When the adjustment is completed stops flashing and stays on The camcorder retains the custom setting even if you turn off the camcorder 2 Press to save the setting and close the menu Automatic Settings are automatically set by the camcorder Use this setting for outdoor sce...

Page 51: ... with special color effects POINTS TO CHECK Select a recording mode other than the Special Scene recording programs Options Default value Image Effect Off Desired option When you select Custom Effect do not press and continue instead with the following procedure Image Effect Off Records with no image enhancing effects Vivid Emphasizes the contrast and color saturation Neutral Tones down the contra...

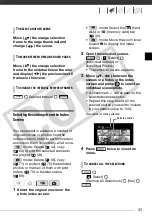
Page 52: ...rd The icon of the selected effect turns green Push the joystick again to deactivate the digital effect its icon will turn white again Activate the selected fader in record pause mode then press to start recording with a fade in Activate the selected fader while recording then press to fade out and pause the recording TO SET THE CUSTOM IMAGE EFFECT Digital Effect Off Select this setting when you d...

Page 53: ...only All displays off mode All displays on Regular displays only removes the histogram and information icons All displays off The following icons will appear even when all other on screen displays are turned off The icons and in mode the icon and AF frames when the autofocus is locked in mode screen markers both recording modes Audio Recording Level You can adjust the audio recording level of the ...

Page 54: ...ment Usually the audio level indicator will be displayed only after activating the manual adjustment of the audio recording level You can choose to display it also when the audio level is adjusted automatically Menu Audio Level Indicator On NOTES When the 0 dB mark turns red the sound may be distorted If the audio level is too high and the sound gets distorted activate the microphone attenuator 95...

Page 55: ... a 3 5 mm minijack When you change the operating mode the AV Headphones setting in mode will return to AV Using the Mini Advanced Shoe You can attach an optional DM 100 Directional Stereo Microphone or an optional VL 5 Video Light For details about how to attach and use the accessories refer also to the instruction manual of the each accessory Only the optional VL 5 Video Light can be used in mode...

Page 56: ...he mini advanced shoe Refer to Using the Mini Advanced Shoe 55 appears For details about using the microphone refer to the instruction manual of the DM 100 Using other microphones You can also use commercially available microphones Connect the external microphone to the MIC terminal Use commercially available condenser microphones with their own power supply You can connect almost any stereo micro...

Page 57: ... the original movies index screen Select the hard disk or memory card tab 40 2 Select the scene you want to divide 3 Open the scene division screen Divide The scene selected will start playing back 4 Select the icon and press where you want to divide the scene You can use the following icons and the special playback modes 39 to bring the scene to a precise point Skip to the beginning end of the cu...

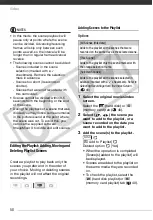
Page 58: ...ist to play back only the scenes you prefer and in the order of your choice Moving or deleting scenes in the playlist will not affect the original recordings Adding Scenes to the Playlist Options 1 Select the original movies index screen Select the hard disk or memory card tab 40 2 Select the scene you want to add to the playlist or a scene recorded on the date you want to add to the playlist 3 Ad...

Page 59: ...All Scenes you can press to interrupt the operation while it is in progress Some scenes will be deleted nevertheless Moving Scenes in the Playlist Move the scenes in the playlist to play them back in the order of your choice 1 Select the playlist index screen Select the hard disk playlist or memory card playlist tab 40 2 Select the scene you want to move 3 Open the scene moving screen Move 4 Move ...

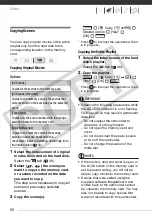
Page 60: ...sult in permanent data loss Do not subject the camcorder to vibrations or strong impacts Do not open the memory card slot cover Do not disconnect the power source or turn off the camcorder Do not change the position of the mode dial NOTES If the memory card slot cover is open or the LOCK switch on the memory card is set to prevent writing you will not be able to copy movies to the memory card Scen...

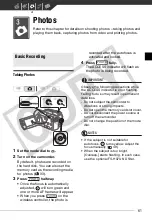
Page 61: ... after the autofocus is activated and locked 4 Press fully The ACCESS indicator will flash as the photo is being recorded IMPORTANT Observe the following precautions while the ACCESS indicator is on or flashing Failing to do so may result in permanent data loss Do not subject the camcorder to vibrations or strong impacts Do not open the memory card slot cover Do not disconnect the power source or ...

Page 62: ...f photos that can be recorded will vary depending on the subject and shooting conditions The camcorder retains the last setting used even if you set the camcorder to mode FUNC FUNC Approximate number of photos available on a memory card Default value 1 Super Fine Fine Normal 2 This size is only available for recording in mode simultaneous recording 68 3 Approximate number of photos that can actual...

Page 63: ...Turn on the camcorder 3 Push the joystick to move between photos Push the joystick and hold it down to run quickly through the photos Slideshow You can play a slideshow of all the photos 1 Select the first photo of the slideshow 2 Press to play back the photos one after another Press to stop the slideshow Photo size Recommended use L 2048x1536 To print photos up to A4 size M 1440x1080 To print pho...

Page 64: ... time 1 Press to display the joystick guide 2 Push the joystick toward 3 Select Jump 10 photos or Jump 100 photos 4 Jump the number of photos selected and press Press again to hide the joystick guide IMPORTANT Observe the following precautions while the ACCESS indicator is on or flashing Failing to do so may result in permanent data loss Do not subject the camcorder to vibrations or strong impacts...

Page 65: ... not necessary to delete all photos or previously selected photos 3 Delete the photo s Delete Desired option Yes OK If you selected an option other than This Photo you can press to interrupt the operation while it is in progress Some photos will be deleted nevertheless IMPORTANT Be careful when deleting photos Deleted photos cannot be recovered NOTES Protected photos cannot be deleted All Photos D...

Page 66: ...magnification move the zoom lever toward W until the frame disappears Flash You can use the flash to take photos in dark places Options Default value 1 Press to display the joystick guide If does not appear on the joystick guide push the joystick toward Next to display it 2 Push the joystick toward Repeatedly push the joystick to cycle between the flash modes The icon of the flash mode appears dis...

Page 67: ... be displayed also immediately after taking a photo Use the histogram as a reference to verify the correct exposure of the photo The area to the right of the histogram represents highlights and the left side represents shadows A photo whose histogram skews to the right is relatively bright while one whose histogram peaks to the left is relatively dark Drive Mode Continuous Shooting and Exposure Br...

Page 68: ...ve the same aspect ratio of movies 16 9 Simultaneous Recording Off Desired photo size Desired photo quality Press to move back and forth between size and quality selection The number displayed on the right corner indicates the approximate number of photos that can be recorded with the current quality size setting While recording or in record pause mode press to capture the photo NOTES Photos canno...

Page 69: ...corded with the current quality setting 1 Play back the scene containing the picture you want to capture 2 Pause the playback at the point you want to capture 3 Press fully NOTES The data code of the photo will reflect the date and time of recording of the original scene A photo captured from a scene with lots of fast movement may be blurred Evaluative Appropriate for standard shooting conditions ...

Page 70: ...ializing the recording media 33 will permanently erase all recordings including protected photos Copying Photos You can copy photos only from the hard disk to the memory card Copying a Single Photo 1 Select to view the photos recorded on the hard disk Select the tab 40 and move the zoom lever toward T to return to single photo view 2 Select the photo you want to copy 3 Copy the photo to the memory...

Page 71: ...s as possible will be copied before stopping the operation If the memory card slot cover is open or the LOCK switch on the memory card is set to prevent writing you will not be able to copy photos to the memory card You may not be able to copy photos that were not recorded with this camcorder Other Functions You Can Use when Taking Photos All Photos Copies all the photos This Photo Copies only the...

Page 72: ...If continues to flash for more than 1 minute or if does not appear the camcorder is not correctly connected to the printer In such case disconnect the USB cable and turn off the camcorder and the printer After a short while turn them on again set the camcorder to mode and restore the connection During the following operations even if you connect a printer to the camcorder it will not be recognized...

Page 73: ... printer s instruction manual Printing after Changing the Print Settings 1 Press to display the joystick guide 2 Push the joystick toward Paper Settings Paper Size Available paper sizes vary depending on the printer model Paper Type Select Photo Fast Photo Plain or Default Page Layout Select Default Bordered or one of the following page layouts Borderless The photo is enlarged and may be slightly ...

Page 74: ...t paper settings paper size paper type and page layout Trimming settings 75 Date printing Print effect Number of copies Paper settings x photos sheet Printing multiple photos on the same sheet When using Canon printers you can print the same photo multiple times on the same sheet of paper Use the following table as a guideline for the recommended number of copies depending on the Paper Size settin...

Page 75: ... USB cable and restore the connection after a short while Trimming Settings Set the paper size and page layout before changing the trimming settings Trimming settings apply to one photo only 1 Open the print settings menu Refer to steps 1 2 in Printing after Changing the Print Settings 73 2 Select Trimming and press The trimming frame appears 3 Change the size of the trimming frame Move the zoom l...

Page 76: ...ion screen Print Orders appears on the screen 2 Select the photo you want to mark with a print order 3 Press to set the print order The number of copies appears in orange 4 Set the number of copies desired and press To cancel the print order set the number of copies to 0 5 Repeat steps 2 4 to mark additional photos with print orders or press twice to close the menu Setting Print Orders from the In...

Page 77: ...rts The print menu disappears when the printing is completed NOTES To cancel the printing refer to page 74 Restarting printing Open the print menu as explained in step 2 In the print settings menu select Print or Resume and press The remaining photos will be printed Printing cannot be restarted when the print order settings have been changed or if you deleted a photo with print order settings In c...

Page 78: ...nal cover The HDMI OUT terminal offers a high quality digital connection that combines audio and video in a single convenient cable COMPONENT OUT Terminal Access Open the front terminal cover The component video terminal is for video only When you use connection do not forget the audio connections using the AV OUT terminal AV OUT Terminal Access Open the front terminal cover Sound from the built i...

Page 79: ...Quality Depends on the settings Output only Connect to a high definition TV HDTV or a standard TV with component video input terminals Change the following settings on the camcorder Component Output according to the TV set standard or high definition 96 AV Headphones to AV 96 HTC 100 HDMI Cable optional HDMI mini connector standard HDMI connector HDMI IN AUDIO R L Pr Cr Pb Cb Y Red Green Blue CTC ...

Page 80: ...AV 96 TV Type according to the TV set widescreen or 4 3 if the TV cannot automatically detect and change the aspect ratio 97 Connection Type Digital data connection Connect to a computer to transfer and back up your recordings to the optional DW 100 DVD Burner to create DVD discs from them or to a printer to print out photos VIDEO AUDIO R L STV 250N Stereo Video Cable supplied Yellow White Red USB...

Page 81: ...e TV set will switch automatically to widescreen mode if it is compatible with the Video ID 1 system Otherwise change the aspect ratio of the TV manually Playback on a TV Screen About the HDMITM connection The HDMI High Definition Multimedia Interface connection is a convenient all digital connection using a single cable for both video and audio When you connect the camcorder to an HDTV equipped w...

Page 82: ...CHD discs of your movies and Photo DVDs of your photos 82 Connect the camcorder to an external recording device DVD or HDD recorder VCR etc to save standard definition copies of your movies 86 IMPORTANT When the camcorder is connected to a computer Do not access change or delete any of the camcorder s folders or files directly from the computer as this may result in permanent data loss Always back...

Page 83: ... screen appears select DVD Burner and press When the connection is completed No disc will be displayed 3 Insert a brand new disc into the DVD Burner Use the OPEN CLOSE button on the DVD Burner to open and close the disc tray After the disc is recognized an information screen will display the type of DVD you are creating and the estimated time and number of discs it will require based on the disc y...

Page 84: ...eMixer 3 to back up such scenes While the camcorder is connected to the DVD Burner do not open the memory card slot cover and do not remove the memory card Observe the following precautions while the ACCESS indicator on the camcorder is on or flashing Failing to do so may result in permanent data loss Do not subject the camcorder to vibrations or strong impacts Do not open the memory card slot cov...

Page 85: ...e DVD Burner Use the OPEN CLOSE button on the DVD Burner to open and close the disc tray After the disc is recognized the disc s content will be displayed in an index screen 5 Select the scene you want to play back and press to begin the playback IMPORTANT While the camcorder is connected to the DVD Burner do not open the memory card slot cover and do not remove the memory card NOTES Only AVCHD di...

Page 86: ...l You can change the displays by repeatedly pressing 53 Transferring Photos to a Computer Direct Transfer With the software supplied on the DIGITAL VIDEO Solution Disk CD ROM you can transfer photos to a computer simply by pressing Refer also to the relevant sections in the Digital Video Software instruction manual PDF file Preparations Install the software before you connect the camcorder to the ...

Page 87: ... files on your computer make copies of them first Use the copied files retaining the originals During the following operations even if you connect the camcorder to the computer it will not be recognized Deleting all photos Removing all transfer orders Removing all print orders NOTES We recommend powering the camcorder using the compact power adapter Refer also to the computer s instruction manual ...

Page 88: ...Select and Transfer Repeat this step to select other photos to transfer The button will flash while the photos are being transferred 3 Press to return to the transfer menu NOTES When the camcorder is connected to the computer and the photo selection screen is displayed press to return to the transfer menu All Photos Transfers all photos New Photos Transfers only those photos that have not yet been...

Page 89: ... to cancel the transfer order 4 Repeat steps 2 3 to mark additional photos with transfer orders or press twice to close the menu Setting Transfer Orders from the Index Screen Options Transfer Orders Desired option Yes OK Connect the camcorder to the computer and select Photos with Transfer Orders in the transfer menu 88 FUNC FUNC Individual Photos Opens the same screen described in Marking Single ...

Page 90: ...nu item Setting options Recording programs Programmed AE Shutter Priority AE Aperture Priority AE z z 46 Cine Mode z 47 Portrait Sports Night Snow Beach Sunset Spotlight Fireworks z z 45 Light metering mode Evaluative Center Weighted Average Spot z 69 White balance Automatic Daylight Shade Cloudy Tungsten Fluorescent Fluorescent H Custom WB z z 50 Image effects Image Effect Off Vivid Neutral Low S...

Page 91: ...From the index screen Individual Photos Remove All Selections z Copy Original movies All Scenes All Scenes this date This Scene Selected Scenes z 60 Playlist No Yes From the index screen All Photos This Photo Selected Photos z 70 From single photo view No Yes Add to Playlist 1 All Scenes this date This Scene Selected Scenes z 58 Divide 1 z 57 Move 2 z 59 Protect From single photo view From the ind...

Page 92: ...ematic look will be enhanced Transfer Orders From single photo view From the index screen Individual Photos Selected Photos Remove All z 89 Delete Original movies All Scenes All Scenes this date This Scene Selected Scenes z 44 Scenes in the playlist All Scenes This Scene z 59 From the index screen All Photos This Photo Selected Photos z 65 Scene Search Calendar Screen Date Selection z 41 Menu item...

Page 93: ...ress while reviewing a photo it will continue to be displayed indefinitely Press halfway to return to the normal display Camera Setup 2 Digital Zoom Determines the operation of the digital zoom The color of the indicator indicates the zoom When activated the camcorder will switch automatically to digital zoom when you zoom in beyond the optical zoom range With the digital zoom the image is digital...

Page 94: ...ode is set to Fireworks focus priority is automatically set to Off Image Stabilizer The image stabilizer compensates for camcorder shake even at full telephoto The image stabilizer is designed to compensate for a normal degree of camcorder shake We recommend setting the image stabilizer to Off when using a tripod Auto Slow Shutter The camcorder automatically uses slow shutter speeds to obtain brig...

Page 95: ... Connection Type Select the connection protocol to use when connecting the camcorder to an external device using the supplied USB cable DVD Burner To connect exclusively to the optional DW 100 DVD Burner Computer Printer To connect to a computer printer or similar USB peripheral Connect and Set To make the selection from a screen that appears at the time of the connection to the external device Me...

Page 96: ...of the LCD screen does not affect the brightness of your recordings the brightness of the viewfinder only or the brightness of the playback image on a TV Component Output You can select the video specifications to use when connecting the camcorder to a high definition TV using the component video connection 480i To use the 480i specification standard definition 1080i To use the full 1080i high def...

Page 97: ...o Mode The demonstration mode displays the camcorder s main features It starts automatically when the camcorder is powered with the compact power adapter if you leave it turned on for more than 5 minutes To cancel the demo mode once it has started press any button or turn off the camcorder System Setup 2 1 Option not available when the camcorder is connected to an HDTV using the HDMI cable 2 Optio...

Page 98: ... right buttons and the OK or SET button on the TV s remote control to play back your recordings Depending on the TV set additional settings may be required on the TV itself to activate the HDMI CEC function Refer to the TV s instruction manual Correct operation of the HDMI CEC function cannot be guaranteed even when connecting the camcorder to compatible TV sets If you cannot use the TV s remote c...

Page 99: ... selected for the date printed on photos Calendar Start Day Select the day on which the week starts for the calendar display 41 Information Screens HDD Info Memory Card Info Displays a screen where you can verify how much of the hard disk or the memory card is currently in use total recording time and total number of photos and how much space remains available for recording Estimated figures about...

Page 100: ...s a screen where you can verify the battery charge as a percentage and the remaining recording time mode or playback time mode HDMI Status Displays a screen where you can verify the standard of the video output signal from the HDMI OUT terminal COPY ...

Page 101: ...he battery pack is damaged Use a different battery pack A noise can be heard from the compact power adapter A faint sound can be heard while the compact power adapter is connected to a power outlet This is not a malfunction After using the camcorder for a long time it becomes hot This is not a malfunction Turn off the camcorder and let it cool down before resuming use The battery pack is exhausted...

Page 102: ...urn off the camcorder and let it cool down before resuming use The camcorder will not focus Autofocus does not work on the subject Focus manually 49 Adjust the viewfinder with the dioptric adjustment lever 35 The lens or Instant AF sensor is dirty Clean the lens or sensor with a soft lens cleaning cloth 120 Never use tissue paper to clean the lens When a subject flits across in front of the lens t...

Page 103: ...emove the protection 70 Indicators and Onscreen Displays lights up in red Battery pack is exhausted Replace or charge the battery pack 23 appears on the screen The camcorder cannot communicate with the battery pack attached so the remaining battery time cannot be displayed lights up in red A memory card error occurred Turn off the camcorder Remove and reinsert the memory card Initialize the memory...

Page 104: ...e power source and press the RESET button with a pointed item Pressing the RESET button resets all settings Video noise appears on screen Keep a distance between the camcorder and devices that emit strong electromagnetic fields plasma TVs cellular phones etc Horizontal bands appear on the screen This is a phenomenon typical of CMOS image sensors when recording under some types of fluorescent mercu...

Page 105: ... position of the LOCK switch 119 The folder and file numbers have reached their maximum value Set Photo Numbering to Reset 98 and insert a new memory card The simultaneous recording option in the FUNC menu is set to Simultaneous Recording Off Change the setting to take photos while recording video 68 Photos cannot be captured from the playback scene when TV Type is set to Normal TV In such case ap...

Page 106: ...epending on the type of TV Refer to the instruction manual of the connected TV The computer doesn t recognize the camcorder even though the camcorder is connected correctly or USB Connection Type is set to DVD Burner Set it to Computer Printer or to Connect and Set 95 Disconnect the USB cable and turn off the camcorder After a short while turn it on again and restore the connection Connect the cam...

Page 107: ... detected repeatedly and the buffer became full Move to a more stable location and allow data to be written onto the hard disk If you are using the camcorder in such a situation that vibrations or drop like conditions for example weightlessness are likely to occur set Drop Sensor to Off 99 The data transfer rate was too high for the memory card in use and the recording was stopped Replace the memo...

Page 108: ...y card in the camcorder was initialized using a computer Initialize the memory card with this camcorder 33 Cannot read the HDD The hard disk could not be read This message can also appear if condensation has formed 121 Wait until the camcorder dries completely before resuming use This message can also appear if the camcorder has exceeded its operational temperature appears Turn off the camcorder a...

Page 109: ...d by the battery pack Connect the compact power adapter to the camcorder Could not add the scene s to the playlist One or more scenes could not be added to the playlist 58 You cannot add more than 999 scenes to the playlist If the playlist includes scenes recorded in MXP or FXP mode the maximum number of scenes in the playlist may be less than 999 Delete some recordings 44 65 Data includes scenes ...

Page 110: ...he recording media with this camcorder 33 May not be possible to record movies on this memory card You may not be able to record movies on a memory card without a Speed Class rating Replace the memory card with one rated Speed Class 2 or higher Memory card cover is open After inserting a memory card close the memory card slot cover 32 Memory card is full The memory card is full Delete some recordi...

Page 111: ...eleted Movies that were protected edited with other devices cannot be deleted with this camcorder Task in progress Do not disconnect the power source The camcorder is updating the hard disk memory card Do not disconnect the compact power adapter or remove the battery pack Temperature too high Turn off the camcorder and wait The camcorder has exceeded its operational temperature Disconnect the comp...

Page 112: ...ith transfer orders Unable to recognize the data You transferred data to the camcorder recorded in a different television system PAL or SECAM Unable to recover data Could not recover a corrupted file This message can also appear if condensation has formed 121 Wait until the camcorder dries completely before resuming use Messages Related to the Optional DW 100 DVD Burner If an error message appears...

Page 113: ...disc Reading data from the disc Unable to recover data Could not recover a corrupted file Direct Print Related Messages Cannot print this photo You attempted to print a photo that was recorded with another camcorder has a different compression or was edited on a computer Cannot trim this photo You attempted to trim a photo that was recorded with another camcorder Check print settings Current print...

Page 114: ... paper is not correctly loaded or the paper size is wrong Alternatively if the paper output tray is closed open it to print Paper jam The paper jammed during printing Select Stop to cancel printing After removing the paper set some paper again and retry printing Paper lever error Paper lever error occurred Adjust the paper selection lever to the proper position X photos could not be printed You at...

Page 115: ...s Readjust trim settings The trimming settings for this photo were lost as a result of changes in the paper related settings NOTES About Canon PIXMA SELPHY DS Printers If the printer s error indicator flashes or an error message appears on the printer s operation panel refer to the printer s instruction manual If you cannot solve the problem even after consulting this list and the printer s instru...

Page 116: ...do not allow the camcorder to swing and hit an object Keep the drop sensor activated whenever possible This camcorder is equipped with a sensor that detects acceleration Should the camcorder be dropped or subject to a similar condition a mechanism designed to help prevent hard disk damage will activate and recording playback may stop or the camcorder may turn off Deactivating this function 99 can ...

Page 117: ...Do not use the camcorder near strong electromagnetic fields such as above TVs near plasma TVs or mobile phones Do not point the lens or viewfinder only at strong light sources Do not leave the camcorder pointed at a bright subject Do not use or store the camcorder in dusty or sandy places The camcorder is not waterproof avoid also water mud or salt If any of the above should get into the camcorder...

Page 118: ...t time may not be displayed Use the time shown on the screen as an approximation Regarding the use of non Canon battery packs For your safety battery packs that are not genuine Canon battery packs will not be charged even if you attach them to this camcorder or to the optional CG 800 Battery Charger We recommend using genuine Canon battery packs bearing the mark If you attach to the camcorder batt...

Page 119: ...hium battery Connect the compact power adapter to the camcorder and leave it connected for 24 hours with the camcorder off Lithium Button Battery Do not pick up the battery using tweezers or other metal tools as this will cause a short circuit Wipe the battery with a clean dry cloth to ensure proper contact For California USA only The lithium battery included contains Perchlorate Material special ...

Page 120: ...n using the same option This makes recovering the original recordings very difficult Cleaning Camcorder Body Use a soft dry cloth to clean the camcorder body Never use chemically treated cloths or volatile solvents such as paint thinner Lens Viewfinder only and Instant AF Sensor If the lens surface or Instant AF sensor is dirty autofocus may not work properly Remove any dust or dirt particles usin...

Page 121: ...location and weather conditions As a general rule wait for 2 hours before resuming use of the camcorder Using the Camcorder Abroad Power Sources You can use the compact power adapter to operate the camcorder and to charge battery packs in any country with power supply between 100 and 240 V AC 50 60 Hz Consult a Canon Service Center for information on plug adapters for overseas use Playback on a TV...

Page 122: ...00 Battery Charger STV 250N Stereo Video Cable CA 570 Compact Power Adapter SC 2000 Soft Carrying Case WS 20 Wrist Strap SS 600 SS 650 Shoulder Strap SD SDHC memory card BP 807 BP 808 BP 819 BP 827 Battery Pack Computer TV HDTV WL D88 Wireless Controller PictBridge compatible printers IFC 400PCU USB Cable VCR DVD recorder WD H37 II Wide converter TL H37 Tele converter FS H37U Filter Set DTC 100 D ...

Page 123: ...without a cable Charging Times The charging times given in the following table are approximate and vary according to charging conditions and initial charge of the battery pack Optional Accessories Use of genuine Canon accessories is recommended This product is designed to achieve excellent performance when used with genuine Canon accessories Canon shall not be liable for any damage to this product...

Page 124: ... 170 min 170 min 185 min 190 min 190 min Typical recording time 105 min 105 min 115 min 115 min 115 min Playback time 205 min 235 min 235 min 245 min 245 min BP 827 Maximum recording time 265 min 270 min 290 min 290 min 295 min Typical recording time 170 min 170 min 175 min 175 min 180 min Playback time 325 min 360 min 370 min 380 min 380 min Battery pack Recording mode MXP FXP XP SP LP Usage time...

Page 125: ...g you a wide perspective for indoor shots or panoramic views When the Wide converter is attached a shadow may appear in the picture when you use the flash FS H37U Filter Set Neutral density and MC protector filters help you to control difficult lighting conditions HTC 100 HDMI Cable Use this cable to connect the camcorder to an external device using an all digital connection allowing you to enjoy ...

Page 126: ...icrophone monaural or stereo microphone Shoulder Strap You can attach a shoulder strap for more security and portability SC 2000 Soft Carrying Case A handy camcorder bag with padded compartments and plenty of space for accessories This mark identifies genuine Canon video accessories When you use Canon video equipment we recommend Canon brand accessories or products bearing the same mark COPY ...

Page 127: ...U USB Cable 9370A001AA Optional Accessories BP 808 Battery Pack 3185B002AA BP 819 Battery Pack 2589B002AA BP 827 Battery Pack 3185B002AA CG 800 Battery Charger 2590B002AA TL H37 Tele converter 8835A001AA WD H37 II Wide converter 3187B001AA FS H37U Filter Set 8837A001AA HTC 100 HDMI Cable 2384B001AA SS 650 Shoulder Strap 3123A001AA SS 600 Shoulder Strap 3122A001AA WS 20 Wrist Strap 3118A002AA D81 0...

Page 128: ...s L M S approx 2 760 000 LCD Screen 2 7 in wide TFT color approx 211 000 dots Viewfinder 0 27 in wide TFT color approx 123 000 dots Microphone Stereo electret condenser microphone Lens f 4 8 57 6 mm F 1 8 3 0 12x optical zoom 35 mm equivalent Movies 42 9 514 8 mm Photos LW 42 9 514 8 mm Photos L M S 39 3 471 6 mm Lens Configuration 11 elements in 9 groups 2 aspheric elements AF System Autofocus TT...

Page 129: ... V DC battery pack 8 4 V DC compact power adapter Power consumption SP mode AF on 3 8 W LCD screen normal brightness recording on the hard disk 3 7 W LCD screen normal brightness recording on a memory card 3 7 W viewfinder normal brightness recording on the hard disk 3 5 W viewfinder normal brightness recording on a memory card Operating temperature 0 40 C 32 104 F Dimensions W x H x D excluding t...

Page 130: ...backup battery 119 C Calendar display 41 Capturing photos from video 69 Cine Mode recording program 47 COMPONENT OUT terminal 79 Condensation 121 Connections to external devices 79 Continuous shooting 67 Copying Movies 60 Photos 70 D Data code 53 95 Date and time 30 Date format 99 Daylight saving time 31 Time zone 31 Deleting Movies 37 44 59 Photos 63 65 Digital effects 52 Direct print 72 Direct t...

Page 131: ... program 46 Photo numbers 98 Photo quality 62 Photo size 62 Playback Movies 38 Photos 63 Playlist 58 Portrait recording program 45 Power save 34 Print order 76 Print share button 73 87 Printing photos 72 Protecting photos 70 Q Quick Start function 37 R Recording Movies 34 Photos 61 Recording mode 35 Recording programs 45 46 Recording time 36 Remote sensor 25 RESET 104 Reviewing Movies Record revie...

Page 132: ...ding program 45 T Telephoto 36 Timeline 42 Transfer order 89 Transferring to a computer Movies 82 Photos 86 Tripod 117 Troubleshooting 101 Tv recording program 46 U USB terminal 78 V Viewfinder 35 Volume 39 97 W White balance 50 Wide angle 36 Wind screen 94 95 Wireless controller 24 Z Zoom 36 Digital zoom 93 Zoom speed 36 93 only COPY ...

Page 133: ...andling accident improper maintenance or failure to follow operating instructions B If the Equipment is defective as a result of leaking batteries sand dirt or water damage C If defects or damages are caused by the use of unauthorized parts or by service other than by Canon USA s factory service centers or authorized service facilities D If the Equipment is used for commercial or industrial use Th...

Page 134: ...nish of the Equipment media nor does it apply to Equipment purchased outside Canada If the Equipment contains a hard disk drive Canon Canada recommends that data stored on that drive be duplicated or backed up to prevent its loss in the event of a failure or other malfunction of such drive TO OBTAIN WARRANTY SERVICE Ship your Equipment in its original carton box or equivalent properly packed fully...

Page 135: ...1 800 OK CANON 1 800 652 2666 sans frais au Canada seulement MÉXICO CANON MEXICANA S DE RL DE CV Blvd Manuel Ávila Camacho No 138 Piso 17 Col Lomas de Chapultepec C P 11000 México D F México CANON U S A INC NEW JERSEY OFFICE 100 Jamesburg Road Jamesburg NJ 08831 USA CENTRO Y CANON LATIN AMERICA INC SURAMÉRICA 703 Waterford Way Suite 400 Miami FL 33126 USA ASIA CANON HONGKONG COMPANY LTD 19 F The M...

Reviews: