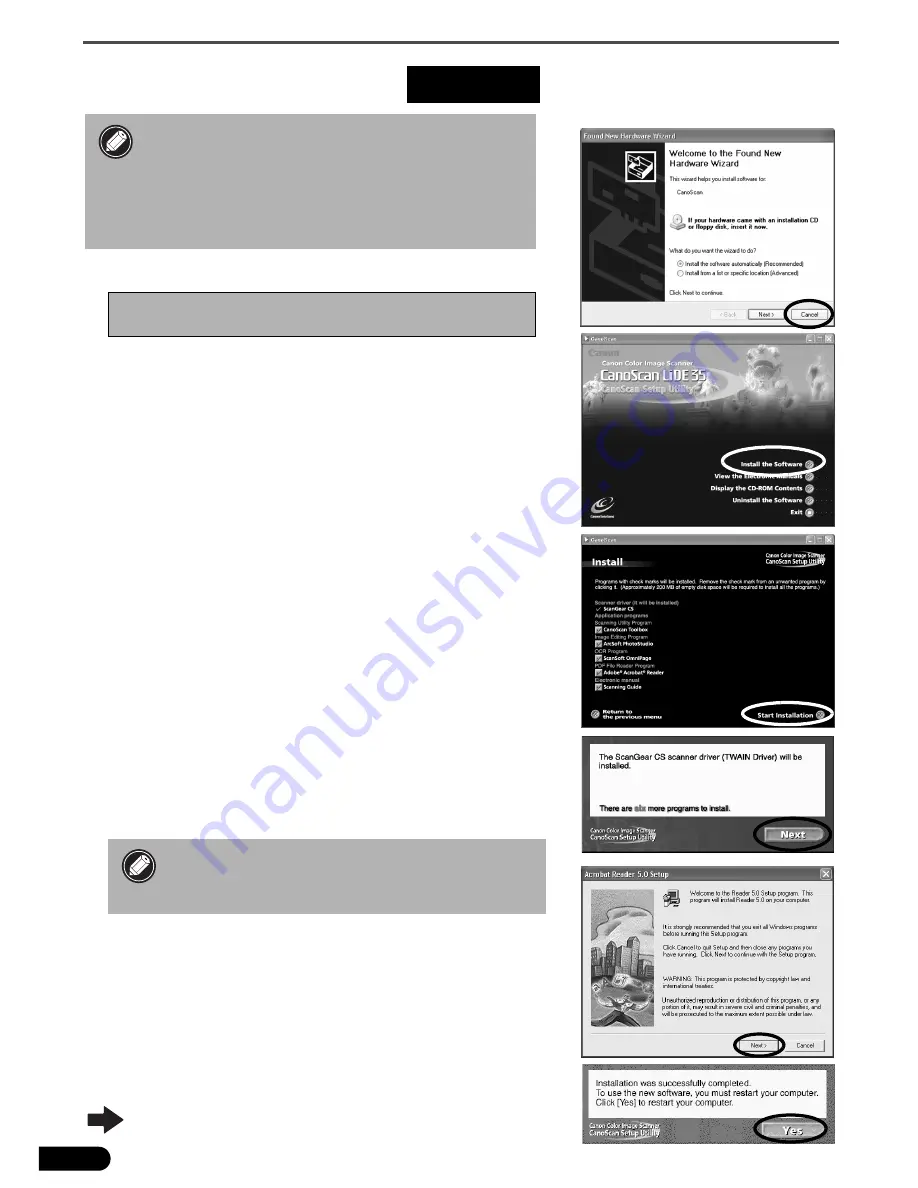
Install the Software (Windows)
4
Install the Software
(Windows)
1
Turn the computer on.
2
Place the CanoScan Setup Utility CD-ROM in the drive.
After you select your language, the CanoScan Setup Utility main
menu will display.
3
Click [Install the Software].
Read the SOFTWARE USER LICENSE AGREEMENT. Click [Yes] if
you accept the terms.
The [Install] window will display.
4
Click [Start Installation].
You will install five software programs and the
Scanning Guide
(HTML format manual).
5
The installation procedure will start.
Follow the on-screen message prompts and click [Next] or [Yes]
to continue the installation.
6
When the installation is complete, click [Yes].
The computer will restart.
7
After Windows restarts, remove the CD-ROM from
the drive and store it in a safe place.
Continue on P. 6.
• With Windows XP/2000, you should log on with
an administrator user name when you install or
uninstall software programs.
• If you are using a computer which does not
equip USB 2.0 interface by standard, refer to
P. 12.
If the "Found New Hardware Wizard" or
"Add New Hardware Wizard" appears, click [Cancel].
• In few cases, your operating system may
require a restart. Follow the on-screen
messages to restart and resume installation.
Windows


