background image

日本語

レンズ本体ソフトウェアのアップデートについて

本機をレンズキットにてご購入の場合、同梱レンズについては以下の対応は不要で


す。
下記のレンズを以前にお買い上げのお客様はレンズ本体ソフトウェアのアップデー


トが必要な場合があります。

E 18-55mm F3.5-5.6 OSS

E 18-200mm F3.5-6.3 OSS

E 55-210mm F4.5-6.3 OSS

Sonnar T* E 24mm F1.8 ZA

E 30mm F3.5 Macro

E 50mm F1.8 OSS

E 18-200mm F3.5-6.3 OSS LE

レンズ本体ソフトウェアのアップデートがお済みでない場合、下記の機能がご使用


になれません。

AF

モード:

AF-A

AF

制御自動切り換え)


カメラ設定:[

AF

追従感度]設定(動画時)


カメラ設定:[

AF

駆動速度]設定(動画時)


レンズ本体ソフトウェアのバージョンの確認方法

1


お使いになるレンズを装着し、

MENU 

[セットアップ]

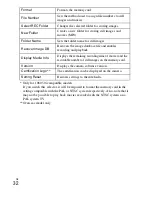
バージョン表示]

を選んでください。

2


レンズ本体ソフトウェアのバージョンが表示されます。

レンズ本体ソフトウェアが「

Ver. 02

」以上の場合はアップデート不要です。


アップデートについて詳しくは、下記

URL

をご覧ください。


http://www.sony.jp/ichigan/update/

English

Updating the camera lens software

When you purchase this camera with a lens kit, you do not need to perform the following 


procedures for the lens supplied with the camera in the same package.

When you purchase the following lenses before purchasing this camera, you may need to 


update the software installed on the camera lens.

E 18-55mm F3.5-5.6 OSS

E 18-200mm F3.5-6.3 OSS

E 55-210mm F4.5-6.3 OSS

Sonnar T* E 24mm F1.8 ZA

E 30mm F3.5 Macro

E 50mm F1.8 OSS

E 18-200mm F3.5-6.3 OSS LE

The following functions will not be available unless you finish updating the camera lens 


software.

AF mode: AF-A (Automatic AF)


Camera setting: [AF Track Duration] setting (during movie shooting) 


Camera setting: [AF drive speed] setting (during movie shooting)


Confirming the version of the camera lens software

1

  Attach the lens you want to use and select MENU 

 [Setup] 

 [Version].

2

  The version of the camera lens software is displayed.

If “Ver. 02” or later is indicated for the version of the camera lens software, you do not need 


to update the software.

For further information on the update procedure, visit the website below.


http://www.sony.net/SonyInfo/Support/

Français

Mise à jour du logiciel de l’objectif de l’appareil

Lorsque vous achetez cet appareil photo avec un kit d’objectif, vous n’avez pas besoin 


d’effectuer les procédures suivantes pour l’objectif fourni avec l’appareil et se trouvant 
dans le même emballage.

Lorsque vous achetez les objectifs suivants avant d’acheter cet appareil, il se peut que 


vous deviez mettre à jour le logiciel installé sur l’objectif de l’appareil.

E 18-55mm F3.5-5.6 OSS

E 18-200mm F3.5-6.3 OSS

E 55-210mm F4.5-6.3 OSS

Sonnar T* E 24mm F1.8 ZA

E 30mm F3.5 Macro

E 50mm F1.8 OSS

E 18-200mm F3.5-6.3 OSS LE

Les fonctions suivantes ne seront pas disponibles tant que vous n’aurez pas terminé la 


mise à jour du logiciel de l’objectif de l’appareil.

mode AF : AF-A (AF automatique)


réglage de l’appareil : réglage [Durée Suivi AF] (pendant l’enregistrement de films) 


réglage de l’appareil : réglage [Vitesse AF] (pendant l’enregistrement de films)


Vérification de la version du logiciel de l’objectif de l’appareil

1

  Montez l’objectif que vous voulez utiliser et sélectionnez MENU 

 [Réglage] 


[Version].

2

  La version du logiciel de l’objectif de l’appareil s’affiche.

Si la version indiquée est « Ver. 02 » ou une version ultérieure du logiciel de l’objectif de 


l’appareil, vous n’avez pas besoin de mettre le logiciel à jour.

Pour plus d’informations sur la procédure de mise à jour, consultez le site Internet ci-


dessous.

http://www.sony.net/SonyInfo/Support/

Deutsch

Aktualisieren der Kameraobjektiv-Software

Wenn Sie diese Kamera mit einem Objektivsatz kaufen, brauchen Sie die folgenden 


Vorgänge für das mit der Kamera in derselben Verpackung gelieferte Objektiv nicht 
durchzuführen.

Wenn Sie die folgenden Objektive kaufen, bevor Sie die Kamera kaufen, müssen Sie 


eventuell die im Kameraobjektiv installierte Software aktualisieren.

E 18-55mm F3.5-5.6 OSS

E 18-200mm F3.5-6.3 OSS

E 55-210mm F4.5-6.3 OSS

Sonnar T* E 24mm F1.8 ZA

E 30mm F3.5 Macro

E 50mm F1.8 OSS

E 18-200mm F3.5-6.3 OSS LE

Die folgenden Funktionen sind nur verfügbar, wenn Sie die Aktualisierung der 


Kameraobjektiv-Software abschließen.

AF-Modus: AF-A (Automatischer AF)


Kamera-Einstellung: Einstellung [AF-Verfolg.dauer] (während Filmaufnahme)


Kamera-Einstellung: Einstellung [AF Speed] (während Filmaufnahme)


Überprüfen der Version der Kameraobjektiv-Software

1

    Bringen Sie das gewünschte Objektiv an, und wählen Sie MENU 

 [Einstellung] 

 [Version].

2

    Die Version der Kameraobjektiv-Software wird angezeigt.

Wenn „Ver. 02“ oder später für die Version der Kameraobjektiv-Software angezeigt wird, 


brauchen Sie die Software nicht zu aktualisieren.

Für weitere Informationen zum Aktualisierungsverfahren besuchen Sie die nachstehende 


Website.

http://www.sony.net/SonyInfo/Support/

Español

Actualización del software del objetivo de la cámara

Cuando usted adquiera esta cámara con un kit de objetivo, no necesitará realizar los 


procedimientos siguientes para el objetivo suministrado con la cámara en el mismo 
paquete.

Cuando haya adquirido los objetivos siguientes antes de adquirir esta cámara, es posible 


que necesite actualizar el software instalado en el objetivo de la cámara.

E 18-55mm F3.5-5.6 OSS

E 18-200mm F3.5-6.3 OSS

E 55-210mm F4.5-6.3 OSS

Sonnar T* E 24mm F1.8 ZA

E 30mm F3.5 Macro

E 50mm F1.8 OSS

E 18-200mm F3.5-6.3 OSS LE

Las funciones siguientes no estarán disponibles a menos que complete la actualización 


del software del objetivo de la cámara.

Modo AF: AF-A (AF automático)


Ajuste de la cámara: Ajuste [Dur. Seguim. AF] (durante la toma de película) 


Ajuste de la cámara: Ajuste [Velocidad AF] (durante la toma de película)


Confirmación de la versión del software del objetivo de la cámara

1

  Coloque el objetivo que quiere utilizar y seleccione MENU 

 [Ajustes] 

 [Versión].

2

  Se visualiza la versión del software del objetivo de la cámara.

Si se indica “Ver. 02” o posterior para la versión del software del objetivo de la cámara, no 


necesita actualizar el software.

Para ver más información sobre el procedimiento de actualización, visite el sitio web de 


abajo.

http://www.sony.net/SonyInfo/Support/

Italiano

Aggiornamento del software dell’obiettivo della fotocamera

Quando si acquista questa fotocamera con un kit dell’obiettivo, non è necessario 


eseguire le seguenti procedure per l’obiettivo in dotazione con la fotocamera nella stessa 
confezione.

Quando si acquistano i seguenti obiettivi prima di acquistare questa fotocamera, 


potrebbe essere necessario aggiornare il software installato sull’obiettivo della 
fotocamera.

E 18-55mm F3.5-5.6 OSS

E 18-200mm F3.5-6.3 OSS

E 55-210mm F4.5-6.3 OSS

Sonnar T* E 24mm F1.8 ZA

E 30mm F3.5 Macro

E 50mm F1.8 OSS

E 18-200mm F3.5-6.3 OSS LE

Le seguenti funzioni non saranno disponibili a meno che non si finisca di aggiornare il 


software dell’obiettivo della fotocamera.

Modo AF: AF-A (AF automatico)


Impostazione della fotocamera: impostazione di [Durata inseg. AF] (durante la ripresa del 


filmato)
Impostazione della fotocamera: impostazione di [Velocità AF] (durante la ripresa del 


filmato)

Conferma della versione del software dell’obiettivo della fotocamera

1

    Montare l’obiettivo che si desidera usare e selezionare MENU 

 [Impostazione] 


[Versione].

2

    Si visualizza la versione del software dell’obiettivo della fotocamera.

Se “Ver. 02” o successiva è indicata per la versione del software dell’obiettivo della 


fotocamera, non è necessario aggiornare il software.   

Per ulteriori informazioni sulla procedura di aggiornamento, consultare il sito web 


indicato sotto.

http://www.sony.net/SonyInfo/Support/

Português

Atualizar o software da objetiva da câmara

Quando adquire esta câmara com um kit de objetiva, não tem de executar os seguintes 


procedimentos para a objetiva fornecida com a câmara na mesma embalagem.

Quando adquire as seguintes objetivas antes de adquirir esta câmara, pode ter de 


atualizar o software instalado na objetiva da câmara.

E 18-55mm F3.5-5.6 OSS

E 18-200mm F3.5-6.3 OSS

E 55-210mm F4.5-6.3 OSS

Sonnar T* E 24mm F1.8 ZA

E 30mm F3.5 Macro

E 50mm F1.8 OSS

E 18-200mm F3.5-6.3 OSS LE

As seguintes funções não estarão disponíveis a menos que termine de atualizar o 


software da objetiva da câmara.

Modo AF: AF-A 


(AF Automática)

Definição da câmara: definição [Dur. Seguim. AF] (durante filmagem) 


Definição da câmara: definição [Veloc 


avanço AF] (durante filmagem)

Confirmar a versão de software da objetiva da câmara

1

    Coloque a objetiva que pretende usar e selecione MENU 

 [Configuração] 


[Versão].

2

    Visualiza-se a versão de software da objetiva da câmara.

Se estiver indicada “Ver. 02” ou posterior relativamente à versão de software da objetiva 


da câmara, não precisa de atualizar o software.

Para mais informações sobre o procedimento de atualização, visite o seguinte website.


http://www.sony.net/SonyInfo/Support/

Nederlands

De software van de cameralens updaten

Als u deze camera met een lenskit aanschaft, hoeft u de volgende procedures niet uit te 


voeren voor de lens die in dezelfde verpakking als de camera werd geleverd.

Als u de volgende lenzen hebt aangeschaft voordat u deze camera hebt gekocht, kan het 


noodzakelijk zijn om de software van de cameralens te updaten.

E 18-55mm F3.5-5.6 OSS

E 18-200mm F3.5-6.3 OSS

E 55-210mm F4.5-6.3 OSS

Sonnar T* E 24mm F1.8 ZA

E 30mm F3.5 Macro

E 50mm F1.8 OSS

E 18-200mm F3.5-6.3 OSS LE

De volgende functies zullen niet beschikbaar zijn totdat het updaten van de software van 


cameralens is voltooid.

AF-functie: AF-A (Automatische AF)


Camera-instelling: [Duur AF-volgen] instelling (tijdens het opnemen van bewegende 


beelden) 
Camera-instelling: [AF-snelheid] instelling (tijdens het opnemen van bewegende beelden)


De softwareversie van de cameralens controleren

1

    Bevestig de lens die u wilt gebruiken en selecteer MENU 

 [Instellingen] 


[Versie].

2

    De softwareversie van de cameralens wordt afgebeeld.

Als 


“Ver. 02” of hoger wordt afgebeeld voor de softwareversie van de cameralens, hoeft u 

de software niet te updaten.

Voor meer informatie over de procedure van het updaten, gaat u naar de onderstaande 


website.

http://www.sony.net/SonyInfo/Support/

Polski

Aktualizowanie oprogramowania obiektywu aparatu

W przypadku zakupu opisywanego aparatu z obiektywem w zestawie, nie ma potrzeby 


wykonywania poniższych procedur dla obiektywu dostarczonego z aparatem w tym 
samym opakowaniu.

W przypadku zakupu poniższych obiektywów przed zakupem opisywanego aparatu, 


może zajść potrzeba aktualizacji oprogramowania zainstalowanego w obiektywie 
aparatu.

E 18-55mm F3.5-5.6 OSS

E 18-200mm F3.5-6.3 OSS

E 55-210mm F4.5-6.3 OSS

Sonnar T* E 24mm F1.8 ZA

E 30mm F3.5 Macro

E 50mm F1.8 OSS

E 18-200mm F3.5-6.3 OSS LE

Poniższe funkcje nie będą dostępne przed zakończeniem aktualizacji oprogramowania 


obiektywu aparatu.

Tryb AF: AF-A (Automatyczny AF) 


Ustawienie aparatu: Ustawienie [Czas śledz. AF] (podczas filmowania) 


Ustawienie aparatu: Ustawienie [Prędkość AF] (podczas filmowania)


Sprawdzanie wersji oprogramowania obiektywu aparatu

1

    Zamocować obiektyw, który będzie używany, i wybrać MENU 

 [Ustawienia] 


[Wersja].

2

    Zostanie wyświetlona wersja oprogramowania obiektywu aparatu.

W przypadku wyświetlenia wersji „Ver. 02” lub nowszej oprogramowania obiektywu 


aparatu, nie ma potrzeby aktualizacji oprogramowania.

Dalsze informacje na temat procedury aktualizacji można znaleźć w poniższej witrynie 


internetowej.

http://www.sony.net/SonyInfo/Support/

Svenska

Uppdatering av kameraobjektivets mjukvara

Om du köper den här kameran med en objektivsats behöver du inte utföra följande 


procedurer för det objektiv som medföljer kameran i samma förpackning.

Om du har köpt något av följande objektiv innan du köper kameran kan det hända att du 


behöver uppdatera mjukvaran som är installerad i själva kameraobjektivet.

E 18-55mm F3.5-5.6 OSS

E 18-200mm F3.5-6.3 OSS

E 55-210mm F4.5-6.3 OSS

Sonnar T* E 24mm F1.8 ZA

E 30mm F3.5 Macro

E 50mm F1.8 OSS

E 18-200mm F3.5-6.3 OSS LE

Följande funktioner går inte att använda om man inte först uppdaterar kameraobjektivets 


mjukvara.

AF-läge: AF-A (Automatisk AF)


Kamerainställningar: Inställning av [Varakt. AF-spårn.] (under filminspelning)


Kamerainställningar: Inställning av [AF-hastighet] (under filminspelning)


Kontroll av kameraobjektivets mjukvaruversion

1

    Montera det objektiv som ska användas och välj MENU 

 [Installation] 


[Version].

2

    Kameraobjektivets mjukvaruversion visas.

Om ”Ver. 02” eller en senare version visas som kameraobjektivets mjukvaruversion 


behöver du inte uppdatera mjukvaran.

För närmare detaljer om uppdateringsproceduren, se nedanstående webbsida.


http://www.sony.net/SonyInfo/Support/

Suomi

Kameran objektiivin ohjelmiston päivittäminen

Jos ostat tämän kameran objektiivisarjan kanssa, kameran mukana samassa pakkauksessa 


toimitetulle objektiiville ei tarvitse suorittaa seuraavia toimenpiteitä.

Jos ostat seuraavat objektiivit ennen tämän kameran ostamista, sinun täytyy ehkä 


päivittää kameran objektiiviin asennettu ohjelmisto.

E 18-55mm F3.5-5.6 OSS

E 18-200mm F3.5-6.3 OSS

E 55-210mm F4.5-6.3 OSS

Sonnar T* E 24mm F1.8 ZA

E 30mm F3.5 Macro

E 50mm F1.8 OSS

E 18-200mm F3.5-6.3 OSS LE

Seuraavat toiminnot eivät ole käytettävissä, ellei kameran objektiivin ohjelmiston 


päivittämistä suoriteta loppuun.

AF-tila: AF-A (Autom. AF)


Kameran asetus: [AF-seur. kesto] -asetus (videokuvauksen aikana) 


Kameran asetus: [AF-nopeus]-asetus (videokuvauksen aikana)


Kameran objektiivin ohjelmistoversion tarkistaminen

1

    Kiinnitä objektiivi, jota haluat käyttää, ja valitse MENU 

 [Asetus] 

 [Versio].

2

    Kameran objektiivin ohjelmistoversio näytetään.

Jos kameran objektiivin ohjelmistoversioiksi ilmoitetaan ”Ver. 02” tai uudempi, 


ohjelmistoa ei tarvitse päivittää.

Lisätietoja päivitysmenettelystä on alla olevalla sivustolla.


http://www.sony.net/SonyInfo/Support/

Norsk

Oppdatere programvaren til kameraobjektivet

Når du kjøper dette kameraet med et objektivsett, trenger du ikke utføre følgende 


prosedyrer for det objektivet som fulgte med kameraet i samme pakke.

Når du kjøper følgende objektiver før du kjøper dette kameraet, kan det hende du vil få 


behov for å oppdatere programvaren som er installert i kameraobjektivet.

E 18-55mm F3.5-5.6 OSS

E 18-200mm F3.5-6.3 OSS

E 55-210mm F4.5-6.3 OSS

Sonnar T* E 24mm F1.8 ZA

E 30mm F3.5 Macro

E 50mm F1.8 OSS

E 18-200mm F3.5-6.3 OSS LE

Følgende funksjoner vil ikke være tilgjengelige før du avslutter oppdateringen av 


programvaren til kameraobjektivet.

AF-modus: AF-A (Automatisk AF)


Kamerainnstilling: [Varigh. AF-spor.]-innstilling (under filmopptak) 


Kamerainnstilling: [AF-motorhast.]-innstilling (under filmopptak)


Bekrefte versjonen til programvaren til kameraobjektivet

1

  Sett på det objektivet du ønsker å bruke, og velg MENU 

 [Oppsett] 

 [Versjon].

2

  Versjonen til programvaren til kameraobjektivet vises.

Hvis versjonen til programvaren til kameraobjektivet er 


“Ver. 02” eller nyere, trenger du 

ikke oppdatere programvaren.

Du finner nærmere informasjon om oppdateringsprosedyren på nettsiden nedenfor.


http://www.sony.net/SonyInfo/Support/

決定

レンズ

Ver. 02

ボディ: 

ILCE-

Ver.

OK

Lens
Ver. 02

Body: ILCE-
Ver.

2014 Sony Corporation 

Printed in Thailand

4-536-317-

01

(1)

Summary of Contents for A 6000 ILCE-6000

Page 1: ...4 532 055 11 1 ILCE 6000 Interchangeable Lens Digital Camera Instruction Manual E mount ...

Page 2: ...ode 2 Select the desired shooting tip then press z on the control wheel The shooting tip is displayed You can scroll the screen using v V and change shooting tips using b B English Learning more about the camera Help Guide Help Guide is an on line manual Refer to it for in depth instructions on the many functions of the camera 1 Access the Sony support page http www sony net SonyInfo Support 2 Sel...

Page 3: ...r outlet use an attachment plug adaptor of the proper configuration for the power outlet Battery pack If the battery pack is mishandled the battery pack can burst cause a fire or even chemical burns Observe the following cautions Do not disassemble Do not crush and do not expose the battery pack to any shock or force such as hammering dropping or stepping on it Do not short circuit and do not allo...

Page 4: ...ycling location nearest you For more information regarding recycling of rechargeable batteries call toll free 1 800 822 8837 or visit http www call2recycle org Caution Do not handle damaged or leaking Lithium Ion batteries Battery pack and lens If lens supplied This device complies with Part 15 of the FCC Rules Operation is subject to the following two conditions 1 This device may not cause harmfu...

Page 5: ...ular installation If this equipment does cause harmful interference to radio or television reception which can be determined by turning the equipment off and on the user is encouraged to try to correct the interference by one or more of the following measures Reorient or relocate the receiving antenna Increase the separation between the equipment and receiver Connect the equipment into an outlet o...

Page 6: ...any Hereby Sony Corporation declares that this equipment is in compliance with the essential requirements and other relevant provisions of Directive 1999 5 EC For details please access the following URL http www compliance sony de Notice If static electricity or electromagnetism causes data transfer to discontinue midway fail restart the application or disconnect and connect the communication cabl...

Page 7: ...h an incorporated battery this battery should be replaced by qualified service staff only To ensure that the battery and the electrical and electronic equipment will be treated properly hand over these products at end of life to the applicable collection point for the recycling of electrical and electronic equipment For all other batteries please view the section on how to remove the battery from ...

Page 8: ... images and recordable time of movies Notes on using the camera Specifications Preparing the camera Step 1 P 9 Basic operation Step 2 P 23 Playback function Step 3 P 24 Recording function Step 4 P 25 Importing images to the computer P 33 Adding functions to the camera P 35 Others P 36 This manual covers several models supplied with different lenses The model name varies depending on the supplied l...

Page 9: ...ble battery pack NP FW50 1 Micro USB cable 1 AC adaptor AC UB10C UB10D 1 Shoulder strap 1 Eyepiece cup 1 Instruction Manual this manual 1 Wi Fi Connection One touch NFC Guide 1 This guide explains the functions that require a Wi Fi connection x ILCE 6000 Body cap 1 attached to the camera x ILCE 6000L E16 50 mm zoom lens 1 attached to the camera Front lens cap 1 attached to the lens x ILCE 6000Y E1...

Page 10: ... button C Remote sensor D ON OFF Power switch E Self timer lamp AF illuminator F Lens release button G Microphone1 H Lens I Mount J Image sensor2 K Lens contacts2 1 Do not cover this part during movie recording 2 Do not touch this part directly Identifying parts ...

Page 11: ...ity Shutter Priority Manual Exposure Memory recall Movie Sweep Panorama Scene Selection G Control dial H Charge lamp I Multi Micro USB Terminal1 Supports Micro USB compatible device J HDMI micro jack 1 For details on compatible accessories for the multi interface shoe and the Multi Micro USB Terminal visit the Sony web site or consult your Sony dealer or local authorized Sony service facility You ...

Page 12: ...om any position O Diopter adjustment dial Adjust the diopter adjustment dial to your eyesight until the display appears clearly in the viewfinder If it is difficult to turn the diopter adjustment dial remove the eyepiece cup and then adjust the dial P Flash pop up button Q MENU button R For shooting AEL button For viewing Playback zoom S MOVIE Movie button T For shooting Fn Function button For vie...

Page 13: ...ld separately Insert the connection plate into the battery compartment and then pass the cord through the connection plate cover as shown below Make sure that the cord is not pinched when you close the cover C Tripod socket hole Use a tripod with a screw less than 5 5 mm 7 32 inches long Otherwise you cannot firmly secure the camera and damage to the camera may occur D Speaker E Access lamp F Batt...

Page 14: ...0L ILCE 6000Y A Zooming Focusing ring B Zooming lever C Mounting index D Lens contacts1 1 Do not touch this part directly E55 210 mm F4 5 6 3 OSS supplied with ILCE 6000Y A Focusing ring B Zooming ring C Focal length scale D Focal length index E Lens contacts1 F Mounting index 1 Do not touch this part directly ...

Page 15: ...ert the battery pack While pressing the battery eject lever insert the battery pack as illustrated Make sure that the battery eject lever locks after insertion Closing the cover with the battery inserted incorrectly may damage the camera Battery eject lever ...

Page 16: ... Adaptor supplied using the micro USB cable supplied 2 Connect the AC Adaptor to the wall outlet wall socket The charge lamp lights orange and charging starts Turn off the camera while charging the battery You can charge the battery pack even when it is partially charged When the charge lamp flashes and charging is not finished remove and re insert the battery pack Notes Power cord Mains lead For ...

Page 17: ...Full charge The charging time is approximately 310 minutes using the AC Adaptor supplied The above charging time applies when charging a fully depleted battery pack at a temperature of 25 C 77 F Charging may take longer depending on conditions of use and circumstances x Charging by connecting to a computer The battery pack can be charged by connecting the camera to a computer using a micro USB cab...

Page 18: ...omatic AF Shooting once every 30 seconds The flash is used once every two times The power is turned on and off once every ten times The number of minutes for movie shooting is based on the CIPA standard and is for shooting under the following conditions Record Setting 60i 17M FH 50i 17M FH Typical movie shooting Battery life based on repeatedly starting stopping shooting zooming turning on off etc...

Page 19: ... when the access lamp page 13 is lit This may cause damage to data in the memory card Inserting a memory card sold separately 1 Open the cover page 15 2 Insert the memory card sold separately With the notched corner facing as illustrated insert the memory card until it clicks into place 3 Close the cover Memory card For still images For movies A Memory Stick XC HG Duo Memory Stick PRO Duo Mark2 on...

Page 20: ...ttach the socket on the lens side to the tripod to maintain balance Attaching removing the lens 1 If the cap or the packaging lid is attached remove it from the camera or the lens Quickly change the lens somewhere away from dusty locations to keep dust or debris from getting inside the camera 2 Mount the lens by aligning the white index marks on the lens and the camera Hold the camera facing down ...

Page 21: ...tions If foreign material attaches to the image sensor dust it off using a blower Do not leave the camera with the lens removed When you want to use body caps or rear lens caps please purchase ALC B1EM Body cap or ALC R1EM Rear lens cap sold separately When you use a lens with a power zoom set the power switch of the camera to OFF and confirm that the lens is completely retracted before switching ...

Page 22: ...eration 2 Check that Enter is selected on the screen then press z on the control wheel 3 Select a desired geographic location by following the on screen instructions then press z 4 Set Daylight Savings Date Time and Date Format then press z When setting Date Time midnight is 12 00 AM and noon is 12 00 PM 5 Check that Enter is selected then press z Control wheel ON OFF Power Select items v V b B Se...

Page 23: ... page 36 When movie recording is finished you can restart recording by pressing the MOVIE button again Recording may stop to protect the camera depending on the ambient temperature Shooting still images movies 1 Press the shutter button halfway down to focus When the image is in focus a beep sounds and the z or indicator lights 2 Press the shutter button fully down to shoot an image 1 Press the MO...

Page 24: ...rol wheel to view movies x Deleting an image 1 Press the Delete button 2 Select Delete with v on the control wheel then press z x Returning to shooting images Press the shutter button halfway down Viewing images 1 Press the Playback button Delete Control wheel Playback Select images B next b previous or turn the control wheel Set z Zoom in Adjust turn the control wheel ...

Page 25: ...e Drive Mode Allows you to switch between shooting methods such as single shooting continuous shooting or bracket shooting z Standard Lock on AF is assigned to this button in the default setting x Fn Function button Allows you to register 12 functions and recall those functions when shooting 1 Press the Fn Function button 2 Select the desired function by pressing v V b B on the control wheel 3 Sel...

Page 26: ...thod Focus Area Selects the area of focus AF Illuminator Sets the AF illuminator which provides light for a dark scene to aid focusing AF drive speed Switches focusing speed when using autofocus in movie mode AF Track Duration Sets the duration for AF tracking in movie mode Exposure Comp Compensates the brightness of the entire image Exposure step Selects the size of the increment step for shutter...

Page 27: ...ects tracked by the Lock on AF function and automatically trims and saves another copy of the image with a more impressive composition Scene Selection Selects pre set settings to match various scene conditions Movie Selects the exposure mode to suit your subject or effect SteadyShot Sets SteadyShot for shooting still images and movies Reduces blur from camera shake when shooting while holding the ...

Page 28: ...ing screen Live View Display Sets whether or not to reflect settings such as exposure compensation in screen display Disp cont AF area Sets whether or not to display the focus area in Continuous AF mode Pre AF Sets whether or not to perform auto focus before the shutter button is half pressed Zoom Setting Sets whether to use the Clear Image Zoom and Digital Zoom when zooming Eye Start AF Sets whet...

Page 29: ...nction Menu Set Customizes the functions displayed when the Fn Function button is pressed Custom Key Settings Assigns a desired function to the button Dial Wheel Setup Sets the function of the control dial and the control wheel when the exposure mode is set to M You can adjust the shutter speed or aperture with this setting Dial Wheel Ev Comp Adjusts the exposure compensation with the control dial...

Page 30: ... Resets the SSID and password for the smartphone connection Reset Network Set Resets all network settings Application List Displays the application list You can select the application you want to use Introduction Displays instructions on using the application Delete Deletes an image View Mode Sets the way in which images are grouped for playback Image Index Displays multiple images at the same tim...

Page 31: ...onfirmation screen Pwr Save Start Time Sets the time intervals to automatically switch to power save mode PAL NTSC Selector By changing the TV format of the device shooting in a different movie format is possible Cleaning Mode Starts the cleaning mode to clean the image sensor Demo Mode Sets demonstration movie playback to on or off Remote Ctrl Sets whether to use the infrared remote control HDMI ...

Page 32: ...bers to still images and movies Select REC Folder Changes the selected folder for storing images New Folder Creates a new folder for storing still images and movies MP4 Folder Name Sets the folder name for still images Recover Image DB Recovers the image database file and enables recording and playback Display Media Info Displays the remaining recording time of movies and the recordable number of ...

Page 33: ... Online or other network services PlayMemories Online or other network services may not be available in some countries or regions Use the following URL for Mac applications http www sony co jp imsoft Mac If the software PMB Picture Motion Browser supplied with models released before 2011 has already been installed on your computer PlayMemories Home will overwrite it during the installation Use Pla...

Page 34: ...click disconnect icon For Windows Vista click on the tasktray 1 Using the Internet browser on your computer go to the following URL and then install PlayMemories Home www sony net pm For details on PlayMemories Home refer to the following PlayMemories Home support page English only http www sony co jp pmh se When installation is complete PlayMemories Home starts 2 Connect the camera to your comput...

Page 35: ...t pmca After installing an application you can call up the application by touching an NFC enabled Android smartphone to the N mark on the camera using the One touch NFC function The application downloading function may not be available in some countries and regions For details refer to the application downloading website above Adding functions to the camera Notes ...

Page 36: ... times for all movie files Continuous shooting is possible for approximately 29 minutes a product specification limit The maximum continuous recording time of an MP4 12M format movie is about 20 minutes limited by the 2 GB file size restriction h hour m minute Number of still images and recordable time of movies Capacity Quality 2 GB Standard 330 images Fine 200 images RAW JPEG 54 images RAW 74 im...

Page 37: ...ther more realistic image On use and care Avoid rough handling disassembling modifying physical shock or impact such as hammering dropping or stepping on the product Be particularly careful of the lens Notes on recording playback Before you start recording make a trial recording to make sure that the camera is working correctly This camera is neither dust proof nor splash proof nor water proof Do ...

Page 38: ...ields such as a floppy disk or a credit card to the screen or the camera body On using the lenses and accessories It is recommended that you use Sony lenses accessories designed to suit the characteristics of this camera Using the products of other manufacturers may cause the camera not to operate to its capability or result in accidents and malfunctions of the camera Notes on shooting with the vi...

Page 39: ...ht laws No guarantee in the case of damaged content or recording failures Sony cannot provide a guarantee in the case of failure to record or loss or damage of recorded content due to a malfunction of the camera or recording media etc Cleaning the camera surface Clean the camera surface with a soft cloth slightly moistened with water then wipe the surface with a dry cloth To prevent damage to the ...

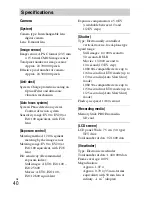
Page 40: ...ll images AUTO ISO 100 ISO 25 600 Movies AUTO ISO 100 ISO 12 800 equivalent Exposure compensation 5 0 EV switchable between 1 3 and 1 2 EV steps Shutter Type Electronically controlled vertical traverse focal plane type Speed range Still images 1 4 000 second to 30 seconds BULB Movies 1 4 000 second to 1 4 second 1 3 EV step 1080 60i compatible device up to 1 60 second in AUTO mode up to 1 30 secon...

Page 41: ...ory Stick PRO Duo media 285 g 10 1 oz camera only Operating temperature 0 C to 40 C 32 F to 104 F File format Still image JPEG compliant DCF Ver 2 0 Exif Ver 2 3 MPF Baseline RAW Sony ARW 2 3 Format Movie AVCHD format AVCHD format Ver 2 0 compatible Video MPEG 4 AVC H 264 Audio Dolby Digital 2ch Dolby Digital Stereo Creator Manufactured under license from Dolby Laboratories Movie MP4 format Video ...

Page 42: ... F Storage temperature 20 C to 60 C 4 F to 140 F Dimensions Approx 50 mm 22 mm 54 mm 2 inches 7 8 inches 2 1 4 inches W H D Rechargeable battery pack NP FW50 Battery type Lithium ion battery Maximum voltage DC 8 4 V Nominal voltage DC 7 2 V Maximum charge voltage DC 8 4 V Maximum charge current 1 02 A Capacity Typical 7 7 Wh 1 080 mAh Minimum 7 3 Wh 1 020 mAh ...

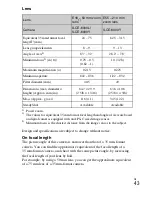
Page 43: ...oot with the same picture angle by increasing the focal length of your lens by half For example by using a 50 mm lens you can get the approximate equivalent of a 75 mm lens of a 35 mm format camera Lens E16 50 mm zoom lens1 E55 210 mm zoom lens Camera ILCE 6000L ILCE 6000Y ILCE 6000Y Equivalent 35 mm format focal length2 mm 24 75 82 5 315 Lens groups elements 8 9 9 13 Angle of view2 83 32 28 2 7 8...

Page 44: ... Systems Inc iPhone and iPad are registered trademarks of Apple Inc in the United States and other countries SDXC logo is a trademark of SD 3C LLC Android Google Play are trademarks of Google Inc Wi Fi the Wi Fi logo and Wi Fi PROTECTED SET UP are registered trademarks of the Wi Fi Alliance The N Mark is a trademark or registered trademark of NFC Forum Inc in the United States and in other countri...

Page 45: ... 2014 Sony Corporation Printed in Thailand Additional information on this product and answers to frequently asked questions can be found at our Customer Support Website ...

Page 46: ... Atualizar o software da objetiva da câmara Quando adquire esta câmara com um kit de objetiva não tem de executar os seguintes procedimentos para a objetiva fornecida com a câmara na mesma embalagem Quando adquire as seguintes objetivas antes de adquirir esta câmara pode ter de atualizar o software instalado na objetiva da câmara E 18 55mm F3 5 5 6 OSS E 18 200mm F3 5 6 3 OSS E 55 210mm F4 5 6 3 O...

Page 47: ...кции будут недоступны до тех пор пока не завершится обновление программного обеспечения объектива камеры Режим АФ AF A Автоматич AF Установка камеры Установка Прод след AF во время видеосъемки Установка камеры Установка Скорость АФ во время видеосъемки Подтверждение версии программного обеспечения объектива камеры 1 Прикрепите объектив который хотите использовать и выберите MENU Настройка Модель 2...

Page 48: ...tionnez Parametres sur fe smartphone puis Plus et cochez NFC Playback an image to be sent to the smartphone Visualisez une image aenvoyer au smartphone Touch the smartphone to the camera Mettez le smartphone en contact avec l appareil photo II Touch the camera and Smartphone together without moving them until PlayMemories Mobile launches on the smartphone 1 2 seconds If there is nom N mark on the ...

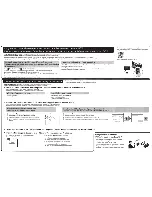
Page 49: ...nstalled on your computer Parametrez Jes regfages d importation Wi Fi une fois fe logicief instaffe sur vorre ordinateur i iiYj iji J ii J I m ll lli ti 11a l E Z1 www sony net pm http www sony eo jp imsoft Mac Select Wireless Auto Import St lectionnez Importation auto sans fil 2 Connect the camera to an access point Raccordezl appareil photo aun point d acces Note For more information refer to th...

Page 50: ...Printed in Thailand 111111111 II 4 489 816 71 ...

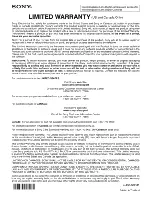
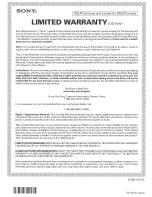
Page 51: ...pelez le Centre de service d information de Ia clientele Sony 1 800 222 SONY 7669 Pour tout accessoire ou piece non disponible de votre detaillant autorise composez le 1 800 488 SONY 7669 Pour les achats effectues au Canada Visitez le site Web Sony a www sony ca support Ou appelez le Centre d information de Ia clientele Sony 1 800 222 SONY 7669 Canada Pour tout accessoire ou piece non disponible d...

Page 52: ...support Or call the Sony Customer Information Service Center 1 800 222 SONY 7669 For an accessory or part not available from your authorized dealer call 1 800 468 SONY 7669 For purchases made in CANADA Visit Sony s Web Site www sony ca support Or call the Sony Customer Information Center 1 877 899 SONY 7669 Canada For an accessory or part not available from your authorized dealer call 1 877 779 99...

Page 53: ......

Reviews: