Part 2: Maintenance
BJC-3000
2-14
2.5.3 When EEPROM setting is required
Replacing the control board and the waste ink absorber requires resetting the
EEPROM, setting the model, and confirmation with the test printout.
The EEPROM (IC502) keeps track of data that is native to the machine, including the
waste ink amount and the model settings.
Refer to
Part 3: 2.1 Service Mode Operations (Page 3-8
) for the operation procedures.
(1) After Control Board Replacement
When replacing the control board, the waste ink absorber must also be replaced if
the waste ink amount exceeds 7%. Also, the EEPROM needs to be reset and model
setting must be performed.
Confirmation of the waste ink amount can be carried out with the service/factory
test print before replacing the control board, or by visually checking the waste ink
absorber.
The memory data for the replacement control board (EEPROM) is not defined.
If the EEPROM is not reset, the waste ink level may exceed the waste ink absorber
capacity without causing the waste ink full error.
(2) After Waste Ink Absorber Replacement
Reset the EEPROM's total waste ink amount to zero.
After the EEPROM is reset, the data it contained cannot be confirmed with
the test printout. Be sure to check the stored data before resetting the
EEPROM.
When the stored data is reset, the various settings, such as the total count
of sheets passed, and the total waste ink amount will be reset, however,
the model setting will remain.
Data on the EEPROM before replacement, including various settings and
the total waste ink amount, cannot be written to the new EEPROM.
When the waste ink-full error occurs, it can be assumed that the printer
has printed more sheets than its service life called for. However, this
depends on how many times the power has been turned on/off, the
cartridge has been replaced (the number of times the front cover is
opened), and the usage conditions.
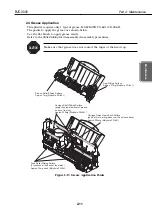
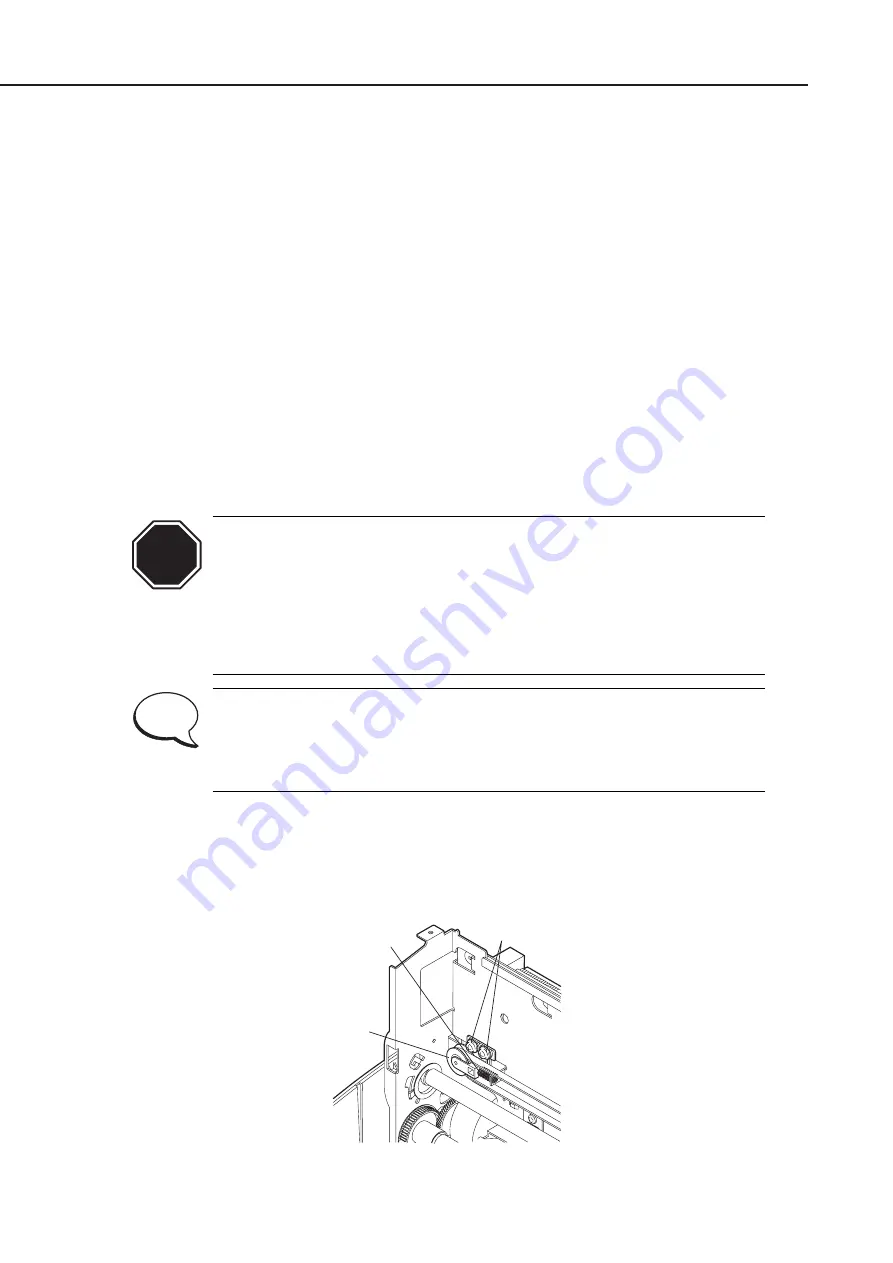
2.5.4 When the carriage belt tension needs adjustment
When tension on the carriage belt has been loosened, for example, to remove the
carriage, the carriage belt tension needs to be adjusted.
Use the tension spring tool (QY9-0043) when fixing the pulley assembly before
tightening the screws. Remove the tension spring after the screws are fixed.
NOTE
Figure 2-15 Carriage Belt Tension Adjustment
Fixing Screws
Tension Spring
Idler Pulley
CAUTION
Summary of Contents for BJC-3000 Series
Page 2: ...0899 SC 0 30 0 ...
Page 3: ......
Page 12: ...VIII This page intentionally left blank ...
Page 14: ......
Page 28: ......
Page 48: ...Part 2 Maintenance BJC 3000 2 20 This page intentionally left blank ...
Page 50: ......
Page 62: ...Part 3 Operation BJC 3000 3 12 This page intentionally left blank ...
Page 64: ......
Page 88: ......
Page 95: ......
Page 112: ...Part 5 Appendix BJC 3000 5 24 This page intentionally left blank ...
Page 118: ......
Page 119: ...PRINTED IN JAPAN IMPRIME AU JAPON CANON INC The printing paper contains 70 waste paper ...


