background image

7

6

5

4

3

2

1

Staple Finisher-D1 / Booklet Finisher-D1

Service Manual Rev. 01

Product Outline

Technology

Periodic Servicing

Parts Replacing and Cleaning

Adjustment

Troubleshooting

Installation

Appendix

Summary of Contents for Booklet Finisher-D1

Page 1: ...7 6 5 4 3 2 1 Staple Finisher D1 Booklet Finisher D1 Service Manual Rev 01 Product Outline Technology Periodic Servicing Parts Replacing and Cleaning Adjustment Troubleshooting Installation Appendix ...

Page 2: ...information as the need arises In the event of major changes in the contents of this manual over a long or short period Canon will issue a new edition of this manual The following paragraph does not apply to any countries where such provisions are inconsistent with local law Trademarks The product names and company names used in this manual are the registered trademarks of the individual companies...

Page 3: ...switch closing the front door and closing the delivery unit door which results in supplying the machine with power 2 In the digital circuits 1 is used to indicate that the voltage level of a given signal is High while 0 is used to indicate Low The voltage value however differs from circuit to circuit In addition the asterisk as in DRMD indicates that the DRMD signal goes on when 0 In practically a...

Page 4: ...6 Contents Assist Roller Engage Operation 2 16 Intermediate Process Tray Assembly 2 18 Overview 2 18 Basic Sequence of Operations 2 19 Stacking Operation 2 20 Shift Operation 2 23 Stapling Operation 2 24 Delivery Operation 2 25 Neat Alignment Operation 2 27 Upper Neat Alignment Plate Operation 2 27 Upper Return Roller Operation 2 27 Lower Neat Alignment Plate Operation 2 28 Lower Return Roller Ope...

Page 5: ...aration 4 18 Procedure 4 18 External Internal Covers 4 20 Removing the Rear Cover 4 20 Procedure 4 20 Removing the Rear Upper Cover Right 4 21 Procedure 4 21 Removing the Rear Upper Cover Left 4 21 Preparation 4 21 Procedure 4 21 Removing the Inner Cover Upper 4 22 Preparation 4 22 Procedure 4 22 Removing the Inner Cover Lower 4 23 Preparation 4 23 Procedure 4 23 Electric Control Assembly 4 24 Rem...

Page 6: ...rocedure 4 48 Removing the Side Registration Shift Unit 4 49 Preparation 4 49 Procedure 4 49 Removing the Side Registration Shift Motor 4 53 Preparation 4 53 Procedure 4 53 Removing the Shift Motor 4 54 Preparation 4 54 Procedure 4 54 Intermediate Process Tray Assembly 4 55 Removing the Stack Delivery Roller Upper Static Eliminator 4 55 Procedure 4 55 Removing the Neat Paddle Upper 4 55 Procedure ...

Page 7: ... 4 89 Preparation 4 89 Procedure 4 89 Removing the Saddle Inlet Roller Static Eliminator 4 90 Preparation 4 90 Procedure 4 90 Removing the Saddle Intermediate Static Eliminator 4 91 Preparation 4 91 Procedure 4 91 Removing the Saddle Stapler 4 91 Preparation 4 91 Procedure 4 91 Removing the Feed Guide Lower Static Eliminator 4 92 Preparation 4 92 Procedure 4 92 Removing the Disengagement Roller 4 ...

Page 8: ... Procedure 5 19 Adjusting the Height of Corrugation Roller for Stack Delivery 5 22 Preparations 5 22 Procedure 5 22 Right Angle Adjustment of Alignment Plate 5 26 Adjusting Alignment Plate Position 5 27 Preparations 5 27 Procedure 5 27 Adjusting Position of Stapler 5 29 Adjusting Staple Position 1 stapling at the rear 5 30 Preparations 5 30 Procedure 5 30 Adjusting Staple Position 1 stapling at th...

Page 9: ...ry 5 79 Preparations 5 79 Procedure 5 79 Adjusting Delivery of Staple Stack saddle delivery 5 82 Preparations 5 82 Procedure 5 82 Saddle Stitch Fold Placement Adjustment 5 85 Fold placement adjustment 5 85 Saddle stitch adjustment 5 86 Adjusting Saddle Stitching Position 5 89 Preparations 5 89 Procedure 5 89 Adjusting Saddle Folding Position 5 91 Preparations 5 91 Procedure 5 91 Adjusting Position...

Page 10: ...Procedure 5 130 Punch skew tolerance adjustment mode 5 133 Preparations 5 133 Procedure 5 133 Process Tray alignment operation adjustment mode with A4R LTRR size paper 5 135 Preparations 5 135 Procedure 5 135 Side registration position fine adjustment mode shift amount change 5 136 Preparations 5 136 Procedure 5 137 6 Troubleshooting Upgrading 6 2 Upgrading 6 2 Drive Sensor check 6 3 Motor Solenoi...

Page 11: ...c 7 32 Affixing the Labels 7 32 Relocationg the Machine 7 34 A NOTE on moving the machine 7 34 Appendix Service Tools 8 2 Solvents and Oils 8 3 List of Signals 8 4 List of Signals finisher 8 4 List Of Signals saddle 8 6 General Circuit Diagram 8 7 ...

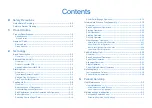
Page 12: ... Notes Before Servicing Points to Note at Cleaning Safety Precautions ...

Page 13: ... source according to the specified steps and disconnect the power plug Caution Do not turn off the power switch when downloading is under way Turning off the main power switch while downloading is under way can disable the machine Points to Note at Cleaning Caution When performing cleaning using organic solvent such as alcohol be sure to check that the component of solvent is vaporized completely ...

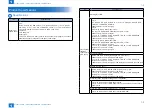
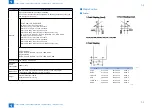
Page 14: ...1 1 Product Outline Product Outline Product Specifications Names of Parts ...

Page 15: ...ER feed length 216 1 to 483 mm or less 1000 sheets or 147 mm in height When large volume stack mode is ON A4 B5 LTR EXE STMTR feed length 216 mm or less 4000 sheets or 490 mm in height 13 x 19 12 x 18 SRA3 A3 B4 A4R B5R LDR LGL LTRR EXER feed length 216 1 to 483 mm or less 1500 sheets or 285 mm in height Stacking for stapling A4 B5 LTR EXE STMTR feed length 216 mm or less 3000 sheets or 423 mm in ...

Page 16: ... m2 or less 50 sheets Over 80 to 81 4 g m2 or less 50 sheets Over 81 4 to 105 g m2 or less 30 sheets Over 105 to 200 g m2 or less 10 sheets Over 200 to 300 g m2 or less Cover and back cover only Corner stapling A3 B4 A4 A4R B5 LDR LGL LTR LTRR EXEC Double stapling A3 B4 A4 A4R B5 LDR LGL LTR LTRR EXEC B5R Power Supply 220 240V AC 50 60Hz 8A Maximum power consumption 500W or less Dimensions 800 mm ...

Page 17: ...Outline Product Specifications Specifications Staple Position saddle stitcher L3 1 0mm Stack front edge Folding position Stample position L1 2 0mm L2 2 0mm Paper Size A3 B4 A4R 11 x17 LGL LTRR L1 88 5 68 5 45 79 7 48 48 L2 208 5 188 5 165 199 7 168 168 L3 210 182 148 5 216 177 8 139 7 F 1 2 ...

Page 18: ...ternal View Product Outline Names of Parts External View Names of Parts External View 1 2 3 4 5 6 7 8 F 1 3 1 Tray B 5 Saddle delivery belt 2 Tray A 6 Upper cover 3 Top delivery outlet 7 Inlet transport unit 4 Bottom delivery outlet 8 Front cover ...

Page 19: ...ng guide 19 Saddle inlet delivery roller 4 Paddle 20 Stapler 5 Tray B 21 Stitcher 6 Process feed roller 22 Pull out roller 7 Tray A 23 Paper guide plate 8 Eject roller 24 Fold delivery roller 9 Buffer roller 2 25 Adjust roller upper 10 Assist roller 3 26 Adjust roller lower 11 Buffer roller 3 27 Sheaf delivery roller 12 Delivery roller 28 Pre press roller 13 Buffer roller 1 29 Press unit 14 Assist...

Page 20: ...2 2 Technology Technology Basic Construction Electrical Control Unit Stacking Unit Feeding Unit Intermediate Process Tray Assembly Saddle Stitcher Unit Detecting Jams ...

Page 21: ...s of the following 5 blocks electrical control block stacking block transport block intermediary tray and saddle stitcher block Transport block Stacking block Saddle stitcher block Electrical control block To host machine Intermediary tray block NOTE The descriptions on the saddle stitcher block apply to the Booklet Finisher Q1 PRO F 2 1 ...

Page 22: ...Finisher F1 PRO F 2 2 Finisher Controller PCB The finisher controller PCB drives the various loads motors solenoids of the machine in response to the commands from the host machine copier and indicates the states of the sensors and switches to the host machine It also serves to control the punch unit and the saddle finisher controller PCB CPU ASIC1 ROM EEPROM ASIC2 Finisher controller PCB Motor So...

Page 23: ...rious loads motors solenoids in response to the commands from the finisher controller and indicates the states of sensors and switches to the host machine Saddle stitcher controller PCB Motor Solenoid Sensor ASIC1 Finisher Controller PCB The machine uses the following major ICs possessing specific functions IC Description ASIC1 Controls the communications with the finisher controller controls the ...

Page 24: ... A lift motor rotation detection signal 3 Tray B paper surface detection light receiving signal 10 Tray B lift motor drive signal 11 Tray B lift motor rotation detection signal 4 Tray A paper detection signal 5 Tray A paper surface detection light emitting signal 6 Tray A paper surface detection light receiving signal M22 Tray A lift motor UN15 Tray A paper side sensor board emitter M23 Tray B lif...

Page 25: ...me time will communicate the fact to the host machine Related Error Code E540 fault in tray A While the tray A motor M22 is rotating the tray A lift motor rotation detection signal is absent for 250 msec or more E542 fault in tray A While the tray B motor M23 is rotating the tray B lift motor rotation detection signal is absent for 250 msec or more Finisher controller PCB PS34 PS35 Tray A Tray B 1...

Page 26: ...f the stacks deposited in the tray will be even The auxiliary tray is moved by operating the solenoid SL9 according to the instructions from the finisher controller PCB Finisher controller PCB Tray B Tray A 1 M23 SL9 Auxiliary tray 1 Auxiliary tray solenoid drive signal SL9 Auxiliary tray solenoid M23 Tray lift motor NOTE A stack with a folded sheet tends to be higher along its lead edge than its ...

Page 27: ...as the LED lightemitting segment goes on As more and more sheets are deposited in the tray the light reaching the light receiving segments will be blocked causing the finisher controller PCB to move down the tray to keep the top of the stack at a specific level When the tray becomes full of paper i e light blocked not reaching any of the 3 photosensors the finisher controller PCB switches over to ...

Page 28: ...10 Assist Motor Disengagement Solenoid 1 drive signal 3 Delivery motor drive signal 11 Horizontal registration motor drive signal 4 Upper path switch solenoid drive signal 12 Shift transport motor drive signal 5 Buffer motor drive signal 13 Horizontal registration detection unit shift motor drive signal 6 Assist Motor Disengagement Solenoid 2 drive signal 14 Inlet transport motor drive signal 7 Bu...

Page 29: ...er 1 Lower delivery sensor signal 5 Buffer path 1 sensor signal 2 Lower path sensor signal 6 Shift unit trailing edge sensor detection signal 3 Upper delivery sensor signal 4 Buffer path 2 sensor signal 7 Inlet sensor signal PS3 Inlet sensor UN13 Buffer path 1 sensor PCB PS4 Shift unit trailing edge sensor UN14 Buffer path 2 sensor PCB PS5 Upper delivery sensor UN22 Lower path sensor PCB PS6 Lower...

Page 30: ...nce to the result of horizontal registration detection 3 Alignment 3 Switches the position of the stack with reference to the result of horizontal registration detection only in shift mode 4 Buffer Operation 4 Keeps the sheet stationary inside the transport block thereafter joins it with the subsequent sheet for forward movement 5 Movement Switch Over 5 Moves the paper to the stacking block or the...

Page 31: ...1 Shift roller unit 4 Standby position 2 Horizontal registration detection unit 5 Home position 3 Pape F 2 12 2 The finisher controller PCB causes M6 to rotate clockwise so that UN12 moves to horizontal registration detection position 11 mm toward the inside from standby position during which UN12 detects the edge of paper to be moved The finisher controller PCB uses the results of the detection t...

Page 32: ...ft roller unit to begin to rotate 3 The finisher controller board computes the side registration correction value from the side registration detection results Then once the trailing edge of the paper clears the inlet feed roller 1 and based on the computed side registration correction value the side registration shift motor M7 will rotate either forwards or in reverse In this way the shift roller ...

Page 33: ...ion 4 Upon job offset selection the shift roller unit is moved either forwards or in reverse the same as for side registration shift Ref This causes the stacking position for each sheaf to change when the paper is output to the delivery tray 1 1 2 2 NOTE At this time the degree of shift is decided after taking the side registration correction value into account F 2 17 ...

Page 34: ...ffer path switching solenoid SL1 with the help of the buffer path 1 sensor PCB and the buffer path 2 sensor PCB UN13 UN14 M4 SL1 UN14 UN13 Finisher controller PCB Buffer path M4 Buffer motor UN13 Buffer path 1 sensor PCB SL1 Buffer path switching solenoid UN14 Buffer path 2 sensor PCB F 2 18 T 2 3 The buffer operation takes place as follows when 3 sheets of paper are moved UN14 UN13 1 UN14 UN13 1 ...

Page 35: ... B 3 To tray A 7 To saddle delivery belt 4 Upper delivery flapper F 2 20 T 2 4 Assist Roller Engage Operation When feeding paper whose feed length is 148 mm or smaller A4R_Half Fold LTRR_Half Fold LTRR_Z Fold feedability is improved by turning ON the Assist Motor Disengagement Solenoids 1 and 2 and 3 and making the Assist Rollers 1 and 2 and 3 engaged M3 M4 M27 M1 Assist Motor Disengagement Soleno...

Page 36: ...2 2 2 17 2 17 Technology Feeding Unit Assist Roller Engage Operation Technology Feeding Unit Assist Roller Engage Operation ...

Page 37: ...Stack delivery auxiliary motor drive signal 9 Operation feed motor drive signal 10 Transport belt motor drive signal 3 Stack delivery motor drive signal 11 Assist motor drive signal 4 Delivery angle adjustment motor drive signal 12 Staple motor drive signal 13 Staple motor shift drive signal 5 Swing guide motor drive signal 14 Process tray shift motor signal 6 Paddle rotation motor drive signal 15...

Page 38: ...ng front the transport block in the intermediary tray 2 Aligning Operation 2 Switches over the point of depositing stacks between the front and the rear of the tray in shift mode 3 Stapling Operation 3 Staples a stack of sheets at a specific point in staple mode 4 Delivery Operation 4 Discharges the sheets deposited in the intermediary tray to the tray A or the tray B 5 Neat Alignment Operation Th...

Page 39: ...delivery roller and the stack delivery roller discharges the paper to the outside of the machine At the same time the machine s stack delivery auxiliary mechanism causes the stack delivery tray to move outside the machine to support the paper When the trailing edge of paper goes through the feed belt the trailing edge drop plate hits the trailing edge of the paper to drop the paper to the process ...

Page 40: ... pushed outside the machine before delivery occurs to hold the lead edge of paper This prevents misalignment The tray auxiliary plate is pulled inside the machine at the end of the delivery operation 5 1 2 3 1 2 3 4 Tray Tray Stacks Free of Misalignment Stacks Subject to Misalignment 1 Stack 4 Variation present among lead edges of sheets 2 Tray auxiliary plate 5 Variation absent among trail edges ...

Page 41: ...wing guide 7 Feed belt 4 Operation stopper NOTE Upper guide is to hold the paper and avoid the paper from bending when the paper is pushed to the operation tray F 2 29 4 When the trailing edge of the paper reaches the operation stopper the stack delivery roller 1 and the paddle 2 stop rotating and the swing guide 1 is lifted 1 At the first stack operation only 2 At the second stack operation or la...

Page 42: ...his function is for the operation of tray B only Tray A executes the alignment operation inside the feed assembly 1 2 3 1 Alignment plate 3 Swing guide 2 Paper stack F 2 32 CAUTION Shift Function The machine s alignment mechanism operates either of its 2 aligning plates to switch over offset the point of depositing individual stacks of sheets 1 2 3 4 1 5 5 2 3 4 Shifting to the Front Shifting to t...

Page 43: ...the process stopper position is overlapping that staple position the process stopper is moved away 2 6 1 5 4 3 1 Swing guide 4 Stapler 2 Stapled stack of sheets 5 Aligning plate 3 Stack delivery roller 6 Process stopper F 2 34 CAUTION The machine s stapling sequence consists of the following operations driving a staple cutting the staple tips clinching the staple 1 2 3 4 5 1 Stack of sheets 4 Cutt...

Page 44: ...ling after the alarm and the operation stops At the same time the message Check the waste staple case is displayed on the control panel When the waste staple in the case is emptied out the host machine clears the waste staple full and the status is changed to ready Delivery Operation 1 The machine starts delivery of the stack at the end of alignment or stapling by rotating the delivery roller in t...

Page 45: ...ngle when the paper is coming to the stack delivery roller to provide the stable paper feed Stack delivery upper roller Stack delivery lower roller Swing guide Angle switch cam Process tray unit Cam contact block F 2 37 When the delivery angle adjustment motor M28 starts driving the cam on the shaft rotates and the swing guide is pushed and then the stack delivery upper roller moves to the downstr...

Page 46: ...nt Plate flag The Alignment Plate arm is lifted and lowered by the drive of the Upper Neat Alignment Plate Lifting Motor Alignment Plate Upper Neat Stack Unit Front Alignment HP Sensor Upper Neat Stack Unit Rear Alignment HP Sensor flag flag Alignment Plate Upper Neat Stack Unit Rear Alignment Moter Upper Neat Stack Unit Front Alignment Moter F 2 39 F 2 40 Upper Return Roller Operation This is a m...

Page 47: ...moved by the drive of the Front and Rear Alignment Motors respectively flag Alignment Plate Alignment Plate flag Lower Neat Stack Unit Rear Alignment HP Sensor Lower Neat Stack Unit Front Alignment Moter Upper Neat Stack Unit Rear Alignment Moter Lower Neat Stack Unit Front Alignment HP Sensor F 2 42 F 2 43 Lower Return Roller Operation This is a mechanism that aligns the feed direction of paper o...

Page 48: ...aper folding transport motor drive signal 14 Saddle trailing edge shift motor drive signal 15 Alignment roller disengage solenoid upper drive signal 6 Stitcher motor drive signal 7 Saddle tapping motor drive signal 16 Alignment roller disengage solenoid lower drive signal 8 Saddle pull in shift motor drive signal 9 Saddle transport motor drive signal 17 Leading edge gripper solenoid drive signal 1...

Page 49: ...ignal PS109 Saddle press front sensor F 2 46 Basic Sequence of Operations The saddle stitcher block uses the following sequence of operations 1 Transport 1 Moves the paper from the transport block to the vertical path assembly 2 Alignment 2 Aligns the edges of sheets of paper coming to the transport block 3 Stitching 3 Uses the stitcher to staple the middle of the stack 4 Folding Delivery 4 Folds ...

Page 50: ...ailing edge stay 3 Saddle roller guide 2 Saddle leading edge stopper F 2 48 2 The paper is transported to the stitcher unit by the saddle feed roller 3 Once the saddle inlet sensor PS101 detects the paper the saddle alignment roller rotates and drives the saddle pull roller disengage motor and the saddle alignment roller disengage solenoid so that the paper is transported by the pull roller and al...

Page 51: ...per A A Shutter shift mount Shutter shift block Slide rack Gear Saddle process tray Roller guide F 2 50 Clearance A between the roller guide and the saddle process tray changes in accordance with the position of shutter shift block hereinafter called as shift block The roller guide motor M104 lifts the shift block Since the shift block contacts the shutter shift mount at the first time it moves wi...

Page 52: ...he paper size to align the paper stack 3 3 3 1 1 2 7 2 5 5 6 4 1 Pull roller 5 Tapping plate 2 Alignment roller 6 Trailing edge stay 3 Alignment guide 7 Paper 4 Leading edge stopper F 2 52 2 The machine engages the alignment roller again and the paper is pushed to the leading edge stopper and then the knocking plate taps the trailing edge of paper 3 3 3 1 1 2 7 2 5 5 6 4 1 Pull roller 5 Tapping pl...

Page 53: ... stopper 4 There is one sticker unit at the front and the rear of the machine respectively When the alignment operation is complete and the trailing edge retainer is released the stitcher unit starts the stitching operation on the paper F 2 54 Staple Operation 1 There is one sticker unit at the front and the rear of the machine respectively When the alignment operation is complete and the trailing...

Page 54: ... edge gripper solenoid Sl105 comes ON and the paper 3 is gripped by the gripper 2 2 3 1 1 Saddle roller guide 3 Paper 2 Gripper F 2 56 2 With the sheaf 2 held in place by the gripper 1 the paper positioning plate 3 lowers moving the sheaf in the direction of the arrow Thus the stitching position 4 and the folding position 5 are aligned 2 5 3 1 4 1 Gripper 4 Stitching position 2 Paper sheaf 5 Foldi...

Page 55: ...per guide plate moves in the direction of the arrow This starts the paper folding operation Then the paper stay plate is returned to its original position and stops 3 1 2 1 Paper sheaf 3 Paper fold roller 2 Paper guide plate F 2 58 4 The sheaf transport roller and pre press roller begin to rotate forwards transporting the sheaf to the press unit 1 2 3 4 1 Paper sheaf 3 Pre press roller 2 Sheaf tra...

Page 56: ...row At this time the press pressure roller within the press unit begins to rotate and applies pressure onto the sheaf This action makes sure that the sheaf is properly folded 1 2 2 3 3 4 4 1 Sheaf transport roller 3 Pre press roller 2 Paper sheaf 4 Press unit F 2 60 6 After the press unit has moved in the direction of the arrow the pre press roller begins to rotate once more This action delivers t...

Page 57: ...it Sensor PS4 doesn t detect the paper within the specified time distance after Inlet Sensor PS3 detects the paper and do the feeding 1004 Shift Unit Trailing Edge Sensor stationary PS4 The paper doesn t come out from Shift Unit Sensor PS4 within the specified time distance after Inlet Sensor PS3 detects the paper and do the feeding 1105 Buffer Path 1 Sensor delay UN13 Buffer Path 1 Sensor UN13 do...

Page 58: ...specified time distance after Buffer Path 2 Sensor UN14 detects the paper and do the feeding 110F Processing Tray Staple Stationary PS27 The Stapler HP Sensor PS27 doesn t detect the paper within the specified time after Stapler Motor M25 is triggered and if Stapler Motor M25 rotates counter clock wise Staple HP Sensor PS27 is turned ON 1524 Paper ID Mismatch There is Paper ID mismatch informed by...

Page 59: ...th Sensor UN24 detects the paper and do the feeding 1143 Saddle Vertical Path Sensor Delay PS105 The Saddle Vertical Path Sensor PS105 doesn t detect the paper within the specific time after Saddle Push on Plate movement starts 1046 Saddle Vertical Path Sensor Stationary PS105 The paper doesn t come out from Saddle Vertical Path Sensor PS105 within the specified time distance after Saddle Push on ...

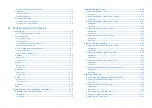
Page 60: ...3 3 Periodic Servicing Periodic Servicing User Maintenance Maintenance and Inspection ...

Page 61: ...Item saddle User Maintenance User Maintenance User Maintenance Items finisher No Item Timing 1 staple cartridge replacement when prompted in host machine control panel 2 waste staple disposal when prompted in host machine control panel User Maintenance Item saddle No Item Timing 1 staple cartridge replacement when prompted in host machine control panel T 3 1 T 3 2 ...

Page 62: ...s 2 Feed Belt FB5 9103 2 3 000 000 pages 3 Belt Roller φ35 FC6 6148 2 6 000 000 pages 4 Delivery Static Eliminator FC9 3038 1 1 000 000 pages 5 Stack Delivery Roller Static Eliminator FE3 0006 1 3 000 000 pages 6 Neat Paddle FL3 7459 4 3 000 000 pages Durables Saddle Some parts of the machine may require replacement once or more over the period of product warranty because of deterioration or damag...

Page 63: ...Inspection Periodical Servicing Periodical Servicing Saddle Periodical Servicing Periodical Servicing Finisher Parts name Description Remarks Sensors Cleaning Minimum maintenance interval of the host machine Periodical Servicing Saddle Parts name Description Remarks Sensors Cleaning Minimum maintenance interval of the host machine T 3 5 T 3 6 ...

Page 64: ...ning Parts Replacing and Cleaning List of Parts Removing from the connection equipment External Internal Covers Electric Control Assembly Stacking Assembly Feed Assembly Intermediate Process Tray Assembly Saddle Stitcher Assembly ...

Page 65: ...atch Base Cover 6 Inner Cover Upper Refer to page 4 22 7 Inner Cover Lower Refer to page 4 23 8 DIP Switch Cover F 4 1 T 4 1 Model with Saddle Unit 1 6 3 2 5 4 9 10 7 8 No Name Remarks Reference 1 Front Cover 2 Rear Upper Cover Right Refer to page 4 21 3 Rear Upper Cover Left Refer to page 4 21 4 Rear Cover Refer to page 4 20 5 Latch Base Cover 6 Inner Cover Upper Refer to page 4 22 7 Inner Cover ...

Page 66: ...efer to page 4 32 Refer to page 4 37 2 Tray B Unit Refer to page 4 35 Refer to page 4 37 3 Stack Wall Upper Refer to page 4 27 4 Stack Wall Lower For plain model Refer to page 4 29 F 4 3 T 4 3 Model with Saddle Unit 3 4 1 2 No Name Remarks Reference Adjustment during parts replacement 1 Tray A Unit Refer to page 4 32 Refer to page 4 37 2 Tray B Unit Refer to page 4 35 Refer to page 4 37 3 Stack Wa...

Page 67: ...lacing and Cleaning List of Parts List of Main Unit Feed Assembly Feed Assembly 4 3 1 2 No Name Remarks Reference 1 Upper Feed Unit Refer to page 4 40 2 Side Registration Sensor Unit Refer to page 4 47 3 Side Registration Shift Unit Refer to page 4 49 4 Puncher Unit Refer to page 4 46 F 4 5 T 4 5 ...

Page 68: ...No Name Remarks Reference Adjustment during parts replacement 1 Neat Stack Unit Upper Refer to page 4 57 Refer to page 5 17 2 Neat Stack Unit Lower Refer to page 4 59 Refer to page 5 19 3 Process Tray Unit Refer to page 4 62 4 Swing Guide Unit 5 Process Tray Plate Unit Refer to page 4 72 6 Process Upper Guide Unit Refer to page 4 78 7 Lower Delivery Upper Guide Unit 8 Belt Controller Unit Refer to...

Page 69: ... 5 4 2 3 F 4 7 No Name Remarks Reference Adjustment during parts replacement 1 Saddle Unit Refer to page 4 101 2 Saddle Stapler Refer to page 4 91 Refer to page 5 63 3 Thrust Unit Refer to page 4 95 4 Saddle Process Tray Unit 5 Positioning Plate Unit Refer to page 4 98 6 Alignment Roller Unit Refer to page 4 112 7 Press Unit Refer to page 4 102 8 Press Roller Unit Refer to page 4 105 9 Saddle Deli...

Page 70: ...elivery Static Eliminator 1 5 Stack Delivery Roller Static Eliminator 1 6 Neat Paddle 4 Top delivery outlet Refer to page 4 55 Bottom delivery outlet Refer to page 4 56 F 4 8 T 4 8 Saddle Stitcher Assembly 1 7 6 4 3 4 5 6 2 No Name Q ty Reference Adjustment during parts replacement 1 Saddle Alignment Roller 4 Refer to page 4 113 2 Saddle Disengagement Roller 2 Refer to page 4 93 3 Saddle Inlet Sta...

Page 71: ...t plate HP sensor PS107 Saddle roller guide HP sensor PS108 Saddle paper push on plate HP sensor PS109 Saddle press front sensor PS110 Saddle press HP sensor PS111 Saddle delivery tray paper sensor 2 PS112 Saddle delivery sub tray paper sensor PS113 Saddle paper push on plate motor sensor PS114 Saddle folder feeder motor sensor PS115 Saddle press motor sensor PS116 Saddle press position sensor PS1...

Page 72: ...per trailing edge drop guide HP sensor PS25 Feed belt HP sensor PS26 Upper guide HP sensor PS27 Staple HP sensor PS28 Staple position sensor 1 PS29 Staple position sensor 2 PS30 Staple position sensor 3 PS31 Staple position sensor 4 PS32 Tray A paper sensor PS33 Tray B paper sensor PS34 Tray A lift motor rotation sensor PS35 Tray B lift motor rotation sensor PS42 Needle chip full sensor PS43 Inlet...

Page 73: ...dle feed motor M102 Saddle alignment guide motor M103 Saddle lead edge stopper motor M104 Saddle roller guide motor M105 Saddle paper push on plate motor M106 Saddle folder feeder motor M107 Saddle delivery belt motor M108 Saddle press motor M109 Saddle sticher motor M110 Saddle trailing edge holding motor M111 Saddle trailing edge moving motor M112 Saddle alignment roller motor M113 Saddle tappin...

Page 74: ... M13 Stack delivery auxiliary tray motor M14 Paddle rotation motor M15 Paddle lift motor M16 Paper trailing edge drop motor M17 Feed belt move motor M18 Swing guide motor M19 Stack delivery motor M20 Upper guide motor M21 Staple move motor M22 Tray A lift motor M23 Tray B lift motor M25 Staple motor M26 Processing feed motor M27 Inlet roller disengage motor M28 Delivery angle adjustment motor M201...

Page 75: ...ddle Unit Parts Replacing and Cleaning List of Parts Solenoids Saddle Unit Solenoids Saddle Unit SL103 SL104 SL105 F 4 14 Notation Name SL103 Alignment roller disengage solenoid upper SL104 Alignment roller disengage solenoid lower SL105 Lead edge gripper solenoid T 4 14 ...

Page 76: ... and Cleaning List of Parts Solenoids Finisher Unit Finisher Unit SL3 SL2 SL1 SL10 SL11 F 4 15 Notation Name SL1 Buffer path switch solenoid SL2 Upper path switch solenoid SL3 Saddle path switch solenoid SL10 Assist Roller Disengagement Solenoid 1 SL11 Assist Roller Disengagement Solenoid 2 T 4 15 ...

Page 77: ... and Cleaning List of Parts PCBs Saddle Unit Parts Replacing and Cleaning List of Parts PCBs Saddle Unit PCBs Saddle Unit UN125 UN101 F 4 16 Notation Name UN101 Saddle sticher controller PCB UN125 Saddle sticher jam LED PCB T 4 16 ...

Page 78: ... PCB UN6 Staple driver PCB UN7 Relay PCB UN8 ARCNET transceiver PCB UN9 Optional switch PCB UN10 Upper tray motor driver PCB UN11 Lower tray motor driver PCB UN12 AC noise filter PCB UN13 Buffer path 1 sensor PCB UN14 Buffer path 2 sensor PCB UN15 Tray A paper surface sensor PCB emission UN16 Tray A paper surface sensor PCB receiving UN17 Tray B paper surface sensor PCB emission UN18 Tray B paper ...

Page 79: ... and Cleaning List of Parts Switchs Parts Replacing and Cleaning List of Parts Switchs Switchs CB1 MSW1 MSW7 SW1 F 4 18 Notation Name MSW1 Front door switch MSW7 Swing guide safety switch SW1 Main switch CB1 Circuit breaker T 4 18 ...

Page 80: ...arts Fans Parts Replacing and Cleaning List of Parts Fans Fans FM2 FM5 FM3 FM1 FM6 FM4 F 4 19 Notation Name FM1 Power cooling fan 1 FM2 Feeder cooling fan 1 FM3 Feeder cooling fan 2 FM4 Power cooling 2 FM5 Upper Delivery Fan FM6 Lower Delivery Fan T 4 19 ...

Page 81: ...st Machine Preparation 1 Open the Front Cover Procedure CAUTION Be sure to check that the power of the host machine and this equipment is OFF and the power plug is disconnected from the outlet 1 Disconnect the Shunt Cable 1 finisher side only 1 Screw 2 1 2 F 4 20 2 Free the ARCNET Cable 1 from the Wire Saddle 2 3 Turn the tab 3 in the direction of the arrow and disconnect the ARCNET Cable 1 from t...

Page 82: ... Machine Procedure Parts Replacing and Cleaning Removing from the connection equipment Removing from the Host Machine Procedure 5 Bring down the hinge 1 of the Latch Base Rear 1 Screw 2 1 2 6 While lifting the Latch Base Front 1 remove the finisher 2 from the host machine 3 1 Screw 4 1 4 2 3 F 4 23 F 4 24 ...

Page 83: ... External Internal Covers Removing the Rear Cover Procedure External Internal Covers Removing the Rear Cover Procedure 1 Remove the Rear Cover 1 2 Screws 2 to loosen 6 Screws 3 to remove x6 2 1 3 3 F 4 25 CAUTION When installing the Rear Cover be sure to check that the edge 1 of the cover is in contact with the gasket 2 2 1 F 4 26 ...

Page 84: ...nal Covers Removing the Rear Upper Cover Left Procedure Removing the Rear Upper Cover Right Procedure 1 Remove the Rear Upper Cover Right 1 2 Screws 2 2 Protrusions 3 x2 1 2 3 F 4 27 Removing the Rear Upper Cover Left Preparation 1 Remove the Rear Upper Cover Right Refer to page 4 21 Procedure 1 Remove the Rear Upper Cover Left 1 3 Screws 2 x3 1 2 2 F 4 28 ...

Page 85: ...r Procedure Removing the Inner Cover Upper Preparation 1 Open the Front Cover Procedure 1 Push the 3 claws 1 and remove the 3 knobs 2 2 1 CAUTION When the One way Clutch 1 inside the knob is removed be sure to install it in the direction where the arrow marking of the One way Clutch is visible 1 F 4 30 F 4 29 2 Open the Upper Cover 1 and remove the Inner Cover Upper 2 4 Screws 3 2 3 1 F 4 31 ...

Page 86: ...Removing the Inner Cover Lower Procedure Parts Replacing and Cleaning External Internal Covers Removing the Inner Cover Lower Procedure Removing the Inner Cover Lower Preparation 1 Open the Front Cover Procedure 1 Remove the Inner Cover Lower 1 2 Screws 2 x2 2 1 F 4 32 ...

Page 87: ... to perform the following adjustment Adjustment after Replacing the Finisher Controller PCB Refer to page 5 53 1 Remove the Finisher Controller PCB 1 33 Connectors 2 2 Connectors 3 when the Puncher Unit is installed 6 Screws 4 1 Spacer 5 1 3 3 3 3 3 3 3 3 4 4 4 4 4 4 5 5 x6 x2 x33 F 4 33 Removing the Neat Stack Driver PCB Preparation 1 Remove the Rear Upper Cover Right Refer to page 4 21 2 Remove ...

Page 88: ...er to page 4 21 2 Remove the Rear Upper Cover Left Refer to page 4 21 3 Remove the Rear Cover Refer to page 4 20 4 Remove the Neat Stack Driver PCB Refer to page 4 24 Procedure 1 Remove the Feed Motor Driver PCB 1 17 Connectors 2 6 Screws 3 2 2 3 2 3 2 3 2 3 3 3 1 F 4 35 Removing the Saddle Stitcher Controller PCB Preparation 1 Open the Front Cover 2 Pull out the Saddle Unit 3 Remove the Saddle In...

Page 89: ...mbly Removing the Saddle Stitcher Controller PCB Procedure Parts Replacing and Cleaning Electric Control Assembly Removing the Saddle Stitcher Controller PCB Procedure 2 Remove the Saddle Stitcher Controller PCB 1 11 Connectors 2 4 Screws 3 2 2 2 2 3 3 1 3 3 F 4 37 ...

Page 90: ...Stack Wall Rail CAUTION Be sure to avoid scars and dents on the Stack Rail 1 Having scars or dents on the Stack Rail can affect stackability If soiling is attached be sure to clean it with alcohol 1 1 F 4 38 Removing the Stack Wall Upper Procedure CAUTION Be sure to avoid scars and dents on the Stack Rail 1 Having scars or dents on the Stack Rail can affect stackability If soiling is attached be s...

Page 91: ...n of B and lower the Tray B 2 by approximately 10 cm from the lower edge of the Neat Stack Unit Lower Cover 4 4 1 2 B 3 A 3 Remove the Neat Stack Unit Lower Cover 1 3 Screws 2 2 Protrusions 3 1 3 2 2 3 x3 F 4 40 F 4 41 4 While supporting the Tray A 1 insert a screwdriver into the hole A to release the block 2 in the direction of B and lower the Tray A 1 to the lower limit position CAUTION When low...

Page 92: ...k Wall Lower Preparation 1 Open the Front Cover Procedure CAUTION Be sure to avoid scars and dents on the Stack Rail 1 Having scars or dents on the Stack Rail can affect stackability If soiling is attached be sure to clean it with alcohol 1 1 F 4 44 1 Remove the Tray B Upper Limit Stopper 1 1 Screw 2 2 1 2 Lift the Tray B 1 until it hits the A part of the Neat Stack Unit Lower Cover 2 1 2 A F 4 45...

Page 93: ...o avoid hitting the following parts on the upper side by lifting the Tray B 2 4 Neat Stack Unit Lower 5 Tray A 6 Neat Stack Unit Upper 1 2 2 4 5 6 A F 4 47 NOTE Because of the different procedures depending on whether the Saddle Unit is attached be sure to follow the steps for the appropriate model Model with Saddle Unit Steps 3 and 4 Model without Saddle Unit Step 5 3 Lower the shutter 1 and remo...

Page 94: ...y B at power on Points to Note on Tray A B Cable CAUTION When installing the Tray A B Unit be careful not to get the cables of the Tray A Unit and Tray B Unit tangled F 4 50 Position of Tray B at power on CAUTION The Tray B 1 must be below the Tray B Paper Sensor 2 at power on Otherwise it can cause an error at position detection of the Tray B 1 2 F 4 51 ...

Page 95: ...r to page 4 21 4 Remove the Rear Upper Cover Left Refer to page 4 21 5 Remove the Rear Cover Refer to page 4 20 6 Remove the Inner Cover Upper Refer to page 4 22 Procedure CAUTION When replacing or installing removing the Tray A be sure to perform the following adjustment Adjusting the Positions of the Tray A and B Refer to page 4 37 1 Remove the Support Column Cover 1 1 Claw 2 2 1 F 4 52 2 Remove...

Page 96: ...ing Assembly Removing the Tray A Unit Procedure 4 Remove the Neat Stack Relay PCB Support Plate 1 4 Screws 2 2 2 1 x4 5 Pull out the Grounding Wire 1 and the harness 2 from the hole A 3 Screws 3 1 Toothed Washer 4 1 Connector 5 1 Wire Saddle 6 x2 3 4 A 3 6 2 5 1 F 4 55 F 4 56 6 Remove the Tray A Cover 1 4 Screws 2 x4 2 2 1 F 4 57 ...

Page 97: ...and Cleaning Stacking Assembly Removing the Tray A Unit Procedure 7 Remove the Tray A Unit 1 CAUTION Be sure to avoid contact with the Upper Cover 1 when removing the unit 1 F 4 58 1 F 4 59 CAUTION When installing the Tray A B Unit be careful not to get the cables of the Tray A Unit and Tray B Unit tangled F 4 60 ...

Page 98: ...age 4 21 5 Remove the Rear Upper Cover Left Refer to page 4 21 6 Remove the Rear Cover Refer to page 4 20 7 Remove the Inner Cover Upper Refer to page 4 22 8 Remove the Tray A Unit Refer to page 4 32 9 Remove the Neat Stack Unit Lower Refer to page 4 59 Procedure CAUTION When replacing or installing removing the Tray B be sure to perform the following adjustment Adjusting the Positions of the Tray...

Page 99: ...he Tray B Unit 1 CAUTION Be sure to avoid contact with the Upper Cover 1 when removing the unit 1 F 4 63 1 F 4 64 CAUTION When installing the Tray A B Unit be careful not to get the cables of the Tray A Unit and Tray B Unit tangled F 4 65 CAUTION The Tray B 1 must be below the Tray B Paper Sensor 2 at power on Otherwise it can cause an error at position detection of the Tray B 1 2 F 4 66 ...

Page 100: ...ing the tray horizontal put the tray into the rails left and right Be sure to have same distance at distance A length from the tip 3 of the rail to the tray shaft 4 between the front side 1 and the rear side 2 of the tray when installing the tray CAUTION When lowering the tray be sure to do so while pulling the block 5 To stop the lowering return the block 5 3 4 A 1 2 5 F 4 67 Removing the Tray A ...

Page 101: ... and lower the tray until it hits the bottom CAUTION Be sure to lower the Tray Unit to the bottom beforehand because removing the Tray A B Lifting Motor loosens tension of the belt causing the Tray Unit to fall 1 3 Remove the screw 2 and remove the Connector Cover 1 1 2 F 4 69 F 4 70 4 Disconnect the connector 1 and free the harness 4 from the Edge Saddle 2 and the Wire Saddle 3 x2 1 2 3 4 5 Remov...

Page 102: ...dure 1 While supporting the Tray A 1 insert a screwdriver into the hole A to release the block 2 in the direction of B and lower the bottom side C of the Tray A 1 to the upper end position D of the Neat Stack Unit Lower Cover 3 2 1 1 3 3 B A C D 2 Store the following parts of the Neat Stack Unit Upper 1 2 Alignment Arms 2 1 Paddle Unit 3 2 2 3 1 F 4 73 F 4 74 3 Remove the Delivery Static Eliminato...

Page 103: ...t Upper Refer to page 4 57 3 Remove the Rear Upper Cover Right Refer to page 4 21 4 Remove the Rear Upper Cover Left Refer to page 4 21 5 Remove the Rear Cover Refer to page 4 20 6 Open the Front Cover Procedure 1 Remove the Fan Unit 1 1 Connector 2 1 Screw 3 1 2 3 F 4 76 2 Disconnect the 2 Grounding Wires 1 2 Screws 2 3 Free the harness 3 2 Connectors 4 1 Edge Saddle 5 1 Reuse Band 6 4 Wire Saddl...

Page 104: ...ly Removing the Upper Feed Unit Procedure 5 While opening the Upper Feed Unit 1 remove the Damper Shaft 2 1 Screw 3 2 1 3 6 Place the 2 Grounding Wires 1 and the harness 2 on top of the finisher by putting them through the hole A and the gap B B 1 A 2 F 4 79 F 4 80 7 Slide the 2 Hinge Pins 1 and remove the Upper Feed Unit 2 2 1 1 F 4 81 ...

Page 105: ...y Removing the Inlet Feed Motor Procedure Removing the Inlet Feed Motor Preparation 1 Remove the Rear Cover Refer to page 4 20 Procedure 1 Free the harness 1 1 Edge Saddle 2 2 Wire Saddles 3 3 1 2 3 x3 F 4 82 2 Remove the Inlet Feed Motor Unit 1 1 Connector 2 2 Screws 3 1 3 2 3 3 Remove the Inlet Feed Motor 1 2 Screws 2 1 2 F 4 83 F 4 84 ...

Page 106: ...tor Preparation 1 Remove the Rear Cover Refer to page 4 20 Procedure 1 Remove the Paper Trailing Edge Drop Motor 1 1 Connector 2 2 Screws 3 3 1 2 x2 F 4 85 Removing the Buffer Front Feed Motor Preparation 1 Remove the Rear Upper Cover Right Refer to page 4 21 2 Remove the Rear Upper Cover Left Refer to page 4 21 Procedure 1 Remove the Buffer Front Feed Motor Unit 1 and the belt 2 1 Connector 3 2 S...

Page 107: ...lowing steps to hook the belt on the pulley 1 Hook the belt 2 of the Buffer Front Feed Motor Unit 1 on the 2 pulleys 3 2 While keeping the condition of step 1 hook the A part of the belt 2 on the pulley 4 at the finisher side 1 2 3 4 A F 4 88 F 4 87 Removing the Buffer Motor Preparation 1 Remove the Rear Upper Cover Right Refer to page 4 21 2 Remove the Rear Upper Cover Left Refer to page 4 21 3 R...

Page 108: ...g and Cleaning Feed Assembly Removing the Buffer Motor Procedure 2 Disconnect the 8 connectors 1 1 Reuse Band 2 1 1 1 1 1 2 3 Remove the Harness Guide 1 2 Screws 2 1 2 2 F 4 90 F 4 91 4 Remove the Buffer Motor Unit 1 1 Connector 2 2 Screws 3 1 2 3 3 5 Remove the Buffer Motor 1 2 Screws 2 1 2 2 F 4 92 F 4 93 ...

Page 109: ...the Front Cover 2 Separate the finisher from the host machine Refer to page 4 18 3 Remove the Rear Cover Refer to page 4 20 4 Remove the Inner Cover Upper Refer to page 4 22 Procedure 1 Remove the Punch Dust Box Unit 1 1 F 4 94 2 Disconnect the 2 connectors 2 connected to the Finisher Controller 1 x2 1 2 2 3 Free the harness 1 of the Puncher Unit 1 Edge Saddle 2 1 Harness Guide 3 1 Connector 4 4 1...

Page 110: ... 1 2 3 3 3 4 A x2 2 F 4 97 Removing the Side Registration Sensor Unit Preparation 1 Open the Front Cover 2 Separate the finisher from the host machine Refer to page 4 18 3 Remove the Rear Upper Cover Right Refer to page 4 21 4 Remove the Rear Upper Cover Left Refer to page 4 21 5 Remove the Rear Cover Refer to page 4 20 6 Remove the Inner Cover Upper when the Puncher Unit is installed Refer to pag...

Page 111: ...efer to page 4 21 5 Remove the Rear Cover Refer to page 4 20 6 Remove the Inner Cover Upper when the Puncher Unit is installed Refer to page 4 22 7 Remove the Puncher Unit when the Puncher Unit is installed Refer to page 4 46 8 Remove the Side Registration Sensor Unit Refer to page 4 47 Procedure 1 Place the Side Registration Sensor Unit in the direction as shown in the figure below 2 Remove the 2...

Page 112: ...ration Sensor PCB 2 2 Screws 3 3 1 2 x2 F 4 102 Removing the Side Registration Shift Unit Preparation 1 Open the Front Cover 2 Separate the finisher from the host machine Refer to page 4 18 3 Remove the Rear Upper Cover Right Refer to page 4 21 4 Remove the Rear Upper Cover Left Refer to page 4 21 5 Remove the Rear Cover Refer to page 4 20 6 Remove the Inner Cover Upper Refer to page 4 22 Procedur...

Page 113: ...g Feed Assembly Removing the Side Registration Shift Unit Procedure 2 Remove the Latch Base Cover Upper Right 1 1 Screw 2 2 Hooks 3 3 2 1 3 Remove the Latch Base Support Plate 1 2 Screws 2 1 2 F 4 104 F 4 105 4 Remove the Rear Cover Support Base 1 3 Screws 2 1 2 x2 2 5 Remove the Feed Stay Upper Right 1 4 Screws 2 1 2 2 F 4 106 F 4 107 ...

Page 114: ...ng Feed Assembly Removing the Side Registration Shift Unit Procedure 6 Remove the Detection Drive Assembly 1 2 Connectors 2 4 Screws 3 1 3 3 2 7 Disconnect the Flat Cable 1 1 Connector 2 1 Guide A 1 2 A F 4 108 F 4 109 8 Disconnect the 7 connectors 1 1 Reuse Band 2 1 1 1 1 2 x7 9 Remove the Harness Guide 1 1 Screw 2 1 2 F 4 110 F 4 111 ...

Page 115: ... Remove the Side Registration Shift Unit 1 2 Screws 2 1 2 2 1 CAUTION When installing the Side Registration Unit 1 align the 2 holes 2 of the Side Registration Shift Unit with 2 the Positioning Pins 3 of the Finisher Front Plate 1 2 3 F 4 113 F 4 112 CAUTION When connecting the connector 1 Relay Connector that was removed in step 8 be sure to put it through the hole A of the Harness Guide 2 1 2 A ...

Page 116: ...er Cover Right Refer to page 4 21 4 Remove the Rear Upper Cover Left Refer to page 4 21 5 Remove the Rear Cover Refer to page 4 20 6 Remove the Inner Cover Upper Refer to page 4 22 7 Remove the Side Registration Shift Unit Refer to page 4 49 Procedure 1 Move the Shift Motor Unit 1 5 Screws 2 1 2 2 2 F 4 115 2 Remove the Shift Motor Unit 1 1 Screw 2 Flat Cable Retainer Plate 3 1 Connector 4 1 4 3 2...

Page 117: ... Removing the Shift Motor Preparation 1 Open the Front Cover 2 Separate the finisher from the host machine Refer to page 4 18 3 Remove the Rear Upper Cover Right Refer to page 4 21 4 Remove the Rear Upper Cover Left Refer to page 4 21 5 Remove the Rear Cover Refer to page 4 20 6 Remove the Inner Cover Upper Refer to page 4 22 7 Remove the Side Registration Shift Unit Refer to page 4 49 Procedure 1...

Page 118: ... 15cm from the lower edge of the Neat Stack Unit Lower Cover 3 3 1 B 2 A 2 Remove the Stack Delivery Roller Upper Static Eliminator 1 4 Screws 2 x4 1 2 F 4 120 F 4 121 Removing the Neat Paddle Upper Procedure 1 While supporting the Tray B 1 insert a screwdriver into the hole A to release the block 2 in the direction of B and lower the Tray B 1 by approximately 10 cm from the lower edge of the Neat...

Page 119: ...tion of the arrow so that the 2 claws 3 face upward NOTE If the 2 claws 3 are already facing upward there is no need to move the belt 2 3 2 1 5 5 Remove the 2 Neat Paddles Upper 1 2 Claws 2 x2 1 1 2 2 F 4 124 F 4 125 Removing the Neat Paddle Lower Procedure 1 While supporting the Tray B 1 insert a screwdriver into the hole A to release the block 2 in the direction of B and lower the Tray B 1 by ap...

Page 120: ...he 2 claws 3 are already facing upward there is no need to move the belt 2 3 2 1 4 Remove the 2 Neat Paddles Lower 1 2 Claws 2 x2 1 1 2 2 F 4 127 F 4 128 Removing the Neat Stack Unit Upper Preparation 1 Remove the Stack Wall Upper Refer to page 4 27 Procedure CAUTION When replacing or installing removing the component parts of the Neat Stack Unit Upper be sure to perform the following adjustment A...

Page 121: ...eased 1 3 Turn the pulley 1 in the direction of the arrow to set the positions of the 2 ribs A as shown in the figure below 1 A A F 4 130 F 4 131 4 Remove the Timing Belt 2 from the pulley 1 1 2 5 Remove the Neat Stack Unit Upper 1 2 Connectors 2 2 Screws 3 2 Pins 4 CAUTION When installing removing the Neat Stack Unit Upper 1 be sure to install remove the screw 3 while supporting the Neat Stack Un...

Page 122: ...1 1 F 4 134 Removing the Neat Stack Unit Lower Preparation 1 Remove the Stack Wall Lower Refer to page 4 29 2 Remove the Stack Wall Upper Refer to page 4 27 Procedure CAUTION When replacing or installing removing the component parts of the Neat Stack Unit Lower be sure to perform the following adjustment Adjusting the Alignment Position of the Lower Neat Alignment Plate Refer to page 5 19 1 Lift t...

Page 123: ...Neat Stack Unit Lower be sure to place the unit with the 2 Alignment Plates 1 facing up 1 1 F 4 137 F 4 136 Removing the Stapler Preparation 1 Open the Front Cover 2 Remove the Inner Cover Upper Refer to page 4 22 3 Remove the Inner Cover Lower Refer to page 4 23 Procedure CAUTION When replacing or installing removing the Stapler be sure to perform the following adjustment Adjusting the Stapler Po...

Page 124: ...Connectors 2 2 Screws 3 CAUTION Be sure to check the positioning index 4 before removing the Stapler 1 2 4 3 F 4 139 F 4 140 Adjusting Position of Stapler This adjustment is executed when replacing or installing removing the Stapler in the Intermediate Process Tray Assembly Adjusting method is as follows 1 Put a marking 1 on the position of the stapler installed before replacing it 2 Install the n...

Page 125: ...4 29 2 Remove the Stack Wall Upper Refer to page 4 27 3 Remove the Neat Stack Unit Lower Refer to page 4 59 Procedure 1 While supporting the Tray B 1 insert a screwdriver into the hole A on the tray s undersurface to release the block 2 in the direction of B and lower the Tray B 1 to the position as shown in the figure below A 2 B 1 F 4 142 CAUTION When removing the Process Tray Unit hold the 2 gr...

Page 126: ...e CAUTION After removing it be sure to place the unit with the 4 protrusions 1 of the frame facing down Be careful not to trap the harness 2 when putting it down 1 1 2 F 4 144 F 4 145 2 Remove the Process Tray Unit 1 9 Connectors 2 4 Screws 3 2 1 x4 x9 CAUTION Points to Note at Installation 1 Hold the 2 grips 1 of the frame and hook the 2 hooks 2 on the 2 holes of the frame on the host machine sid...

Page 127: ... Tray Unit Procedure 2 Remove the Inner Cover Lower 1 2 Screws 2 x2 2 1 3 Turn the dial 1 to move the Stapler 2 until it hits the rear side 1 2 F 4 148 F 4 149 4 Visually check that the 2 Process Bin Levers 1 have not gotten under the 2 Trailing Edge Guide Levers 2 on the finisher side When the Process Bin Levers are under the Guide Levers be sure to install the Process Tray Unit again 2 2 1 1 F 4...

Page 128: ...age 4 59 4 Remove the Process Tray Unit Refer to page 4 62 Procedure 1 Turn the Paddle Shaft 1 until it can be accessed to the screw and remove the 2 Paddle Units 2 3 Screws 3 3 3 1 2 x2 F 4 151 Removing the paddle Preparation 1 Remove the Stack Wall Lower Refer to page 4 29 2 Remove the Stack Wall Upper Refer to page 4 27 3 Remove the Neat Stack Unit Lower Refer to page 4 59 4 Remove the Process ...

Page 129: ...tion 1 Remove the Stack Wall Lower Refer to page 4 29 2 Remove the Stack Wall Upper Refer to page 4 27 3 Remove the Neat Stack Unit Lower Refer to page 4 59 4 Remove the Process Tray Unit Refer to page 4 62 Procedure 1 Remove the 2 Tension Springs 1 1 1 2 Turn the Process Tray Unit 2 upright with the Front Plate 1 side down 2 1 F 4 153 F 4 154 3 Remove the Swing Guide 1 2 Screws 2 x2 2 1 4 Remove ...

Page 130: ...ownward 6 Release the arm 3 to the left and remove the belt 4 1 2 3 4 7 Slide the bearing 1 and the washer 2 upward and move the Stack Delivery Roller Shaft Unit 3 from the Shaft Support A 1 E ring 4 1 2 4 3 A F 4 157 F 4 158 8 Remove the Stack Delivery Roller Shaft Unit 1 from the Shaft Support B 1 Parallel Pin 2 1 Pulley 3 1 Belt Retainer 4 2 Bearings 5 1 Washer 6 1 1 3 2 4 5 5 6 3 2 4 5 5 6 B 9...

Page 131: ...dure Removing the Process Tray Front Preparation 1 Remove the Stack Wall Lower Refer to page 4 29 2 Remove the Stack Wall Upper Refer to page 4 27 3 Remove the Neat Stack Unit Lower Refer to page 4 59 4 Remove the Process Tray Unit Refer to page 4 62 Procedure 1 Remove the Process Tray Alignment Plate Front 1 1 Screw 2 1 Claw 3 1 2 3 F 4 161 2 Remove the Process Tray Front 1 2 Screws 2 1 Protrusio...

Page 132: ...edure Removing the Process Tray Rear Preparation 1 Remove the Stack Wall Lower Refer to page 4 29 2 Remove the Stack Wall Upper Refer to page 4 27 3 Remove the Neat Stack Unit Lower Refer to page 4 59 4 Remove the Process Tray Unit Refer to page 4 62 Procedure 1 Remove the Process Tray Alignment Plate Rear 1 1 Screw 2 1 Claw 3 1 2 3 F 4 163 2 Remove the Process Tray Rear 1 2 Screws 2 1 Protrusion ...

Page 133: ...Stack Wall Lower Refer to page 4 29 2 Remove the Stack Wall Upper Refer to page 4 27 3 Remove the Neat Stack Unit Lower Refer to page 4 59 4 Remove the Process Tray Unit Refer to page 4 62 Procedure 1 Remove the guide 1 1 Screw 2 1 2 F 4 165 2 Loosen the screw 1 to move the Coupling Rear 2 to the left 1 2 3 Turn the Coupling Front 1 so that the screw comes in front and then loosen the screw 2 to m...

Page 134: ...diate Process Tray Assembly Removing the Feed Belt Procedure 4 Move the Feed Belt Release Unit 1 to the rear 1 5 Release the 2 Roller Guides 1 and remove the 2 rollers 2 and the 2 belts 3 2 Shafts 4 1 3 2 3 4 2 1 F 4 168 F 4 169 6 While releasing the Belt Roller Unit 1 remove the Feed Belt 2 by putting it between the couplings 3 2 1 3 2 3 F 4 170 ...

Page 135: ... Remove the Neat Stack Unit Lower Refer to page 4 59 4 Remove the Process Tray Unit Refer to page 4 62 Procedure 1 Loosen the screw 1 to remove the Stack Delivery Motor 2 1 Connector 3 2 Screws 4 1 Belt 5 3 2 1 5 4 4 x2 F 4 171 Removing the Process Tray Plate Unit Preparation 1 Remove the Stack Wall Lower Refer to page 4 29 2 Remove the Stack Wall Upper Refer to page 4 27 3 Remove the Neat Stack U...

Page 136: ...Front Alignment Motor Preparation 1 Remove the Stack Wall Lower Refer to page 4 29 2 Remove the Stack Wall Upper Refer to page 4 27 3 Remove the Neat Stack Unit Lower Refer to page 4 59 4 Remove the Process Tray Unit Refer to page 4 62 5 Remove the Process Tray Front Refer to page 4 68 6 Remove the Stack Delivery Motor Refer to page 4 72 7 Remove the Process Tray Plate Unit Refer to page 4 72 Proc...

Page 137: ...be sure to note the following points Place the Process Upper Tray 1 and a paper stack 2 horizontal to the floor Be sure to keep the clearance A between the 2 Process Bins 3 and surface of the floor when placing it 3 1 2 2 3 A F 4 175 1 Remove the belt 1 1 Screw 2 to loosen 1 Pulley 3 2 Remove the belt 4 1 Screw 5 to loosen 1 Pulley 6 3 Put a stack of paper 7 to place the Process Upper Tray 8 4 3 1...

Page 138: ...ack Wall Lower Refer to page 4 29 2 Remove the Stack Wall Upper Refer to page 4 27 3 Remove the Neat Stack Unit Lower Refer to page 4 59 4 Remove the Process Tray Unit Refer to page 4 62 5 Remove the Process Tray Front Refer to page 4 68 6 Remove the Stack Delivery Motor Refer to page 4 72 7 Remove the Process Tray Plate Unit Refer to page 4 72 Procedure CAUTION When replacing or installing removi...

Page 139: ...on a paper stack 2 be sure to note the following points Place the Process Upper Tray 1 and a paper stack 2 horizontal to the floor Be sure to keep the clearance A between the 2 Process Bins 3 and surface of the floor when placing it 1 3 2 2 3 A F 4 179 1 Remove the belt 1 1 Screw 2 to loosen 1 Pulley 3 2 Put a stack of paper 4 to place the Process Upper Tray 5 3 1 2 5 4 F 4 180 3 Remove the Rear A...

Page 140: ...rocess Tray Assembly or when replacing the Finisher Controller PCB Adjusting method is as follows 1 After installing the intermediate process tray assembly loosen the 2 screws 2 on the alignment plate 1 in the intermediate process tray assembly 1 2 2 2 Secure the 2 paper edge stoppers 1 with the 2 screws 2 2 1 F 4 182 F 4 183 3 After setting A4 paper 1 in the arrow direction of the intermediate tr...

Page 141: ...ll Lower Refer to page 4 29 2 Remove the Stack Wall Upper Refer to page 4 27 3 Remove the Neat Stack Unit Lower Refer to page 4 59 4 Remove the Process Tray Unit Refer to page 4 62 5 Remove the Rear Cover Refer to page 4 20 6 Open the Front Cover 7 Remove the Inner Cover Upper Refer to page 4 22 Procedure 1 Free the 2 harnesses 1 3 Wire Saddles 2 1 Edge Saddle 3 3 Connectors 4 2 3 4 4 1 x2 x4 1 4 ...

Page 142: ...e CAUTION Avoid deformation of the 2 Process Upper Guides 1 and the 4 Paper Guides 2 Put the removed Process Upper Guide Units 3 with the Belt Controller Unit 4 side up Place a stack of paper approx 2 cm thick or cardboards 6 under the handle 5 to make it stabilized 2 2 5 3 3 4 6 1 1 F 4 187 4 Free the 2 belts 2 from the 2 pulleys 1 and hold the handle 3 to remove the Process Upper Guide Unit 4 2 ...

Page 143: ...pper Guide Unit 1 be sure to align the positions as shown below 1 Hold the handle 2 and the Support Pin Base B so that the surface of the guide A of the Process Upper Guide Unit 1 is at right angle 1 2 A B F 4 189 2 Put the shaft 1 of the Process Upper Guide Unit into the hole A of the Finisher Front Plate 3 Move the pulley 2 of the Process Upper Guide Unit to the opening B of the Finisher Rear Pl...

Page 144: ...4 29 2 Remove the Stack Wall Upper Refer to page 4 27 3 Remove the Neat Stack Unit Lower Refer to page 4 59 4 Remove the Process Tray Unit Refer to page 4 62 5 Remove the Rear Cover Refer to page 4 20 6 Open the Front Cover 7 Remove the Inner Cover Upper Refer to page 4 22 8 Remove the Process Upper Guide Unit Refer to page 4 78 Procedure CAUTION Avoid deformation of the 2 Process Upper Guides 1 a...

Page 145: ...Unit Procedure 1 Slide the Belt Variable Lever 1 in the release direction until it stops 1 2 Release the 2 Roller Guides 1 and remove the 2 Rollers 2 and the 2 belts 3 2 Shafts 4 3 4 4 2 1 1 2 F 4 193 F 4 194 3 Return the Belt Variable Lever 1 in the direction to be engaged and remove the following parts 2 E rings 2 1 Shaft 3 1 Pulley 4 4 Remove the following parts 2 E rings 5 2 Bushings 6 5 6 1 5...

Page 146: ... 1 x2 4 CAUTION When installing the Belt Controller Unit be sure to align the slope angles A of the guide surface of the Guide Lever Front 1 and the guide surface of the Guide Lever Rear 2 The following shows the checking procedure A 1 2 F 4 197 F 4 196 1 Hook the belt 2 of the Process Upper Guide Unit on the pulley 1 of the Belt Controller Unit and then temporarily tighten the 2 screws 3 At this ...

Page 147: ...g in the Guide Lever Rear 2 to the front fit the belt attached 3 pulley 4 to the hole A of the shaft 5 Fit the cut surface B of the shaft with the cut surface C of the shaft hole to install the shaft 5 2 1 3 4 A 5 B C F 4 199 F 4 200 6 Check that the slope angles A of the guide surface of the Guide Lever Front 1 and the guide surface of the Guide Lever Rear 2 are the same A is at the same angle Fu...

Page 148: ... the Front Cover 7 Remove the Inner Cover Upper Refer to page 4 22 8 Remove the Process Upper Guide Unit Refer to page 4 78 Procedure CAUTION Avoid deformation of the 2 Process Upper Guides 1 and the 4 Paper Guides 2 Put the removed Process Upper Guide Units 3 with the Belt Controller Unit 4 side up Place a stack of paper approx 2 cm thick or cardboards 6 under the handle 5 to make it stabilized 2...

Page 149: ...Assembly Removing the Belt Roller Procedure CAUTION When installing the Delivery Roller Shaft 1 fit the 2 cut surfaces A in the groove of the Mounting Plate with the 2 cut surfaces B of the Delivery Roller Shaft 1 A B B A 1 F 4 205 3 Remove the following parts 1 E ring 1 1 Washer 2 1 Bearing 3 1 2 3 4 Slide the 2 couplings 1 2 Screws 2 to loosen 2 2 1 F 4 206 F 4 207 ...

Page 150: ...cedure Removing the Belt Roller on the front side 5 While releasing the Belt Roller Unit 1 slide the bearing 2 from the Support Plate 3 6 Remove the Belt Roller 5 from the Delivery Roller Shaft 4 1 2 3 4 4 5 Removing the Belt Roller on the rear side 7 Remove the E ring 1 1 F 4 208 F 4 209 8 Move the gear 1 and remove the Parallel Pin 2 1 2 9 Remove the E ring 1 and slide the bearing 2 1 2 F 4 210 ...

Page 151: ...e Belt Roller Procedure Parts Replacing and Cleaning Intermediate Process Tray Assembly Removing the Belt Roller Procedure 10 While releasing the Belt Roller Unit 1 slide the bearing 2 from the Support Plate 3 11 Remove the Belt Roller 5 from the Delivery Roller Shaft 4 1 2 3 4 4 5 F 4 212 ...

Page 152: ... Saddle Inner Cover Lower Procedure Saddle Stitcher Assembly Removing the Saddle Inner Cover Upper Preparation 1 Open the Front Cover Procedure 1 Remove the Saddle Inner Cover Upper 1 1 Knob 2 2 Screws 3 x2 1 2 3 F 4 213 Removing the Saddle Inner Cover Lower Preparation 1 Open the Front Cover Procedure 1 Remove the Saddle Inner Cover Lower 1 1 Knob 2 4 Screws 3 x4 1 2 3 3 3 F 4 214 ...

Page 153: ...Saddle Inlet Roller Static Eliminator Procedure Removing the Saddle Inlet Roller Static Eliminator Preparation 1 Open the Front Cover 2 Pull out the Saddle Unit Procedure 1 Move the grip 1 in the direction of the arrow to open the Saddle Stack Guide Assembly 2 1 2 F 4 215 2 Remove the Saddle Inlet Guide 1 2 Screws 2 1 2 2 3 Remove the 2 Saddle Inlet Roller Static Eliminators 1 1 F 4 216 F 4 217 ...

Page 154: ...e the grip 1 in the direction of the arrow to open the Saddle Stack Guide Assembly 2 1 2 2 Remove the Saddle Intermediate Static Eliminator 1 1 F 4 218 F 4 219 Removing the Saddle Stapler Preparation 1 Open the Front Cover 2 Pull out the Saddle Unit Procedure CAUTION When replacing or installing removing the Saddle Stapler be sure to perform the following adjustment Adjusting the Saddle Staple Ali...

Page 155: ...d Guide Lower Static Eliminator Procedure 2 Remove the Harness Cover 1 2 Screws 2 x2 1 2 2 3 Remove the Saddle Stapler 1 1 Connector 2 2 Screws 3 1 2 3 F 4 221 F 4 222 Removing the Feed Guide Lower Static Eliminator Preparation 1 Open the Front Cover 2 Pull out the Saddle Unit 3 Remove the Saddle Stapler Refer to page 4 91 Procedure 1 Remove the 3 Feed Guide Lower Static Eliminators 1 1 F 4 223 ...

Page 156: ...oving the Disengagement Roller Preparation 1 Open the Front Cover 2 Pull out the Saddle Unit 3 Remove the Saddle Stapler Refer to page 4 91 4 Remove the Saddle Inner Cover Lower Refer to page 4 89 Procedure 1 Remove the Resin Ring 1 and the bearing 2 1 2 F 4 224 2 Remove the Resin Ring 1 and the Belt Retainer 2 on the rear side of the Saddle Assembly 1 2 3 Remove the belt 1 from the pulley 2 1 2 F...

Page 157: ... Cleaning Saddle Stitcher Assembly Removing the Disengagement Roller Procedure 4 Move the Disengagement Roller Shaft 1 to remove the front side of the shaft 2 1 2 5 Remove the Disengagement Roller Front 1 1 Screw 2 1 2 6 Follow the same steps as the Disengagement Roller Front to remove the Disengagement Roller Rear F 4 227 F 4 228 ...

Page 158: ...mbly Removing the Thrust Unit Procedure Removing the Thrust Unit Preparation 1 Open the Front Cover 2 Pull out the Saddle Unit 3 Remove the Saddle Inner Cover Lower Refer to page 4 89 Procedure 1 Remove the Saddle Stitcher Controller PCB Cover 1 6 Screws 2 1 2 2 F 4 229 2 Free the harness 1 from the Harness Guide 2 12 Connectors 3 1 2 3 3 3 3 3 F 4 230 ...

Page 159: ...arts Replacing and Cleaning Saddle Stitcher Assembly Removing the Thrust Unit Procedure 3 Free the 2 harnesses 2 Connectors 1 3 Wire Saddles 2 3 Edge Saddles 3 2 3 1 2 2 3 3 4 Free the harness 1 Wire Saddle 1 1 Connector 2 1 2 F 4 231 F 4 232 5 Remove the Thrust Unit 1 4 Screws 2 2 Hooks 3 1 2 2 3 F 4 233 ...

Page 160: ...r to page 4 89 4 Remove the Thrust Unit Refer to page 4 95 Procedure 1 Turn the gear 1 in the direction of the arrow so that the Thrust Plate 2 is at the most protruded position A 1 2 A F 4 234 2 Be sure to mark the current 2 positions 1 of the Thrust Plate where the engraved marking and the outer line of the Thrust Plate are overlapped 1 1 3 Remove the Thrust Plate 1 3 Screws 2 1 Thrust Plate Fix...

Page 161: ...nit Procedure Removing the Positioning Plate Unit Preparation 1 Open the Front Cover 2 Pull out the Saddle Unit 3 Remove the Saddle Inner Cover Lower Refer to page 4 89 4 Remove the Thrust Unit Refer to page 4 95 Procedure 1 Free the harness 1 4 Connectors 2 6 Wire Saddles 3 1 Reuse Band 4 1 Edge Saddle 5 2 5 2 3 3 4 1 x4 x8 2 3 F 4 237 2 Remove the Positioning Plate Unit 1 2 Screws 2 1 2 2 F 4 23...

Page 162: ...Unit service position Preparation 1 Open the Front Cover Procedure 1 Pull out the Saddle Unit 1 by approx 20 cm 1 2 Pull out the Auxiliary Caster 1 in the direction of the arrow A and pull out the Saddle Unit in the direction of the arrow B B A 1 F 4 239 F 4 240 3 Release the Rail Stopper 1 and pull out the Saddle Unit by approx 5 cm 1 4 Remove the Harness Guide 1 and pull out the Saddle Unit unti...

Page 163: ...le Stitcher Assembly Removing the Saddle Inlet Static Eliminator Procedure Removing the Saddle Inlet Static Eliminator Preparation 1 Open the Front Cover 2 Pull out the Saddle Unit service position Refer to page 4 99 Procedure 1 Remove the Static Eliminator Cover 1 2 Screws 2 2 1 F 4 243 2 Remove the Saddle Inlet Static Eliminator 1 2 Screws 2 1 2 2 F 4 244 ...

Page 164: ... Cover 2 Pull out the Saddle Unit service position Refer to page 4 99 Procedure 1 Store the Saddle Unit to the position where the screw 1 can be seen from the hole 2 and remove the screw 1 and the screw 3 3 1 1 2 2 Store the rail 1 1 F 4 245 F 4 246 3 Remove the 3 screws 1 1 1 4 Hold the Saddle Unit 1 as shown in the figure remove it in the direction of the arrow and then carry it after checking t...

Page 165: ...it the side surface A of the Connector Base of the Saddle Unit with the side surface B of the rail on the right 2 At the front side of the Saddle Unit fit the back side C of the Saddle Inner Cover Lower with the surface D of the Rail Unit D C B A 3 Fit the 4 Rail Pins 1 into the 4 grooves A of the Saddle Unit 1 A F 4 249 F 4 250 Removing the Press Unit Preparation 1 Open the Front Cover 2 Pull out...

Page 166: ...moving the Press Unit Procedure Parts Replacing and Cleaning Saddle Stitcher Assembly Removing the Press Unit Procedure 2 Free the harness 3 Connectors 1 1 Wire Saddle 2 2 1 1 F 4 252 3 Remove the 2 Positioning Pins 1 2 Screws 2 1 2 1 2 4 Remove the belt 1 1 F 4 253 F 4 254 ...

Page 167: ...leaning Saddle Stitcher Assembly Removing the Press Unit Procedure 5 Remove the Roller Fixation Plate Rear 1 2 Screws 2 x2 1 2 6 Free the harness 1 1 Wire Saddle 2 1 Edge Saddle 3 2 Connectors 4 4 3 1 2 F 4 255 F 4 256 7 Remove the 2 Positioning Pins 1 2 Screws 2 1 2 1 2 8 Remove the Press Unit 1 2 Hooks 2 2 1 F 4 257 F 4 258 ...

Page 168: ...r Unit Preparation 1 Open the Front Cover 2 Pull out the Saddle Unit service position Refer to page 4 99 3 Remove the Saddle Inner Cover Lower Refer to page 4 89 4 Remove the Press Unit Refer to page 4 102 Procedure 1 Turn the knob 1 in the direction of the arrow to move the Press Roller Unit 2 to the center 1 2 F 4 259 2 Remove the Delivery Guide Upper 1 4 Screws 2 1 2 2 3 Remove the Handle Cover...

Page 169: ...ts Replacing and Cleaning Saddle Stitcher Assembly Removing the Press Roller Unit Procedure 4 Remove the Handle Unit 1 4 Screws 2 1 2 2 5 Remove the Delivery Guide Lower 1 4 Screws 2 1 2 2 F 4 262 F 4 263 6 Remove the Belt Support Plate 1 1 Screw 2 1 2 7 Remove the Slide Shaft Lower 1 1 E ring 2 1 2 F 4 264 F 4 265 ...

Page 170: ...ess Roller Unit Procedure CAUTION When installing the Slide Shaft Lower make sure that the hole 1 of the Press Roller Unit Cover and the hole 2 of the knob are overlapped while the Press Roller Unit is at the rear end 1 2 F 4 266 8 Move the Slide Shaft Upper 1 and remove the Press Roller Unit 2 2 1 F 4 267 9 Remove the Slide Shaft Upper 2 from the Press Roller Unit 1 1 2 F 4 268 ...

Page 171: ...edure Removing the Fold Roller Preparation 1 Open the Front Cover 2 Pull out the Saddle Unit service position Refer to page 4 99 3 Remove the Saddle Inner Cover Lower Refer to page 4 89 4 Remove the Press Unit Refer to page 4 102 Procedure 1 Hold the grip 1 and open the Feed Roller Guide 2 to remove it 1 Screw 3 3 2 1 F 4 269 2 Remove the Unit Fixation Base Front 1 2 Screws 2 1 2 F 4 270 ...

Page 172: ...e Stitcher Assembly Removing the Fold Roller Procedure 3 Remove the Tension Arm Plate 1 1 Spring 2 1 2 4 Remove the Roller Arm Plate 1 1 E ring 2 2 Screws 3 1 Spring 4 1 2 4 3 F 4 271 F 4 272 5 Remove the Belt Retainer 1 the belt 2 and the pulley 3 1 3 2 6 Remove the C ring 1 the gear 2 the bearing 3 and the plate 4 4 3 2 1 F 4 273 F 4 274 ...

Page 173: ...cing and Cleaning Saddle Stitcher Assembly Removing the Fold Roller Procedure 7 Remove the Unit Fixation Base Rear 1 at the rear side of the Saddle Unit 2 Screws 2 1 2 8 Remove the C ring 1 and the Ball Bearing 2 2 1 F 4 275 F 4 276 9 Slide the Fold Roller Upper 1 1 10 Remove the Fold Roller Upper 1 1 F 4 277 F 4 278 ...

Page 174: ...addle Stitcher Assembly Removing the Fold Roller Procedure 11 Remove the C ring 1 and the gear 2 1 2 12 Remove the C ring 1 and the bearing 2 at the rear side of the Saddle Unit 2 1 F 4 279 F 4 280 13 Insert the shaft 1 on the front side of the Fold Roller Lower into the upper hole 1 14 Remove the Fold Roller Lower 1 1 F 4 281 F 4 282 ...

Page 175: ...lignment Roller Unit Procedure Removing the Alignment Roller Unit Preparation 1 Open the Front Cover 2 Pull out the Saddle Unit service position Refer to page 4 99 3 Remove the Saddle Inner Cover Lower Refer to page 4 89 4 Remove the Press Unit Refer to page 4 102 Procedure 1 Disconnect the connector 1 1 F 4 283 2 Remove the Alignment Roller Unit 1 1 Screw 2 2 Hooks 3 1 2 3 F 4 284 ...

Page 176: ...e 4 89 4 Remove the Press Unit Refer to page 4 102 5 Remove the Alignment Roller Unit Refer to page 4 112 Procedure 1 Remove the 4 Alignment Rollers 1 4 Plastic Rings 2 1 1 2 2 2 2 F 4 285 Removing the Saddle Alignment Motor Preparation 1 Open the Front Cover 2 Pull out the Saddle Unit service position Refer to page 4 99 3 Remove the Saddle Inner Cover Lower Refer to page 4 89 4 Remove the Press U...

Page 177: ...5 5 Adjustment Adjustment Basic Adjustment Adjustment at Time of Parts Replacement Auxiliary Adjustment ...

Page 178: ... 0 p 5 54 Adjustment in the Case of Failure in Stacking Performance of Tray upper curl ON 1 3 6 7 SORTER OPTION CURLSW 0 to 2 0 p 5 55 Adjustment in the Case of Failure in Stacking Performance of Tray lower curl ON 1 3 6 7 SORTER OPTION CURLSW 0 to 2 0 p 5 57 Adjustment in the Case of Failure in Stacking Performance of Tray runon of paper when using thin paper ON 1 3 7 SORTER OPTION TRYEJCT 0 to 1...

Page 179: ... height between the finisher and the host machine Check whether the height difference between the upper right surface 1 of the finisher and the upper left surface 2 of the host machine is within 2mm 1 2 F 5 1 2 If the height difference is 2mm or more execute height adjustment NOTE Use 4 casters 1 shown in the figure for height adjustment 1 1 F 5 2 Height adjustment 1 Separate the finisher from the...

Page 180: ...saddle inner cover lower 1 1 screw 2 1 knob 3 3 screws 4 1 2 3 4 4 F 5 4 4 Remove the 2 caster covers 1 at the left side the illustration shows in the case of the saddle finisher 2 screws 2 1 2 1 2 5 Measure height A from the floor where the caster is landing to the upper surface of the bottom plate using a scale and check that the height is within 86 3 0 3mm 86 3 0 3mm A F 5 5 F 5 6 ...

Page 181: ... adjustment bolt 1 with the spanner small 2 Adjust the height that is measured in step 6 to be within 83 6 0 3mm To raise the height rotate in A direction To lower the height rotate in B direction Amount of height change per rotation approx 1 75mm 1 2 A B 8 Tighten the fixing nut 1 in B direction 1 B 9 Adjust the other 3 casters as well by repeating the steps above 10 Connect the finisher with the...

Page 182: ...cking adjustment value Preparations 1 Turn ON the power of the finisher 2 Turn ON the power of the host machine to be on to be on standby 3 Open the front cover and put the door switch tool into the door switch 1 1 F 5 11 4 Remove the switch cover 1 of the inner cover lower 1 screw 2 2 1 Procedure 1 Set DIP switch SW382 1 on the switch PCB as shown in the figure 1 4 6 8 ON and press ENTER SW385 bu...

Page 183: ... ENTER SW384 SW385 DSP381 1 4 Press ENTER button to complete the adjustment mode If the adjustment value estimated value is within the range set the DIP switch back and complete the adjustment If the adjustment value estimated value is out of the range execute 2 Side registration adjustment or 3 Skew adjustment 5 Turn OFF the power switch of the host machine then the finisher F 5 14 Side registrat...

Page 184: ...within the range start from step 7 1 Push the 3 claws 1 and remove the 3 knobs 2 2 1 CAUTION When the One way Clutch 1 inside the knob is removed be sure to install it in the direction where the arrow marking of the One way Clutch is visible 1 F 5 17 F 5 16 1 Lift the upper cover 1 in the arrow direction to remove the inner cover upper 2 4 screws 3 2 3 1 2 Remove the Latch Base Cover 1 3 Screws 2 ...

Page 185: ...justment value is positive move it in A direction and tighten the screws 2 If the value obtained at checking adjustment value is negative move it in B direction and tighten the screws 2 CAUTION Perform adjustment so that the total of the shifting amount scale of the latch base front rear is within 2 to 2 mm B A 1 2 7 Connect the finisher with the host machine 8 Turn ON the power switch of the host...

Page 186: ...s 1 Turn ON the power of the finisher 2 Turn ON the power of the host machine to be on to be on standby 3 Open the front cover and put the door switch tool into the door switch 4 Put the screwdriver 2 into the hole 1 on the lower surface of the tray and slide it toward A direction to release and then move down tray A B in B direction 1 A B 2 F 5 22 CAUTION The Tray A B 2 should be at least 100 mm ...

Page 187: ...hted 0 Press ENTER SW385 button 2 to complete adjustment for sensor light intensity SW382 SW381 SW383 ENTER SW384 SW385 DSP381 2 1 F 5 24 F 5 25 3 If the sensor is faulty The LED indicates with blinking 0 press SW384 1 SW383 2 button to find the code number on the blinking LED 3 and then replace the faulty sensor correspondingly Code Number Sensor Name 1 Buffer path 1 sensor PCB UN13 2 Buffer path...

Page 188: ... 61 Setting of Pressless Mode ON 1 3 4 SORTER OPTION SDLPRS 0 to 3 0 p 5 120 T 5 4 When replacing the parts shown below perform the appropriate adjustment Adjustment Type Symptom adjustment timing Reference Adjusting Sensor Light Intensity When replacing a sensor p 5 14 Adjusting Position of Tray A B When replacing the Tray A B Unit p 5 16 Adjusting the Alignment Position of the Upper Neat Alignme...

Page 189: ...le Lead Edge Stopper p 5 51 Adjustment After Replacing Finisher Controller PCB p 5 53 Bufferless Mode p 5 54 Adjustment in the Case of Failure in Stacking Performance of Tray upper curl p 5 55 Adjustment in the Case of Failure in Stacking Performance of Tray lower curl p 5 57 Adjustment in the Case of Failure in Stacking Performance of Tray run on of paper when using thin paper p 5 59 Adjustment i...

Page 190: ...g procedure Preparations 1 Turn ON the power of the finisher 2 Turn ON the power of the host machine to be on to be on standby 3 Open the front cover and put the door switch tool into the door switch 4 Put the screwdriver 2 into the hole 1 on the lower surface of the tray and slide it toward A direction to release and then move down tray A B in B direction 1 A B 2 F 5 26 CAUTION The Tray A B 2 sho...

Page 191: ...ED 1 indicates with lighted 0 Press ENTER SW385 button 2 to complete adjustment for sensor light intensity SW382 SW381 SW383 ENTER SW384 SW385 DSP381 2 1 F 5 28 F 5 29 3 If the sensor is faulty The LED indicates with blinking 0 press SW384 1 SW383 2 button to find the code number on the blinking LED 3 and then replace the faulty sensor correspondingly Code Number Sensor Name 1 Buffer path 1 sensor...

Page 192: ...sm of the Tray A or B when replacing or installing removing the tray 1 While keeping the tray horizontal put the tray into the rails left and right Be sure to have same distance at distance A length from the tip 3 of the rail to the tray shaft 4 between the front side 1 and the rear side 2 of the tray when installing the tray CAUTION When lowering the tray be sure to do so while pulling the block ...

Page 193: ...to Preparations 5 6 for details of step 1 to 4 Procedure 1 Set DIP SW382 1 on the Switch PCB as shown in the figure below SW382 SW381 SW383 ENTER SW384 SW385 DSP381 1 F 5 31 2 Press the Push Switch SW385 1 to complete preparation for the adjustment SW382 SW381 SW383 ENTER SW384 SW385 DSP381 1 3 Place A4 or LTR size paper in the ADF 4 Press the Start key on the Control Panel to start copy 5 By pres...

Page 194: ... by approx 0 2 mm Adjustment range 15 to 15 shift amount per unit 0 2 mm SW382 SW381 SW383 ENTER SW384 SW385 DSP381 3 4 1 5 2 B F 5 34 8 After executing the adjustment check that the distance 1 and 2 shown below become appropriate so that there is no gap and paper is not leaned on the Alignment Plate 1 Distance between the paper edge front side A and the Front Neat Alignment Plate 1 2 Distance bet...

Page 195: ...cases When replacing or installing removing the Neat Stack Unit Lower and the component parts of the unit When replacing the Finisher Controller PCB Adjusting method is as follows Preparations 1 Turn ON the power of the finisher 2 Turn ON the power of the host machine to be on to be on standby 3 Open the front cover and put the door switch tool into the door switch 4 Remove the switch cover NOTE R...

Page 196: ...at Alignment Plate 4 moves toward the rear by approx 0 2 mm Adjust the distance between the paper edge front side A stopped at the Bottom Delivery Outlet and the Front Neat Alignment Plate 4 Adjustment range 15 to 15 shift amount per unit 0 2 mm SW382 SW381 SW383 ENTER SW384 SW385 DSP381 1 2 3 4 A F 5 38 F 5 39 6 By pressing the SW385 1 the shift amount of the Front Neat Alignment Plate is determi...

Page 197: ...edge front side A and the Front Neat Alignment Plate 1 2 Distance between the paper edge rear side B and the Rear Neat Alignment Plate 2 If the distance is not appropriate measure and write down the shift amount which will be needed for readjustment 1 2 B A 9 Press the Push Switch SW385 1 to finish the adjustment of Lower Neat Alignment Plate position and remove the paper stopped at the Bottom Del...

Page 198: ...method is as follows Preparations 1 Turn ON the power of the finisher 2 Turn ON the power of the host machine to be on to be on standby 3 Open the front cover and put the door switch tool into the door switch 4 Remove the switch cover NOTE Refer to Preparations 5 6 for details of step 1 to 4 Procedure 1 While supporting the Tray B 1 insert a screwdriver into the hole A to release the block 2 in th...

Page 199: ...P381 1 4 Press the Push Switch SW385 1 to complete preparation for the adjustment SW382 SW381 SW383 ENTER SW384 SW385 DSP381 1 F 5 45 F 5 46 5 By pressing the Push Switch SW383 1 or SW384 2 mode can be selected Every time SW384 2 is pressed A B C D E is displayed in that order Display A on LED 3 select the operation check mode 6 Every time SW385 4 is pressed position of the 2 Corrugation Rollers 5...

Page 200: ...Swing Guide 1 3 2 1 4 1 2 F 5 49 8 Measure the distance C between the bottom side A of the heavy paper and the upper side B of the Corrugation Roller 2 Then check that the distance C is within the range of standard value 2 7 1 mm in orthogonal direction against the surface of the Intermediate Process Tray 3 If the distance C is out of the range take a note to write down the excess of the measured ...

Page 201: ...e range press the Push Switch SW385 1 and complete the preparation for the adjustment again Press SW384 2 five times to display E Corrugation position adjustment on LED 3 F 5 51 12 By pressing the Push Switch SW385 1 the current adjustment value is displayed on LED 3 Then press SW383 4 or SW384 2 to change the adjustment value in increments of 1 pulse Adjustment range 12 to 6 shift amount per unit...

Page 202: ...Assembly or when replacing the Finisher Controller PCB Adjusting method is as follows 1 After installing the intermediate process tray assembly loosen the 2 screws 2 on the alignment plate 1 in the intermediate process tray assembly 1 2 2 2 Secure the 2 paper edge stoppers 1 with the 2 screws 2 2 1 F 5 54 F 5 55 3 After setting A4 paper 1 in the arrow direction of the intermediate tray assembly ma...

Page 203: ...ions 1 Turn ON the power of the finisher 2 Turn ON the power of the host machine to be on to be on standby 3 Open the front cover and put the door switch tool into the door switch 4 Remove the switch cover NOTE Refer to Preparations 5 6 for details of step 1 to 4 Procedure 1 Set DIP SW382 1 on the switch PCB as shown in the figure below In the case of A configuration size SW382 SW381 SW383 ENTER S...

Page 204: ...es 1 and the front alignment plate 4 shifts to the front by approx 0 2mm In the same way by pressing SW384 once the LED 3 indicates 1 and the front alignment plate 4 shifts to the rear by approx 0 2mm Adjustment range 10 to 10 shifting amount per unit 0 2mm SW382 SW381 SW383 ENTER SW384 SW385 DSP381 1 2 3 4 F 5 60 F 5 61 5 Pressing push switch SW385 1 determines shifting amount of the front alignm...

Page 205: ...ting Position of Stapler This adjustment is executed when replacing or installing removing the Stapler in the Intermediate Process Tray Assembly Adjusting method is as follows 1 Put a marking 1 on the position of the stapler installed before replacing it 2 Install the new stapler 2 with the marking position 1 aligned and then secures the stapler 2 with the 2 screws 3 2 3 1 F 5 64 ...

Page 206: ...eparations 1 Turn ON the power of the finisher 2 Turn ON the power of the host machine to be on to be on standby 3 Open the front cover and put the door switch tool into the door switch 4 Remove the switch cover NOTE Refer to Preparations 5 6 for details of step 1 to 4 Procedure 1 Set DIP SW382 1 on the switch PCB as shown in the figure below In the case of A configuration size SW382 SW381 SW383 E...

Page 207: ...apling position at the rear shifts to the rear In the same way by pressing SW384 once the LED 3 indicates 1 and the stapling position at the rear shifts to the front Adjustment range 20 to 20 shifting amount per unit 0 5mm SW382 SW381 SW383 ENTER SW384 SW385 DSP381 1 2 3 4 Press switch SW385 1 to move the stapler to the rear SW382 SW381 SW383 ENTER SW384 SW385 DSP381 1 F 5 68 F 5 69 5 Place A4 pap...

Page 208: ...ent Adjusting Staple Position 1 stapling at the rear Procedure 6 Check that the stapling position is within the specified range 1 of 5 2mm using this result If the stapling position is out of the specification go through the procedure again from step 2 1 CAUTION If the LED indicates anything other than 0 meaning the adjustment failure execute the adjustment again F 5 71 ...

Page 209: ... Preparations 1 Turn ON the power of the finisher 2 Turn ON the power of the host machine to be on to be on standby 3 Open the front cover and put the door switch tool into the door switch 4 Remove the switch cover NOTE Refer to Preparations 5 6 for details of step 1 to 4 Procedure 1 Set DIP SW382 1 on the switch PCB as shown in the figure below In the case of A configuration size SW382 SW381 SW38...

Page 210: ...ng position at the front shifts to the rear In the same way by pressing SW384 once the LED 3 indicates 1 and the stapling position at the front shifts to the front Adjustment range 20 to 20 shifting amount per unit 0 5mm SW382 SW381 SW383 ENTER SW384 SW385 DSP381 1 2 3 4 Press push switch SW385 1 to move the stapler to the front SW382 SW381 SW383 ENTER SW384 SW385 DSP381 1 F 5 75 F 5 76 5 Place A4...

Page 211: ...ent Adjusting Staple Position 1 stapling at the front Procedure 6 Check that the stapling position is within the specified range 1 of 5 2mm using this result If the stapling position is out of the specification go through the procedure again from step 2 1 CAUTION If the LED indicates anything other than 0 meaning the adjustment failure execute the adjustment again F 5 78 ...

Page 212: ...Preparations 1 Turn ON the power of the finisher 2 Turn ON the power of the host machine to be on to be on standby 3 Open the front cover and put the door switch tool into the door switch 4 Remove the switch cover NOTE Refer to Preparations 5 6 for details of step 1 to 4 Procedure 1 Set DIP SW382 1 on the switch PCB as shown in the figure below In the case of A configuration size SW382 SW381 SW383...

Page 213: ...mount per unit 0 5mm SW382 SW381 SW383 ENTER SW384 SW385 DSP381 1 2 3 4 Press switch SW385 1 to move the stapler to the 2 stapling position SW382 SW381 SW383 ENTER SW384 SW385 DSP381 1 F 5 82 F 5 83 5 Place A4 paper 1 on the intermediate process tray Be sure to push in the paper to the rear side of the process tray 1 6 Check that the stapling position is within the specified range 1 81 7 4mm for A...

Page 214: ...ns 1 Turn ON the power of the finisher 2 Turn ON the power of the host machine to be on to be on standby 3 Open the front cover and put the door switch tool into the door switch 4 Remove the switch cover NOTE Refer to Preparations 5 6 for details of step 1 to 4 Procedure 1 Set DIP SW382 1 on the switch PCB as shown in the figure below SW382 SW381 SW383 ENTER SW384 SW385 DSP381 1 F 5 86 2 Pressing ...

Page 215: ...s out of the specified value execute the work as follows 1 A B 2 3 B A 1 2 3 1 1st sheet 2 2nd sheet 3 3rd sheet F 5 88 F 5 89 6 If A displacement amount between the 1st sheet and the 2nd sheet or B displacement amount between the 1nd sheet and the 3rd sheet is out of the specified value execute the following work Take out the paper and close the upper cover Press push switch SW385 1 once to get i...

Page 216: ...t amount between the 1nd sheet and the 3rd sheet Pressing push switch SW383 2 reduces the displacement amount while pressing SW384 3 increases the displacement amount Correction amount is displayed on the LED 4 Adjustment range 48 to 48 correcting amount per 2units 0 4mm Adjustment level amount per 2 units Press SW385 again to confirm correction amount for A and B SW382 SW381 SW383 ENTER SW384 SW3...

Page 217: ...he power of the host machine to be on to be on standby 3 Open the front cover and put the door switch tool into the door switch 4 Remove the switch cover NOTE Refer to Preparations 5 6 for details of step 1 to 4 Procedure 1 Set DIP SW382 1 on the switch PCB as shown in the figure below SW382 SW381 SW383 ENTER SW384 SW385 DSP381 1 F 5 92 2 Pressing push switch SW385 1 activates the LED 2 with 0 bli...

Page 218: ...follows CAUTION Be sure to measure the value with the paper stack turned over as shown in the figure below 3 2 1 A B A B 3 2 1 1 1st sheet 2 2nd sheet 3 3rd sheet F 5 94 F 5 95 6 If A displacement amount between the 1st sheet and the 2nd sheet or B displacement amount between the 1st sheet and the 3rd sheet is out of the specified value execute the following work Take out the paper and close the u...

Page 219: ... mode for B displacement amount between the 1nd sheet and the 3rd sheet Pressing push switch SW383 2 reduces the displacement amount while pressing SW384 3 increases the displacement amount Correction amount is displayed on the LED 4 Adjustment range 48 to 48 correction amount by 8 units 1 6mm Adjustment level amount per 8 units Press SW385 again to confirm correction amount for A and B SW382 SW38...

Page 220: ...nt the fold placement is adjusted to the saddle stitch position Even if the saddle stitch position is not at the center adjust the fold placement to the saddle stitch position It will not cause any problem because the fold placement and the saddle stitch position are adjusted to shift to the center of the paper in the following Saddle stitch adjustment Preparations 1 Turn ON the power of the finis...

Page 221: ...W382 SW381 SW383 ENTER SW384 SW385 DSP381 1 3 2 5 Press push switch SW385 once to complete the adjustment mode F 5 99 F 5 100 Saddle stitch adjustment NOTE In saddle stitch adjustment the saddle stitch position and the fold placement are shifted at the same time By adjusting the saddle stitch position the fold placement is also shifted to the center at the same time Preparation 1 Turn ON the power...

Page 222: ... the saddle right guide 3 2 3 1 3 Follow the feed guide to set the paper A4R or LTRR 1 Be sure to push in the paper until it touches the positioning plate 1 2 F 5 102 F 5 103 4 Press push switch SW384 1 once to execute stapling Note that if the push switch is pressed without the paper on the saddle unit the machine goes to the position adjustment mode mentioned in step 7 SW382 SW381 SW383 ENTER SW...

Page 223: ...pecified value execute the following work SW382 SW381 SW383 ENTER SW384 SW385 DSP381 1 7 Work with the 2 push switches SW383 384 according to displacement amount for the specified value Pressing SW383 1 moves the staple position upward while pressing SW384 2 moves the staple position downward Adjustment range 10 to 10 correction amount per unit 0 125mm After the adjustment value is specified go th...

Page 224: ...host machine to be on to be on standby 3 Open the front cover and put the door switch tool into the door switch 4 Remove the switch cover NOTE Refer to Preparations 5 6 for details of step 1 to 4 Procedure 1 Set DIP SW382 1 on the switch PCB as shown in the figure below In the case of A configuration 2 In the case of L configuration 3 Then press SW385 so that the adjustment is ready now SW382 SW38...

Page 225: ... within the specified range A B is 0 5mm or less press push switch SW385 1 once to complete the adjustment mode It the measured value is out of the specified value execute the following work SW382 SW381 SW383 ENTER SW384 SW385 DSP381 1 7 Work with the 2 push switches SW383 384 according to displacement amount for the specified value Pressing SW383 1 moves the staple position upward while pressing ...

Page 226: ...ion 1 Adjustment is complete if the measured value is within the specification C 0 5mm or less otherwise execute the following work 1 2 C Procedure 1 Open the front cover and put the door switch tool into the door switch 2 Remove the switch cover NOTE Refer to Preparations 5 6 for details of step 1 to 2 F 5 115 3 Set DIP SW382 1 on the switch PCB as shown in the figure below Then press SW385 once ...

Page 227: ...n of Saddle Lead Edge Stopper Execute this adjustment in the case of displacement in saddle fording position or replacing the finisher controller PCB 1 Output paper from the saddle assembly and measure displacement amount C for folding position C 15 Pull out the saddle assembly and then remove the PCB cover 1 6 screws 2 1 2 2 F 5 118 F 5 119 16 Free the harness 1 from the Harness Guide 2 12 Connec...

Page 228: ...s Replacement Adjusting Position of Saddle Lead Edge Stopper 17 Free the 2 harnesses 2 Connectors 1 3 Wire Saddles 2 3 Edge Saddles 3 2 3 1 2 2 3 3 F 5 121 18 Remove the Saddle Stitcher Controller PCB and the Harness Guide 1 2 Screws 2 x2 1 2 19 Loosen the 2 fixing screws 1 of the lead edge stopper fixture by approx quarter turn 1 1 F 5 122 F 5 123 ...

Page 229: ...ensity Adjusting the Alignment Position of the Upper Neat Alignment Plate Adjusting the Alignment Position of the Lower Neat Alignment Plate Adjusting the Height of Corrugation Roller for Stack Delivery Adjusting Alignment Plate Position Adjusting Staple Position 1 stapling at the rear Adjusting Staple Position 1 stapling at the front Adjusting Staple Position 2 stapling positions Adjusting Delive...

Page 230: ...oller PCB Buffer operation is disabled once selecting this mode regardless of stacking method non staple stack staple stack Following describes the setup procedure of this mode Preparations 1 Turn ON the power of the finisher 2 Turn ON the power of the host machine to be on to be on standby 3 Open the front cover and put the door switch tool into the door switch 4 Remove the switch cover NOTE Refe...

Page 231: ...this adjustment enables the finisher to increase feeding speed at the timing that the paper s trail edge reaches the delivery roller As a result the trail edge of paper does not stay around the delivery outlet and the tray stackability will improve Preparations 1 Turn ON the power of the finisher 2 Turn ON the power of the host machine to be on to be on standby 3 Open the front cover and put the d...

Page 232: ...stment Adjustment at Time of Parts Replacement Adjustment in the Case of Failure in Stacking Performance of Tray upper curl Procedure 3 Pressing push switch SW384 1 once displays 1 on the LED 2 SW382 SW381 SW383 ENTER SW384 SW385 DSP381 1 2 4 Press switch SW385 1 again to complete this adjustment SW382 SW381 SW383 ENTER SW384 SW385 DSP381 1 F 5 129 F 5 130 ...

Page 233: ...ack and this can make the delivered paper fall from the tray Executing this adjustment enables to reduce feeding speed of the finisher at the timing that the paper s trail edge reaches the delivery roller This operation can prevent fall of the delivered paper from the tray because of reduced impact from kicking of delivered paper Preparations 1 Turn ON the power of the finisher 2 Turn ON the power...

Page 234: ...tment Adjustment at Time of Parts Replacement Adjustment in the Case of Failure in Stacking Performance of Tray lower curl Procedure 3 Pressing push switch SW384 1 twice displays 2 on the LED 2 SW382 SW381 SW383 ENTER SW384 SW385 DSP381 1 2 4 Press switch SW385 1 again to complete this adjustment SW382 SW381 SW383 ENTER SW384 SW385 DSP381 1 F 5 134 F 5 135 ...

Page 235: ...ow or replacing the finisher controller PCB NOTE Executing this adjustment makes the finisher to reduce feeding speed of the paper This operation improves abovementioned failure in stacking performance of the tray because of reduced curl level with thin paper Preparations 1 Turn ON the power of the finisher 2 Turn ON the power of the host machine to be on to be on standby 3 Open the front cover an...

Page 236: ...stment Adjustment at Time of Parts Replacement Adjustment in the Case of Failure in Stacking Performance of Tray run on of paper when using thin paper Procedure 3 Pressing push switch SW384 1 once displays 1 on the LED 2 SW382 SW381 SW383 ENTER SW384 SW385 DSP381 1 2 4 Press switch SW385 1 again to complete this adjustment SW382 SW381 SW383 ENTER SW384 SW385 DSP381 1 F 5 139 F 5 140 ...

Page 237: ...ype At normal operation When stacking limit is canceled Plain paper Half Less than 64 gsm 1 000 sheets Up to 147 mm in height 80 gsm or less 4 000 sheets Up to 490 mm in height Over 80 gsm 3 000 sheets Up to 147 mm in height Stitching 200 sets or 3 000 sheets 200 sets Extra large Up to 147 mm in height Up to 216 mm in height Coated paper Half 80 gsm or less 4 000 sheets Up to 490 mm in height Over...

Page 238: ... in the Case of Canceling Limit for Tray Stack Procedure 2 Press switch SW385 1 so that this adjustment is ready now SW382 SW381 SW383 ENTER SW384 SW385 DSP381 1 3 Pressing push switch SW384 1 once displays 1 on the LED 2 SW382 SW381 SW383 ENTER SW384 SW385 DSP381 1 2 F 5 143 F 5 144 4 Press switch SW385 1 again to complete this adjustment SW382 SW381 SW383 ENTER SW384 SW385 DSP381 1 F 5 145 ...

Page 239: ...staple positions saddle delivery are displaced at the rear side and the front side Adjusting method is as follows 1 Open the front cover 2 Remove the saddle inner cover upper 1 1 knob 2 2 screws 3 2 3 3 1 F 5 146 3 Remove the saddle inner cover lower 1 4 screws 2 1 knob 3 1 3 2 2 4 Turn ON the power of the finisher 5 Turn ON the power of the host machine to be on to be on standby 6 Open the front ...

Page 240: ...DR 1 Be sure to push in the paper until it touches the positioning plate 1 2 10 Set DIP SW382 1 on the switch PCB as shown in the figure below SW382 SW381 SW383 ENTER SW384 SW385 DSP381 1 F 5 149 F 5 150 11 Press switch SW385 1 once so that stapling saddle delivery is ready now SW382 SW381 SW383 ENTER SW384 SW385 DSP381 1 12 Press push switch SW384 1 several times to execute stapling SW382 SW381 S...

Page 241: ... of the saddle stapler by going through the following procedure A B 1 2 1 2 F 5 153 F 5 154 15 Loosen the 2 screws 1 that secure the saddle stapler 1 2 16 Adjust tilt of the saddle stapler according to the displacement amount of stapling position If the stapling position at the rear is displaced downward as shown in step 14 in the case of displacement amount A Remedy Move the stapler 1 in the dire...

Page 242: ... Adjusting Position of Tray A B When replacing the Tray A B Unit p 5 67 Adjusting Position of Feed Belt When displacement occurs with delivered stack p 5 68 Adjusting Staple Position 1 stapling at the rear When staple position rear 1 point stapling is displaced p 5 70 Adjusting Staple Position 1 stapling at the front When staple position rear 1 point stapling is displaced p 5 73 Adjusting Staple P...

Page 243: ...When staple position is displaced p 5 115 Adjusting Side Registration of Saddle When jam occurs frequently at the Saddle Stack Guide p 5 117 Setting of Pressless Mode When paper wrinkle occurs p 5 120 Adjusting Delivery Angle When paper is curled p 5 121 Setting of Tray Speed When abnormal noise is heard at the time of lifting lowering a tray after replacement of the Tray Motor p 5 123 Changing Lo...

Page 244: ...B when replacing or installing removing the tray 1 While keeping the tray horizontal put the tray into the rails left and right Be sure to have same distance at distance A length from the tip 3 of the rail to the tray shaft 4 between the front side 1 and the rear side 2 of the tray when installing the tray CAUTION When lowering the tray be sure to do so while pulling the block 5 To stop the loweri...

Page 245: ...as shown in the figure below SW382 SW381 SW383 ENTER SW384 SW385 DSP381 1 F 5 157 2 Press switch SW385 1 to start position adjustment of the feed belt SW382 SW381 SW383 ENTER SW384 SW385 DSP381 1 3 Pressing switch SW383 1 or SW384 2 determines adjustment level By pressing SW383 once the LED 3 indicates 1 and the distance between the belt 4 and the sheet interval 5 is reduced to increase feeding fo...

Page 246: ...dure SW382 SW381 SW383 ENTER SW384 SW385 DSP381 1 2 3 4 5 4 Press switch SW385 1 to complete adjustment of the feed belt 0 indication on the LED means normal completion of the adjustment SW382 SW381 SW383 ENTER SW384 SW385 DSP381 2 1 5 If the LED indication is anything other than 0 meaning the adjustment failure execute the adjustment again F 5 159 F 5 160 ...

Page 247: ... the power of the finisher 2 Turn ON the power of the host machine to be on to be on standby 3 Open the front cover and put the door switch tool into the door switch 4 Remove the switch cover NOTE Refer to Preparations 5 6 for details of step 1 to 4 Procedure 1 Set DIP SW382 1 on the switch PCB as shown in the figure below In the case of A configuration size SW382 SW381 SW383 ENTER SW384 SW385 DSP...

Page 248: ...e rear shifts to the rear In the same way by pressing SW384 once the LED 3 indicates 1 and the stapling position at the rear shifts to the front Adjustment range 20 to 20 shifting amount per unit 0 5mm SW382 SW381 SW383 ENTER SW384 SW385 DSP381 1 2 3 4 Press switch SW385 1 to move the stapler to the rear SW382 SW381 SW383 ENTER SW384 SW385 DSP381 1 F 5 164 F 5 165 5 Place A4 paper 1 on the interme...

Page 249: ...e Position 1 stapling at the rear Procedure 6 Check that the stapling position is within the specified range 1 of 5 2mm using this result If the stapling position is out of the specification go through the procedure again from step 2 1 CAUTION If the LED indicates anything other than 0 meaning the adjustment failure execute the adjustment again F 5 167 ...

Page 250: ...ON the power of the finisher 2 Turn ON the power of the host machine to be on to be on standby 3 Open the front cover and put the door switch tool into the door switch 4 Remove the switch cover NOTE Refer to Preparations 5 6 for details of step 1 to 4 Procedure 1 Set DIP SW382 1 on the switch PCB as shown in the figure below In the case of A configuration size SW382 SW381 SW383 ENTER SW384 SW385 D...

Page 251: ...ont shifts to the rear In the same way by pressing SW384 once the LED 3 indicates 1 and the stapling position at the front shifts to the front Adjustment range 20 to 20 shifting amount per unit 0 5mm SW382 SW381 SW383 ENTER SW384 SW385 DSP381 1 2 3 4 Press push switch SW385 1 to move the stapler to the front SW382 SW381 SW383 ENTER SW384 SW385 DSP381 1 F 5 171 F 5 172 5 Place A4 paper 1 on the int...

Page 252: ...e Position 1 stapling at the front Procedure 6 Check that the stapling position is within the specified range 1 of 5 2mm using this result If the stapling position is out of the specification go through the procedure again from step 2 1 CAUTION If the LED indicates anything other than 0 meaning the adjustment failure execute the adjustment again F 5 174 ...

Page 253: ...N the power of the finisher 2 Turn ON the power of the host machine to be on to be on standby 3 Open the front cover and put the door switch tool into the door switch 4 Remove the switch cover NOTE Refer to Preparations 5 6 for details of step 1 to 4 Procedure 1 Set DIP SW382 1 on the switch PCB as shown in the figure below In the case of A configuration size SW382 SW381 SW383 ENTER SW384 SW385 DS...

Page 254: ...SW382 SW381 SW383 ENTER SW384 SW385 DSP381 1 2 3 4 Press switch SW385 1 to move the stapler to the 2 stapling position SW382 SW381 SW383 ENTER SW384 SW385 DSP381 1 F 5 178 F 5 179 5 Place A4 paper 1 on the intermediate process tray Be sure to push in the paper to the rear side of the process tray 1 6 Check that the stapling position is within the specified range 1 81 7 4mm for A configuration 72 7...

Page 255: ...er of the finisher 2 Turn ON the power of the host machine to be on to be on standby 3 Open the front cover and put the door switch tool into the door switch 4 Remove the switch cover NOTE Refer to Preparations 5 6 for details of step 1 to 4 Procedure 1 Set DIP SW382 1 on the switch PCB as shown in the figure below SW382 SW381 SW383 ENTER SW384 SW385 DSP381 1 F 5 182 2 Pressing switch SW385 1 acti...

Page 256: ...ed value execute the work as follows 1 A B 2 3 B A 1 2 3 1 1st sheet 2 2nd sheet 3 3rd sheet F 5 184 F 5 185 6 If A displacement amount between the 1st sheet and the 2nd sheet or B displacement amount between the 1nd sheet and the 3rd sheet is out of the specified value execute the following work Take out the paper and close the upper cover Press push switch SW385 1 once to get into the adjustment...

Page 257: ... 1nd sheet and the 3rd sheet Pressing push switch SW383 2 reduces the displacement amount while pressing SW384 3 increases the displacement amount Correction amount is displayed on the LED 4 Adjustment range 48 to 48 correcting amount per 2units 0 4mm Adjustment level amount per 2 units Press SW385 again to confirm correction amount for A and B SW382 SW381 SW383 ENTER SW384 SW385 DSP381 2 3 4 1 CA...

Page 258: ... machine to be on to be on standby 3 Open the front cover and put the door switch tool into the door switch 4 Remove the switch cover NOTE Refer to Preparations 5 6 for details of step 1 to 4 Procedure 1 Set DIP SW382 1 on the switch PCB as shown in the figure below SW382 SW381 SW383 ENTER SW384 SW385 DSP381 1 F 5 188 2 Pressing push switch SW385 1 activates the LED 2 with 0 blinking The Adjustmen...

Page 259: ...re to measure the value with the paper stack turned over as shown in the figure below 3 2 1 A B A B 3 2 1 1 1st sheet 2 2nd sheet 3 3rd sheet F 5 190 F 5 191 6 If A displacement amount between the 1st sheet and the 2nd sheet or B displacement amount between the 1st sheet and the 3rd sheet is out of the specified value execute the following work Take out the paper and close the upper cover Press pu...

Page 260: ...ement amount between the 1nd sheet and the 3rd sheet Pressing push switch SW383 2 reduces the displacement amount while pressing SW384 3 increases the displacement amount Correction amount is displayed on the LED 4 Adjustment range 48 to 48 correction amount by 8 units 1 6mm Adjustment level amount per 8 units Press SW385 again to confirm correction amount for A and B SW382 SW381 SW383 ENTER SW384...

Page 261: ...t is adjusted to the saddle stitch position Even if the saddle stitch position is not at the center adjust the fold placement to the saddle stitch position It will not cause any problem because the fold placement and the saddle stitch position are adjusted to shift to the center of the paper in the following Saddle stitch adjustment Preparations 1 Turn ON the power of the finisher 2 Turn ON the po...

Page 262: ...ER SW384 SW385 DSP381 1 3 2 5 Press push switch SW385 once to complete the adjustment mode F 5 195 F 5 196 Saddle stitch adjustment NOTE In saddle stitch adjustment the saddle stitch position and the fold placement are shifted at the same time By adjusting the saddle stitch position the fold placement is also shifted to the center at the same time Preparation 1 Turn ON the power of the finisher 2 ...

Page 263: ...uide 3 2 3 1 3 Follow the feed guide to set the paper A4R or LTRR 1 Be sure to push in the paper until it touches the positioning plate 1 2 F 5 198 F 5 199 4 Press push switch SW384 1 once to execute stapling Note that if the push switch is pressed without the paper on the saddle unit the machine goes to the position adjustment mode mentioned in step 7 SW382 SW381 SW383 ENTER SW384 SW385 DSP381 1 ...

Page 264: ...ute the following work SW382 SW381 SW383 ENTER SW384 SW385 DSP381 1 7 Work with the 2 push switches SW383 384 according to displacement amount for the specified value Pressing SW383 1 moves the staple position upward while pressing SW384 2 moves the staple position downward Adjustment range 10 to 10 correction amount per unit 0 125mm After the adjustment value is specified go through the following...

Page 265: ...on to be on standby 3 Open the front cover and put the door switch tool into the door switch 4 Remove the switch cover NOTE Refer to Preparations 5 6 for details of step 1 to 4 Procedure 1 Set DIP SW382 1 on the switch PCB as shown in the figure below In the case of A configuration 2 In the case of L configuration 3 Then press SW385 so that the adjustment is ready now SW382 SW381 SW383 ENTER SW384...

Page 266: ...ed range A B is 0 5mm or less press push switch SW385 1 once to complete the adjustment mode It the measured value is out of the specified value execute the following work SW382 SW381 SW383 ENTER SW384 SW385 DSP381 1 7 Work with the 2 push switches SW383 384 according to displacement amount for the specified value Pressing SW383 1 moves the staple position upward while pressing SW384 2 moves the s...

Page 267: ... complete if the measured value is within the specification C 0 5mm or less otherwise execute the following work 1 2 C Procedure 1 Open the front cover and put the door switch tool into the door switch 2 Remove the switch cover NOTE Refer to Preparations 5 6 for details of step 1 to 2 F 5 211 3 Set DIP SW382 1 on the switch PCB as shown in the figure below Then press SW385 once so that the adjustm...

Page 268: ...dge Stopper Execute this adjustment in the case of displacement in saddle fording position or replacing the finisher controller PCB 1 Output paper from the saddle assembly and measure displacement amount C for folding position C 1 Pull out the saddle assembly and then remove the PCB cover 1 6 screws 2 1 2 2 F 5 214 F 5 215 2 Free the harness 1 from the Harness Guide 2 12 Connectors 3 1 2 3 3 3 3 3...

Page 269: ...usting Position of Saddle Lead Edge Stopper 3 Free the 2 harnesses 2 Connectors 1 3 Wire Saddles 2 3 Edge Saddles 3 2 3 1 2 2 3 3 F 5 217 4 Remove the Saddle Stitcher Controller PCB and the Harness Guide 1 2 Screws 2 x2 1 2 5 Loosen the 2 fixing screws 1 of the lead edge stopper fixture by approx quarter turn 1 1 F 5 218 F 5 219 ...

Page 270: ...e stopper fixture according to the displacement amount C for folding position that was measured in step 1 Procedure Turn the cross hole screw 1 to adjust the position of the lead edge stopper fixture 2 upward downward 0 5mm change per turn 1 2 7 After the adjustment is completed tighten the fixing screw of the lead edge stopper 8 Output the paper from the saddle assembly and check the result F 5 2...

Page 271: ...put the door switch tool into the door switch 4 Remove the switch cover NOTE Refer to Preparations 5 6 for details of step 1 to 4 Procedure 1 Set DIP SW382 1 on the switch PCB as shown in the figure below In the case of A configuration 2 In the case of L configuration 3 Then press SW385 so that the adjustment is ready now SW382 SW381 SW383 ENTER SW384 SW385 DSP381 1 3 2 F 5 221 2 Hold the lever 1 ...

Page 272: ...3 384 so that there will be no gap D between the saddle guide plate 1 and the paper edge 2 Adjustment method is as follows Pressing SW383 3 moves the guide plate in A direction while pressing SW384 2 moves the guide plate in B direction Adjustment range 10 to 10 correction amount per unit 0 2mm SW382 SW381 SW383 ENTER SW384 SW385 DSP381 D D 3 4 2 1 A B 6 Press switch SW385 once to complete the adj...

Page 273: ...eration is disabled once selecting this mode regardless of stacking method non staple stack staple stack Following describes the setup procedure of this mode Preparations 1 Turn ON the power of the finisher 2 Turn ON the power of the host machine to be on to be on standby 3 Open the front cover and put the door switch tool into the door switch 4 Remove the switch cover NOTE Refer to Preparations 5...

Page 274: ...e assist stopper 3 When the measurement value A or A is out of the standard value within 0 0 5 mm in A direction perform the following steps to make the value within the range A A 1 1 2 2 3 1 2 2 3 F 5 226 29 Remove the 2 screws 2 and remove the Assist Stopper 1 x2 1 2 310 Loosen the screw 1 of the assist stopper to adjust the displacement amount of the stopper 2 to be within the specified value 3...

Page 275: ...of alignment fault in stapling Preparations 1 Turn ON the power of the finisher 2 Turn ON the power of the host machine to be on to be on standby 3 Open the front cover and put the door switch tool into the door switch 4 Remove the switch cover NOTE Refer to Preparations 5 6 for details of step 1 to 4 F 5 229 Procedure 1 Set DIP SW382 1 on the switch PCB as shown in the figure below SW382 SW381 SW...

Page 276: ...the staple inlet guide position 4 is moved down In the same way by pressing SW384 once the LED 3 indicates 1 and the staple inlet guide position 5 is moved up Adjustment range 4 to 4 0 5mm change per unit NOTE In the case of failure as referred to above perform adjustment in negative direction to clear the problem SW382 SW381 SW383 ENTER SW384 SW385 DSP381 1 2 3 4 5 F 5 232 F 5 233 4 Press switch ...

Page 277: ...n ON the power of the finisher 2 Turn ON the power of the host machine to be on to be on standby 3 Open the front cover and put the door switch tool into the door switch 4 Remove the switch cover NOTE Refer to Preparations 5 6 for details of step 1 to 4 F 5 235 Procedure 1 Set DIP SW382 1 on the switch PCB as shown in the figure below SW382 SW381 SW383 ENTER SW384 SW385 DSP381 1 2 Press SW385 1 so...

Page 278: ...SW384 once the LED 3 indicates 1 and the paddle position 5 is moved up In the case of using thin paper perform adjustment in the direction to increase height of the paddle position direction Adjustment range 12 to 2 0 1mm change per unit NOTE In the case of failure as referred to above make the adjustment in negative direction to clear the problem SW382 SW381 SW383 ENTER SW384 SW385 DSP381 1 2 3 5...

Page 279: ...ables the finisher to increase feeding speed at the timing that the paper s trail edge reaches the delivery roller As a result the trail edge of paper does not stay around the delivery outlet and the tray stackability will improve Preparations 1 Turn ON the power of the finisher 2 Turn ON the power of the host machine to be on to be on standby 3 Open the front cover and put the door switch tool in...

Page 280: ...ustment Auxiliary Adjustment Adjustment in the Case of Failure in Stacking Performance of Tray upper curl Procedure 3 Pressing push switch SW384 1 once displays 1 on the LED 2 SW382 SW381 SW383 ENTER SW384 SW385 DSP381 1 2 4 Press switch SW385 1 again to complete this adjustment SW382 SW381 SW383 ENTER SW384 SW385 DSP381 1 F 5 244 F 5 245 ...

Page 281: ...ake the delivered paper fall from the tray Executing this adjustment enables to reduce feeding speed of the finisher at the timing that the paper s trail edge reaches the delivery roller This operation can prevent fall of the delivered paper from the tray because of reduced impact from kicking of delivered paper Preparations 1 Turn ON the power of the finisher 2 Turn ON the power of the host machi...

Page 282: ...stment Auxiliary Adjustment Adjustment in the Case of Failure in Stacking Performance of Tray lower curl Procedure 3 Pressing push switch SW384 1 twice displays 2 on the LED 2 SW382 SW381 SW383 ENTER SW384 SW385 DSP381 1 2 4 Press switch SW385 1 again to complete this adjustment SW382 SW381 SW383 ENTER SW384 SW385 DSP381 1 F 5 249 F 5 250 ...

Page 283: ...e finisher controller PCB NOTE Executing this adjustment makes the finisher to reduce feeding speed of the paper This operation improves abovementioned failure in stacking performance of the tray because of reduced curl level with thin paper Preparations 1 Turn ON the power of the finisher 2 Turn ON the power of the host machine to be on to be on standby 3 Open the front cover and put the door swi...

Page 284: ...ustment Auxiliary Adjustment Adjustment in the Case of Failure in Stacking Performance of Tray run on of paper when using thin paper Procedure 3 Pressing push switch SW384 1 once displays 1 on the LED 2 SW382 SW381 SW383 ENTER SW384 SW385 DSP381 1 2 4 Press switch SW385 1 again to complete this adjustment SW382 SW381 SW383 ENTER SW384 SW385 DSP381 1 F 5 254 F 5 255 ...

Page 285: ...ation When stacking limit is canceled Plain paper Half Less than 64 gsm 1 000 sheets Up to 147 mm in height 80 gsm or less 4 000 sheets Up to 490 mm in height Over 80 gsm 3 000 sheets Up to 147 mm in height Stitching 200 sets or 3 000 sheets 200 sets Extra large Up to 147 mm in height Up to 216 mm in height Coated paper Half 80 gsm or less 4 000 sheets Up to 490 mm in height Over 80 gsm 3 000 shee...

Page 286: ...nceling Limit for Tray Stack Procedure 2 Press switch SW385 1 so that this adjustment is ready now SW382 SW381 SW383 ENTER SW384 SW385 DSP381 1 3 Pressing push switch SW384 1 once displays 1 on the LED 2 SW382 SW381 SW383 ENTER SW384 SW385 DSP381 1 2 F 5 258 F 5 259 4 Press switch SW385 1 again to complete this adjustment SW382 SW381 SW383 ENTER SW384 SW385 DSP381 1 F 5 260 ...

Page 287: ...addle delivery are displaced at the rear side and the front side Adjusting method is as follows 1 Open the front cover 2 Remove the saddle inner cover upper 1 1 knob 2 2 screws 3 2 3 3 1 F 5 261 3 Remove the saddle inner cover lower 1 4 screws 2 1 knob 3 1 3 2 2 4 Turn ON the power of the finisher 5 Turn ON the power of the host machine to be on to be on standby 6 Open the front cover and put the ...

Page 288: ...sh in the paper until it touches the positioning plate 1 2 10 Set DIP SW382 1 on the switch PCB as shown in the figure below SW382 SW381 SW383 ENTER SW384 SW385 DSP381 1 F 5 264 F 5 265 11 Press switch SW385 1 once so that stapling saddle delivery is ready now SW382 SW381 SW383 ENTER SW384 SW385 DSP381 1 12 Press push switch SW384 1 several times to execute stapling SW382 SW381 SW383 ENTER SW384 S...

Page 289: ...pler by going through the following procedure A B 1 2 1 2 F 5 268 F 5 269 15 Loosen the 2 screws 1 that secure the saddle stapler 1 2 16 Adjust tilt of the saddle stapler according to the displacement amount of stapling position If the stapling position at the rear is displaced downward as shown in step 14 in the case of displacement amount A Remedy Move the stapler 1 in the direction of the arrow...

Page 290: ...ment between the disengagement roller 1 and the paper so that this operation improves feeding performance inside the saddle assembly M102 1 Preparations 1 Turn ON the power of the finisher 2 Turn ON the power of the host machine to be on to be on standby 3 Open the front cover and put the door switch tool into the door switch 4 Remove the switch cover NOTE Refer to Preparations 5 6 for details of ...

Page 291: ...sengagement roller is moved in A direction In the same way by pressing SW384 once the LED 3 indicates 1 and the pressure applied to the disengagement roller 1 is increased the disengagement roller is moved in B direction Adjustment range 8 to 8 0 3mm change per unit SW382 SW381 SW383 ENTER SW384 SW385 DSP381 1 2 3 F 5 274 M102 1 A B Reference As the plus adjustment value is specified the feed perf...

Page 292: ...this adjustment there will be no abovementioned failure because this adjustment can prevent insufficient feeding that is caused by slip of the disengagement roller 1 M101 1 Preparations 1 Turn ON the power of the finisher 2 Turn ON the power of the host machine to be on to be on standby 3 Open the front cover and put the door switch tool into the door switch 4 Remove the switch cover NOTE Refer to...

Page 293: ...edure 3 Pressing switch SW383 1 or SW384 2 determines adjustment level By pressing SW384 once the LED 3 indicates 1 and feeding distance of the paper is increased as shown in the figure below direction Adjustment range 0 to 59 2mm change per unit SW382 SW381 SW383 ENTER SW384 SW385 DSP381 1 2 4 Press switch SW385 1 again to complete this adjustment SW382 SW381 SW383 ENTER SW384 SW385 DSP381 1 F 5 ...

Page 294: ...e of this guide due to displacement of the saddle stack guide Preparations 1 Turn ON the power of the finisher 2 Turn ON the power of the host machine to be on to be on standby 3 Open the front cover and put the door switch tool into the door switch 4 Remove the switch cover NOTE Refer to Preparations 5 6 for details of step 1 to 4 Procedure 1 Set DIP SW382 1 on the switch PCB as shown in the figu...

Page 295: ...le stack guide 3 1 Open the front cover 1 3 2 Push the 3 claws 1 and remove the 3 knobs 2 2 1 CAUTION When the One way Clutch 1 inside the knob is removed be sure to install it in the direction where the arrow marking of the One way Clutch is visible 1 F 5 285 F 5 284 3 3 Lift the upper cover 1 in the arrow direction to remove the inner cover upper 2 4 screws 3 2 3 1 3 4 Remove the saddle inner co...

Page 296: ...t the displacement amount is 1 2 The displacement amount in positive value means that the saddle stack guide is displaced to the rear 1 increment changes by 0 5mm in service mode In this case the correction amount is 2 Slide the shift unit to the rear in service mode as shown below so that the feeding paper will not be caught in the hole of the stack guide F 5 288 5 Pressing switch SW383 1 or SW38...

Page 297: ...ut the door switch tool into the door switch 4 Remove the switch cover NOTE Refer to Preparations 5 6 for details of step 1 to 4 Procedure 1 Set DIP SW382 1 on the switch PCB as shown in the figure below SW382 SW381 SW383 ENTER SW384 SW385 DSP381 1 F 5 291 2 Press switch SW385 1 so that this adjustment is ready now SW382 SW381 SW383 ENTER SW384 SW385 DSP381 1 3 Press push switch SW384 1 to execute...

Page 298: ...d pushes a paper already delivered to a tray toward the feed direction depending on the delivery angle In the case of upper curl F 5 294 F 5 295 F 5 296 When trailing edge leaning occurred Trailing edge leaning A stacking failure which occurs when trailing edge of paper to be delivered is caught at the delivery outlet depending on the delivery angle Preparations 1 Turn ON the power of the finisher...

Page 299: ... this adjustment is ready now SW382 SW381 SW383 ENTER SW384 SW385 DSP381 1 F 5 298 F 5 299 3 Press push switch SW384 1 to execute setting SW382 SW381 SW383 ENTER SW384 SW385 DSP381 1 Setting range 19 to 3 In the case of lower curl execute adjustment in negative direction delivery angle is increased In the case of upper curl execute adjustment in positive direction delivery angle is reduced feeding...

Page 300: ...g of Tray Speed Execute this adjustment in the case of abnormal sound when the tray is moved up down Adjusting method is as follows Preparations 1 Turn ON the power of the finisher 2 Turn ON the power of the host machine to be on to be on standby 3 Open the front cover and put the door switch tool into the door switch 4 Remove the switch cover NOTE Refer to Preparations 5 6 for details of step 1 t...

Page 301: ...W385 1 so that this adjustment is ready now SW382 SW381 SW383 ENTER SW384 SW385 DSP381 1 3 Press push switch SW384 1 to execute setting 0 lifting speed gets slower 1 lifting speed gets faster SW382 SW381 SW383 ENTER SW384 SW385 DSP381 1 F 5 305 F 5 306 4 Press switch SW385 1 again to complete this adjustment SW382 SW381 SW383 ENTER SW384 SW385 DSP381 1 F 5 307 ...

Page 302: ...arations 1 Turn ON the power of the finisher 2 Turn ON the power of the host machine to be on to be on standby 3 Open the front cover and put the door switch tool into the door switch 4 Remove the switch cover NOTE Refer to Preparations 5 6 for details of step 1 to 4 Procedure 1 Set DIP SW382 1 on the switch PCB as shown in the figure below SW382 SW381 SW383 ENTER SW384 SW385 DSP381 1 F 5 308 2 Pr...

Page 303: ...ignment is performed on the process tray 4 Forcible 1 sheet alignment delivery mode alignment is performed on the process tray with 1 sheet 5 Forcible 1 sheet through delivery mode plain paper only SW382 SW381 SW383 ENTER SW384 SW385 DSP381 1 NOTE Under normal circumstances coated paper is delivered after having been aligned on the process tray while normal paper is passed through to be delivered ...

Page 304: ... and put the door switch tool into the door switch 4 Remove the switch cover NOTE Refer to Preparations 5 6 for details of step 1 to 4 Procedure 1 Set DIP SW382 1 on the switch PCB as shown in the figure below SW382 SW381 SW383 ENTER SW384 SW385 DSP381 1 F 5 312 2 Press switch SW385 1 so that this adjustment is ready now SW382 SW381 SW383 ENTER SW384 SW385 DSP381 1 3 Press push switch SW384 1 to e...

Page 305: ... the punch unit 2 Remove the 2 punch stopper units 1 2 screws 2 1 2 3 Remove the spring 1 1pc each 1 F 5 315 F 5 316 4 Loosen the screw 1 to adjust position of the stopper plate 3 by following the scale of the engraved line 2 Engraved line A adjustment position at the time of shipment B not used C scale for adjustment 1 increment shifts the punch position toward the paper edge by 1mm A B C 1 3 2 C...

Page 306: ...ailure on the Upper Tray Stacking failure on the Lower Tray Preparations 1 Turn ON the power of the finisher 2 Turn ON the power of the host machine to be on to be on standby 3 Open the front cover and put the door switch tool into the door switch 4 Remove the switch cover NOTE Refer to Preparations 5 6 for details of step 1 to 4 F 5 319 F 5 320 Procedure 1 Set DIP SW382 1 on the Switch PCB as sho...

Page 307: ...Neat Paddle is displayed on the LED 3 Determine the mode by pressing SW385 4 SW382 SW381 SW383 ENTER SW384 SW385 DSP381 1 2 3 4 4 By pressing the Push Switch SW385 1 the adjustment value is displayed on LED 3 Then press SW383 4 or SW384 2 to change the adjustment value in increments of 1 pulse Adjustment range 7 to 7 shift amount per unit 1 mm SW382 SW381 SW383 ENTER SW384 SW385 DSP381 4 2 1 3 F 5...

Page 308: ...eat Paddle position adjustment Procedure Adjustment Auxiliary Adjustment Upper Lower Neat Paddle position adjustment Procedure 5 Press the Push Switch SW385 1 to complete the adjustment of Neat Paddle position SW382 SW381 SW383 ENTER SW384 SW385 DSP381 1 F 5 327 ...

Page 309: ...hen it passes through the Delivery Outlet until it is aligned with the Alignment Plate 1 F 5 328 F 5 329 NOTE By executing this adjustment hole position accuracy improves On the other hand to prioritize productivity over skew correction skew correction amount can be adjusted within the range The operation procedure is shown below Preparations 1 Turn ON the power of the finisher 2 Turn ON the power...

Page 310: ...he adjustment SW382 SW381 SW383 ENTER SW384 SW385 DSP381 1 3 By pressing the Push Switch SW383 1 or SW384 2 skew correction amount can be selected Every time SW384 2 is pressed 1 2 mm 2 4 mm 3 6 mm is displayed on the LED 3 SW382 SW381 SW383 ENTER SW384 SW385 DSP381 1 2 3 F 5 331 F 5 332 4 Press the Push Switch SW385 1 to determine skew correction amount and complete the adjustment SW382 SW381 SW3...

Page 311: ...justment alignment operation at the Process Tray Assembly is omitted therefore productivity is prioritized over stacking accuracy The operation procedure is shown below Preparations 1 Turn ON the power of the finisher 2 Turn ON the power of the host machine to be on to be on standby 3 Open the front cover and put the door switch tool into the door switch 4 Remove the switch cover NOTE Refer to Pre...

Page 312: ...1 to determine the mode and complete the adjustment SW382 SW381 SW383 ENTER SW384 SW385 DSP381 1 F 5 336 F 5 337 Side registration position fine adjustment mode shift amount change Execute the adjustment in the following cases When paper corner is bent or caught with custom size paper NOTE By executing this adjustment shift amount at the time of delivery is adjusted so that paper corner bend or pa...

Page 313: ...5 338 F 5 339 3 By pressing the Push Switch SW383 1 or SW384 2 mode can be selected Every time SW384 2 is pressed A Mode setting B Adjustment value setting is displayed on LED 3 Display A on LED 3 select the mode setting mode 4 Press the Push Switch SW385 1 to determine the mode SW382 SW381 SW383 ENTER SW384 SW385 DSP381 1 2 4 3 5 By pressing the Push Switch SW383 1 or SW384 2 mode setting can be ...

Page 314: ...o determine the mode SW382 SW381 SW383 ENTER SW384 SW385 DSP381 1 2 4 3 9 Press SW383 1 or SW384 2 and adjust the shift amount in increments of 1 pulse Adjustment range 0 to 40 shift amount per unit 0 1 mm Example When the adjustment value is 40 the shift amount is decreased by 4 mm 15 to 11 mm Default 15 mm SW382 SW381 SW383 ENTER SW384 SW385 DSP381 1 2 3 F 5 342 F 5 343 In the case of shifting t...

Page 315: ...6 6 Troubleshooting Troubleshooting Upgrading ...

Page 316: ...ooting Upgrading Upgrading Troubleshooting Upgrading Upgrading Upgrading Upgrading Perform upgrade of this machine by connecting a copy machine Refer to the service manual of imagePRESS C7000 Series for a detailed procedure ...

Page 317: ...the mode Close DIPSW SW382 Name details 1 2 3 4 5 6 7 8 On On M9 Front alignment motor After pressing ENTER to start the motor use to move 20 mm Press ENTER again to terminate the motor Home On On On M10 Rear alignment motor After pressing ENTER to start the motor use to move 20 mm Press ENTER again to terminate the motor Home On On M17 Feed belt move motor After pressing ENTER to start the motor ...

Page 318: ...motor use Down Up to move 20 mm Press ENTER again to terminate the motor On On On FM5 Upper Delivery Fan After pressing ENTER to start the fan use to operate it in units of 5 8 5 10 255 V in the range of 0 to 29 V Press ENTER again to terminate the fan DIPSW SW382 Name details 1 2 3 4 5 6 7 8 On On FM6 Lower Delivery Fan After pressing ENTER to start the fan use to operate it in units of 5 8 5 10 ...

Page 319: ...e in units of 30 mm s in the range of 175 to 295 mm s or to switch the rotation direction Press ENTER to terminate the motor DIPSW SW382 Name details 1 2 3 4 5 6 7 8 On On On M105 Saddle paper push on plate motor After pressing ENTER to start the motor use to conduct push on operation Press ENTER again to terminate the motor NOTE Push on is not performed unless the Roller Guide is in HP On On On M...

Page 320: ...opration After pressing ENTER to start fold operation press or Then place paper on the Saddle Unit When pressing stack processing starts Press ENTER to terminate the operation the size is A3 T 6 1 Sensor DIPSW SW382 1 2 3 4 5 6 7 8 On On display Name Lit Blinking 1 PS1 Front door sensor Closed Open 2 PS2 Upper cover sensor Closed Open 3 PS3 Inlet sensor Paper present Paper absent 4 PS4 Shift unit ...

Page 321: ...ay Third Position Sensor Detected Not detected c PS53 Lower Tray Fourth Position Sensor Detected Not detected T 6 6 T 6 7 T 6 8 T 6 9 DIPSW SW382 1 2 3 4 5 6 7 8 On On On On display Name Lit Blinking 1 PS101 Saddle inlet sensor Paper present Paper absent 2 3 PS112 Saddle delivery sub tray paper sensor HP Other than HP 4 PS103 Saddle vertical path sensor Paper present Paper absent 5 6 PS105 Saddle ...

Page 322: ...or PCB OK NG 5 UN24 Horizontal registration sensor PCB OK NG 6 UN24 Horizontal registration sensor PCB OK NG 7 UN15 UN16 UN16 Light receiving section Middle Paper surface detection OK NG 8 UN15 UN16 UN16 Light receiving section Upper Paper leaning detection OK NG 9 UN15 UN16 UN16 Light receiving section Lower Paper stop position detection OK NG A UN17 UN18 UN18 Light receiving section Middle Paper...

Page 323: ...ation Installation How to check this Installation Procedure Checking Before Installation Unpacking and Checking the Contents Installation Procedure Making Adjustments Operation Check Machine Relocation Work F 7 1 ...

Page 324: ...ckaged Item Symbols in the Illustration The frequently performed operations are described with symbols in this procedure Connector Disconnect Screw Tighten Remove Connect Secure Free Harness Push Insert Plug in Turn on Sound Check Check Visual Check Claw Remove Checking instruction F 7 2 F 7 3 Product Name Safety regulations require the product s name to be registered In some regions where this pr...

Page 325: ...bed in the figure below indicates minimum space needed for installation area Thus a space for installation work is desirable to be larger than what is described below 1 In the case of unpacking in the room the following space is needed to unpack 907mm 1021mm 1316mm 2776mm 1460mm F 7 4 2 The following space is needed in the case of using slope board Palette Slope Equipment 1021mm 914mm 2775mm 840mm...

Page 326: ...0 Power Cord USA only 1pc 21 Staple Cartridge 1pc 22 4 Saddle Staple Cartridge 1pc 1 The figure shows Booklet Finisher Q1 PRO 2 Use 7 Screws when connecting the Host Machine Use8 Screws whenConnecting the Profesional Puncher Integration Unit or the Paper Folding Unit or the Document Insertion Unit 3 Includeed with Staple Finisher Q1 PRO only 4 Included with Booklet Finisher Q1 PRO only 5 Used for ...

Page 327: ...ransformation of the Host Machine or even breakage Don t hold it by the transportation guide Transportation Guide F 7 7 3 Remove the packing material on the top of this equipment and bring down the plastic to the bottorn Packing Material Plastic Material 4 Lift up one side to remove the packaging material at the bottom move the plastic material to one side and slowly bring the equipment down Packi...

Page 328: ...erial 6 Move the equipment in the direction of the arrow A and take out the 2 slope stored at the center of the palette in the direction of the arow B Slope Plates A B F 7 10 F 7 11 7 Remove the 2 pin attached to the backside of the slope plates with tape Pins 8 Turn the slope plates over Fit the plalettes to the pin hples on the slope plates and insert yhe 2 pins Pins F 7 12 F 7 13 ...

Page 329: ...st Machine 2 Check that the display on the Control Panel and the Main Power Supply Lamp are turned off before disconnecting the outlet CAUTION Proper order to turn ON the power when pickup delivery accessories are connected Be sure to follow the correct order to turn ON the power otherwise it may cause an error because the host machine fails to recognize the accessories including the equipment Pow...

Page 330: ...Installation Procedure Before Installing the Finisher 1 Remove all the tapes and cardboards attached to the equipment 2 Open the Finisher Front Cover F 7 15 F 7 16 NOTE Step 3 and 4 are needed to be performed only for the Saddle Stitch Finisher 3 Pull out the Saddle Unit and remove the packing tapes Packing Tapes 4 Put the Saddle Unit back F 7 17 ...

Page 331: ...the Latch Plate Front The removed Screw will be used when connecting the upstream equipment Latch Plate Front 6 Remove the Rear Small Cover 1 Screw Rear Small Cover Screw F 7 18 F 7 19 7 Remove the screw on the Latch Plate Rear and bring the hinge down toward the front The removed Screw will be used when connecting the upstream equipment Latch Plate Rear Screw F 7 20 ...

Page 332: ...ly when options other than the Host machine are connected 8 Be sure to affix the Cover Spacer by beginning at the center of range A CAUTION Be careful not to make a gap for B F 7 21 Connecting with the Host Machine CAUTION Be sure the power of the Host Machine is turned OFF and the Power Plug is disconnected from the outlet 1 Remove the Left Rear Cover 1 Claw 1 Protrusion Claw Protrusion F 7 22 ...

Page 333: ... Face Plates Face Plate Face Plate F 7 23 3 On the Host machine s upper left side cover install the Latch Plate Front Latch Plate Rear 4 Screws RS tightening M4x10 CAUTION Confirm the engraved mark on each Latch Plate when attaching Latch Plate Front F Latch Plate Rear R x4 Latch Plate Rear Latch Plate Front Screw Latch Plate Rear Latch Plate Front Screw F 7 24 ...

Page 334: ... Delivery Guide Up to the Host Machine 3 Hooks 1 Screw P tightening M4x12 6 Install the Delivery Guide Down to the Host Machine 2 Hooks 1 Screw P tightening M4x12 Delivery Guide Up Delivery Guide Down Hook Hook Hook x2 Hook F 7 25 F 7 26 7 Lock the Latch Plate Front Then fit the positioning pin on the machine side to the Finisher s positioning hole Connect the Finisher with the machine Front side ...

Page 335: ...hine 8 Fix the front Latch Plate Front 1 Screw Use the Screw removed in the step 5 of Before Installing Finisher Latch Plate Front Screw 9 Shut the Front Cover of the Finisher F 7 29 10 Lift up the rear Latch Base Rear to fit the pin and fix it 1 Screw Use the Screw removed in the step 7 of Before Installing Finisher Latch Plate Rear Screw F 7 30 ...

Page 336: ...st Machine CAUTION Height difference should be within 2 mm Execute Height Adjustment if the difference is 2 mm or more Finisher Host Machine 12 Attach the Rear Small Cover 1 Screw 13 Remove the Screw on the rear lower of the Host Machine Removed Screw will be used in step 14 F 7 31 14 Install the Shunt Cable 1 Screw The Screw remove in step 13 1 Screw RS tighting M4x10 x2 Shunt Cable F 7 32 F 7 33...

Page 337: ...ional Puncher Integration Unit CAUTION Be sure the power of the Host Machine is turned OFF and the Power Plug is disconnected from the outlet 1 Attach the Latch Plate Front and Latch Plate Rear to the left side of the Integration unit upper left stay 4 Screws RS tighting M4x10 CAUTION Confirm the engraved mark on each Latch Plate when attaching Latch Plate Front F Latch Plate Rear R Latch Plate Fr...

Page 338: ...ning Screw 2 Screws RS tighting M4x10 x2 Positioning Pin 3 Lock the Latch Plate Front to the cover Then fit the positioning pin of the Integration Unit to the positioning plate hole on the Finisher to connect Front side Latch Plate Front F 7 35 F 7 36 Rear side Hole Positioning Pin 4 Fix the Latch Base Front 1 Screw Use the Screw removed in the step 5 of Before Installing Finisher Screw Latch Plat...

Page 339: ... direction of the arrow and insert it to the pin to fix it 1 Screw Use the Screw removed in the step 7 of Before Installing Finisher Latch Plate Rear Screw 7 Check the height between Finisher and the Integration Unit CAUTION Height difference should be within 2 mm Execute Height Adjustment if the difference is 2 mm or more Finisher Integration Unit F 7 39 F 7 40 8 Install the Rear Small Cover 1 Sc...

Page 340: ... and the Power Plug is disconnected from the outlet 1 On the Paper Folding Unit s upper left side install the Latch Plate Front Latch Plate Rear 4 Screws RS tighting M4x10 CAUTION Confirm the engraved mark on each Latch Plate when attaching Latch Plate Front F Latch Plate Rear R Latch Plate Front Latch Plate Rear x4 F 7 42 2 Fit the positioning pin 2 Screws RS tightening M4x10 x2 Positoning Pin 3 ...

Page 341: ...oning pin of the Paper Folding Unit to the positioning plate hole on the Finisher to connect Front side Latch Plate Front Rear side Positioning Pin Hole F 7 45 F 7 46 CAUTION When connecting the inner side take caution not to get the cable pinched F 7 47 5 Secure the Latch Base Front 1 Screw Use the Screw removed in the step 5 Before Installing Finisher Screw Latch Plate Front 6 Close the Front Co...

Page 342: ...ed in the step 7 Before Installing the Finisher Latch Plate rear Screw 8 Fix the cable 2 Reuse Band 2 spots Edge Saddle x2 Reuse Band Edge Saddle F 7 49 F 7 50 9 Insert the connector to the Finisher Controller PCB and fix the cable 2 Wire Saddles x2 Connector Wire Saddles 10 Check the height between Finisher and the Paper Folding Unit CAUTION Height difference should be within 2 mm Execute Height ...

Page 343: ...M4x10 Shunt Cable x2 F 7 53 Connecting with the Document Insertion Unit CAUTION Be sure the power of the Host Machine is turned OFF and the Power Plug is disconnected from the outlet 1 On the Document Insertion Unit upper left side install the Latch Plate Front Latch Plate Rear 4 Screws RS tighting M4x10 CAUTION Confirm the engraved mark on each Latch Plate when attaching Latch Plate Front F Latch...

Page 344: ... RS tighting M4x10 x2 Positioning Pin 3 Lock the Latch Base Front to the cover Then fit the positioning pin of the Document Insertion Unit to the positioning plate hole on the Finisher to connect Front side Latch Plate Front F 7 55 F 7 56 Rear side Positioning Pin Hole 4 Secure the Latch Plate Front 1 Screw Use the Screw removed in the step 5 of Before Installing Finisher Screw Latch Plate Front F...

Page 345: ... arrow and insert it to the pin to fix it 1 Screw Use the Screw removed in the step 7 of Before Installing Finisher Latch Plate Rear Screw 7 Check the height between Finisher and the Document Insertion Unit CAUTION Height difference should be within 2 mm Execute Height Adjustment if the difference is 2 mm or more Finisher Insertion Unit F 7 59 F 7 60 8 Install the Rear Small Cover 1 Screw 9 Instal...

Page 346: ... NOTE Trailing edge connector is not used in the Integration Unit F 7 62 2 Connect the ARKNET Cable to the terminal at the back of the Host machine and then rotate the knob in the direction of the arrow to fix Knob ARCNET Cable Terminal CAUTION Be sure to turn the knob of the ARCNET Cable all the way to connect otherwise it can cause unstable electrical contact 3 Connect the terminal connector and...

Page 347: ...to secure CAUTION Be sure the power OFF of the Host Machine and the unpliged power plug before connecting the ARKNET Cable ARCNET Cable Terminal Knob 5 Install the Wire Saddle on the Rear Cover of the Finisher Wire Saddle F 7 65 F 7 66 6 Bundle the ARKNET Cable with the Wire Saddle If connected to Host Machine Wire Saddle ARCNET Cable If connected to Professional Puncher Integration Unit Wire Sadd...

Page 348: ...wer cable to the Finisher CAUTION Make sure that the power cord is fully connected to the outlet If the connection is not right an accident causing the smoke or fire may occur CAUTION Note for Europe Asia Oceania Regions Use the correct power cord to mach the location area of installation make sure not leave unused power cord at the site Power Cable 8 Connect the Power Plug of the Finisher to the ...

Page 349: ...e Mode Level 1 COPIER OPTION ACCPST D ACC1 to 8 NOTE In the case of directly connecting to the Host machine enter 1 and press OK 2 Exit from Service Mode 3 Turn OFF the Main Power Switch of the machine and Finisher 4 Turn ON the power of the Finisher then the Host Machine CAUTION Be sure to power cycle after specifying the connecting order otherwise the accessories will not be recognized ...

Page 350: ...ently in the Finisher Pickup Assembly Follow the steps below to adjust the hight if necessary Checking the height 1 Turn OFF the Main Power Switch of the machine and Finisher 2 Check the height of the Finisher and the Host Machine The height difference between the Right top of the Finisher and the Left top of the Host Machine should be within 2 mm Right top of the Finisher Left top of the Host Mac...

Page 351: ...sher Remove the Wire Saddle at the Rear Lower Cover of the Finisher and disconnect the ARCNET Cable Remove the Latch Plates the front and rear 2 Remove the Spanner from the Finisher Front Cover 1 Screw Spanner Screw F 7 74 3 In the case of the Saddle Finisher remove the Saddle Inner Cover lower 1 Screw 1 knob 3 Screws Saddle Inner Cover lower Knob ビス x4 4 Remove the 2 caster covers at the Left sid...

Page 352: ...of the bootom plate using a scale and cheeck that the height is within 86 3 0 3 mm If the height is not within the range execute step 7 anf lettter 86 3 0 3mm A F 7 77 F 7 78 7 Loosen the caster s fixing nut with the spanner in the direction of A A Spanner Fixing Nut CAUTION When loosening the caster fixing nut at the front side of the Saddle Finisher be sure to insert the spaner into the opening ...

Page 353: ...86 3 0 3 mm To increase the height rotate in the direction of A To lower the height rotate in the direction of B Height increment per rotation approx 1 75 mm A B Adjusting Bolt Spanner 9 Tighten the fixing nut in the direction of B B Fixing Nut 10 Adjust the other 3 casters as well by repeating the steps above 11 Reconnect the Finisher with the Host Mashine and check the height 12 Return the Rear ...

Page 354: ...hing the Labels etc Affixing the Labels 1 Open the Finisher Front Cover 2 Install the Guide Map Label inside the Finisher Front Cover 7 Claws Guide Map Label Claw Claw Claw F 7 83 F 7 84 3 Install the Staple Label inside the Front Cover 4 Claws Claw Claw Staple Label 4 Affix over the LED Lamp Label EUR only LED Lamp Label F 7 85 F 7 86 ...

Page 355: ...lation Attaching the Labels etc Affixing the Labels 5 Pull out the Saddle Unit 6 Affix the Saddle Return Attention Label according to the location over the existing ones Saddle Return Attention Label 7 Put the Saddle Unit back 8 Close the Front Cover of the Finisher F 7 87 F 7 88 ...

Page 356: ...Relocationg the Machine A NOTE on moving the machine Relocationg the Machine A NOTE on moving the machine Caution If the machine the moved in connected condition it will burden the part where it is connected and might cause damage or form changed Hence be sure to move it in dissemble condition ...

Page 357: ... Service Tools Solvents and Oils List of Signals General Circuit Diagram Appendix ...

Page 358: ...8 2 Appendix Service Tools Appendix Service Tools Service Tools The followings are the required tools to perform the service operation No Tool name Tool number Usage remarks 1 Door switch tool FY9 8006 Front door switch ON T 8 1 ...

Page 359: ...Name Description Composition Remarks Vic Clean Cleaning e g glass plastic rubber parts external covers Hydrocarbon fluorine family Alcohol Surface activating agent Water Do not bring near fire Procure locally Isopropyl alcohol may be substituted Lubricant Sliding units Silicone oil MOLYKOTE EM30 L T 8 2 ...

Page 360: ...l name BUFF M Clk buffer motor clock signal BUFF M CW buffer motor drive signal BUFF M IA buffer motor current switch signal 1 BUFF M IB buffer motor current switch signal 2 BUFF PASS SEN buffer path sensor detection signal BUFF SL ON buffer path switch solenoid signal BUNDLE M 8FG stack delivery motor rotation detection signal BUNDLE M CLK stack delivery motor clock signal BUNDLE M CW stack deliv...

Page 361: ...l registration detection unit home position detection signal SIDEREJI M A horizontal registration detection unit shift motor drive signal A SIDEREJI M A horizontal registration detection unit shift motor drive signal A SIDEREJI M B horizontal registration detection unit shift motor drive signal B SIDEREJI M B horizontal registration detection unit shift motor drive signal B SIDEREJI M IHA horizont...

Page 362: ...tion detection signal PRESS M CCW saddle pressing motor CCW rotation drive signal PRESS M CW saddle pressing motor CW rotation drive signal PRESS M PWM saddle pressing motor PWM signal PRESS POSITION SEN saddle pressing position detection signal ROLLERGUIDE HP SEN saddle roller guide home position detection signal ROLLERGUIDE M A saddle roller guide motor drive signal A ROLLERGUIDE M B saddle roll...

Page 363: ...2 J601D 2 1 J474 2 3 4 1 J411 8 1 2 3 4 5 6 7 9 10 J1201 J201 2 3 1 J473 3 2 1 3 2 1 2 3 4 5 1 J415 2 1 J414 2 3 4 5 1 J102 2 3 1 J655 8 1 2 3 4 5 6 7 J418 8 1 2 3 4 5 6 7 J274 2 3 1 J471 2 3 4 5 6 7 1 J1202 9 8 2 3 4 5 6 1 7 J103 2 1 J1011 2 1 J1012 MT1003 FT1013 FT1017 MT1005 FT1022 FT1023 FT1024 1 2 3 1 2 3 FT1020 FT1021 MT1004 FT1012 FT1007 FT1008 SOLD3 SOLD2 SOLD1 3 4 5 6 1 2 J412 J1003LH 1 2...

Page 364: ...J524L J539LH 1 2 3 J539L 1 2 3 J539D J526LH 1 2 3 4 5 J526L J525DH 1 2 3 4 5 J525D J520LH 1 2 3 4 5 J520L J522DH 12 11 10 9 8 2 3 4 5 6 1 7 J522D J518LH 1 2 3 J518L 11 10 9 8 2 3 4 5 6 1 7 J127 5 4 3 2 1 J526D 5 4 3 2 1 J520D 1 2 3 4 J516 J519LH 18 17 16 15 14 13 12 11 10 9 8 2 3 4 5 6 1 7 19 J128 1 2 3 J513 J640DH 1 2 3 4 J640L 3 2 1 1 2 1 2 3 4 J3101 1 2 3 J512 3 2 1 1 2 J506L 4 1 2 3 5 6 7 8 9 ...

Page 365: ...1 13 12 11 10 9 8 2 3 4 5 6 1 7 J142 J272 J125 J273 J126 1 2 J3000D 8 1 2 3 4 5 6 7 9 10 J286 1 2 J159 2 3 1 J538 J2596DH 2 1 J3000L 8 1 2 3 4 5 6 7 9 10 J281 3 4 5 6 1 2 J282 12 11 8 1 2 3 4 5 6 7 9 10 J284 13 12 11 8 1 2 3 4 5 6 7 9 10 J280 2 3 4 5 6 7 1 J285 1 2 3 J283 1 2 3 4 5 6 7 8 J279 3 2 1 3 2 1 J543DH 3 2 1 1 2 3 J287 3 2 1 J543D MT1020 MT1006 2 3 1 J537 J535DH 2 3 4 1 J535D 1 2 3 J543L ...

Page 366: ...16 15 14 13 12 11 10 9 8 2 3 4 5 6 1 7 19 J140 J623DH 1 2 3 4 5 6 7 8 9 10 11 12 13 14 15 16 17 18 19 20 21 22 23 24 25 J623D J615DH 1 2 3 J615D 18 17 16 15 14 13 12 11 10 9 8 2 3 4 5 6 1 7 19 J633D J633DH 1 2 3 J545L 3 2 1 J2599D J2598DH 1 2 3 4 J2598D 1 2 3 4 5 6 7 J2597L J2597DH 1 2 3 4 5 6 7 J2597D 1 2 3 4 5 6 7 J152 3 2 1 1 2 3 4 1 2 3 4 J2598L J651DH 1 2 3 4 J651D 1 2 3 4 J629D 1 2 3 4 5 J68...

Page 367: ...31 J139 12 11 8 1 2 3 4 5 6 7 9 10 J634F 3 4 5 6 1 2 J141 12 11 8 1 2 3 4 5 6 7 9 10 J634M 1 2 3 4 1 2 3 4 J612L 3 2 1 3 2 1 3 2 1 3 2 1 3 2 1 3 2 1 J606DH 1 2 3 J604 3 4 5 6 1 2 J632 6 5 4 3 2 1 15 14 13 12 11 10 9 8 2 3 4 5 6 1 7 J679D 15 14 13 12 11 10 9 8 2 3 4 5 6 1 7 J679L J679LH 2 3 4 5 6 1 J631M 1 2 3 4 5 6 J317 2 1 J316 6 5 4 3 2 1 3 4 5 6 1 2 J671 6 5 4 3 2 1 12 11 8 1 2 3 4 5 6 7 9 10 J...

Page 368: ... 3 J704 1 2 3 J705 1 2 3 J702 13 12 11 10 9 8 2 3 4 5 6 1 7 J292B 13 12 11 10 9 8 2 3 4 5 6 1 7 J292A 1 2 3 J2534 1 2 3 J2533 3 2 1 MT1014 MT1012 3 2 1 MT1015 MT1013 3 4 5 6 1 2 J291B 3 4 5 6 1 2 J291A 6 5 4 3 2 1 3 2 1 6 5 4 3 2 1 3 2 1 3 2 1 3 2 1 1 2 3 J2543 3 2 1 1 2 3 J2541 1 2 3 J2542 3 5 6 7 8 9 10 11 12 13 14 15 16 17 18 4 2 1 3 5 6 7 8 9 10 11 12 13 14 15 16 17 4 1 2 3 5 6 7 8 9 10 11 12 ...

Page 369: ... 3 4 5 6 1 7 J3001L 13 12 11 10 9 8 2 3 4 5 6 1 7 J3001D J3001DH 1 2 3 4 5 6 7 8 9 10 11 12 13 14 15 16 17 18 19 20 21 22 23 24 25 26 27 28 29 J2507D J2507DH 1 2 3 J2515 1 2 3 4 5 6 7 8 9 10 11 12 13 14 15 16 17 18 19 20 21 22 23 24 25 26 27 28 29 J2507L 1 2 3 4 J2511D J2511DH 1 2 3 J2514 1 2 3 J2513 J2510DH 1 2 3 4 J2510D J2509DH 1 2 3 4 J2509D J2508DH 2 3 1 J2517 13 12 11 10 9 8 2 3 4 5 6 1 7 J5...

Page 370: ...3 2 1 11 10 9 8 2 3 4 5 6 1 7 J1005D 1 2 3 4 J922D J922DH 1 2 3 J919 J1007D 8 16 1 2 3 4 J939L 2 17 1 2 3 4 J925L 1 2 3 4 J922L J920DH 1 2 J920D 1 2 3 J929 1 2 3 J928 1 2 3 4 J925D J925DH 1 2 J921D J921DH 1 2 3 J944 1 2 J921L 1 2 3 4 1 2 3 4 1 2 J920L 1 2 1 2 3 2 1 1 2 3 4 3 2 1 4 1 2 3 5 6 7 8 9 10 11 12 13 14 15 16 17 1 3 4 5 6 7 9 10 11 12 13 14 15 4 1 3 5 6 7 8 9 10 11 12 13 14 15 16 17 18 19 ...

Reviews: