


7
7
7-17
7-17
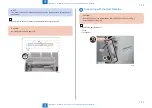
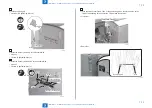
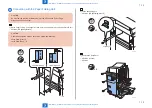
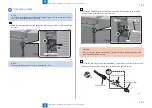
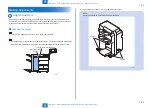
Installation > Installation Procedure > Connecting with the Professional Puncher Integration Unit
Installation > Installation Procedure > Connecting with the Professional Puncher Integration Unit
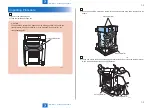
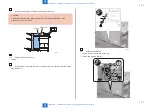
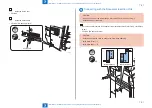
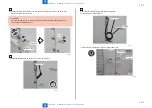
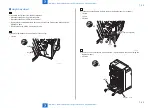
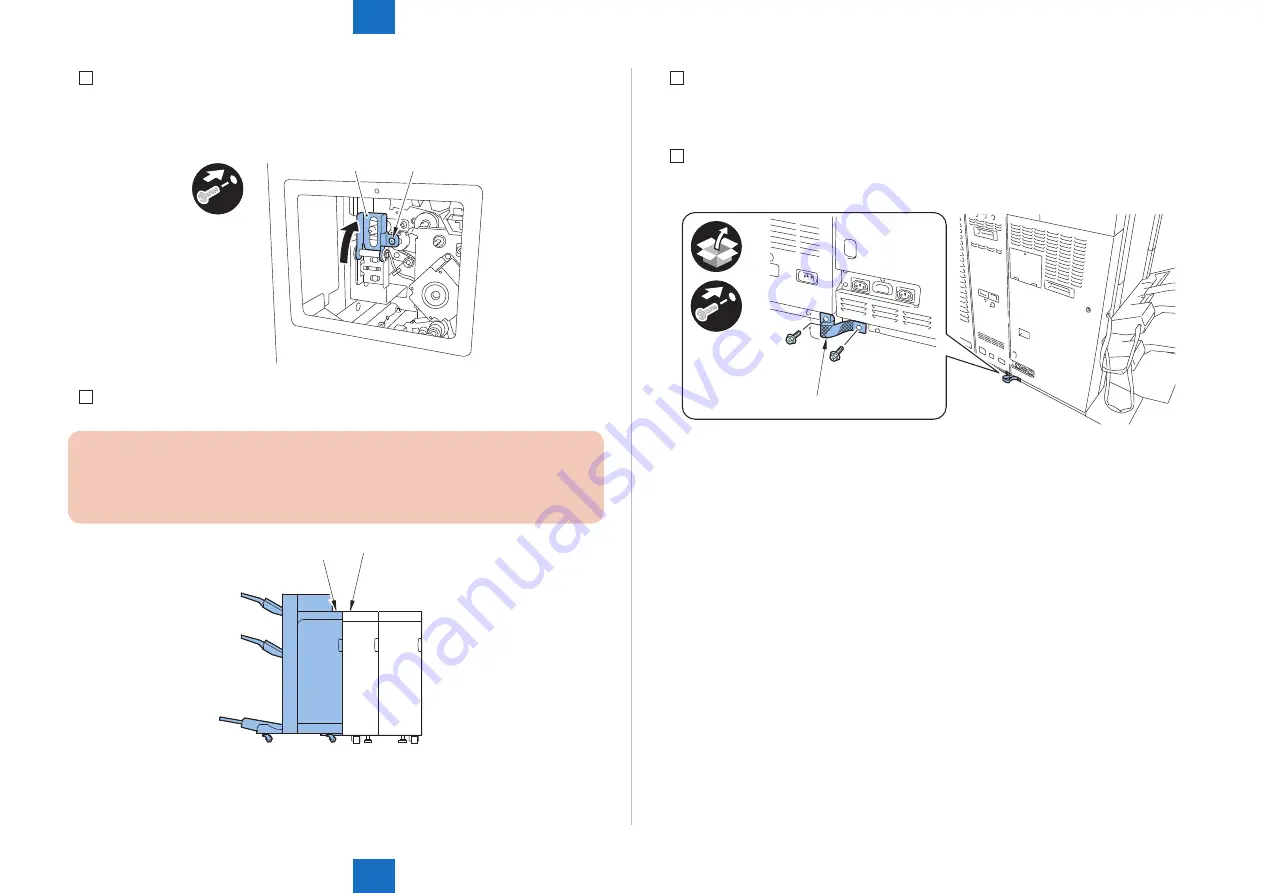
5) Close the Front Cover of the Finisher.
6) Move the Latch Plate (Rear) on the direction of the arrow and insert it to the pin to fix it.
• 1 Screw (Use the Screw removed in the step 7) of "Before Installing Finisher" )
Latch Plate(Rear) Screw
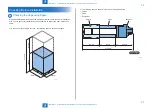
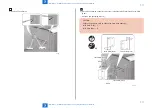
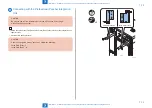
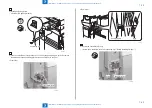
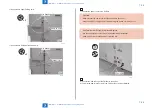
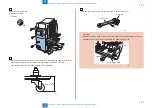
7) Check the height between Finisher and the Integration Unit.
CAUTION:
Height difference should be /-2 mm. Execute "Height Adjustment" if the
difference is +/-2 mm or more.
Finisher
Integration Unit
F-7-39
F-7-40
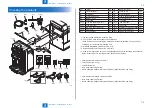
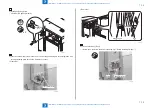
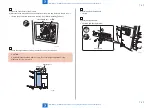
8) Install the Rear Small Cover.
• 1 Screw
9) Install the Shunt Cable.
• 2 Screws (RS tighting; M4x10)
Shunt Cable
x2
F-7-41
Summary of Contents for Booklet Finisher-D1
Page 12: ... Notes Before Servicing Points to Note at Cleaning Safety Precautions ...
Page 14: ...1 1 Product Outline Product Outline Product Specifications Names of Parts ...
Page 60: ...3 3 Periodic Servicing Periodic Servicing User Maintenance Maintenance and Inspection ...
Page 315: ...6 6 Troubleshooting Troubleshooting Upgrading ...
Page 357: ... Service Tools Solvents and Oils List of Signals General Circuit Diagram Appendix ...