


4
4
4-28
4-28
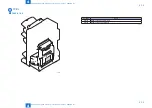
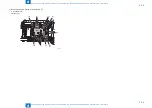
Parts Replacing and Cleaning > Stacking Assembly > Removing the Stack Wall (Upper) > Procedure
Parts Replacing and Cleaning > Stacking Assembly > Removing the Stack Wall (Upper) > Procedure
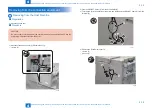
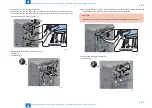
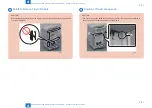
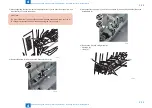
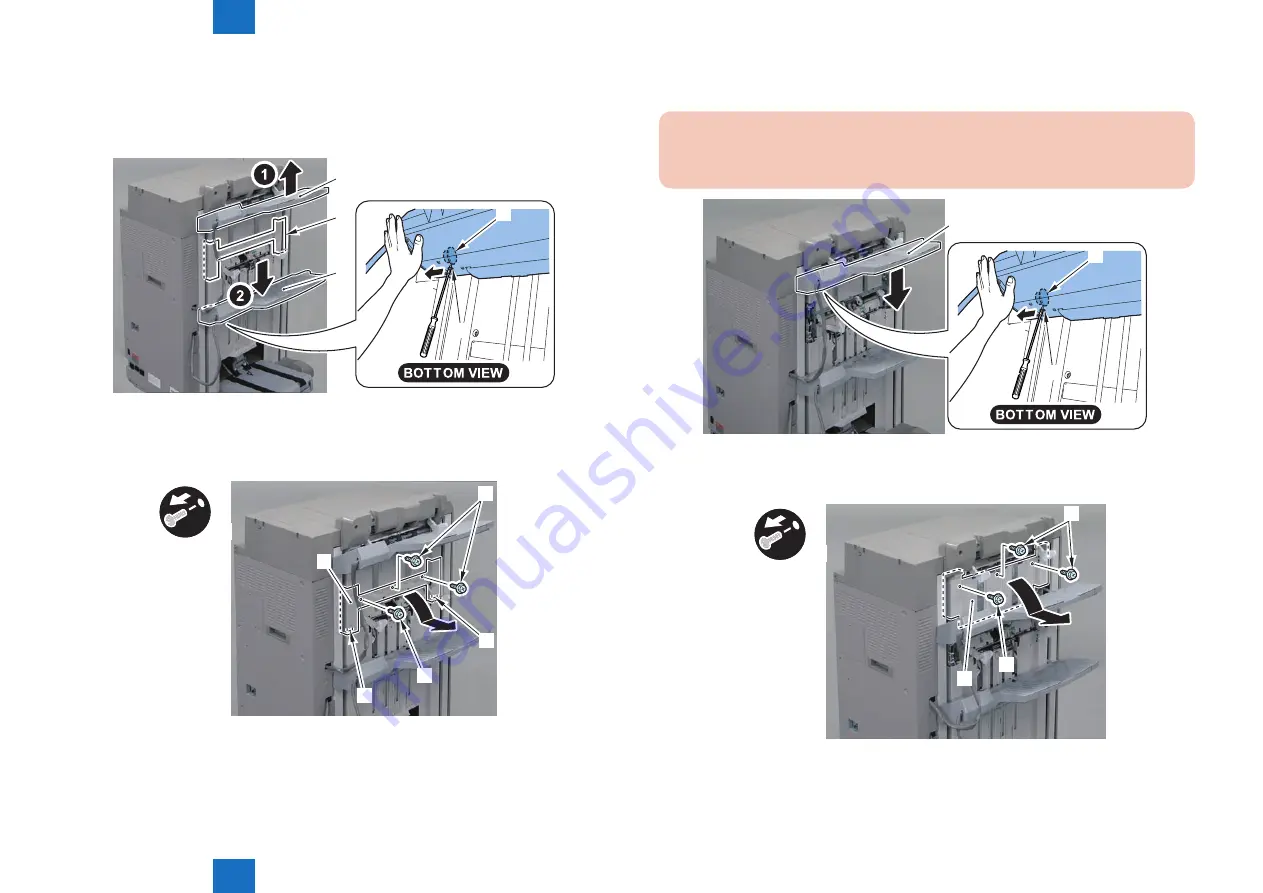
1) Lift the Tray A [1] to the upper limit position.
2) While supporting the Tray B [2], insert a screwdriver into the hole [A] to release the block [3]
in the direction of [B], and lower the Tray B [2] by approximately 10 cm from the lower edge
of the Neat Stack Unit (Lower) Cover [4].
[4]
[1]
[2]
[B]
[3]
[A]
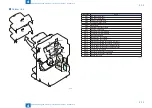
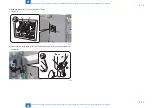
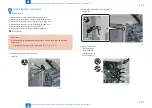
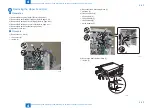
3) Remove the Neat Stack Unit (Lower) Cover [1].
• 3 Screws [2]
• 2 Protrusions [3]
[1]
[3]
[2]
[2]
[3]
x3
F-4-40
F-4-41
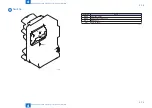
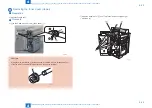
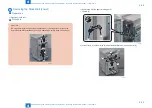
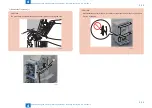
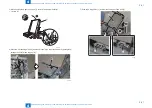
4) While supporting the Tray A [1], insert a screwdriver into the hole [A] to release the block [2]
in the direction of [B], and lower the Tray A [1] to the lower limit position.
CAUTION::
When lowering the Tray A [1], be careful not hit it with the Neat Stack Unit (Lower).
[1]
[B]
[2]
[A]
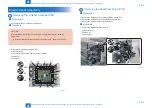
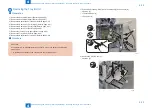
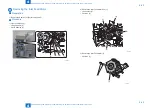
5) Remove the Stack Wall (Upper) [1].
• 3 Screws [2]
[2]
[2]
x3
[1]
F-4-42
F-4-43
Summary of Contents for Booklet Finisher-D1
Page 12: ... Notes Before Servicing Points to Note at Cleaning Safety Precautions ...
Page 14: ...1 1 Product Outline Product Outline Product Specifications Names of Parts ...
Page 60: ...3 3 Periodic Servicing Periodic Servicing User Maintenance Maintenance and Inspection ...
Page 315: ...6 6 Troubleshooting Troubleshooting Upgrading ...
Page 357: ... Service Tools Solvents and Oils List of Signals General Circuit Diagram Appendix ...