background image

5

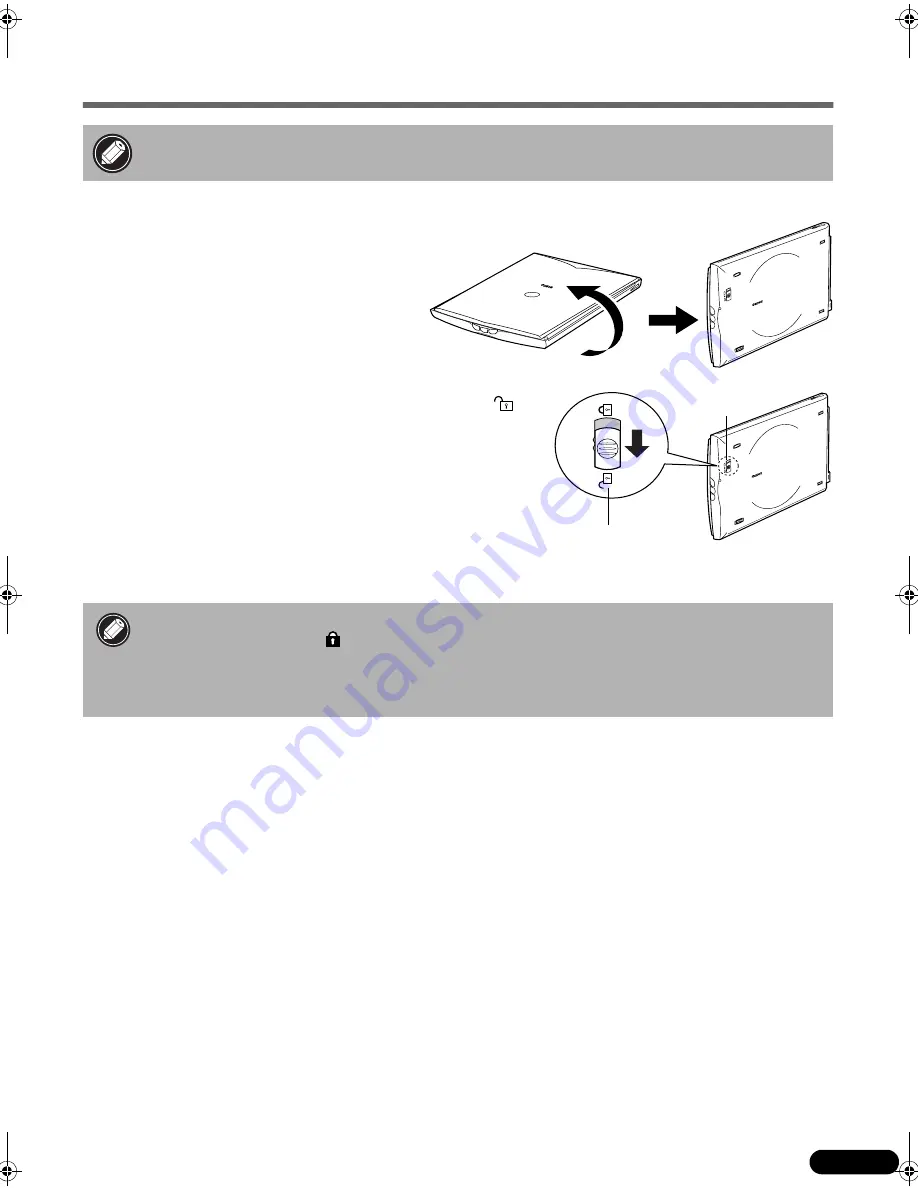
Unlock the Scanning Unit

1

11

1

Peel the caution seal on the front of the scanner.

2

22

2

Gently turn the scanner over.

3

33

3

Push the lock switch toward the unlock mark (

). 

4

44

4

Return the scanner to a horizontal position.

• Unlock the Scanning Unit before connecting the scanner to the computer. If it is left 

locked, a malfunction or other problem may occur.

• When transporting the scanner, always lock the scanning unit by pushing the lock switch 

toward the lock mark ( ).

• Carrying or transporting the scanner without locking the scanning unit may damage it. 

Be particularly careful to lock the scanning unit when transporting the scanner in a 
vehicle.

Unlock Mark

Lock Switch

00-QSG_E_MAIN_0301.fm  Page 5  Friday, May 10, 2002  6:29 PM

Summary of Contents for CanoScan LiDE 20

Page 1: ...the bundled software and how to solve problems when they occur You can install this manual onto the hard disk together with the software programs When you install it the Scanning Guide icon will appe...

Page 2: ...hotoBase 75 MB 5 MB Photo Album Program It allows you to create and edit image albums perform image searches and create slide shows ScanSoft OmniPage SE 65 MB 48 MB OCR Optical Character Recognition P...

Page 3: ...e programs and the Scanning Guide HTML format manual 5 5 5 5 The installation procedure will start Follow the on screen message prompts and click Yes or Next to continue the installation 6 6 6 6 When...

Page 4: ...on You will install six software programs and the Scanning Guide HTML format manual 5 5 5 5 The installation procedure will start Follow the on screen message prompts and click Yes Next or Install to...

Page 5: ...he Scanning Unit before connecting the scanner to the computer If it is left locked a malfunction or other problem may occur When transporting the scanner always lock the scanning unit by pushing the...

Page 6: ...canning Unit is unlocked P 5 Only use the USB interface cable provided with the scanner Use of other cables may lead to a malfunction The scanner does not have a power switch The power is activated as...

Page 7: ...otoStudio 5 PhotoStudio will start 3 3 3 3 Select this scanner a Click the File menu and select Select Source b Highlight the scanner name and click OK This step is required only for the first time Wi...

Page 8: ...Type of original You can select Photo Magazine Newspaper or Document Photo Color 300 dpi Magazine Color 150 dpi Newspaper Black and White 300 dpi Document Grayscale 300 dpi 6 6 6 6 Click Preview After...

Page 9: ...folder where you wish to store the image file enter a file name select a file type JPG format is recommended and click Save 10 10 10 10Click or close box in the PhotoStudio window to close it If the s...

Reviews: