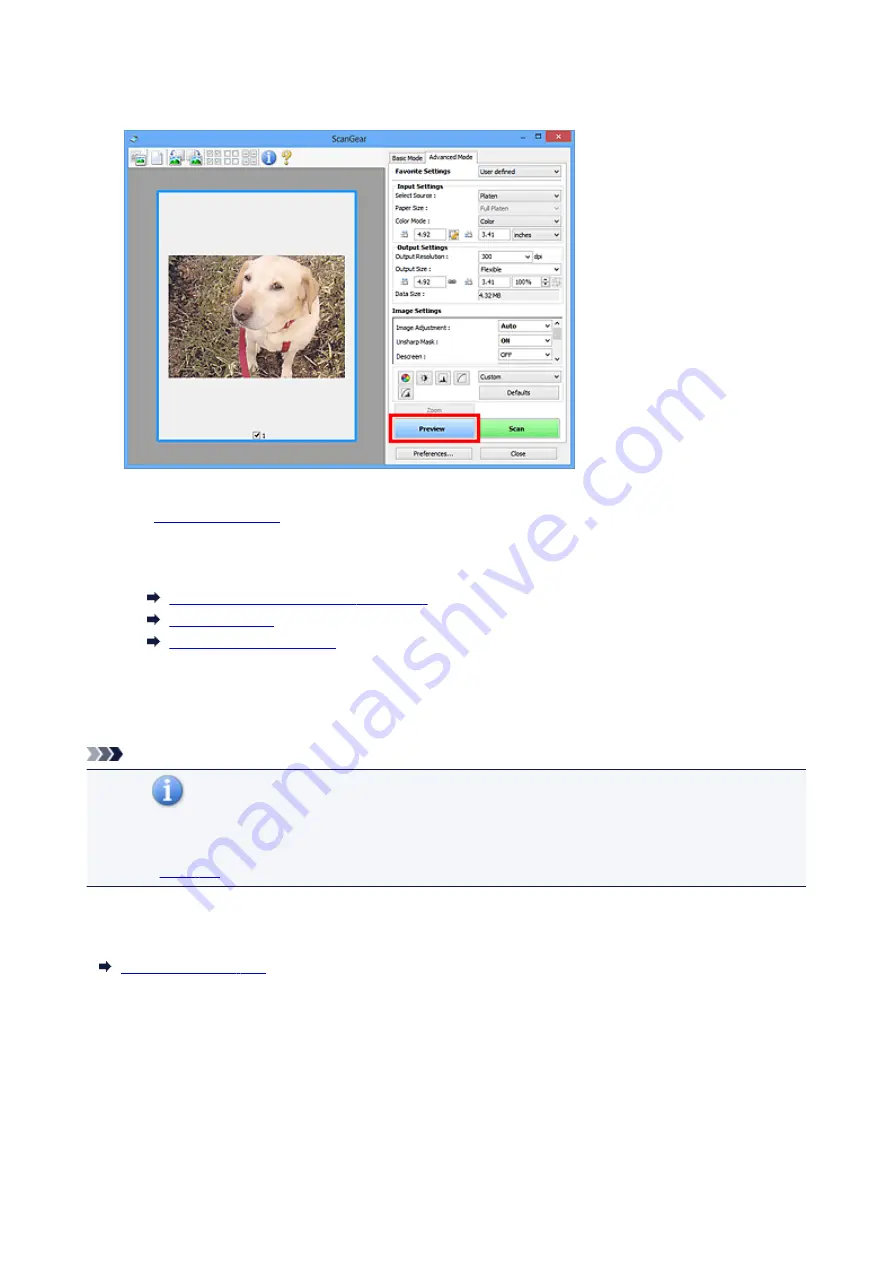
4. Click
Preview
.
Preview images appear in the Preview area.
5. Set
.
6. Adjust the cropping frame (scan area), correct image, and adjust colors as required.
Adjusting Cropping Frames (ScanGear)
7. Click
Scan
.
Scanning starts.
Note
• Click
(Information) to open a dialog box in which you can check the current scan settings
(document type, etc.).
• A response of ScanGear after scanning can be specified in
Status of ScanGear dialog after scanning
on the
of the
Preferences
dialog box.
Related Topic
132
Summary of Contents for CanoScan LiDE 220
Page 20: ...Safety Guide Safety Precautions Regulatory and Safety Information 20 ...
Page 27: ...Placing Items Place the Item on the Platen Items You Can Place How to Place Items 27 ...
Page 38: ...Scanning Scanning from a Computer Scanning Using the Scanner Buttons 38 ...
Page 97: ...Defaults You can restore the settings in the displayed screen to the default settings 97 ...
Page 106: ...Defaults You can restore the settings in the displayed screen to the default settings 106 ...
Page 141: ...141 ...
Page 214: ...6 Click Scan When scanning is completed the scanned image appears in the application 214 ...


