
CD-R Print Guide
Table of Contents
Preface
1
Introduction
1
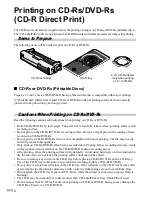
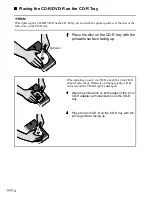
Printing on CD-Rs/DVD-Rs (CD-R Direct Print)
2
Items to Prepare
2
Cautions When Printing on CD-Rs/DVD-Rs
2
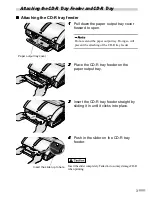
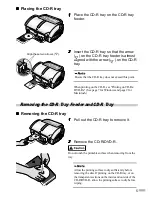
Attaching the CD-R Tray Feeder and CD-R Tray
3
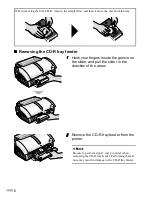
Removing the CD-R Tray Feeder and CD-R Tray
5
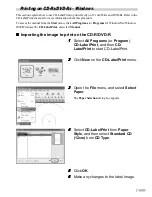
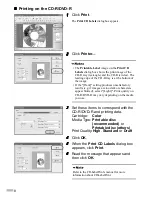
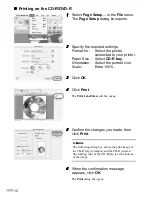
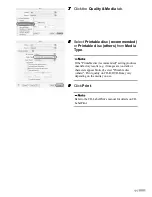
Printing on CD-Rs/DVD-Rs - Windows
7
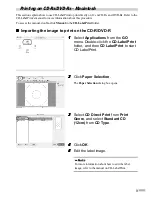
Printing on CD-Rs/DVD-Rs - Macintosh
9
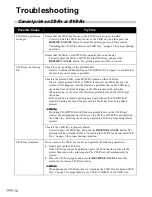
Troubleshooting
12
Cannot print on CD-Rs or DVD-Rs
12
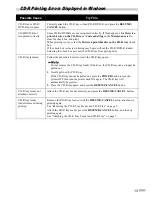
CD-R Printing Errors Displayed in Windows
13
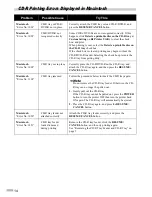
CD-R Printing Errors Displayed in Macintosh
14
Printing Area
15
QA7-2877-V01
XXXXXXXX
©CANON INC.2003
PRINTED IN THAILAND
QA7-2877-V01
BE
Summary of Contents for Cd printer
Page 2: ......
Page 18: ...16 ...
Page 19: ......
Page 20: ...QA7 2877 V01 XXXXXXXX CANON INC 2003 PRINTED IN THAILAND ...


