CHAPTER 2 STANDARDS AND ADJUSTMENTS
2-10
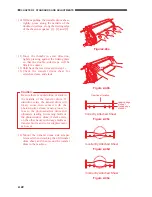
6) Dry wipe the window of the pre-
cleaning sensor, and mount it.
7) Turn on the power switch, and keep
the copier in standby state.
8) Select FUNCTION>INSTALL>
STIR-4 in service mode, and execute
it.
9) Select FUNCTION>SENS-ADJ>
CLN-OFST, and execute it.
10) Record the settings of ADJUST>
SENS-ADJ>CLN-TH, CLN-TMP
on the service label attached behind
the front right cover.
11) Select FUNCTION>INSTALL>
INIT-D in service mode, and execute
it.
c.
If the surface of the photosensitive drum
is soiled, wipe it with a flannel cloth
coated with toner. (Do NOT use paper,
lint-free or otherwise.)
Do not use solvent when cleaning it. Do
not touch its surface.
3
Adjusting the Position of the
Photosensitive Drum Fixing
Shaft
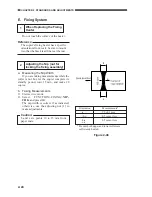
Slide the photosensitive drum frame unit
about 5 cm out of the copier, and then slide it
back in. If the movement is not smooth, adjust
the position of the photosensitive drum fixing
shaft using the drum shaft positioning tool
(FY9-3045).
This adjustment, however, need not be
made if the images are free of color
displacement, blurring, and faults at intervals
and, moreover, the discrepancy between the
photosensitive drum fixing shaft and the hole
of the photosensitive drum flange is about 1
mm.
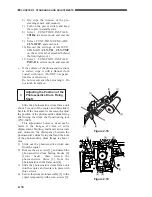
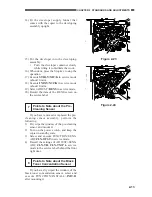
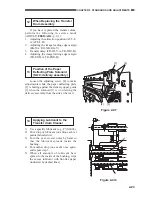
1) Slide out the photosensitive drum unit
from the copier.
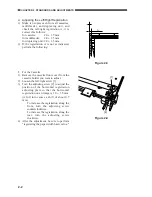
2) Remove the six screws [1], and detach the
photosensitive drum butting blocks [2]
(front, back); then, detach the
photosensitive drum [3] from the
photosensitive drum frame unit [4].
3) Slide the photosensitive drum frame unit
into the copier, and secure it in place with
three screws.
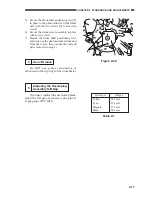
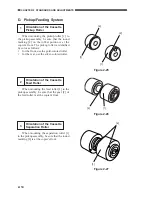
4) Secure the drum motor assembly [5] to the
copier temporarily with seven screws [6].
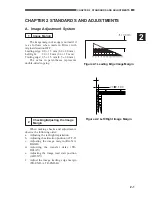
Figure 2-18
Figure 2-19
[2]
[1]
[3]
[4]
[1]
[2]
[6]
[6]
[6]
[6]
[5]
[6]


