CHAPTER 10 PAPER DECK
10-32
COPYRIGHT © 1999 CANON INC. CANON CLC1120/1130/1150 REV.0 MAR. 1999 PRINTED IN JAPAN (IMPRIME AU JAPON)
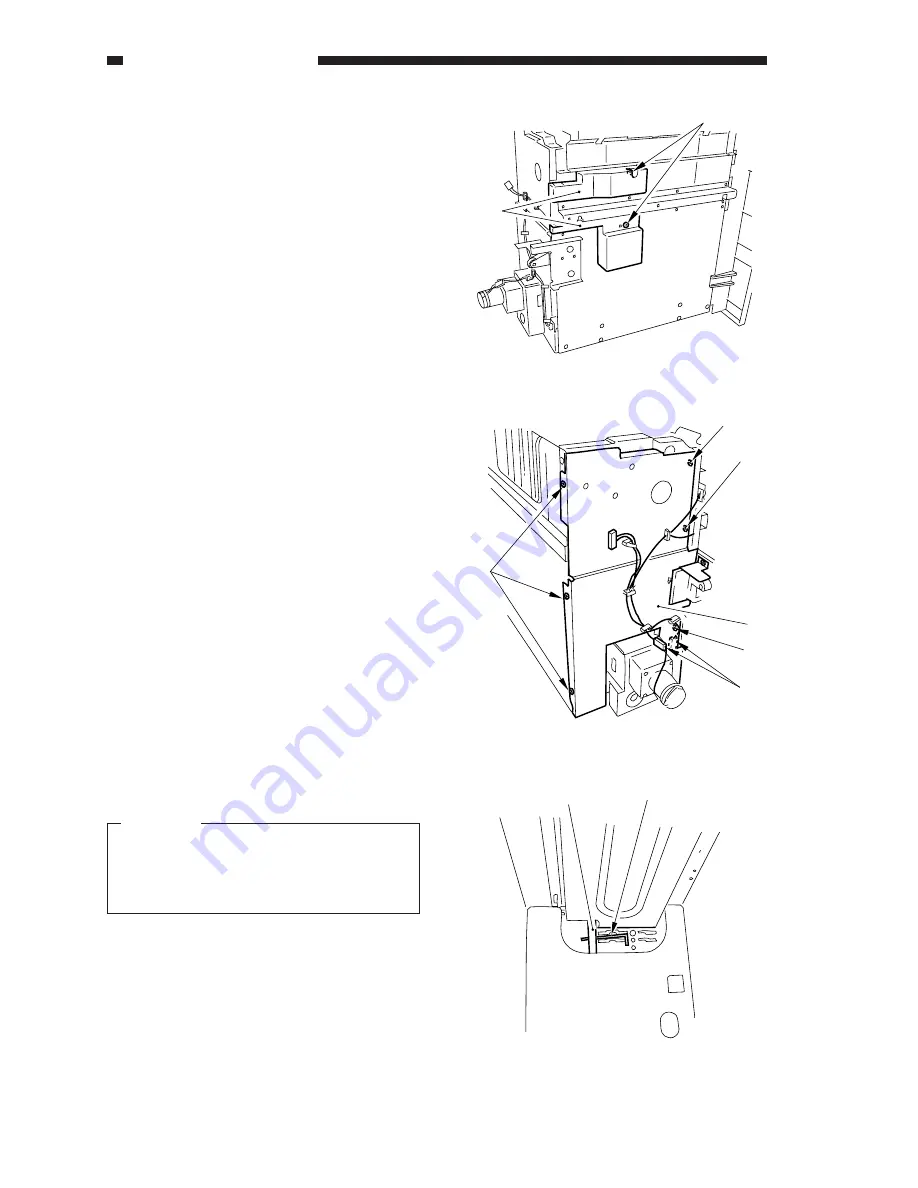
4) Remove the compartment.
5) Remove the screw [3], and detach the
sensor covers upper and lower [4].
Figure 10-332
6) Disconnect the four connectors [5], and
remove the six screws [6]; then, detach the
metal plate [7].
Figure 10-333
7) Insert a hex wrench [9] or the like into the
hole of the lifter drive shaft [8] to hold it in
position (against turning).
Caution:
If the lifter drive shaft is not held in
position as instructed, the lifer cable will
become slack when the lifter motor unit
is removed. Take full care.
Figure 10-334
[3]
[4]
[6]
[6]
[7]
[6]
[5]
[6]
[8]
[9]
(front)
Summary of Contents for CLC 1120
Page 6: ......
Page 20: ......
Page 22: ......
Page 48: ......
Page 94: ......
Page 96: ......
Page 114: ......
Page 134: ......
Page 136: ......
Page 152: ......
Page 242: ......
Page 346: ......
Page 374: ......
Page 376: ......
Page 412: ......
Page 452: ......
Page 454: ......
Page 517: ......
Page 881: ......
Page 893: ......
Page 895: ......
Page 899: ......


