COPYRIGHT © 1999 CANON INC. CANON CLC1120/1130/1150 REV.0 MAR. 1999 PRINTED IN JAPAN (IMPRIME AU JAPON)
11-41
CHAPTER 11 INSTALLATION
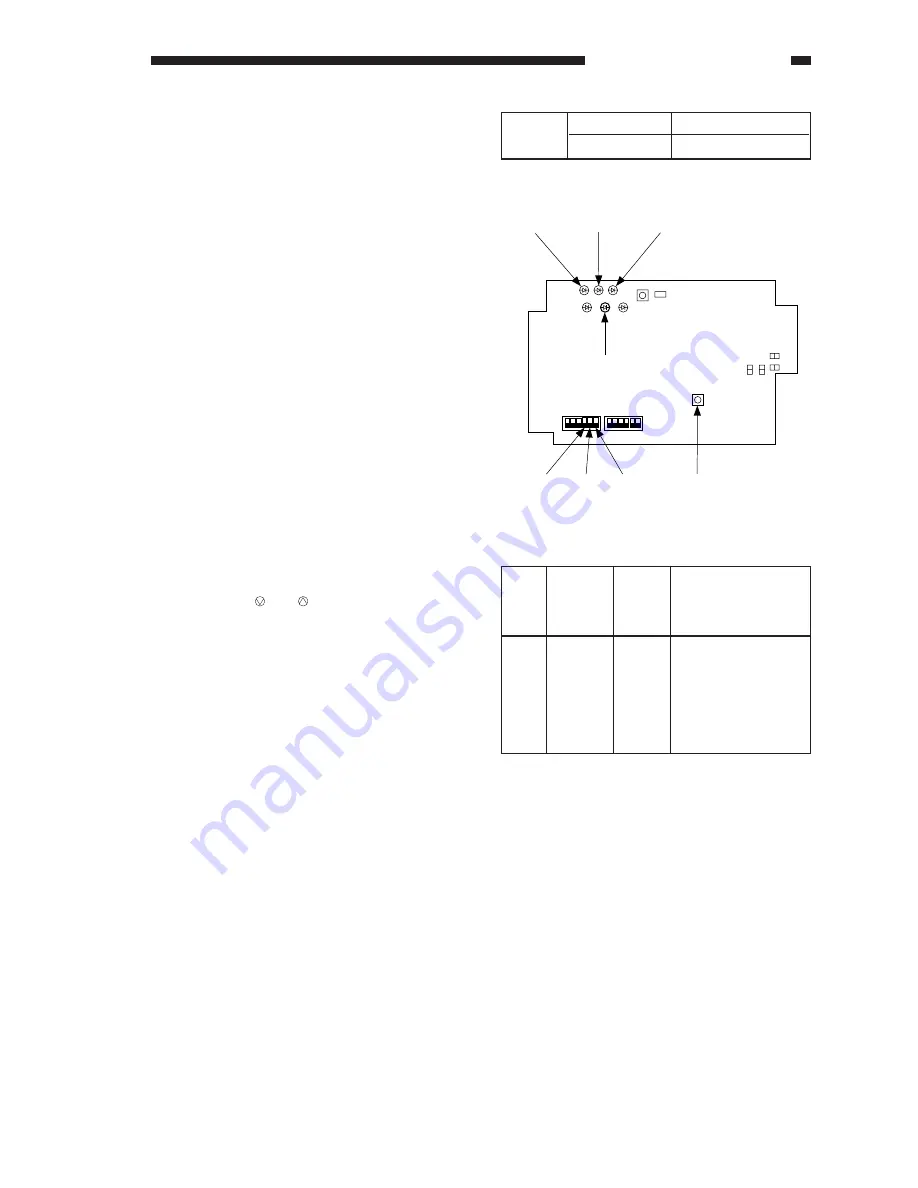
d) Set the DIP switch (SW1) on the copy
data controller as indicated in Table
11-604. At this time, LED5 turns off.
Bit
Position
1,2,3
OFF
SW1
Table 11-604
Figure 11-618
9) Set the control method.
a) Use the Numeric Keypad-A1 to
select the control method as follows:
Press and so that ‘FORMAT=1’
appears.
b) Select the appropriate control type
number to suit the type of copier and
the user’s needs as shown in the
table; initially, ‘1’ is selected.
c) To set the control type number to ‘3’,
1. ‘FORMAT=1 appears. Since it is
initially ‘1’, change it to ‘3’ as
follows:
Press ‘3’.
Press ‘c’ so that the existing input is
cleared, ready for another input.
As needed, press ‘ESC’ to cancel.
Figure 11-605
LED5
SW4
SW1-1
SW1-2
SW1-3
1
6
SW4
SW1 ON
SW5 ON
LED6
LED5
LED4
LED3
LED2
LED1
SW2
SW3
JB2
JB1
JA1
JA2
1
6
LED1
LED2
LED3
No.
1
2
3
Number
of
groups
3000
1000
1000
Paper
size
5
5
5
Mode
Single-sided/
double-sided
Mono/2-color/full-
color
Summary of Contents for CLC 1120
Page 6: ......
Page 20: ......
Page 22: ......
Page 48: ......
Page 94: ......
Page 96: ......
Page 114: ......
Page 134: ......
Page 136: ......
Page 152: ......
Page 242: ......
Page 346: ......
Page 374: ......
Page 376: ......
Page 412: ......
Page 452: ......
Page 454: ......
Page 517: ......
Page 881: ......
Page 893: ......
Page 895: ......
Page 899: ......


