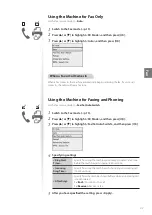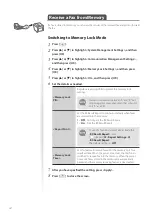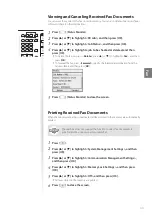
background image

52

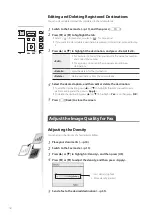
Editing and Deleting Registered Destinations

You can edit or delete destinations registered in the Address Book.

Switch to the Fax mode (

p.15), and then press [ 

 ].

Press [

] or [

] to highlight the tab.

• 

Select <

> for Favorites, or select < 

 > for Group Dial.

• 

If you want to edit or delete a destination registered in Coded Dial, proceed to step 
3.

Press [

] or [

] to highlight the destination, and press <Details/Edit>.

<Edit>

• 

For Favorites or Coded Dial, you can edit the name, fax number, 
and Coded Dial number.

• 

For a group, you can edit the group name or add new 
destinations.

<Details>

View the details for the destination.

<Delete>

Delete destinations from the Address Book.

Select the desired option, and then edit or delete the destination.

• 

To edit the destination, press [

] or [

] to highlight the item you want to edit, 

perform editing, and then press <

Apply

>.

• 

To delete the destination, press [

] or [

] to highlight <

Yes

>, and then press [

OK

].

Press [   ] (Back) to close the screen.

Adjust the Image Quality for Fax

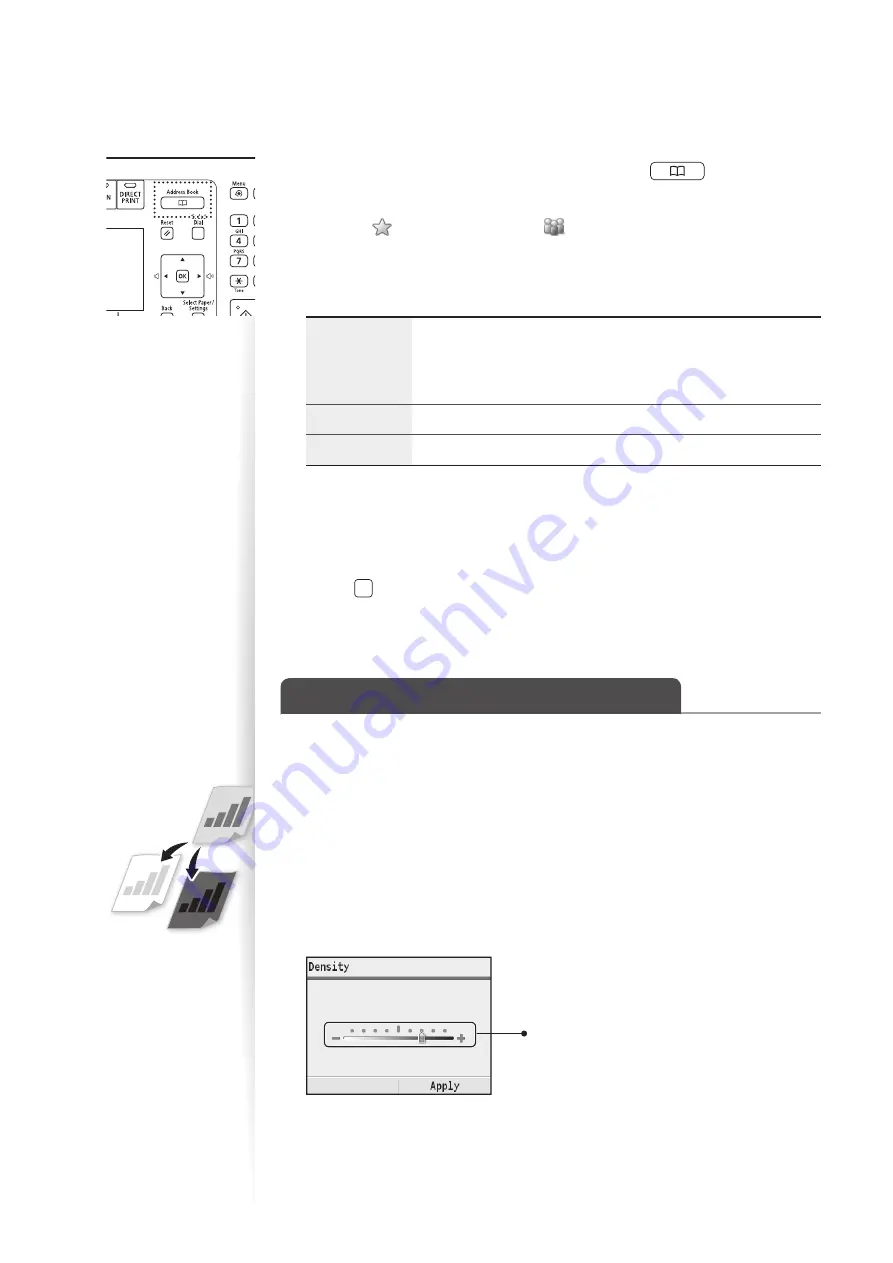
Adjusting the Density

You can adjust the density of a fax darker or lighter.

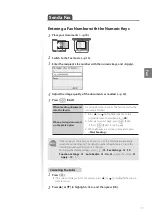
Place your documents (

p.18).

Switch to the Fax mode (

p.15).

Press [

] or [

] to highlight <Density>, and then press [OK].

Press [

] or [

] to adjust the density, and then press <Apply>.


– : Less density (lighter)
+ : More density (darker)

Send a fax to the desired destination (

p.55).

Summary of Contents for Color imageCLASS MF8580Cdw

Page 1: ...d This guide describes the basic use of the machine Read this guide after finishing the machine setup Read Important Safety Instructions first p 113 Keep this manual for future reference For informati...

Page 2: ...mon use and basic functions of the copy fax scan and print functions This Manual For Macintosh Users The examples shown in this manual are based on the operation in the Windows environment To view how...

Page 3: ...etting Guide MF8580Cdw Only Send Setting Guide describes how to use the Send Function Setting Tool to set up the machine for scanning documents as e mails Send to E mail and scanning documents to shar...

Page 4: ...31 Fax P 52 2 Sided Printing Print copies received faxes or documents on both sides of paper Copy P 33 Print P 41 Fax P 69 Multiple Documents onto Single Page Print multiple pages onto a single page...

Page 5: ...er Watermark Printing P 45 Add watermarks such as COPY or DRAFT to the document Scan Scanning using the Operation Panel P 75 Select a computer to save scanned images in and scan images directly from t...

Page 6: ...g Paper in the Manual Feed Slot 23 Loading Envelopes or Paper with a Letterhead 25 Setting a Paper Size and Type 27 Switch to the Sleep Mode 28 Copy Make a Basic Copy 30 Copy by Saving Paper 30 Enlarg...

Page 7: ...umeric Keys 55 Selecting from Favorites 56 Selecting with Coded Dial 56 Selecting from Group Dial 56 Searching by Name for Destinations 57 Redialing 57 Sending a Fax to Multiple Destinations Sequentia...

Page 8: ...g Unit 85 Cleaning the Transfer Belt 85 Check and Replace Toner Cartridges 86 Checking the Toner Level 86 Replacing Toner Cartridges 87 Manage Using the Report and List Functions 90 Configure Settings...

Page 9: ...ments 18 Placing Documents on the Platen Glass 19 Placing Documents in the Feeder 19 Load Paper 20 Loading Paper in the Paper Drawer 21 Loading Paper in the Manual Feed Slot 23 Loading Envelopes or Pa...

Page 10: ...nts into the machine p 19 Operation panel Use the panel to control the machine p 13 Paper drawer Load paper here p 21 Power switch Turns the power ON or OFF Ventilation slots Allows heat to escape fro...

Page 11: ...s from the feeder Lift handles Hold these handles to lift or transport the machine Manual feed transport guide Lower the guide to remove the jammed paper Manual feed slot Load paper manually p 23 USB...

Page 12: ...when contacting the Canon Customer Care Center USB port Connect to a computer via a USB cable External telephone jack Connect an external telephone Ventilation slots Allows heat to escape from inside...

Page 13: ...i Indicator Lights up when the machine is connected to wireless LAN Error Indicator The indicator blinks or lights up when an error occurs Address Book Press to search for recipients registered in the...

Page 14: ...ecured by a PIN Secure Print MF8580Cdw Only in the e Manual Menu Press to access menu functions see Navigating the Menu at the bottom of this page Report Press to manually print reports and lists p 90...

Page 15: ...ttings Auto Reset Time Specify the time Apply Fax Mode Scan Mode USB Print Mode Displays the recipient s number To change the settings 1 Press or to highlight an item and then press OK 2 Press or to s...

Page 16: ...character is displayed Press to delete the last character Press and hold to delete all text Press to move the cursor To enter a space move the cursor to the end of the text and then press Enter Text...

Page 17: ...d then press OK 4 Press or to highlight Current Date Time Settings and then press OK To change the display format for the date or time specify Date Format or Time Format To use daylight savings time s...

Page 18: ...80 g m 50 sheets When placing non standard documents such as heavy paper small paper or booklets Use the platen glass p 19 When placing multiple documents of plain paper in the same size thickness and...

Page 19: ...per above the document 4 Close the feeder Placing Documents in the Feeder 1 Spread the document guides a little wider than the document s width When placing large documents pull out the tray extension...

Page 20: ...fore loading paper check the paper is the right type If you load inappropriate paper repeatedly this may cause paper jams 1 Step Check if the type of paper is appropriate Paper such as Legal Letter St...

Page 21: ...aper is appropriate If the setting is different from the size of the loaded paper an error message appears or printing is not performed correctly Loading Paper in the Paper Drawer This section describ...

Page 22: ...he print side face up until the edge of the paper stack meets the back of the paper drawer Make sure that the paper stack does not exceed the load limit marks 4 Adjust the paper guides tightly to the...

Page 23: ...y extension 3 Spread the paper guides apart 4 Insert the paper into the manual feed slot until the paper stops 5 Align the paper guides against the edges of the paper IMPORTANT IMPORTANT If the paper...

Page 24: ...into the paper drawer with the print side face up and adjust the paper guides tightly to the width of the paper IMPORTANT IMPORTANT If the paper guides are too loose or too tight this may result in m...

Page 25: ...pes to release any remaining air Loosen any stiff corners of the envelopes and flatten any curls as shown in the figure Loading Orientation Load the envelopes with the non glued side front side face u...

Page 26: ...ce up 2 sided printing MF8580Cdw only Load the paper with the printed side face down When printing with portrait layout When printing with landscape layout When printing with landscape layout When pri...

Page 27: ...select Custom and then refer to Specify a Paper Size Manually at the bottom of this page to specify the size 5 Press or to highlight the desired paper type and then press OK 6 Press Select Paper Setti...

Page 28: ...g the machine will not enter the Sleep mode because an operation is in progress or an error has occurred By default the machine automatically enters the Sleep mode if you do not perform any functions...

Page 29: ...ing the Document Type 32 Adjusting the Sharpness 32 Make Double Sided Copies MF8580Cdw Only 33 Copy Multiple Pages onto One Sheet 34 Collate Copies 35 Copy a Double Sided ID Card 35 Erase Dark Borders...

Page 30: ...ments press or to highlight the job you want to cancel 2 Press or to highlight Yes and then press OK Copy by Saving Paper You can save paper with Paper Save Copy when making a copy 1 Place your docume...

Page 31: ...itch to the Copy mode p 15 3 Press or to highlight Copy Ratio and then press OK 4 Press or to highlight the desired ratio and then press OK If you want to set a copy ratio in 1 increments select Custo...

Page 32: ...n text photos and maps Scanned documents are at a low resolution at high speed Text Photo Map Suitable for documents that contain text photos and maps Text Photo Map Quality Suitable for documents tha...

Page 33: ...or single sided copies from double sided documents place documents in the feeder 2 Switch to the Copy mode p 15 3 Press or to highlight 2 Sided and then press OK 4 Press or to highlight the 2 sided co...

Page 34: ...the entire page of an LTR size document 6 Press or to highlight the paper source that contains the paper you want to use and then press OK 7 Press When placing your documents in the feeder Copying st...

Page 35: ...an make a copy of a double sided ID card onto single sided paper 1 Place an ID card on the platen glass Align the card with the top left corner of the platen glass and close the feeder 1 4 1 4 A5 B4 A...

Page 36: ...the frame to erase and then press Apply 6 Select the document size and then press OK 7 Press View and Cancel Copy Jobs You can view or cancel copy jobs while the jobs are in progress 1 Press Status M...

Page 37: ...o 2 sides Copy Ratio Select the copy ratio Paper Specify the paper source N on 1 Copy multiple documents onto one sheet Collate Collate copies of a complete copy job arranged in page sequential order...

Page 38: ...38 38 Memo...

Page 39: ...e Getting Started to learn how to install the printer driver You cannot specify printing options with the printer driver and another application at the same time Your computer screen may differ from t...

Page 40: ...Cancel on the pop up screen after printing starts You can also cancel printing from the operation panel of the machine For details see Using the Machine as a Printer Printing from a Computer Canceling...

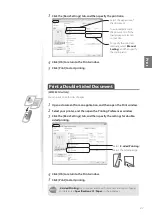
Page 41: ...ng Print a Double Sided Document MF8580Cdw Only You can print on both sides of paper 1 Open a document from an application and then open the Print window 2 Select your printer and then open the Printi...

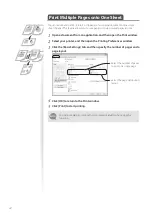
Page 42: ...application and then open the Print window 2 Select your printer and then open the Printing Preferences window 3 Click the Basic Settings tab and then specify the number of pages and a page layout Sel...

Page 43: ...asic Settings tab select Booklet Printing and then click Booklet 4 Specify the settings for the booklet and then click OK You can choose to print all pages at once or print them as multiple bundles co...

Page 44: ...nd then open the Print window 2 Select your printer and then open the Printing Preferences window 3 Click Basic Settings tab and then select Poster NxN from the Page Layout drop down menu Select Poste...

Page 45: ...pecify the settings for watermark printing Select the desired watermark Select to add watermarks 4 To create a new watermark click Edit Watermark and then enter the new text Select to create a new wat...

Page 46: ...ress OK 4 Press or to highlight the job you want to view or cancel and then press OK To view the details press or To cancel the job press Cancel press or to highlight Yes and then press OK 5 Press Sta...

Page 47: ...International Destination Adding Pauses 58 Calling a Recipient before Sending a Fax 59 Receive a Fax Receive Mode 60 Using the Machine for Fax Only 61 Using the Machine for Faxing and Phoning 61 Usin...

Page 48: ...g you to enter the PIN enter the correct PIN using the numeric keys and press OK The Address Book can be saved as a file to your computer using the Remote UI The machine can read the file saved in you...

Page 49: ...ee Selecting with Coded Dial p 56 1 Switch to the Fax mode p 15 and then press 2 Press Register Dest 3 Press or to highlight Coded Dial and then press OK 4 Press or to highlight Fax and then press OK...

Page 50: ...gister group addresses to an unused Favorites or Coded Dial number Make sure that you leave some unused Favorites or Coded Dial number for group dialing Individual destinations must be registered in F...

Page 51: ...ess Add 11 Repeat steps 9 and 10 to add more destinations as needed 12 Press Apply 13 If you selected Coded Dial in step 3 press or to highlight Coded Dial and then press OK If you selected Favorites...

Page 52: ...ions Details View the details for the destination Delete Delete destinations from the Address Book 4 Select the desired option and then edit or delete the destination To edit the destination press or...

Page 53: ...hoto For documents that contain photographs 200 dpi x 400 dpi Superfine For documents that contain very fine text 400 x 400 dpi Ultrafine Achieves an even finer resolution than Superfine 5 Send a fax...

Page 54: ...ings that are applied when the machine is restarted is pressed or the screen is returned to the default screen after auto reset is performed 1 Press 2 Press or to highlight Fax Settings and then press...

Page 55: ...size of the original document and then press OK 2 After placing next page press B W Press B W for each page 3 When all pages are scanned completely press Start Sending If the recipient s line is busy...

Page 56: ...stered in Coded Dial 1 Place your documents p 18 2 Switch to the Fax mode p 15 and then press Coded Dial 3 Enter the three digit registration number 001 to 181 with the numeric keys The destination nu...

Page 57: ...pient s name 4 Press or to highlight the desired recipient and then press OK 5 Adjust the image quality of the documents as needed p 52 6 Press B W Redialing You can select a destination from among th...

Page 58: ...details see the e Manual 4 Repeat step 3 to enter additional destinations as needed Specify Next Destination New is available up to 10 destinations To confirm or delete destinations press or to highli...

Page 59: ...lly To use this function you must connect an external telephone to the machine If it is not connected use another telephone to make sure the recipient to switch the fax mode to receive fax 1 Place you...

Page 60: ...ne to the machine Connect an external telephone to the machine If you have subscribed to a Distinctive Ring Pattern Detection DRPD service provided by your telephone company DRPD is also available for...

Page 61: ...ceive mode to Fax Tel Auto Switch 1 Switch to the Fax mode p 15 2 Press or to highlight RX Mode and then press OK 3 Press or to highlight Fax Tel Auto Switch and then press OK 4 Specify ring settings...

Page 62: ...umber of rings Apply Using the Answering Machine Set the fax receive mode to Answering Machine 1 Switch to the Fax mode p 15 2 Press or to highlight RX Mode and then press OK 3 Press or to highlight A...

Page 63: ...xes manually Receiving Faxes in Manual Mode Follow the procedure below to receive faxes manually 1 When an incoming call rings pick up the telephone receiver 2 If you hear a beep press or to highlight...

Page 64: ...d 9 but cannot register consecutive digits that consist of only 0 as a PIN Report Print Set the RX Result Report to print automatically when faxes are received into the memory Off Do not print the RX...

Page 65: ...forwarding destination from the Address Book and then press OK 5 Press Status Monitor to close the screen Printing Received Fax Documents When the memory receiving is deactivated all faxes stored in t...

Page 66: ...rward the received fax p 65 5 Press Status Monitor to close the screen You can also view the sending receiving logs For details see Faxing Checking Status and Log for Sent and Received Documents in th...

Page 67: ...d corrects errors during fax communication Using the ECM function can diminish send errors even over poor connections Set Pause Time 1 to 2 to 15 seconds Specify the length of pauses added to fax dest...

Page 68: ...stination with the numeric keys Registering new destinations in the Address Book Changing destinations that are registered in the Address Book Allow Fax Driver TX Off On Specify whether or not to allo...

Page 69: ...ng an incoming call if RX Mode is set to Auto or Fax Tel Auto Switch After the external telephone rings for specified times the machine automatically starts receiving the fax if the call is a fax If t...

Page 70: ...hen printing received faxes Continue Printing When Toner Is Low Off On Specify whether or not to continue printing received faxes and reports when the toner is nearly out Changing Communication Manage...

Page 71: ...ng start speed if you have difficulty sending or receiving faxes Memory Lock Settings Off On Memory Lock PIN Seven digit number Report Print Off On Memory Lock Time Off On Generally received documents...

Page 72: ...72 72 Memo...

Page 73: ...od 74 Scan a Document with the Operation Panel 75 Scanning a Document Using a Shortcut Key 77 Scan a Document with MF Toolbox 78 Configuring Scan Settings Using MF Toolbox 80 Scan a Document with the...

Page 74: ...nning Documents to a Computer Scanning Using an Application in the e Manual Saving a Scanned Document to USB Memory For more details see Using the Machine as a Scanner Scanning Documents to USB Memory...

Page 75: ...OK When multiple computers are connected the computer connected by a USB cable is listed on the top 6 Press or to specify the scan settings and then press OK Color Scan Scan the document in color 300...

Page 76: ...he destination computer press or to highlight Confirm Destination and then press OK When scanning is complete the folder that contains the scanned images is opened on the screen of the computer Cancel...

Page 77: ...want to register and then press OK 6 Press or to highlight the connection method and then press OK 7 Press or to highlight the destination computer and then press OK When the machine and a computer ar...

Page 78: ...ress or to highlight Scan Next Original and then press OK 2 Press Store Finish When scanning is complete the folder that contains the scanned images is opened on the screen of the computer Scan a Docu...

Page 79: ...destination that you specify PDF The scan preset for the multiple page searchable PDF is displayed The scanned document will be saved as a PDF file Color Scan B W Scan Custom 1 Custom 2 The custom se...

Page 80: ...e limit of the file that is attached to the e mail This item is available only when you scan using the Mail mode Set the color mode This setting is not available when scanning using the Color Scan or...

Page 81: ...ng the OCR button Set an application to display the scanned image Click Set to select an application or drag and drop the application icon Click Delete to save the file without using the applications...

Page 82: ...tting window appears select the Display the Scanner Driver check box and then click Start 8 Select Preview on the scanner driver dialog box and then specify settings as needed Specify various scanner...

Page 83: ...Check and Replace Toner Cartridges 86 Checking the Toner Level 86 Replacing Toner Cartridges 87 Manage Using the Report and List Functions 90 Configure Settings Using the Remote UI 91 Maintenance and...

Page 84: ...lass or feeder 3 Clean the exterior of the machine and ventilation slots with a soft well wrung out cloth dampened with water or a mild detergent that has been diluted with water 4 Wait for the machin...

Page 85: ...n printed pages 1 Press 2 Press or to highlight Adjustment Maintenance and then press OK 3 Press or to highlight Clean Fixing Unit and then press OK 4 Load Letter size plain paper drawer or manual fee...

Page 86: ...the actual message When the Prepare the XXXX toner cartridge message appears on the display the incoming faxes will be stored in the memory without printing You can also set to print the received faxe...

Page 87: ...toner cartridges MF8580Cdw Canon Cartridge 118 Black Canon Cartridge 118 Yellow Canon Cartridge 118 Magenta Canon Cartridge 118 Cyan MF8280Cw Canon Cartridge 131 Black Canon Cartridge 131 H Black Cano...

Page 88: ...Front View IMPORTANT IMPORTANT When pulling out the sealing tape Do not pull the sealing tape at an angle or up and down If the tape breaks it may not be pulled out completely Top View Even if the sea...

Page 89: ...aner that does not have safeguards against dust explosions to clean up spilled toner Doing so may cause a malfunction in the vacuum cleaner or result in a dust explosion due to static discharge CAUTIO...

Page 90: ...Address Book Coded Dial favorites and groups User Data List Information about the machine and settings Communication Management Report Fax or e mail communication history 4 Follow the on screen instr...

Page 91: ...rk router or hub 2 Start the web browser enter http the IP address of the machine in the address filed and then press Enter key on your keyboard Input Example http 192 168 222 84 3 Log on to the Remot...

Page 92: ...92 92 Memo...

Page 93: ...solve a Displayed Message 105 Resolve an Error Code 106 Improve Output Quality 107 Resolve a Problem 108 Troubleshooting This chapter describes how to clear paper jams and offers solutions to problems...

Page 94: ...and Back Sides p 99 Pull out the drawer Open the paper cover Clearing Paper Jams in the Manual Feed Slot p 103 Pull out the drawer Remove the jammed paper Clearing Paper Jams in the Paper Drawer p 100...

Page 95: ...edge on a flat surface to align the paper before loading it into the machine Make sure that the paper meets the requirements for use p 20 Make sure that you have removed all scraps of paper from the i...

Page 96: ...the inner cover 7 Replace the lever and close the feeder cover Clearing Document Jams in the Feeder MF8280Cw After removing any documents placed in the feeder follow the procedure below to remove jam...

Page 97: ...ring Paper Jams in the Front Side MF8580Cdw 1 Step Step Remove the jammed paper inside 1 Open the front cover 2 Lift the operation panel 3 Gently pull out the paper 2 Step Step Lower the operation pan...

Page 98: ...tep Remove the jammed paper deep in the back side 1 Pull down the green knob toward you 2 Gently pull out the paper 3 Step Remove the jammed paper close to the back side Hold the green knobs and firml...

Page 99: ...0Cw 1 Step Step Remove the jammed paper in the front side Lift the operation panel Gently pull out the paper 2 Step Step Lower the operation panel 3 Step Remove the jammed paper in the back side Open...

Page 100: ...sure to hold the paper drawer with both hands Otherwise you may damage the paper drawer by dropping it if it slides out too easily Even if an optional paper drawer MF8580Cdw only is installed remove t...

Page 101: ...the jammed paper in the tray Do not forcibly remove jammed paper from the machine If the jammed paper cannot be removed easily proceed to the next step 1 Gently pull out the paper 2 Close the tray 3 S...

Page 102: ...Touching it may deteriorate print quality Step Step Hold the green knobs and return this part back in place Return this part back in place until it clicks Step Step Set the paper drawer Step Step When...

Page 103: ...Feed Slot MF8280Cw 1 Step Step Hold the paper drawer with both hands and pull it out 2 Step Step Remove the jammed document inside the manual feed slot 1 Open the cover 2 Hold the green knobs and pus...

Page 104: ...obs return this part back in place and close the cover Return this part back in place until it clicks Step Step Set the paper drawer Step Step When the screen shown below is displayed press or to high...

Page 105: ...to be printed automatically If Continue Printing When Toner Is Low in RX Print Settings is set to On however printing will be continued but faxes may fade or blur End of Toner Cart Lifetime XXXX It i...

Page 106: ...ted Wait a moment and then try again If you are still unable to send the document ask the recipient to verify that the fax machine is ready to receive a fax No pause was added to the fax number when a...

Page 107: ...pecial Mode P setting from the operation panel Paper creases Verify that the appropriate paper is being used p 20 Print a test page with new paper Verify that the paper is loaded properly p 20 Remove...

Page 108: ...owing information ready when you contact Canon Product name Serial number Place of purchase Nature of problem Steps you have taken to solve the problem and the results If you cannot solve the problem...

Page 109: ...ng a voice call A Set the fax receive mode to Answering Machine and then set the answering machine to activate after a few rings The machine will detect a fax signal before the answering machine activ...

Page 110: ...the scan function when sharing drivers that are installed to another computer To use the scan function install the MF Drivers on your computer You can use the supplied user software CD ROM or downloa...

Page 111: ...he MF Toolbox screen click Browse 2 Locate a folder to save the scanned images and then click OK Q Can I scan multiple images and save as a single PDF file A Yes you can save multiple images as a sing...

Page 112: ...e Federation and The Nature Conservancy and in Canada through donations to the World Wildlife Fund Canada and The Nature Conservancy of Canada Since its inception The Canon Cartridge Recycling Program...

Page 113: ...e Canon Canada Inc Canada Post label provided in this brochure Canon s labels are specially marked so that Canon pays the postage Deliver to any local Canada Post outlet or franchise Customers who hol...

Page 114: ...bstances come into contact with electrical parts inside the machine this may result in a fire or electric shock CAUTION For your safety please unplug the power cord if the machine will not be used for...

Page 115: ...two conditions 1 This device may not cause harmful interference and 2 This device must accept any interference received including interference that may cause undesired operation FCC WARNING Changes or...

Page 116: ...or premise wiring using a compatible modular jack that is Part 68 compliant This equipment may not be used on coin service provided by the telephone company Connection to party lines is subjected to...

Page 117: ...riate This equipment complies with the Canadian ICES 003 Class B limits Utilisation au Canada Conditions Remplir Pr alablement L installation d un T l copieur Canon A Emplacement Pr voir une table un...

Page 118: ...de la classe B de la NMB 003 du Canada Laser Safety This machine complies with 21 CFR Chapter 1 Subchapter J as a Class 1 laser product under the U S Department of Health and Human Services DHHS Radia...

Page 119: ...119 119 Memo...

Page 120: ...ville NY 11747 U S A CANON EUROPA N V Bovenkerkerweg 59 1185 XB Amstelveen The Netherlands CANON CHINA CO LTD 15F Jinbao Building No 89 Jinbao Street Dongcheng District Beijing 100005 PRC CANON SINGAP...

Reviews: