0ALJ-084
Setting IPv4 Address
The machine's IPv4 address can be either assigned automatically by a dynamic IP addressing protocol, such as
DHCP, or entered manually. When connecting the machine to a wired LAN, make sure that the connectors of
the LAN cable are firmly inserted into the ports (
). You can test the network
connection if necessary.
Testing the Network Connection
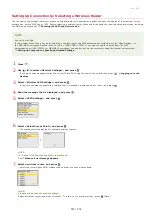
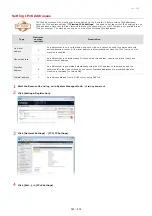
Press .
Use
/
to select <Network Settings>, and press
.
If the logon screen appears, enter the correct ID and PIN using the numeric keys, and then press
.
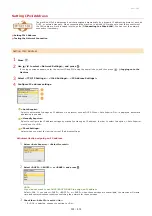
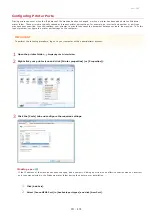
Select <TCP/IP Settings> <IPv4 Settings> <IP Address Settings>.
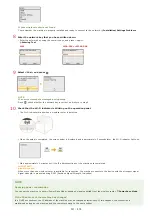
Configure IP address settings.
<Auto Acquire>
Select to automatically assign an IP address via a protocol such as DHCP. When <Auto Acquire: On> is displayed, automatic
addressing is enabled.
<Manually Acquire>
Select to configure the IP address settings by manually entering an IP address. In order to select this option, <Auto Acquire>
must be set to <Off>.
<Check Settings>
Select when you want to view the current IP address settings.
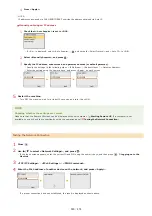
Automatically assigning an IP address
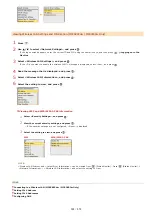
1
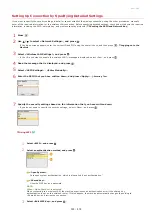
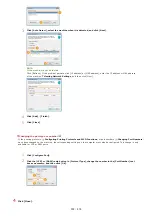
Select <Auto Acquire> <Select Protocol>.
2
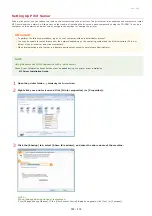
Select <DHCP>, <BOOTP>, or <RARP>, and press
.
NOTE:
If you do not want to use DHCP/BOOTP/RARP to assign an IP address
Select <Off>. If you select <DHCP>, <BOOTP>, or <RARP> when these services are unavailable, the machine will waste
time and communications resources searching the network for these services.
3
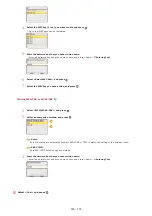
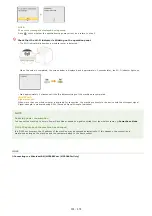
Check that <Auto IP> is set to <On>.
If <Off> is selected, change the setting to <On>.
Setting IPv4 Address
1
2
3
4
㻟㻟㻥㻌㻛㻌㻢㻣㻢
Summary of Contents for Color imageCLASS MF8580Cdw
Page 1: ......
Page 19: ...Step 9 Configuring Initial Settings for Fax Functions MF8580Cdw MF8550Cdn MF8280Cw Only...
Page 46: ...Continue to Selecting the Receive Mode LINKS Sending Faxes...
Page 48: ...LINKS Receiving Faxes...
Page 76: ...Paper...
Page 87: ...Select the paper type and press LINKS Loading Paper in the Manual Feed Slot Paper 2...
Page 106: ...the hook...
Page 113: ...LINKS Basic Copy Operations...
Page 118: ...LINKS Basic Copy Operations Adjusting Color Balance Adjusting Sharpness...
Page 148: ...LINKS Sending Faxes Sending Faxes to Multiple Destinations Simultaneously Sequential Broadcast...
Page 162: ...LINKS Receiving Faxes Checking Status and Log for Sent and Received Documents...
Page 169: ...LINKS Receiving Faxes...
Page 183: ...To specify multiple destinations repeat steps 3 and 4...
Page 188: ......
Page 199: ...LINKS Printing a Document...
Page 206: ...Gutter check box and specify the margin width in Booklet Gutter LINKS Printing a Document...
Page 210: ...LINKS Printing a Document Printing Borders Printing Dates and Page Numbers...
Page 212: ...LINKS Printing a Document NOTE For more information click Help on the printer driver screen...
Page 269: ...Configuring Scan Settings in ScanGear MF...
Page 287: ......
Page 332: ...LINKS Connecting to a Wireless LAN MF8580Cdw MF8280Cw Only...
Page 341: ...LINKS Setting IPv6 Addresses Viewing Network Settings Configuring WINS...
Page 353: ...LINKS Setting Up Print Server...
Page 372: ...LINKS Changing the Maximum Transmission Unit Setting a Wait Time for Connecting to a Network...
Page 378: ...LINKS Setting IPv4 Address Setting IPv6 Addresses Viewing Network Settings...
Page 413: ...LINKS Specifying IP Addresses for Firewall Rules...
Page 455: ......
Page 495: ...Yellow 17 Levels Magenta 17 Levels Cyan 17 Levels Black 17 Levels...
Page 656: ......
Page 669: ......
Page 677: ......
Page 687: ...5 Read the License Agreement and click Yes 6 Click Next...
Page 726: ...The icon is added to the printer folder...
Page 731: ......
Page 733: ......

