A1 Back
Triangular glue tab
Glue tab
Parts name
Scissors line
Parts No.
Manta ray : Assembly Instructions
Page
Scissors
Paste, or woodwork glue
Stencil pen, or bodkin
Ruler
Scissors line
Mountain fold
Valley fold
Glue spot
Parts No.
Notation Key
Tools
<Caution>
Keep scissors and glue away from small children.
Be careful not to cut your fingers when using scissors.
marks a basic assembly technique that remains the same
regardless of the part.
Instructions are printed only for the first instance.
The Assembly instructions are divided into two blocks:
A (body, fin, tail) and B (display stand, coral).
Follow the instructions for each block to assemble your manta ray.
Assemble the body, fin and tail
Use pattern: Page2 to Page4.
Cut along the line marked
.
Cut out A1 by cutting along the lines.
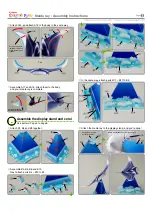
Make a mountain fold and valley fold on A1.
Trace along the mountain fold line and valley fold line with a
stencil pen, scoring it to make it easier to fold.
The parts will be easier to assemble if curled.
Using the photo as a guide, move your fingers in the direction of the
arrow, adjusting the pressure to curl the paper.
Attach the triangular glue tabs so that the front side becomes convex.
Add a slight curl to A1 when attaching it.
Using the photo as a guide, attach in the direction of the arrow.


