background image

Complete

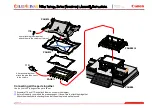
Assemble 5B and 5C. Then, attach them all. 

5B

5C

PAGE16

Nikko Toshogu Shrine (Yomeimon) : Assembly Instructions

Summary of Contents for Creative Park Nikko Toshogu Shrine Yomeimon

Page 1: ...y 500 engravings and richly colored decorations representing the stylishness of the Edo culture It is also called Higurashimon meaning gate of sundown because of its sophistication and splendor that continue to take your breath away even after gazing at it all day long Parts sheet Pattern Twenty two A4 sheets No of Parts 411 parts Assembly Instructions Sixteen A4 sheets Build the model by carefull...

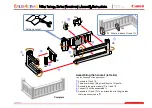
Page 2: ...side Use the 2nd page of the parts sheet Assemble 1D and 1H There are thirteen 1Ls attach them to 1F and 1J Assemble the parts made in to 1D and 1H Connect 1H to the assembled 1D Assemble 1N and 1P Then attach them to the glue tabs that were connected in PAGE02 Nikko Toshogu Shrine Yomeimon Assembly Instructions ...

Page 3: ...il left side Use the 2nd page of the parts sheet Assemble 1I and 1E There are thirteen 1Ms attach them to 1G and 1K Assemble the parts made in to 1I and 1E Connect 1E to the assembled 1I Assemble 1O and 1Q Then attach them to the glue tabs that were connected in Nikko Toshogu Shrine Yomeimon Assembly Instructions ...

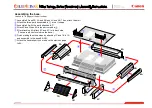
Page 4: ... into a U shape Assemble 5A with the parts attached in Attach Stone Steps 6A to the parts made in After attaching 6A attach 3C and 4C to its back side These are pieces to reinforce the base Finish making the stone steps by attaching 1C and 1B to 1A and assemble to the base 2A 2B Attach the handrail part you made on the previous page to 6A PAGE04 Nikko Toshogu Shrine Yomeimon Assembly Instructions ...

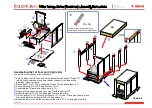
Page 5: ...spective glue tabs make four sets Attach each 7L to 7I Then assemble 7O and 7P and attach them to 7I Attach Person 9G Lion 9E and Partition 7J to 7I Assemble the 7B parts and attach each to 7A Attach all the parts you made up to step with the parts of Roll all the parts 7C 7H and apply glue to make the pillars Slot the pillars 7C 7H onto the cut lines on 7O 7P and 7R and glue them in place Also as...

Page 6: ...spective glue tabs make four sets Attach each 8L to 8I Then assemble 8O and 8P and attach them to 8I Attach Person 9H Lion 9F and Partition 8J to 8I Assemble the 8B parts and attach each to 8A Attach all the parts you made up to step with the parts of Roll all the parts 8C 8H and apply glue to make the pillars Slot the pillars 8C 8H onto the cut lines on 8O 8P and 8R and glue them in place Also as...

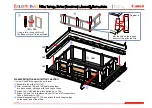
Page 7: ...ion Attach the right and left sides of the first floor section to the base Assemble parts 9DA 9DB and 9I and attach them between the parts on the right and left Referring to Diagram a attach the engravings from page 10 to the 14 areas on the corresponding pillars by matching the numbers assemble two parts for each Assemble 9A and attach it by placing it over the first floor section Nikko Toshogu S...

Page 8: ...e 11th page of the parts sheet Fold parts 10G to 10J mountain fold in half to assemble them Assemble 10A and 10B 10E and 10F and 10C and 10D and attach them as shown in the diagram Attach the two assembled parts to the base Nikko Toshogu Shrine Yomeimon Assembly Instructions ...

Page 9: ...ld each along the fold lines When attaching the parts to 13B attach them by starting from the outer side 11A 12A to the inner side 11F 12F Attaching the parts will be easy if you attach them after connecting them into a box shape After attaching the parts to 13B start attaching the strip like parts to the inner side parts As for the strips that end up in the corners attach them to each otheras sho...

Page 10: ...8th pages of the parts sheet Assemble the pillars 14G 14P After connecting 14A and 14B and forming them into a box shape slot each pillar onto the cut lines Attach 14A 14B with the pillars slotted on to 13A Attach 14E and 14F to the back sides of 14C and 14D respectively Then attach them to 13A Assemble engravings 17F 17S and attach them to the glue tabs on the upper part of the pillars Nikko Tosh...

Page 11: ...he parts will be easy if you attach them after connecting them into a box shape It will be easier if you assemble 17B after attaching 15A 16A 15E 16E After attaching the parts to 13B start attaching the strip like parts to the inner side parts As for the strips that end up in the corners attach them to each other as shown on page 9 Attach the glue tabs of 15E 16E to 17A Then attach engravings 15F ...

Page 12: ...center of the side that needs to be attached Follow that line to attach starting from the center to the outer side Attach 21A to 21C and 21B to 21D make two sets each By aligning the green lines as shown in the diagram start attaching from the center to the outer side Attach 21A and 21B to 17B and connect each When doing so make sure that the glue tabs of 21E 21H do not get misaligned Attach 21E 2...

Page 13: ...s together attach them neatly by putting the corners together Fold the right and left sides of 18A and 18B that have been attached into a 45 degree angle Insert Cut Line a into Cut Line b and neatly attach c to d and e to f Do the same for the other three parts Attach the glue tabs of 18A shown in green in the diagram to 19A d PAGE13 Nikko Toshogu Shrine Yomeimon Assembly Instructions ...

Page 14: ...20A 20K PAGE14 Assembling the Roof Use the 19th to 21st pages of the parts sheet Attach 18D 19D to 18C 19C and 18C 19C to 18B 19B in this order Then attach them to the roof made on page 13 Attach 20D 20N 20A 20K in this order and attach 20E 20O to 20A 20K Then attach them to the roof made on page 13 Assemble 18E 19E 18H 19H and attach them to 18B 19B Likewise assemble 20F 20P 20I 20S and attach th...

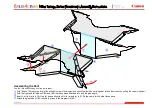
Page 15: ... the corners Connecting all the parts together Use the 2nd to 22th pages of the parts sheet Assemble 17E and 17D and attach them as shown in the diagram As for all the parts you made in the previous pages it is now time to attach them together Attach them neatly while checking to see that the entire piece is well balanced Nikko Toshogu Shrine Yomeimon Assembly Instructions ...

Page 16: ...Complete Assemble 5B and 5C Then attach them all 5B 5C PAGE16 Nikko Toshogu Shrine Yomeimon Assembly Instructions ...

Reviews: