4. Repair Guide
6
2.3
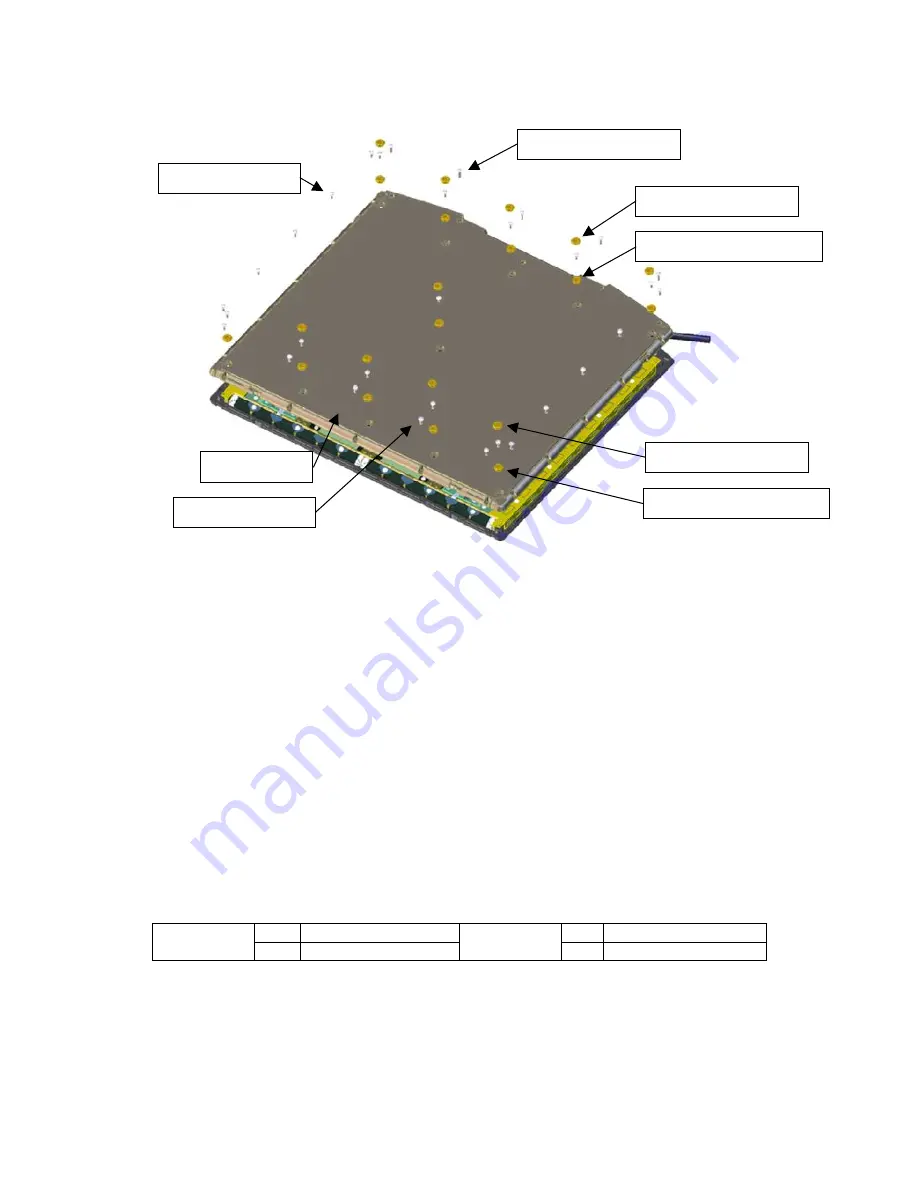
Removing the cover
Sleeve cover (x11)
Insulation sleeve (x11)
Screw M3x12 (x15)
Screw M3x8 (x15)
Screw M3x8 (x11)
Base cover
Insulation sleeve (x11)
Sleeve cover (x11)
1. Remove the sleeve cover (x11).
2. Remove the screw (M3x8) or screw (M3x12).
3. Remove the insulation sleeve and base cover.
Note:
1. Handle with carefully so that the defect should not adhere.
2. The insulation sleeve and sleeve cover must not be lost.
3. The order of detaching the screws fixes the base cover is not asked especially. At assembling,
check the screw length, tight the screws evenly and be careful not to tighten it so much.
[Replacing Base Cover]
As the operation division was relocated, the base cover plate of CXDI-50G has been renewed.
As a result, there are two types of nameplate. Only the manufacture is authorized to change the
description of the plate according to the Pharmaceutical Law in Japan. You need to use the
place with the same address as the previous plate when replacing.
This is required only for Japanese market. Both of old and new plates are interchangeable for
the other countries.
*Application
7M
Body No. 150079 -
7M
Body No. 100009 -
CXDI-50G
3M
Body No. 250001 -
CXDI-50C
3M
Body No. 200001 -
Summary of Contents for CXDI-50C
Page 15: ......
Page 23: ...2 Installation Manual 6 3 Power Box assemble package 4 Grid optional ...
Page 35: ...2 Installation Manual 18 When normal imaging When timeout due to RX_REQ not negating ...
Page 63: ...2 Installation Manual 46 Fig 3 Input parameters ...
Page 115: ...2 Installation Manual 98 2 Power Box Unit mm Mass 4 2Kg ...
Page 118: ......
Page 163: ......
Page 167: ...CXDI SYSTEM 1 2 Rev 04 Key No 5 Key No 6 Key No 7 Key No 8 Key No 9 Canon Inc ...
Page 186: ......
Page 188: ......
Page 189: ...Content 1 Gathering Information about Problems 1 2 How to back up and recover the system 3 ...


