background image

2. Installation Manual 

- 66 - 

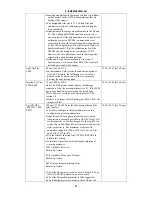
As a result of 
providing the 
server with a 
command request, 
a warning was 
returned as 
response. 

Return value: 0x18 
CXDI interpretation:  

DICOM response warning 

 (CCRTRANS_WRN_RESP) 
The transmission processing was successful but a warning was returned from the 
server. 
See below for the log output at this time: 
------------------------------------------------------------------------------------- 

(To be determined) 

------------------------------------------------------------------------------------- 

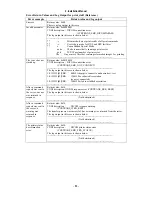
Other errors 

Return value: other than above 
CXDI interpretation:  

DICOM communication error 

 (CCRTRANS_ERR_DICOM_TRANSE) 
The log output is many and varied.  It depends on the error.  One example is shown 
below. 
------------------------------------------------------------------------------------- 
18-140933[d2]ERR: c0082 SRV Send (DATA SET) failed in   SRV_SendDataSet 
18-140933[d2]ERR: 190082 SRV Request failed in  SRV_NCreateRequest 
18-140933[d2]ERR: 70012 NULL key passed to routine: 
 DUL_ReleaseAssociation 
------------------------------------------------------------------------------------- 


Summary of Contents for CXDI-50C

Page 1: ...n n I In nc c M Me ed di ic ca al l T Te ec ch hn ni ic ca al l S Se er rv vi ic ce e D De ep pt t A Al ll l r ri ig gh ht ts s R Re es se er rv ve ed d C CX XD DI I 5 50 0G G 5 50 0C C S Se er rv vi ic ce e M Ma an nu ua al l P Pr ri in nt te ed d b by y C Ca an no on n I In nc c M Ma ar r 2 20 00 07 7 R Re ev v 0 05 5a a ...

Page 2: ...w service manual of revised edition will be sent to you In other cases service manual report will be sent to you updates the manual Note 1 This service manual is published by Canon Inc in accordance with Article 6 Furnishing the Referent Materials of the Service Assignment Contract it has concluded with your company Note 2 This service manual property of Canon Inc and the company may seek to have ...

Page 3: ...he cover during maintenance repair etc perform the work after switching the power off Never touch the device with wet hands as there is a risk of electric shock 3 Fuse When replacing the fuse first resolve the reason of failure and then replace the fuse with the specified type Never use a fuse other than the specified type 4 Connecting the grounding wire The provided ground wire must be connected ...

Page 4: ...Sicherung nur durch den vorgeschriebenen Typ Anderenfalls kann es zu einem Brand oder elektrischen Schlag kommen 4 Erdleiter Erden Sie das Instrument unbedingt an einer Schukosteckdose Anderenfalls kann es zu einem Brand oder elektrischen Schlag durch Leckstrom kommen 5 Umbau Jeder Umbau des Produktes ist strengstens untersagt da dies zu einem Brand oder elektrischen Schlag führen kann 6 Beweglich...

Page 5: ...sified in CXDI C3S The patient environment described below is an example cited from the IEC60601 1 1 2000 the measurements are only guidelines However the IEC60601 1 1 2000 example must be treated as the standard Therefore the CXDI C3S must be installed in a location further than the measurements below outside of the patient environment Areas where the patient moves not only during imaging but whe...

Page 6: ...gh ht t C C C Ca an no on n I In nc c M Me ed di ic ca al l T Te ec ch hn ni ic ca al l S Se er rv vi ic ce e D De ep pt t A Al ll l r ri ig gh ht ts s R Re es se er rv ve ed d 1 1 G Ge en ne er ra al l P Pr ri in nt te ed d b by y C Ca an no on n I In nc c F Fe eb b 2 20 00 06 6 R Re ev v 0 03 3 ...

Page 7: ...Content General 1 1 CXDI 1 System Block Diagram 2 2 System Diagram 3 3 CXDI Image Processing 4 4 Specifications 5 ...

Page 8: ... located in one side of LANMIT and the image data was read from one side Since the appearance of new CXDI 50G is the same as that of the former CXDI 50G they are identified by changing the serial number of the main unit CXDI System Software Ver 6 4 and later Clinic Software Ver 1 04 and later 7M 150001 Serial number of main units 3M 250001 CXDI 50C Fluorescent substance of CXDI 50G has been change...

Page 9: ...nal Control PC CXDI C3S VGA LAN2 AC Power IN SCSI SERIAL COM3 MOUSE KEY BOARD SERIAL COM4 Key Board Printer Image file device Image diagnosis W S X Ray I F CA2 LAN1 CA3 CA4 CA5 Remo SERIAL COM1 SERIAL COM2 1 1 C CX XD DI I 1 1 S Sy ys st te em m B Bl lo oc ck k D Di ia ag gr ra am m Symbol Description Remarks CA1 AC Cable 3m CA2 50Sensor Cable 3m 7m CA3 X Ray I F Cable 20m CA4 LAN Cable Category 5...

Page 10: ...XDI 50G 50C Protective Grounding POWER BOX 50 Power Supply 1st 2nd AC230V Insulation with reinforcement Imaging Unit Grid Unit AC230V Basic Insulation Power Box CXDI 40E Imaging Unit Remote switch Ethernet X ray generator 601 compatible CXDI 40G CXDI 31 etc Imaging Unit Ethernet Network switch Contorol PC C3 Multi Box 2 Image Examination WS Image File Equipment Printer etc Ethernet ...

Page 11: ...ion processing sharpening and other processing The CXDI performs image processing up to this point 5 DIAG IMAGE QA image after further image processing necessary for diagnosis Image processed by the user for diagnostic purposes 6 PROCESSED IMAGE Diagnosis image after post processing Image modified by the user or the default processed image Born image Raw image Original image QA image Diag image Pr...

Page 12: ... Grid 5 2Kg 5 3kg With 3m cable Space between surface where patient gets in contact CFRP and sensor surface glass Within 5 0 0 5mm Within 4 9 0 5mm Remote SW OFF 9 5kcal h Å Including the Power Box Sleep 19kcal h Å Including the Power Box Heat emission Max load mode 24kcal h 30kcal h Including the Power Box 1 image per 15 Sec Remote SW OFF 11W Å Including the Power Box Sleep 22W Å Including the Po...

Page 13: ...Imaging preparation complete Off On Error status Blinking 2 On Communi cating Blinking 3 On Initialization when startup Blinking 4 On Network not set when startup Blinking 5 On User interface Single type LED Off Imaging unit power is off On in orange Imaging unit power is on unable to perform imaging Blinking in green Preparing imaging error status On in green Imaging preparation is complete Å 1 T...

Page 14: ...nication method Data length 10bit Data rate 15 625 kHz Power supply AC 100 120V 10 50 60Hz 1 5A AC 200 240V 10 50 60Hz 0 8A Reference CXDI 50G Power supply Rated Voltage AC 100 120V AC 85 132V AC 200 240V AC170 264V Mass 4 2 Kg Dimension 358 W x 200 D x 65 H mm Except bottom rubber parts With bottom rubber parts 75mm 3 Environment rated parameters Item Content Remarks Operating temperature 5 to 35...

Page 15: ......

Page 16: ...an no on n I In nc c M Me ed di ic ca al l T Te ec ch hn ni ic ca al l S Se er rv vi ic ce e D De ep pt t A Al ll l r ri ig gh ht ts s R Re es se er rv ve ed d 2 2 I In ns st ta al ll la at ti io on n M Ma an nu ua al l P Pr ri in nt te ed d b by y C Ca an no on n I In nc c F Fe eb b 2 20 00 07 7 R Re ev v 0 04 4 ...

Page 17: ...tem Installation Procedures 8 5 Installation 10 5 1 Connection to each unit 10 5 2 Starting up and shutting down the System 16 5 3 X ray Controller Interface 17 5 4 Network Settings 1 23 5 5 Setting the Fixed ROI Areas 26 5 6 Adjusting the photo timer 29 5 7 Settings 31 5 8 Adjusting the Alignment 87 5 9 Image Quality 93 5 10 Post installation checks 95 6 Dimension 97 ...

Page 18: ... must be no dripping water in the area 2 The environment must be free of harmful elements such as humid or acidic air air with a saline or sulfur content where there is poor ventilation or where air pressure or temperature is unusual 3 The equipment must not be placed at an angle or subjected to vibration or shock this includes during transportation 4 The equipment must not be kept where chemical ...

Page 19: ...r connecting the multiple Imaging Units shall be procured at each sales company LAN cable Over category 5 When Control PC and Power Box are connected directly Cross type is used but when they are connected via Network switch Straight type is used However this is not applied when Network switch has AUTO MDI MDI X function Network switch Switching HUB Sales companies adopt Network switch Switching H...

Page 20: ...arks 3 7m Remarks I F and Power supply 3 7m No 3 No 4 Name X ray I F cable Name Remote switch Qty 1 Qty 1 Remarks Connection with X ray generator Remarks Power Box power source ON OFF No 5 No 6 Name Cable clump Name Screw M4 x 6mm Qty 1 Qty 1 Remarks For fixing the sensor cable Remarks For fixing the cable clump ...

Page 21: ...2 Installation Manual 4 No 7 No 8 Name Sensor Information file FD Name Power supply cable Qty 1 Qty 1 Remarks Remarks For Power Box 100 120 230V each type ...

Page 22: ...2 Installation Manual 5 3 3 P Pa ac ck ki in ng g D Di ia ag gr ra am m 3 1 X ray Digital Camera System CXDI 50G 50C 1 CXDI 50G 50C assemble package 2 CXDI 50G 50C Imaging Unit package ...

Page 23: ...2 Installation Manual 6 3 Power Box assemble package 4 Grid optional ...

Page 24: ...ools 1 set 2 Note PC 1 PC AT compatible OS Microsoft Windows XP Professional recommend 3 LAN Card 1 For Note PC as required 4 Mouse 1 PS 2 type 5 Keyboard 1 PS 2 type 6 HUB 1 Connection between Control PC and Note PC 7 10 100BASE TX cable 2 Straight type Control PC to Note PC 8 CXDI Software version compatibility table 9 Mirror oil based marker and paper etc 1 For adjusting the alignment with the ...

Page 25: ...put the sensor serial numbers 6 Identifying the Sensor Units in section 5 6 8 Enter control PC serial number 7 Entering Control PC Serial Number in section 5 6 9 Adjusting the timing with X ray generator No required usually 10 Calibration No error must be displayed Operation Manual 11 Setting the Fixed ROI Areas If necessary set the ROI area 12 Set exposure parameter table Set it in consultation w...

Page 26: ...ted prior narrowing down the adjustments to the final values Operation Manual 25 Inserting the backup floppy disk It must be confirmed at re start that backup files have been made No necessary for the system installed in vehicles 15 Backing up Setting Data to FD in section 5 6 26 Back up valuable data 14 Backing Up when Installing in section 5 6 ...

Page 27: ...2 Installation Manual 10 5 5 I In ns st ta al ll la at ti io on n 5 1 Connection to each unit 5 1 1 Connection diagram CXDI 50G POWER BOX PCBXRAY POWER SUPPLY Control PC Remote switch CXDI 50G 50C ...

Page 28: ... the voltage With changing the jumper pin settings the signal sent to PLD IC1 of the PWB 40XRAY board has either state High or Low By using this state the PBIF50XRAY PLD code which written in the PLD can distinguish whether the power supply is for 3m or 7m The Imaging unit determines the cable length based on the dip switch setting SW1 7 OFF on the PWB 50Di board If cable connector P4 1 2 is open ...

Page 29: ...damage when the cables are removed with very large force Check tightening torque of the bush refer the following figure Sensor cable X RAY I F cable Remote cable 2 Attach the cable clamp to the sensor cable and then fix it to the power box using the screw M4 x 6 mm Lock nut X ray I F cable Sensor cable Remote cable Cable clamp Screw M4 6mm Clamp the cable s shield portion Gap 1 0 to 1 5mm No gap ...

Page 30: ...ecting each cable connector 4 After completing the connections attach the power box cover 5 Connect the LAN cable to the back of the power box Sensor cable Connected to Remote cable Connected to X ray I F cable Connected to LAN cable ...

Page 31: ...2 Installation Manual 14 6 Connect the power cable to the back of the power box CXDI 50G 50C sensor cable Remote cable X ray I F cable Power cable Power switch LAN cable Power cable ...

Page 32: ...nnection diagram for Control PC rear panel LAN cable Between Control PC and Power Box Mouse Keyboard Operation unit RS 232C cable Operation unit VGA cable Connector 1 LAN cable straight cable Between Control PC and network Power cable ...

Page 33: ...n with turning on the control PC Since the power box is equipped with a remote switch that turns on off the secondary output you can install the switch on your side to turn it on off 1 Turn on the main power of the power box 2 Turn on the remote switch of the power box 3 Turn on the control PC Note Ccrstart bat should be registered in Windows Startup 5 2 2 Sequence for Turning the Power off Shutdo...

Page 34: ... emission End X ray emission X ray emission signal OFF Detect X ray emission signal ON Imaging possible Enable X ray emission ON X ray Generator CXDI Image Data read RX_REQ Generator Setup timer X ray emission signal 1st SW level ON X ray emission signal 2nd SW level ON RX_COM Enable X ray emission OFF ...

Page 35: ...2 Installation Manual 18 When normal imaging When timeout due to RX_REQ not negating ...

Page 36: ...ed or RX_COM is time out as a trigger reading action is delayed if RX_COM does not negate and time out is used as the trigger resulting in delay of image display timing We recommend using a configuration in which RX_REQ is negated Time required from X ray exposure completion to negating RX_REQ TRX_REQ_NEG min 0 max 100ms Image display timing is delayed if this is not fulfilled RX_COM X ray release...

Page 37: ... conditions 1 The X ray exposure signal line must be insulated and its total impedance must be 100 ohms or less 2 The maximum contact voltage of the X ray exposure authorization signal line is AC 250V and DC 30V and its current ranges from 10mA to 2A Only the secondary power supply can be connected ...

Page 38: ...le stable arrangement 2 Form C Contact material Au clad AgNi type Relating capacity AC250 5A DC30V 5A Max switching power 1250VA 150W Max switching voltage 250V AC Max switching current 5A Min switching capacity 100µA 1V DC 3 Characteristics Item Content Operate time Max 20ms Reset time Max 10ms Mechanical 18 000 times hour Maximum open close frequency Rated load 1 800 times hour Between coil cont...

Page 39: ...10 µA Capacitance Ct V 0 f 1 MHz 30 pF LED Max Forward current VFM IFM 0 5 A 3 4 V Collector Emitter Breakdown Voltage V BR CEO IC 0 5 mA 80 V Emitter Collector Breakdown Voltage V BR ECO IE 0 1 mA 7 V VCE 48 V Ambient Light Below 100lx 0 01 2 0 1 10 DETECTOR Collector Dark Current ICEO VCE 48 V Ta 85 Ambient Light Below 100lx 2 4 50 50 µA Rise Time tr 2 Fall Time tf 3 Turn On Time tON 3 Turn Off ...

Page 40: ...essary for the network connection Set up the following three items 1 TCP IP setting for the control PC network card 2 Network setting for Screwcap ini 3 Network setting stored in the CXDI 50G 50C sensor 2 Preparation Keyboard Mouse Connect the keyboard and mouse to the back of the control PC Check if the system is connected and then turn the system on 3 Setup method 3 1 TCP IP setting for the cont...

Page 41: ...ssary to edit the setting unless you changed the network protocol TCP IP setting for the LAN card that communicates with the CXDI 50G 50C imaging part in the previous item 3 1 TCP IP setting for the control PC network card Screwcap ini is located in the following directory D ccr screwcap ini 1 CXDI 50G 50C s IP address This address must be the same as the IP address stored in the next item 3 3 Net...

Page 42: ... is not necessary unless you have changed the setting Item to be set Factory default value Sensor IP address 192 168 100 11 Subnet mask 255 255 255 0 Host IP address 192 168 100 10 Port number for command 12121 Port number for data 12122 If you change the setting refer to Tool Software Operation Manual for Ethernet Imaging Part IP Address Setting ...

Page 43: ...EC Automated Exposure Control Field in Preview Screen added from CXDI System Software Ver 6 2 NUMBER that can be specified is max 3 Ws 350mm Hs 430mm 0 0 W H Sensor X Y 2 3 Convert the size and position of the ROIs in 2 to pixel values The pixel size of the sensor is 160µm For multiple values use X Y W H X Y W and H for calculations X 160 µm Let this value equal A Y 160 µm Let this value equal B W...

Page 44: ...r switch button Press the Fixed ROI Area key 2 6 Press the Area setting key 2 7 The fixed ROI 1 setting screen appears Input values A to D from step 3 into the edit box and press ENABLE To set multiple fixed ROIs input A to D and A to D into fixed ROI 2 settings and fixed ROI 3 settings respectively Area setting button ...

Page 45: ...key and press DISABLE in fixed ROI settings Check to make sure the displays are dimmed 2 9 After Confirming all settings and press EXIT 2 10 The display returns to the system settings screen Press OK 2 11 Change settings appears Press OK Be careful because if CANCEL is pressed all changes made to the settings are deleted Change settings appeared 2 12 Return to the normal imaging screen and turn of...

Page 46: ...ion 3 Change parameters of VPT button as follows This operation must be done by the VPT button which uses fixed ROI The adjustment cannot be performed properly by the body parts buttons which use auto ROI 1 From SYSTEM EDIT EXPOSURE MODE select VPT button 2 Press the NEXT PAGE button to enter the parameter editing screen and then set the following parameters A GENERATOR PARAMETER SCREEN Set only t...

Page 47: ...the option buttons such as the H S button L S button plus and minus button on the X ray generator and decide on the final dosage For instance the L S button is for providing about 1 5 times the default dosage If in overall terms the sensitivity has shifted slightly or it differs slightly from one body part to another use the H S L S and buttons on the X ray generator to adjust the sensitivity as r...

Page 48: ...urpose The date and time is set to Japan standard time at factory shipment Reset the date and time to your local value as necessary 2 Procedure 2 1 When CXDI application start open the ADMINISTRATOR SETUP MENU SYSTEM SETUP MENU ADMINISTRATOR SETUP 2 2 When the ADMINISTRATOR SETUP MENU appears and presses the DATE button 2 3 The dialog Date Time Properties appears and set the value properly each of...

Page 49: ...art up the CXDI system b Display the version information from the user mode SYSTEM SETUP MENU VERSION INFORMATION c Confirm the firmware version A Hardware version Product type and Sub No Product type is identified from Sensor serial No is set to the Imaging unit 07 50G and 0a 50C Sub No indicates the states of the dipswitch2 1 to 4 B Firmware initialization code version This is the version of the...

Page 50: ...ing to Telnet Connection in the Tool Software Operation Manual for Ethernet 5 Check the versions of the firmware and PLD code on the screen displayed after the login 6 After you finish checking close HyperTerminal login canon Password CXDI 50G firmware Ver 1 01 00 build as Jul 2 2003 16 13 45 normal boot HUB50 Ver 5010 product code 0701 pcb 50di Firmware version Hardware version PLD code version ...

Page 51: ...nected to the system 3 Procedure 3 1 Installing the firmware Write the firmware by referring to Firm Write Tool Software Firmwrite exe in the Tool Software Operation Manual for Ethernet Where to write IC1 Flash ROM on PWB 50Di 3 2 Installing PLD code Write PLD code by referring to PLD Write Tool Software pldwrite exe in the Tool Software Operation Manual for Ethernet Where to write IC11 PLD on PWB...

Page 52: ...can not be detected after the CXDI application is launched In that case an error message appears 2 Notes 2 1 Check the sensor serial No whenever a PWB 50Di is replaced b Sensor in the imaging unit is replaced 2 2 This checking procedure must be performed with the Control PC Imaging Unit and all the other equipments connected and started up 3 Procedure 3 1 Check the sensor serial No by referring to...

Page 53: ...are at the same time with the register to the Startup Group 3 Register the CXDI application software to the Startup Group procedure 3 1 Connect keyboard and mouse to the control PC 3 2 Turns the all CXDI system power on after the all installation finished And after that Windows XP starts 3 3 Open the Taskbar and Start Menu from the Start Menu Start Settings Taskbar and Start Menu 3 4 Taskbar and S...

Page 54: ...er Size to 5000 Click OK 4 6 The Apply Properties to Shortcut appears and check the item of the Modify shortcut which started this window Click OK 5 Delete CXDI application software from the Startup Menu Group 5 1 Connect the keyboard and the mouse to the control PC 5 2 Turns the CXDI system power on Windows XP start 5 3 After the CXDI application software start press Alt Tab key to show the Debug...

Page 55: ...ears If you are going to remove it click Yes button 5 10 After confirm that the ccrstart bat item is removed from Startup Group close all the application on the desktop and re login to Windows XP 5 11 Make sure that the CXDI application software will not start automatically after login to Windows XP And then shutdown Windows XP turn the CXDI system power off When the CXDI application is deleted fr...

Page 56: ...me to CCR appears Select 1 Set Up 4 4 Setting Mode 0 Normal 1 Expert 0 0x0 appears Select 0 Normal 4 5 CCR SETUP MENU appears Select 7 Scan Sensor Setup 4 6 The Capture Device Configuration Table appears Input 1 to the underlined part in Max Capture Devices shown below 4 7 Enter the serial number to A D Board Serial Number for SensorID 1 Capture Device Configuration Table Max Capture Devices 1 0x1...

Page 57: ...e six digit number indicated on the naming label of the control PC unit Press Enter key until CCR SETUP MENU appears Fig 1 Fig 1 2 7 Press Esc key after CCR SETUP MENU appears to return to Welcome to CCR screen 2 8 Select 8 Exit to exit CXDI application software 2 9 This returns you to the Windows NT desktop Restart the CXDI application and perform the procedure from steps 2 to 5 Check that the se...

Page 58: ...ystem 2 2 Open the TABLE SETUP Change window from the Normal Exposure window System SETUP MENU SYS SETUP TABLE SETUP 2 3 Select the tabs to be changed and change the X ray tube voltage X ray tube current and msec value data to match the exposure conditions of the X ray generator See the operation manual for the details of settings 2 4 After finishing the changes return to the Normal Exposure windo...

Page 59: ... used for the annotation are performed 2 Procedure 2 1 Once the normal radiographic screen has started open the annotation setting screen SYSTEM SETUP MENU SYS SETUP ANNOTATION 2 2 The annotation setting screen now appears Proceed with the settings that will make it possible to put the data desired by the user See the operation manual for the details of settings ...

Page 60: ... item carefully since any errors made in these settings will make it impossible for connection to be made to the network or the images to be transmitted properly etc 3 Windows XP settings 3 1 Connect the keyboard and mouse to the control PC 3 2 After turning on the Operation unit s power and then the Control PC s power start Windows XP 3 3 The Windows XP desktop screen appears Right click the My N...

Page 61: ...r instance the following messages will be repeated y If the CXDI has been connected properly Pic ping 172 17 7 123 input on the DOS screen Pinging 17217 7 123 With 32 bytes of data Reply from 172 17 7 123 bytes 32 time 10ms TTL 255 Reply from 172 17 7 123 bytes 32 time 10ms TTL 255 Reply from 172 17 7 123 bytes 32 time 10ms TTL 255 Reply from 172 17 7 123 bytes 32 time 10ms TTL 2550 If the CXDI ha...

Page 62: ...ed on the pre installation investigation details a Printer host name IP address b Port number c Transmission destination title Fig 2 C Press the SET button and input the parameters of the printer to be connected based on the pre installation inspection details Refer to another sheet for details of the parameters A space delimiter must be input between each of the parameters By pressing the Overrid...

Page 63: ...2 Installation Manual 46 Fig 3 Input parameters ...

Page 64: ...same time can be set B Press the Storage1 button and input the following items based on the pre installation investigation details a Storage host name IP address b Port number c Transmission destination title Fig 4 C Press the SET button and input the parameters Normally the parameters need not be set They must be input only when the need arises A space delimiter must be input between each of the ...

Page 65: ... during the association Retry Message a indicates that connection at the TCP IP level is not possible and that the physical connections or the subnet mask and other settings must be checked again Message b indicates that communication at the TCP IP level is problem free but that DICOM level communication has failed In this case check again that AE_TITLE of CXDI has been sent properly to the transm...

Page 66: ...a change in the installed identification information version c callingtitle calling App Entity Title The CXDI automatically uses CANON_CCR internally for the operation Designating a specific value allows overwriting of the above value Note that the meaning is opposite of the DICOM printing argument c ÆSee the printing parameters This is used when the operator who manages the connected storage devi...

Page 67: ... LUT OD is enabled set appropriate options to suit each output destination level 0 Do not delete default when not specified 1 Delete Window Center Width 2 Delete Window Center Width and Rescale Intercept Slope Type 3 Delete Rescale Intercept Slope Type compatible with releases up to Ver 4 20 Other than a loadable LUT or γ 1 0 has been specified with the output destination specific LUT function For...

Page 68: ...e this transfer image is inserted into the queue in the DICOM printer At HIGH the image is printed first among the queued images This parameter is set according to the user s requirement In the DICOM library TYPE3 the value is transferred together with the Tag However if the value is unknown the value is either transferred as a character string with length 0 or the element itself is not transferre...

Page 69: ...arameter is not transferred problems can occur since unsuitable default values may be used Some printers do not print until a supply magazine of the designated size is loaded and others print even though the designated size is different from the currently loaded supply magazine M magnification Interpolation method NONE REPLICATE BIL INEAR CUBIC This parameter is used in the DICOM Basic Film Box 20...

Page 70: ...eter is not designated it is not transferred over DICOM In this case the printer default values are used Starting from version 2 0 the image can be rotated from the CXDI side without using this parameter A max_density Maximum density Dx100 This parameter designates the density of the digital value for 0 4095 for reverse display of the CXDI transfer data image pixels In the CXDI 0 indicates black I...

Page 71: ...ity Æ If this parameter is not designated it is not transferred over DICOM In this case the printer default values are used r pixel_pitch Transfer pixel pitch for designating the request image size Pixel Pitch in um This parameter is used in the DICOM Basic Image Box 2020 0020 Reverse image density This parameter is used in the DICOM Basic Image Box 2020 0010 Position of the image on film The cumu...

Page 72: ...In the CXDI default settings the printer information is not designated In this case the printer side sends all the information that it has DICOM official specifications When the g option is added the essential information only is collected This information includes the Printer Status and Printer Status Info To prevent installation when the printer does not satisfy the above DICOM specifications Æ ...

Page 73: ...lemented to normalize DICOM headers Note The parameters p v and V filename display the log on the console Therefore be sure to always erase these parameters before operation by the user In the past k2 was used to fix troubles but it has now been set as the default has been changed to k2 to ensure precise compliance with the DICOM code At sites wishing to adhere to their existing window values k1 s...

Page 74: ...inter manufacturer must be performed Kodak Imation DryView 8700 Pacs LINK IMN 9410 A 310 T NO M CUBIC m S LUT 0 2 Site Dependent entered in param member 78 entered in pixelPitch member 14x17 4096 entered in W member 5220 entered in H member Trimming OFF Cubic spline interpolation Smoothing must be adjusted at the user s site Maximum density 3 10 S LUT m n is designated as the Config Info but m and...

Page 75: ...x17 3388 entered in W member 4277 entered in H member Trimming OFF Cubic spline interpolation Smoothing must be adjusted at the user s site Maximum density 3 10 S LUT m n is designated as the Config Info but m and n are adjusted on site by the Kodak service engineer Basically adjustment is performed to achieve a linear output Nishimoto EL2000N A 320 T NO M CUBIC S 15 entered in param member 80 ent...

Page 76: ...density 3 00 A density of 3 20 cannot be designated For this reason a non linear LUT is required Konica Drypro 722 Printlink A 320 T NO M CUBIC m 2 S KC_LUT 1 O PORTRAIT P NORMAL B BLACK entered in param member 80 entered in pixel pitch member 14x17 4424 entered in W member 5324 entered in H member 14x14 4424 entered in W member 4372 entered in H member 11x14 3436 entered in W member 4424 entered ...

Page 77: ...rinter itself is 79 µm x 4090 x 5260 this complete resolution cannot be used when the image passes through the spooler When _ is used in AE Title the association is rejected Use the Disable function for N EVENT REPORT to disable this setting The FilmSize parameter can be used The MediaType BLUE CLEAR parameter is also supported Although the Film Orientation parameter is supported up to 1 7 MB in a...

Page 78: ...ryView 8700 8800 78 µm x 4096 x 5220 Note The 8700 printer cannot display in landscape orientation Also the maximum density is 3 1 If the 8800 box is not added this printer cannot be used by the CXDI However it can be used starting from CXDI version 2 0 If there is an Imager Pixel Spacing tag 0018 2264 the imager will fail 1996 x 2544 160 µm Fuji CR DPL FM DPL FM PS551 100 µm x 3520 x 4280 value a...

Page 79: ...2 Installation Manual 62 DMAX 3 2D equivalent curve required by CXDI Gamma type 17 SAR system Density Shift Contrast Point 1 1 57 0 10 1 00 Point 2 2 29 0 15 1 00 ...

Page 80: ...R_NOT_CONNECT The log output in this case is shown below 18 135933 d2 ERR d0012 Attempt to connect to unknown host test 18 135933 d2 ERR 130012 Peer aborted Association or never connected 18 135933 d2 ERR 180012 Failed to establish association After a command request was sent to the server an error was returned in response Return value 0x10 CXDI description DICOM response error CCRTRANS_ERR_RESP T...

Page 81: ...this case is shown below Not determined Other errors Return value Values other than those above CXDI description DICOM communications error CCRTRANS_ERR_DICOM_TRANSE The log output in this case depends on the specific error A typical example is shown below 18 140933 d2 ERR c0082 SRV Send DATA SET failed in SRV_SendDataSet 18 140933 d2 ERR 190082 SRV Request failed in SRV_NCreateRequest 18 140933 d...

Page 82: ...e future point in time will be helpful Hitachi y Transmission is currently performed with the 1 study multi series 1 series 1 image setting However since a multi format is used for the screen displays for each series the switching operations are a hassle The user will find it more convenient if it is at all possible to change the setting to 1 study 1 series 1 series multi image y This problem aris...

Page 83: ...the server See below for the log output at this time To be determined Other errors Return value other than above CXDI interpretation DICOM communication error CCRTRANS_ERR_DICOM_TRANSE The log output is many and varied It depends on the error One example is shown below 18 140933 d2 ERR c0082 SRV Send DATA SET failed in SRV_SendDataSet 18 140933 d2 ERR 190082 SRV Request failed in SRV_NCreateReques...

Page 84: ... lines which cannot be changed by users with 15 types of characteristic curves which can be changed by users Concerning connections Two types of the Dry View 8700 are available Dry View 8700 Plus The 8700 Plus is a printer which can be connected to two diagnostic units When used in combination with the 8800 multi input manager it can be connected to up to eight diagnostic units Images are processe...

Page 85: ... Up to 2 units can be connected Dry View 8700 Plus 8800 Multi Input Manager Up to 8 units can be connected Dry View 8700 Dual 8800 Multi Input Manager Up to 2 printers can be connected only with Dry View 8700 Dual Up to 7 units can be connected ...

Page 86: ...printer and monitor image output settings should be set to LINEAR For example if the KODAK MLP190 is connected the printer parameter S configuration must be set to S CS000 For other printers refer to Printers and Parameter Examples Reference in Network Connections and set so that the curve shape is 0 density linear B Be sure to calibrate the printer and high definition monitor units separately bef...

Page 87: ...ons 0 to 100 of test image grayscale on the film or on the monitor Fig 3 Measure the SMPTE image density on the film is measured using a densitometer Measure the SMPTE image density on the high definition monitor using the gradation analysis software The data for the SMPTE test image grayscale transferred by the CXDI are the values for the maximum density 3 20 in the case of the MLP 190 in the pri...

Page 88: ...rements when the maximum density is set to 3 2 D and the printed film is measured with a densitometer Refer to the data below when the maximum density is set to 3 1 D or when gradation analysis software is used to take measurements on the monitor The LINEAR output cannot be set for some printer models In this case try to select an output setting as close as possible to LINEAR Ideal density values ...

Page 89: ...e exposure adjust the trim so that the gray scale may be located in the center of the image Fig 5 For correct density measurement of the 32 step chart the gray scale must be printed in the center of an image to eliminate the shading feature Data may not from a straight line near the minimum and maximum densities due to characteristics of the printer Rotate the image on the QA screen and reprint or...

Page 90: ...cale on the test image Fig 7 1 Measure the SMPTE image density on the film using a densitometer The SMPTE image density on the high definition monitor is measured using the gradation analysis software 2 The data for the SMPTE test image grayscale transferred by the CXDI are the values for the maximum density 3 20 in the case of the MLP 190 in the printer settings which have been changed into 32 un...

Page 91: ... 0 0 10 0 21 0 31 0 41 0 52 0 62 0 72 0 83 0 93 1 03 3 1 D 0 0 10 0 20 0 30 0 40 0 50 0 60 0 70 0 80 0 90 1 00 12 Bit 0 132 264 396 528 660 792 924 1056 1188 1320 8 Bit 0 8 16 24 32 41 49 57 65 74 82 Step 12 13 14 15 16 17 18 19 20 21 22 3 2 D 1 14 1 24 1 34 1 45 1 55 1 65 1 75 1 86 1 96 2 06 2 17 3 1 D 1 10 1 20 1 30 1 40 1 50 1 60 1 70 1 80 1 90 2 00 2 10 12 Bit 1453 1585 1717 1849 1981 2113 224...

Page 92: ...red As shown in the graph the data from the minimum density film base density to the maximum density nearly form a straight line SMPTE Density Step 1 2 3 4 5 6 7 8 9 10 11 Percentage 0 10 20 30 40 50 60 70 80 90 100 Density D 0 17 0 46 0 75 1 03 1 36 1 66 1 98 2 29 2 59 2 90 3 20 0 00 0 50 1 00 1 50 2 00 2 50 3 00 3 50 1 2 3 4 5 6 7 8 9 10 11 Step Density The printer parameter settings in this cas...

Page 93: ...d properly SMPTE Density Step 1 2 3 4 5 6 7 8 9 10 11 Percentage 0 10 20 30 40 50 60 70 80 90 100 0 17 0 46 0 75 1 03 1 36 1 66 1 98 2 29 2 59 2 90 3 20 2 Inadequate parameter settings 0 17 0 29 0 45 0 61 0 80 1 02 1 26 1 59 2 02 2 53 3 19 3 Inadequate 0 17 0 33 0 55 0 81 1 08 1 36 1 66 1 97 2 28 2 59 2 94 1 Normal 0 00 0 50 1 00 1 50 2 00 2 50 3 00 3 50 1 2 3 4 5 6 7 8 9 10 11 Step Density Normal...

Page 94: ... correction is an image correction process for monitors and film It is different from the contrast setting or grayscale setting This procedure is simply a visual adjustment As a result differences may occur depending on the operator performing the procedure Therefore be sure to consult with the responsible technician before performing this adjustment 2 4 To make the gamma of operation unit adjust ...

Page 95: ...sure select END STUDY Transfer the SMPTE pattern image to the printer or the high definition monitor Fig 2 Fig 2 4 5 Take the SMPTE pattern image again On the QA screen compare the image displayed on the operation unit screen with the film image printed in Step 4 above or with the image on the high definition monitor Make sure there is no difference in contrast and gradation between those images C...

Page 96: ...g 4 Make sure the gamma value for the test image has changed on the operation unit screen The gamma value is adjustable from 1 00 to 2 50 When the image on the operation unit is lighter whiter than the film image increase the value On the contrary if the image on the operation unit is darker blacker than the film image decrease the value The default gamma value is 1 60 Fig 4 5 3 When the gamma val...

Page 97: ...t does not start up 2 3 Files are overwritten and so be careful when performing the procedure 2 4 As an extra precaution write down the numerical values before overwriting them 2 5 The overwritten counter becomes valid the next time that the CXDI is started up 3 Procedure 3 1 Turn on the control computer and then start up Windows XP 3 2 Right click on My Computer on the Desktop screen of Windows X...

Page 98: ...inute COUNTER 0 TotalCount Total number of images obtained with sensor unit 1 COUNTER1 TotalCount Total number of images obtained with sensor unit 2 COUNTER2 TotalCount Total number of images obtained with sensor unit 3 COUNTER3 TotalCount Total number of images obtained with sensor unit 4 3 5 After overwriting the values overwrite the file ExpResult ini and save 3 6 Close all windows that are ope...

Page 99: ...he CXDI Series Operation Manual 3 2 Backup should be performed immediately before handing over the product to the customer only for new installations 4 Connections 4 1 Check that all equipment is turned off 4 2 Connect the keyboard and mouse removal drive to the control PC 5 Settings 5 1 Turn on the operation unit power and then the control PC power 5 2 The CXDI application starts Press the Alt Ta...

Page 100: ...check that Boot 1 Removable Device is actually set to Disabled If the setting is changed to Legacy Floppy the control PC may not start properly when a floppy disk is inserted For more information see System BIOS Settings 2 4 Be sure to always format the floppy disk that you are using before performing backups 2 5 The backup procedure described here covers the case when backing up for the first tim...

Page 101: ... is left in the BodyParts folder system will not be able to be started as the sensor type of the BodyPart and the settings do not match Example Connection np setting Sensor1 Table Table Sensor2 Stand Stand 3 Preparation 3 1 Connect the keyboard and the mouse to the control PC 3 2 Delete the ccrstart bat file from startup 3 3 Disconnect the imaging unit from the control PC 4 Startup method 4 1 Star...

Page 102: ...A D Board Serial Number for SensorID 1 0x199 409 Custom Type 0 NO CUSTOM 1 STAND 2 TABLE 3 UNIV 4 CASSETTE 0 0x0 0 Field of View Rotation 0 No 1 Yes 0 0x0 0 Capture Device Configuration No 1 SensorID 2 OPU A D Board Serial Number 0 0 11 0x199 A D Board Serial Number 0 1 22 0x2009 A D Board Serial Number 0 2 22 0x123 A D Board Serial Number 0 3 31 0x124 A D Board Serial Number for SensorID 2 0x2009...

Page 103: ...Conflicting X ray parameters Do you wish to reset parameters and Conflicting X ray tube parameters for each imaging method Do you wish to reset parameters appear Click OK for each Æ These above messages might be appeared if np mode is used with a different setting 5 Going out of np mode Connect the sensor unit to the control PC Before using the system in normal condition perform the following step...

Page 104: ... unit before mounting a top panel If anchoring is required for the stand or the table you are going to install be careful not to disturb the alignment For details of anchoring please refer to the Service Manuals of stand type 2 Tools should be prepared by distributors Alignment Adjustment Spacer Mirror first face mirror Tape Oil based Marker Measure Rope and other requirements 3 Adjustment 3 1 Sta...

Page 105: ...e X ray generator cross line of the X ray tube is cast over the sensor unit Align the position to meet the requirements described in 1 and 2 below 1 Align the cross line of X ray tube with the cross line of the sensor unit If the position is mismatched as shown in NG below the sensor unit and the stand are not horizontal In this case put the spacer between the stand base and the floor to align the...

Page 106: ...and base to align the slight differences 4 Regardless the height of the X ray tube and the sensor unit it should keep the positional relation aligned in step 3 above x Should be perpendicular in any height Center of X ray tube and the sensor unit should match in any height Case the cross line Reflect the cross line Correct Alignment Shifted Horizontally Shifted Vertically Reflected cross line Cros...

Page 107: ...r of the table or the spacer 3 Adjust the height of the table to space the appropriate exposure distance Distance from the tube to the sensor unit should be 150cm Using a measure or rope align the vertical and horizontal position of the sensor unit to the center of the tube so that the distance from the tube to side to side and up and down of the sensor is symmetric Fix the Mirror Level Adjuster x...

Page 108: ...rements described in 1 and 2 below 1 Align the position so that the cross lines of X ray tube and the sensor unit exactly match If the position is mismatched as shown in NG below the sensor unit and the stand are not aligned horizontally to the X ray tube In this case put the spacer between the base of the stand and the floor to align the slight differences Top View OK NG ...

Page 109: ... adjust the height of the table by the adjuster or the spacer to align the slight differences 4 Regardless the height of the X ray tube and the sensor unit it should keep the positional relation aligned in step 3 above Correct adjustment Adjuster balance is wrong Reflected cross line Cross line of X ray tube x Cast the cross line Reflect the cross line Look in ...

Page 110: ...cedure Item Operation Conditions 1 Adjust the distance between the focal point of the X ray tube and the CXDI sensor unit X cm Differs according to the grid being used 2 Perform calibration SYSTEM CALIBRATION 3 Perform self test SYSTEM SELF TEST Must pass all the tests X ray tube focal point X cm Right angle at the center CXDI Sensor Unit Self test Positioning Position the X ray tube and CXDI Sens...

Page 111: ...m 5 Output the image to a high resolution monitor or DICOM printer 6 Set the high resolution monitor and DICOM printer by referring to their instruction manuals 7 Check that there is no artifacts shading grid stripes etc on the image High resolution monitor DICOM printer Check image quality Exposure Out the image ...

Page 112: ...condition table msec or mAs Checking the annotation Check that the setting have been made in accordance with the customer s request IP address Subnet mask Network connections Default gateway Perform calibration Preparations prior to exposure Perform self test Checking image transfer to printers and storages Check that the setting have been made in accordance with the customer s request Checking im...

Page 113: ...s Create the backup files in floppy drive by re starting Cannot be used in automobile Backing up ccr folder D ccr Check that the CXDI application starts Registering in startup Check by rebooting Check that no d np or other flags have been raised Communication with X ray generators kV mA msec body part settings etc Table 1 ...

Page 114: ...ion Manual 97 6 6 D Di im me en ns si io on n 1 Imaging Unit Unit mm Mass 50G 4 8 Kg except the cable 5 7 Kg with 7m cable 5 2 Kg with 3m cable 50C 4 9 Kg except the cable 5 8 Kg with 7m cable 5 3 Kg with 3m cable ...

Page 115: ...2 Installation Manual 98 2 Power Box Unit mm Mass 4 2Kg ...

Page 116: ...2 Installation Manual 99 3 Remote Switch Unit mm Mass 0 5Kg 4 Grid Optional 508 27 452 Unit mm Mass 0 9Kg Frame ...

Page 117: ... ht t C C C Ca an no on n I In nc c M Me ed di ic ca al l T Te ec ch hn ni ic ca al l S Se er rv vi ic ce e D De ep pt t A Al ll l r ri ig gh ht ts s R Re es se er rv ve ed d 3 3 F Fu un nc ct ti io on n P Pr ri in nt te ed d b by y C Ca an no on n I In nc c M Ma ar r 2 20 00 07 7 R Re ev v 0 04 4 ...

Page 118: ......

Page 119: ...T 2 1 3 PCB 50AD PWB 50Di Block diagram 4 1 4 Imaging Unit 5 2 Power Box 7 2 1 PWB 40 X ray board 7 2 2 Remote switch 7 2 3 50 Power supply 8 3 Available Imaging Time Normal Imaging Long term Imaging 9 4 About the Power Box Initialization Switch 13 5 How to Access to OS 14 ...

Page 120: ...3 Function 1 1 1 I Im ma ag gi in ng g U Un ni it t 1 1 Block Diagram Imaging Unit 1 1 1 CXDI 50G 1 1 2 CXDI 50C Power Box Power Box PCB 50A 2 ...

Page 121: ...IT 1 2 1 CXDI 50G Reads from One side toward LANMIT AMP IC PCB 50AD PWB 50Di LANMIT A D Conversion Signal Read out Circuit PCB 50A 1 2 3 4 5 6 1 2 3 4 5 6 9 1 Aux Shift Register Driver PCB D EP Aux Shift Register Driver PCB D EP ...

Page 122: ... LANMIT 1 LANMIT 2 1 AMP IC AMP IC AMP IC 6 PCB 50AD 2 PCB 50AD 1 PWB 50Di 1 PWB 50Di A D Conversion Signal Read out Circuit PCB 50A 1 1 2 3 4 5 6 1 2 3 4 5 6 1 1 1 9 9 Aux Shift Register Driver PCB D EP Aux Shift Register Driver PCB D EP Aux Shift Register Driver PCB D EP Aux Shift Register Driver PCB D EP Signal Read out Circuit PCB 50A ...

Page 123: ...CCESS from MPU and data writing from FIFO Data of the reduced size image capture is transferred to system SDRAM by DMAC in MPU Frame Memory SDRAM IC IC IC IC IC IC IC IC Analog MUX 128 1 at 5 33MHz MU X 2 1 MU X 2 1 IC IC IC IC IC IC IC IC ADC ADC ADC ADC 256 analog input per IC IC IC MU X 2 1 MU X 2 1 MU X 2 1 MU X 2 1 14 14 SDRAM CLOCK 64MHz Power Box Control PC PULSE TRANS NIC 100BaseTX 14 14 1...

Page 124: ...ficiencies and other data unique to the sensor unit The sensor data is recorded inside the sensor unit and automatically downloaded to the control PC as sensor data files by the control software 1 4 2 Sensor cable These cables are used to connect the CXDI 50G 50C Imaging unit and Power Box Communication line connected via the power box between the Imaging unit and Control PC Power line for supplyi...

Page 125: ...ntrol of the LED displaying 5 Detecting the Grid by using the Grid detecting sensor 6 Relaying the power which Power Box supplies to the PCB 50AD 7 Detecting the unusual temperature error reporting and stop the Sensor driving 8 Detecting the X ray emission status 9 Holding the data factory set 1 4 5 PCB 50 LED board The PCB 50 LED board has the following functions 1 Power supply relaying 5 5V 3 3V...

Page 126: ...wer Box can be connected only one Imaging Unit 2 1 PWB 40 X ray board The PWB 40 X ray board has the following function 1 The Interface with the X ray generator 2 Relaying the signals insulating the Internet transition AC230V Basic Insulation 3 The cable length setting 3 7m in the 50 Power supply capacity 4 The firm initializing code on the Imaging Unit boot switch is installed 5 2 2 Remote switch...

Page 127: ... current limiting over 105 of the PEAK Current 3 5A CH3 Shutdown over 200 of the NOMINAL Current 2 5A CH4 Automatic current limiting over 105 of the NOMINAL Current 0 2A CH5 Automatic current limiting at the Load Current 500mA When the CH3 is shutdown CH4 and CH5 is shutdown at the same time b Over Voltage protection When detecting the over voltage shutdown the output Over 115 of the rated voltage...

Page 128: ...ion time 10 seconds for normal imaging and 30 seconds for long term imaging In imaging preparation time the imaging unit changes from sleep status sensor in standby status to ready status possible to perform imaging The imaging cycle time 2 becomes longer 2 Time required preparing for the next imaging after a single imaging is done Normal imaging 15 sec long term imaging 30 sec Technical Descripti...

Page 129: ...ill be automatically modified to be at or below the limit However thinking from the range of values that can be used with the generator the probability of the warning message is very low 3 Adding values to the imaging conditions table It is possible to add values up to 3000 msec 4800 mAs to the imaging conditions table However at the time of the actual imaging if the exposure is performed with a C...

Page 130: ...sec 1601 4800mAs values are added a warning message will be displayed only once saying the values cannot be used with the CXDI 11 CXDI 31 sensors Figure 3 2 If at the time of a regular exposure or a calibration exposure the imaging body part of a CXDI 11 CXDI 31 sensor was selected values higher than 1000 msec 1600 mAs cannot be selected from the imaging conditions table Press OK Figure 3 2 ...

Page 131: ...utomatically replaced with the value of the imaging conditions table but can be used for the exposure as it is Note In the case of mAs lead the msec will be automatically recalculated based on the mA mAs and the msec value will be automatically overwritten 6 kV mA mAs cm maximum value check If any of the kV mA mAs cm values of the calibration imaging body part recorded within the BodyPart ini file...

Page 132: ...e is updated when upgrading the firmware Use the initialization code when the normal code cannot start for some reason or when you have lost the Ethernet settings Using the initialization code sets the Ethernet related settings to the default settings and allows you to perform the startup operation for the initialization code In this case the connection can be made by setting the Ethernet settings...

Page 133: ...ll not operate normally if the operation is not performed properly 1 3 Procedures 1 Turn ON the power of the control PC 2 When the exposure screen of the CXDI appears press Alt and Tab keys on the keyboard together 3 Keep Alt key pressed even after the display as shown below appears Press Tab key while pressing Alt key to select the command prompt window 4 CCr Console Menu will appear Press Esc ke...

Page 134: ... C C C Ca an no on n I In nc c M Me ed di ic ca al l T Te ec ch hn ni ic ca al l S Se er rv vi ic ce e D De ep pt t A Al ll l r ri ig gh ht ts s R Re es se er rv ve ed d 4 4 R Re ep pa ai ir r G Gu ui id de e P Pr ri in nt te ed d b by y C Ca an no on n I In nc c M Ma ar r 2 20 00 07 7 R Re ev v 0 05 5 ...

Page 135: ...mble Reassemble 4 2 1 Removing Grip unit 4 2 2 Removing the side cover 5 2 3 Removing the cover 6 2 4 Exchanging the sensor cable 7 2 5 Exchanging the PCB 50 LED 17 2 6 Removing the PWB 50Di 21 2 7 Removing the PCB 50AD 22 2 8 Removing the PWB 40XRAY 23 3 PCB Settings 24 4 Operation Required for Replacing Parts 26 ...

Page 136: ...base cover screws Therefore it gets free when the base cover is removed Always keep the unit flat after removing the base cover If the 50G Sensor Unit is set up or tilt the internal sensor unit drops or shifts down Base Cover Always keep the internal sensor unit flat after removing the base cover Top Cover Internal Sensor Unit ...

Page 137: ...e unit The tabs toward the grip are exposed on the internal sensor unit when the base cover is removed Touching tabs may cause to damage them and hinder to scan an image appropriately Besides they cannot be individually replaced or repaired Do not touch tabs when replacing the LED board Tabs x 11 Tab in Enlarged View LED Board ...

Page 138: ...4 Repair Guide 3 Do not touch the tabs when replacing the sensor cable Tabs in Enlarged View Sensor Cable ...

Page 139: ...rface which opens the hole to the Base cover side and fix 3 The handle cap must be pushed tightly until the hook is in the handle cap hole position Replacing Handle Unit To improve the performance of the handle unit following parts have been changed Key No Description Former Part No New Part No Qty Remarks 1 HANDLE IMAGING UNIT BA4 1792 030 BA4 1792 040 1 2 CAP HANDLE BA4 1793 020 BA4 1793 030 2 3...

Page 140: ... as not to come out 2 Lift the side cover C with a little and remove it 3 Applied the solvent loosen the screw x2 and remove the plate Exchange the shock sensor when its color is red Note 1 Handle with carefully so that the defect should not adhere Side cover R Side cover L Sleeve cover Side cover C Screw x2x2 Shock sensor pigment Shock sensor Color former Screw x2 Plate ...

Page 141: ...specially At assembling check the screw length tight the screws evenly and be careful not to tighten it so much Replacing Base Cover As the operation division was relocated the base cover plate of CXDI 50G has been renewed As a result there are two types of nameplate Only the manufacture is authorized to change the description of the plate according to the Pharmaceutical Law in Japan You need to u...

Page 142: ...the connectors from PCB 50LED and PWB 50Di 5 Remove the sensor cable unit NOTES 1 During assembly lay out the signal cables carefully to they will not get caught by covers Sensor cable Screw M2 6x6 x2 Cable clamp 2 Screw M3x8 x2 Cable clamp 1 Disconnect the signal cable connector Screw M2 6x6 x2 Clamp cushion The cable protect sheet is put under the cable so as to protect the sensor cable Bush Dis...

Page 143: ...4 Repair Guide 8 2 Place the bush into the case on the cover while adjusting the position of the bush so signal cables of 50G 50C sensor cable unit become straight ...

Page 144: ... of the cable will not be caught in cable clamp plate NOTES This operation requires below special attachment jigs when installing the cables Attachment jigs BY9 6551 000 in sets with jig A and jig B Cable clamp plate The slight difference in form of plate affects snapping of cable Cable is pressed downward by the edge of plate New cable ...

Page 145: ... Then decide the position of attaching the rubber bush 2 Bending the cable After position of rubber bush is decided lift the cable and bend it so that the shape of the section will become an oval Press the inner side of the cable with your thumb as shown below when bending the cable A cross section of cable Top Round Oval Top Cover Rubber bush ...

Page 146: ... Place the cable on the top cover again 4 Attaching jig A Attach jig A to the cable as shown below Technical Information The purpose of using jig A is to prevent the cable from spreading and being caught at the part where jig A is bent Jig ...

Page 147: ...ning cable clamp plate screws 1 Tighten the sensor side screw until the space between the screw and the cover is 2 mm At this time cable clamp plate will be inclined as shown below Q Technical Information Space between the sensor side cable clamp plate and cover is made smaller first in order to prevent the cable on the sensor side being caught in the cable clamp plate Sensor side screw Sensor sid...

Page 148: ...lamp plate and the cover is about 2 5 mm O QD T 8 Attaching jib B Insert jig B between the outer side of the cable clamp plate and the cover Tighten the outer side screw while pressing jib B in the direction as illustrated Technical information Pushing in the cable with Jig B will decrease the amount of cable that will be caught in the cable clamp plate Jig B should be pushed until the U groove to...

Page 149: ...er side screw until the cable is held with the cable clamp plate Then loosen the screw slightly to remove jig B 10 Fully tightening the screws Fully tighten the outer side screw until the cable clamp plate touches against the cover Then fully tighten the sensor side screw ...

Page 150: ...ck that the screws are fully tightened so there is no space between the edges of the cable clamp plate and the cover on both the sensor side and the outer side Cable may be slightly caught at parts where cable clamp plate is bent Must be no space ...

Page 151: ...assembly screw Finally tighten the screws of cable clamp assembly 14 Checks Check that the cable is not caught in cable clamp plate NG Cover of cable is caught and clamp is not touching against the top OK Cover of cable is slightly caught but the clamp is touching against the top cover ...

Page 152: ...he Grid detect sensor on the top cover and remove this screw 2 Loosen the screw x4 fixes the PCB 50 LED on the top cover and remove this PCB Note 1 At the assembling draw the cable carefully so as not to crowd 2 Do not tighten the screw so much Screw x2 Washer Connector Grid detect sensor PCB 50 LED Screw x4 Spring Washer Plane Washer Alminium Spacer ...

Page 153: ... measuring resistance value Cable attachment jig BY9 6551 Adhesive Cable attachment jig is used when attaching the new cable For details see Service Manual Report CXDI 50G 05 001 2 Notes Do not place anything in the chest pocket Things in your pocket may fall out and damage the sensor unit Be sure that the work place is well ordered to prevent the chassis from getting scratched Be sure that the wo...

Page 154: ... is recommended to use the torque screwdriver for tightening the screw Tightening torque 4kgf cm Note Note that torque differs from that for the conduction tape After screws have been secured apply adhesive XD1 3100 267 XD1 2100 267 XB1 2260 606 BG7 2767 100 BA4 2434 000 Aluminum spacer Bent here Rib Do not let the bent part of aluminum spacer touch the rib PCB 50LED Tightening torque 4Kgf cm Appl...

Page 155: ...he bottom of the screw hole 3 Check that the value on the tester is 0 1 ohm or less from the value measured in 1 above For example if the value is 0 3 ohm or less 0 2 ohm 0 1 ohm it is acceptable Note The value on the test must be the same for more than two seconds However if the value changes between two successive numbers such as between 0 2 ohm and 0 3 ohm it is acceptable 5 Assembly 1 Connect ...

Page 156: ...es the PWB 50Di and remove it Note 1 At assembling insert the connector carefully in the direction of the flat cable 2 At assembling there must not be a foreign body on the spacer sheet 3 Exchange the flat cable for parts with a new one used one Screw x 9 Hold Connect point Upper Connect point Below ...

Page 157: ...ew M2 6 x 16 fixes the PCB 50AD and remove it Note 1 At assembling insert the connector carefully in the direction of the flat cable 2 Exchange the flat cable for parts with a new one used one Contact position Screw x 16 At attaching the flat cable perform the work with very carefully ...

Page 158: ...e connector of each cable 1 Sensor cable J002 CN2 2 X ray I F cable J004 3 Remote switch cable CN4 4 PWB 40XRAY board 50 Power supply J001 CN3 2 Loosen the screw fixes the PWB 40XRAY and remove it Note The power supply cable must be removed before assembling ...

Page 159: ...OFF 7m SW2 SW2 Function 1 ON 2 OFF 3 ON 4 ON Sub No by Product type 2 It changes when PCB is changed etc Not compatible with that of sub No 1 5 ON 6 OFF 7 ON 8 OFF Product type a Product type should be a Since Firmware Ver 2 00 05 and later identifies the product type CXDI 50G 50C from Sensor serial No Sub No by product type The setting 1 4 of SW2 is identified Sub No by product type 2 indicates t...

Page 160: ...G7 9061 No special setting 2 Power Box 1 PWB 40XRAY BG7 3069 JP1 Short the JP1 according to the power unit JP1 Function 6 8 Short 50 Power Unit 7m BG7 2857 7 8 Short 50 Power Unit 3m BG7 2858 How to discriminate between the power boxes 50 Power Unit 7m 1 2 Alphabet on the label A A Color of the label White 50 Power Unit 3m 1 2 Alphabet on the label B B Color of the label Pink JP1 1 2 50G Power Uni...

Page 161: ...r of exposures Basically the counter should be reset to 0 when the sensor unit is replaced Refer to 13 Changing the Total Image Count in 5 2 5 Settings in 2 5 Installation of 2 Installation Manual 6 Check the image quality Refer to 5 2 6 Image Quality in 2 5 Installation of 2 Installation Manual 7 Back up the data Back up the data to FD as required Refer to Backing Up when Installing and 15 Backin...

Page 162: ...ights 2 Check the image quality Refer to 5 2 6 Image Quality in 5 2 5 Settings in 2 5 Installation of 2 Installation Manual 4 When PCB 50AD BG7 2770 is replaced 1 Check the image quality Refer to 5 2 6 Image Quality in 5 2 5 Settings in 2 5 Installation of 2 Installation Manual 4 2 Power box 1 When PWB 40XRAY BG7 3069 is replaced 1 Set the jumper pins on the PCB Refer to 2 Power Box in 2 PCB setti...

Page 163: ......

Page 164: ...c ch h 2 20 00 07 7 R Re ev v 0 04 4 C Ca an no on n I In nc c J Ja ap pa an n C Co op py yr ri ig gh ht t C C C Ca an no on n I In nc c M Me ed di ic ca al l T Te ec ch hn ni ic ca al l S Se er rv vi ic ce e D De ep pt t A Al ll l r ri ig gh ht ts s R Re es se er rv ve ed d C CX XD DI I 5 50 0G G 5 50 0C C ...

Page 165: ...CXDI SYSTEM Rev 04 CONTENTS CXDI 50G 50C 1 IMAGING UNIT 2 POWER BOX 3 REMOTE SWITCH UNIT 4 IMAGING UNIT Electrical 5 POWER BOX Electrical 6 INDEX OF PARTS NUMBERS 7 ...

Page 166: ...50C POWER BOX 7m Y67 2786 000 1 50C POWER BOX 3m Y67 2787 000 1 3 CABLE UNIT X RAY I F BH6 5728 040 1 4 SWITCH UNIT REMOTE BG7 2772 060 1 5 CABLE UNIT POWER 100V BH4 6494 020 1 6 CABLE UNIT POWER 120V BH4 2385 100 1 7 CABLE UNIT POWER 230V BH4 6217 030 1 8 CLAMP CABLE WT2 5859 020 1 9 SCREW XB1 1400 603 1 Key No 1 Key No 2 Key No 3 Key No 4 Canon Inc ...

Page 167: ...CXDI SYSTEM 1 2 Rev 04 Key No 5 Key No 6 Key No 7 Key No 8 Key No 9 Canon Inc ...

Page 168: ... 2783 000 1 COVER SIDE L W O SHEET Q 3 Y67 2784 000 1 COVER SIDE R W O SHEET Q 4 BA4 1786 050 1 COVER SIDE C W O SHEET Q 5 BA4 2144 000 2 SHEET Q 6 BA4 2144 000 2 SHEET Q 7 BA4 2144 000 2 SHEET Q 8 BA4 1783 000 4 SCREW 9 XB1 2301 206 5 SCREW Y67 2692 030 1 CABLE UNIT 7M 10 Y67 2693 030 1 CABLE UNIT 3M Application of the base cover unit with Shimomaru address 7M Body No 150079 7M Body No 100009 CXD...

Page 169: ...O PARTS NO Q TY DESCRIPTION MEMO 1 XB1 2300 806 15 SCREW 2 XB1 2300 806 11 SCREW 3 BA4 1775 030 11 SLEEVE ISOLATION 4 BA4 1776 020 11 CAP SLEEVE 5 BA4 1789 000 4 SENSOR SHOCK 6 XB1 2260 606 8 SCREW 7 BA4 1779 000 4 PLATE CONDUCTIVE 1 3 2 4 7 5 6 Canon Inc ...

Page 170: ...lated 9 BH6 5720 000 1 CABLE FLAT 10 BH6 5722 000 1 CABLE FLAT 11 BH6 7582 000 1 CABLE FLAT Gold plated 12 BH6 7583 020 1 CABLE FLAT Gold plated 13 BH6 7584 000 1 CABLE FLAT Gold plated 14 XB1 2260 606 8 SCREW 15 XB1 2260 606 9 SCREW 16 XB1 2260 606 4 SCREW 17 BH6 5730 000 1 SWITCH UNIT GRID 18 XA1 1200 506 2 SCREW 19 BA4 2180 000 1 CLAMP CABLE 20 XB1 2300 806 2 SCREW 21 XB1 2260 606 2 SCREW 22 XB...

Page 171: ...CXDI SYSTEM 2 4 Rev 04 IMAGING UNIT CXDI 50G 27 26 25 24 23 22 21 20 19 17 18 2 8 5 12 9 13 7 10 6 11 1 4 3 14 15 16 Canon Inc ...

Page 172: ... Gold plated 9 BH6 5720 000 1 CABLE FLAT 10 BH6 5721 000 1 CABLE FLAT 11 BH6 5722 000 1 CABLE FLAT 12 BH6 7582 000 2 CABLE FLAT Gold plated 13 BH6 7584 000 1 CABLE FLAT Gold plated 14 XB1 2260 606 16 SCREW 15 XB1 2260 606 9 SCREW 16 XB1 2260 606 8 SCREW 17 BH6 5730 000 1 SWITCH UNIT GRID 18 XA1 1200 506 2 SCREW 19 BA4 2180 000 1 CLAMP CABLE 20 XB1 2300 806 2 SCREW 21 XB1 2260 606 2 SCREW 22 XB1 22...

Page 173: ...CXDI SYSTEM 2 6 Rev 04 IMAGING UNIT CXDI 50C 27 26 25 24 23 22 21 20 19 17 18 5 2 8 9 13 7 11 10 12 1 6 12 3 14 15 4 16 Canon Inc ...

Page 174: ...rt BA4 1794 020 2 PLATE HANDLE Old part 3 BA4 2992 000 2 PLATE HANDLE New part 4 XB1 2401 206 2 SCREW Key No 1 Old part Key No 2 Old part Key No 3 Old part Key No 4 Application of Key No 1 to 3 of the new parts 7M Body No 150827 CXDI 50G 3M Body No 250001 7M Body No 100056 CXDI 50C 3M Body No 200001 Note Old and new parts are not interchangeable Replace three parts from Key No 1 to 3 in sets to al...

Page 175: ...2 XB1 2300 806 4 SCREW 3 BA4 1803 000 4 PAD 4 XB1 2300 406 8 SCREW 5 BA4 1800 020 1 UPPER COVER POWER BOX 6 XB2 7300 606 5 SCREW W WASHER 7 XB1 2300 406 2 SCREW 8 XB1 2300 406 2 SCREW 9 BA4 1802 000 1 COVER CABLE 10 XB1 1400 603 1 SCREW 11 XD1 4200 402 1 WASHER TOOTHED LOCK 1 3 2 4 7 11 10 9 5 8 6 Canon Inc ...

Page 176: ... PARTS NO Q TY DESCRIPTION MEMO 1 BG7 3069 000 1 PCB UNIT X RAY I F 2 BG7 2856 050 1 CABLE UNIT POWER SUPPLY 3 BG7 2857 070 1 POWER SUPPLY UNIT 7M BG7 2858 060 1 POWER SUPPLY UNIT 3M 4 WB2 5019 000 1 RELAY DC 5 WS1 0287 000 1 PLUG 2P 4 1 3 2 5 Canon Inc ...

Page 177: ...CXDI SYSTEM 4 Rev 04 REMOTE SWITCH UNIT CXDI 50G 50C KEY NO PARTS NO Q TY DESCRIPTION MEMO 1 Y67 2659 000 1 SWITCH LOCKER 2 XZ9 0488 000 2 MAGNET CATCH 1 2 Canon Inc ...

Page 178: ...LAT CA4 BH6 5700 000 CABLE FLAT CA5 BH6 7580 000 CABLE FLAT Gold plated CA6 BH6 7581 000 CABLE FLAT Gold plated CA7 BH6 7584 000 CABLE FLAT Gold plated CA8 BH6 5720 000 CABLE FLAT CA9 BH6 7583 020 CABLE FLAT Gold plated SW1 BH6 5730 000 SWITCH UNIT GRID W CABLE PB1 BG7 2999 040 PCB UNIT DIGITAL Gold plated PB2 BG7 9061 160 PCB UNIT A D Gold plated PB3 BG7 2767 100 PCB UNIT LED Gold plated Canon In...

Page 179: ...YSTEM 5 2 Rev 04 POWER BOX CA1 PCB D EP 2 CA9 PB3 PWB 50Di PB1 CA8 CA7 CA3 CA2 CA6 PB2 CA4 CA5 CXDI S Canon Inc CXDI 50G Electrical PCB D EP 3 SW1 Grid Detector PCB 50A 2 ...

Page 180: ...CA7 BH6 7581 000 CABLE FLAT Gold plated CA8 BH6 7581 000 CABLE FLAT Gold plated CA9 BH6 7582 000 CABLE FLAT Gold plated CA10 BH6 5722 000 CABLE FLAT CA11 BH6 5700 000 CABLE FLAT CA12 BH6 7580 000 CABLE FLAT Gold plated CA13 BH6 7581 000 CABLE FLAT Gold plated CA14 BH6 7584 000 CABLE FLAT Gold plated CA15 BH6 5720 000 CABLE FLAT SW1 BH6 5730 000 SWITCH UNIT GRID W CABLE PB1 BG7 2999 040 PCB UNIT DI...

Page 181: ...CXDI SYSTEM 5 4 Rev 04 Canon Inc POWER BOX CA3 CA4 CA2 CA7 PB2 CA5 CA6 PCB D EP 2 PCB D EP 1 PB4 PB1 CA15 CA14 CA10 CA9 CA8 CA13 PB3 CXDI 50C Electrical PCB D EP 3 CA12 CA11 PCB D EP 4 Grid Detector SW1 ...

Page 182: ...5 100 CABLE UNIT POWER 120V BH4 6217 030 CABLE UNIT POWER 230V CA2 BG7 2856 050 CABLE UNIT POWER SUPPLY CA3 BH6 5728 040 CABLE UNIT X RAY I F CA4 Y67 2692 030 Y67 2693 030 CABLE UNIT 7M CABLE UNIT 3M SW1 BG7 2772 060 SWITCH UNIT REMOTE PB1 BG7 3069 000 PCB UNIT X RAY I F POWER BOX Electrical Imaging Unit CA 4 PB 1 CA 3 CA 2 SW 1 CA 1 ...

Page 183: ...0 2 3 2 5 BA4 1789 000 2 2 BA4 1792 030 2 7 BA4 1793 020 2 7 BA4 1794 020 2 7 BA4 1800 020 3 1 BA4 1802 000 3 1 BA4 1803 000 3 1 BA4 2144 000 1 2 BA4 2180 000 2 3 2 5 BA4 2434 000 2 3 2 5 BF0 5372 020 2 3 2 5 BG7 2767 100 2 3 2 5 5 1 5 3 BG7 2772 060 1 1 6 BG7 2856 050 3 2 6 BG7 2857 070 3 2 BG7 2858 060 3 2 BG7 2999 040 2 3 2 5 5 1 5 3 BG7 3069 000 3 2 6 BG7 9061 160 2 3 2 5 5 1 5 3 Canon Inc ...

Page 184: ...2 000 2 3 2 5 5 1 5 3 BH6 5728 040 1 1 6 BH6 5730 000 2 3 2 5 5 1 5 3 BH6 7580 000 2 3 2 5 5 1 5 3 BH6 7581 000 2 3 2 5 5 1 5 3 BH6 7582 000 2 3 2 5 5 1 5 3 BH6 7583 020 2 3 2 5 5 1 BH6 7584 000 2 3 2 5 5 1 5 3 WB2 5019 000 3 2 WS1 0287 000 3 2 WT2 5859 020 1 1 XA1 1200 506 2 3 2 5 XB1 1400 603 1 1 3 1 XB1 2260 606 2 2 2 3 2 5 XB1 2300 406 3 1 XB1 2300 806 2 2 2 3 2 5 3 1 XB1 2301 006 2 3 2 5 XB1 ...

Page 185: ...NO REPORT NO XD1 2100 267 2 3 2 5 XD1 3100 267 2 3 2 5 XD1 4200 402 3 1 XZ9 0488 000 4 Y67 2659 000 4 Y67 2669 040 1 1 Y67 2670 040 1 1 Y67 2671 000 1 2 Y67 2692 030 1 2 5 1 5 3 6 Y67 2693 030 1 2 5 1 5 3 6 Y67 2783 000 1 2 Y67 2784 000 1 2 Y67 2786 000 1 1 Y67 2787 000 1 1 Canon Inc ...

Page 186: ......

Page 187: ...C Ca an no on n I In nc c M Me ed di ic ca al l T Te ec ch hn ni ic ca al l S Se er rv vi ic ce e D De ep pt t A Al ll l r ri ig gh ht ts s R Re es se er rv ve ed d 6 6 T Tr ro ou ub bl le es sh ho oo ot ti in ng g P Pr ri in nt te ed d b by y C Ca an no on n I In nc c F Fe eb b 2 20 00 06 6 R Re ev v 0 03 3 ...

Page 188: ......

Page 189: ...Content 1 Gathering Information about Problems 1 2 How to back up and recover the system 3 ...

Page 190: ...ormation when Communication error related to Dr Watson occurred between the OPU and the CXDI resulting in CXDI application failure Display on the OPU freezes and cannot be recovered 1 Environmental information such as version of the CXDI host program composition of hardware and optional software 2 Dr Watson log C Documents and Settings All Users Application Data Microsoft Drwatson drwts32 log 3 Ev...

Page 191: ...g but all the history files 7 syslog 8 Dr Watson log 9 Event viewer system log 2 Required log files and information according to the used optional module Please also gather the following files and information other than those indicated in 1 2 1 DMW 1 chmwm ini 2 ccMax_ws ini chmwm ini ccMax_ws ini will be collected automatically when all the INI files directly under CCR folder are collected 3 chmw...

Page 192: ...ations users made while using the system B Backup method using a hard drive The control PC has no feature that mirrors all the files including the OS to other hard drives Therefore to be ready for hard drive crashes we recommend that you add another hard drive when installing the system in order to copy the software between the hard drives using Ghost or Drive Copy which are available on the marke...

Page 193: ...drive crashes 1 Replace the crashed hard drive with the hard drive provided in item B above Backup method using a hard drive Copy Ccr from the original hard drive to the new hard drive when the D drive in the crashed hard drive is in a normal state a problem case caused by the OS Note Perform Step 2 after upgrading if the CXDI version you are using is newer than that in the hard drive provided by ...

Page 194: ... a hard drive to a different machine Required Due to being regarded as anything other than the hard drive being modified Changing external devices Not required Due to recognizing the PC s internal configuration only Adding hardware components Not required Only replacement of components that existed at the time of first activation is detected Adding components is a different category 2 Hardware com...

Page 195: ... no on n I In nc c M Me ed di ic ca al l T Te ec ch hn ni ic ca al l S Se er rv vi ic ce e D De ep pt t A Al ll l r ri ig gh ht ts s R Re es se er rv ve ed d 7 7 S Se er rv vi ic ce e M Ma an nu ua al l R Re ep po or rt t P Pr ri in nt te ed d b by y C Ca an no on n I In nc c F Fe eb b 2 20 00 06 6 R Re ev v 0 03 3 ...

Reviews: