Chapter 3
3-30
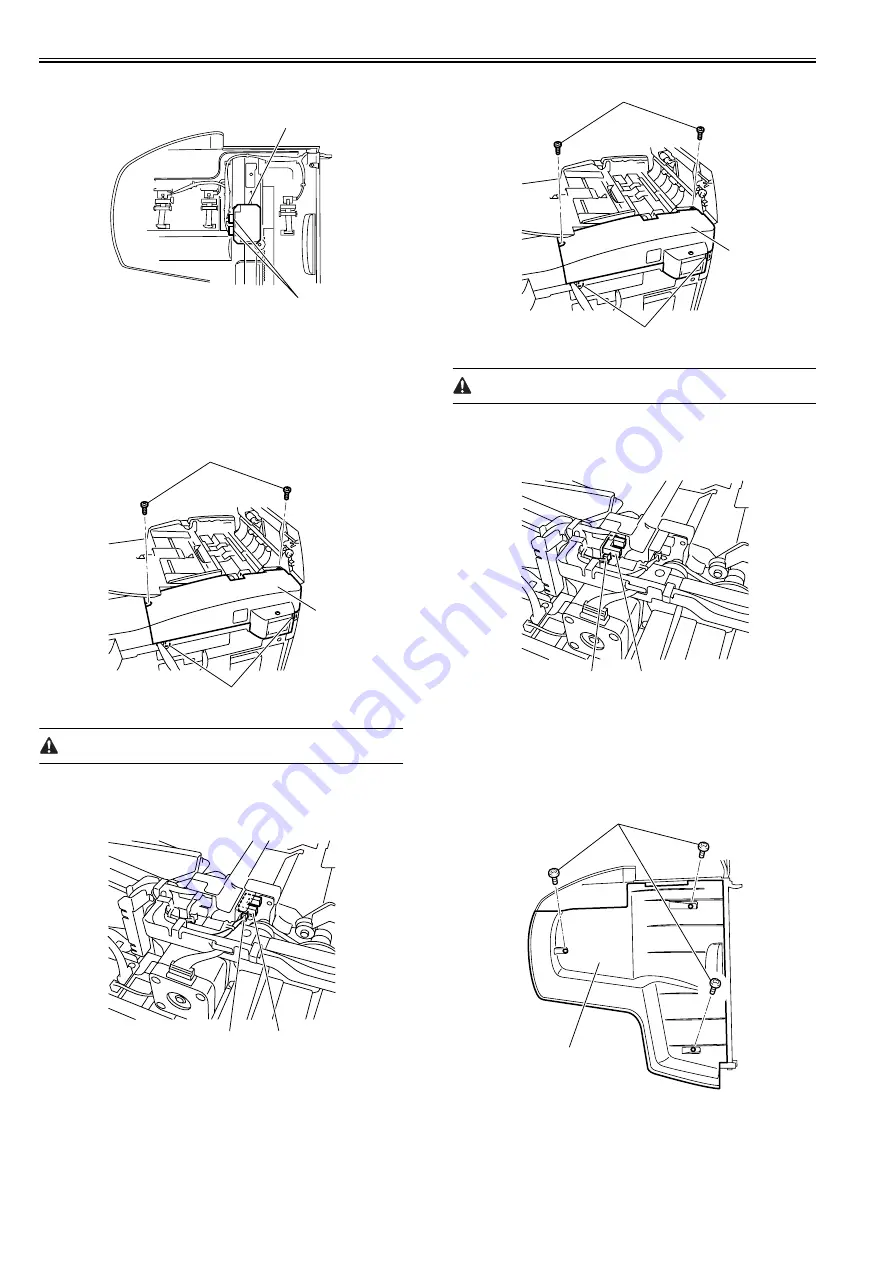
2) Disconnect the two connectors [1], and then remove the relay PCB (doc-
ument width sensor PCB) [2].
F-3-191
3.5.3 Cover Open/Closed Sensor
3.5.3.1 Removing the Rear Cover
0010-6200
1) Open the feeder cover.
2) Move to the back of the machine, remove the two screws [1], and then
detach the rear cover [2].
F-3-192
Remove the rear cover with the two claws [3] released.
3.5.3.2 Removing the Feeder Cover Open/Close Sensor
0010-4235
1) Disconnect the connector [1], and then remove the feeder cover open/
close sensor [2].
F-3-193
3.5.4 Document Set Sensor
3.5.4.1 Removing the Rear Cover
0010-6202
1) Open the feeder cover.
2) Move to the back of the machine, remove the two screws [1], and then
detach the rear cover [2].
F-3-194
Remove the rear cover with the two claws [3] released.
3.5.4.2 Removing the Document Placement Sensor
0010-4237
1) Disconnect the connector [1], and remove the document placement sensor
[2].
F-3-195
3.5.5 Document Length sensor
3.5.5.1 Removing the Document Length Sensor
0010-6761
1) Remove the three screws [1] on the reverse side of the document tray us-
ing the stubby driver, and then detach the cover [2].
F-3-196
2) Disconnect the connector, and then remove the document length sensor
[1].
[1]
[2]
[1]
[3]
[2]
[1]
[2]
[1]
[3]
[2]
[1]
[2]
[1]
[2]
Summary of Contents for DADF-P1
Page 1: ...Sep 14 2005 Service Manual Feeder DADF P1 ...
Page 2: ......
Page 6: ......
Page 12: ......
Page 13: ...Chapter 1 Specifications ...
Page 14: ......
Page 16: ......
Page 19: ...Chapter 2 Functions ...
Page 20: ......
Page 22: ......
Page 35: ...Chapter 3 Parts Replacement Procedure ...
Page 36: ......
Page 72: ......
Page 73: ...Chapter 4 Maintenance ...
Page 74: ......
Page 76: ......
Page 83: ...Chapter 5 Error Code ...
Page 84: ......
Page 86: ......
Page 88: ......
Page 89: ...Sep 14 2005 ...
Page 90: ......


