background image

DI

GIT

AL CA

MER

A

Camera

 Use

Guide

Please read the 

Read This First

 section (p. 7).

Please also read the 

Software Starter Guide

 and the 

Direct Print User Guide

.

CDI-E117-010   XXXXXXX   © 2004 CANON INC.   PRINTED IN JAPAN

Camera User Guide

ENGLISH

Summary of Contents for DIGITAL IXUS 430

Page 1: ...Camera User Guide Please read the Read This First section p 7 Please also read the Software Starter Guide and the Direct Print User Guide CDI E117 010 XXXXXXX 2004 CANON INC PRINTED IN JAPAN Camera User Guide ENGLISH ...

Page 2: ...essories e g a leakage and or explosion of a battery pack Please note that this warranty does not apply to repairs arising out of the malfunction of non genuine Canon accessories although you may request such repairs on a chargeable basis Shooting with the Camera This Guide This Guide Software Starter Guide Software Starter Guide Direct Print User Guide Printer User Guide Installing the Software C...

Page 3: ...ideo Format Please set the camera s video signal format to the one used in your region before using it with a TV monitor p 127 Charging the Date Time Battery The camera has a built in rechargeable lithium battery that maintains the date time and other camera settings This battery recharges when the main battery pack is inserted into the camera When you first purchase the camera place a charged bat...

Page 4: ...u p 48 See Set up Menu p 48 See My Camera Menu p 51 What do the icons listed in the Camera User Guide mean See Information Displayed on the LCD Monitor p 35 See Menu Settings and Factory Defaults p 47 This mark denotes issues that may affect the camera s operation This mark denotes additional topics that complement the basic operating procedures Icons on the right end of title bars show the applic...

Page 5: ...ions 30 Shooting 53 Playback 89 Erasing 105 Print Settings Transferring 108 Connecting the Camera to a Computer TV 118 My Camera Settings 129 List of Messages 134 Troubleshooting 136 Appendix 140 Photo Tips and Information 153 Thumb Index ...

Page 6: ...he Viewfinder 39 Using the Zoom 40 Pressing the Shutter Button 41 Selecting Menus and Settings 43 Menu Settings and Factory Defaults 47 Resetting Settings to Their Default Values 52 Shooting Shooting in Auto Mode 53 Reviewing an Image Right after Shooting 54 Changing Resolution Compression Settings 55 Quick Shots 57 Using the Flash 58 Shooting Close Ups Infinity Shots 60 Using the Digital Zoom 62 ...

Page 7: ...ber 87 Playback Displaying Images Individually 89 Magnifying Images 90 Viewing Images in Sets of Nine Index Playback 91 Viewing Movies 93 Editing Movies 95 Rotating Images in the Display 97 Attaching Sound Memos to Images 98 Automated Playback Slide Shows 100 Protecting Images 104 Erasing Erasing Single Images 105 Erasing All Images 106 Formatting CF Cards 107 Printing About Printing 108 Setting t...

Page 8: ...129 Registering My Camera Settings 131 List of Messages 134 Troubleshooting 136 Appendix Using an AC Adapter Kit Sold Separately 140 Using a Car Battery Charger Sold Separately 141 Camera Care and Maintenance 142 Specifications 143 Photo Tips and Information Tip for Using the Self timer 153 How to adjust the exposure 153 ISO Speed 154 Advanced Technique for the Macro mode 154 Index 155 Functions A...

Page 9: ...digital cameras are intended for personal use and should never be used in a manner that infringes upon or contravenes international or domestic copyright laws and regulations Please be advised that in certain cases the copying of images from performances exhibitions or commercial properties by means of a camera or other device may contravene copyright or other legal rights even if the image was sh...

Page 10: ...ticular remain at least one meter 39 inches away from infants when using the flash Store this equipment out of the reach of children and infants Accidental damage to the camera or batteries by a child could result in serious injury In addition placement of the strap around the child s neck could result in asphyxiation Do not attempt to disassemble or alter any part of the equipment that is not exp...

Page 11: ...e camera power off and remove the camera battery or unplug the power cable from the power outlet Continued use of the equipment may result in fire or electrical shock Please consult your camera distributor or the closest Canon Customer Support Help Desk Do not use substances containing alcohol benzene thinners or other flammable substances to clean or maintain the equipment The use of these substa...

Page 12: ...ury Do not short circuit the battery terminals with metallic objects such as key holders It could lead to overheating burns and other injuries Use the supplied terminal cover to transport or store the battery pack Before you discard a battery cover the terminals with tape or other insulators to prevent direct contact with other objects Contact with the metallic components of other materials in was...

Page 13: ...ve use with your camera Do not use them with other products or batteries There is a risk of fire and other hazards Caution about magnetic fields Keep objects that are sensitive to magnetic fields such as credit cards away from the speaker of the camera p 14 Such items may lose data or stop working ...

Page 14: ...flash with your fingers or clothing when shooting The flash may be damaged and emit smoke or noise In addition do not touch the surface of the flash after taking several pictures in rapid succession Either action could result in burns Do not operate the flash with dirt dust or other items stuck to its lens The resulting heat build up could damage the flash Ensure that the battery charger is plugge...

Page 15: ...efore removing it from the bag If Condensation Forms Inside the Camera Stop using the camera immediately if you detect condensation Continued use may damage the equipment Remove the CF card battery pack or compact power adapter from the camera and wait until the moisture evaporates completely before resuming use Extended Storage When not using the camera for extended periods of time remove the bat...

Page 16: ...tems when dangling it from the wrist strap AF assist Beam p 42 Red eye Reduction Lamp p 58 Self timer Lamp p 64 Flash p 58 Lens Microphone p 98 Wrist Strap Mount Attaching the Wrist Strap Speaker Viewfinder Window p 39 Terminal Cover DIGITAL Terminal p 120 A V Out Audio Video Out Terminal p 127 ...

Page 17: ...ters Sold Separately CP Printers Interface Cable IFC 400PCU supplied with camera or the Direct Interface Cable DIF 100 supplied with the CP 100 CP 10 Bubble Jet Printers Bubble Jet Direct Compatible Printers Please refer to your Bubble Jet printer user guide PictBridge Compliant Printers Interface Cable IFC 400PCU supplied with the camera PictBridge Compliant Non Canon Printers Interface Cable IFC...

Page 18: ...ephoto Wide Angle p 40 Replay Magnify p 90 Index p 91 Mode Switch p 32 Print Share Button See below FUNC Function Button p 43 Single Image Erase Button p 105 DISP Display Button p 33 The following operations are accessible through one easy press of the Print Share button Printing See the Direct Print User Guide separate from this guide Downloading images Windows only See p 118 of this guide and th...

Page 19: ...rd Erasing from CF card Transmitting data during a computer connection Orange Ready to shoot flash on Blinking Orange Ready to shoot camera shake warning Lower Indicator Yellow Macro mode Infinity mode AF lock Blinking Yellow Focusing difficulty single beep Although you can still press the shutter button when the indicator blinks yellow you are recommended to shoot using the focus lock or AF lock ...

Page 20: ... battery charger Align the battery pack according to the arrows on the battery and the charger Insert the battery securely 2 Battery charger model names and types vary by region For CB 2LS Plug the battery charger into a power outlet For CB 2LSE Attach the power cord to the battery charger and plug it into a power outlet The charge indicator will light red while the battery pack is charging It wil...

Page 21: ... may cause poor contact between the battery pack and camera Polish the terminals with a tissue or a dry cloth before charging or using the battery pack zDo not rapidly overturn or wave the battery charger around when it contains the battery pack The battery pack could fly out zAt low temperatures battery pack performance may be reduced and the low battery icon may appear earlier than usual Under t...

Page 22: ...ring a fully charged battery pack for long periods of time about 1 year can shorten its life cycle or affect performance you are recommended to use the battery pack in the camera until it is completely discharged and to store it at normal temperature 23 C 73 F or lower If you do not use the battery pack for long periods of time charge it fully and discharge it fully in the camera at least once a y...

Page 23: ...u use it for the first time 1 Slide the battery cover in the direction of the arrows 2 Press the battery lock while inserting the battery pack all the way in until the lock clicks Insert the battery pack correctly by aligning the arrows on the camera and the battery pack To remove the battery pack press the battery lock and pull the battery pack out 3 Slide the battery cover closed 1 2 Battery Loc...

Page 24: ...emoved for more than three weeks Please use an AC Adapter Kit ACK500 sold separately for extended use of the camera p 140 Battery Pack Charge The following icons and messages will display when the battery pack charge is low See Battery Capacity p 147 Battery pack charge is low Recharge it as soon as possible before it is required for an extended period When the LCD monitor is off this icon will di...

Page 25: ...card Push the eject button and pull the CF card out 1 Slide the lock up and open the CF card slot cover 2 Insert the CF card with its label facing upward until the CF card eject button fully extends Insert the card firmly into the slot following the diagram on the CF card slot cover 3 Close the CF card slot cover 1 2 Label CF Card Eject Button ...

Page 26: ...urn the camera s power off or open the battery cover or CF card slot cover Please note that CF cards formatted with other manufacturers cameras or a computer or formatted or edited with application programs may slow down writing to the CF card or may not operate correctly in the camera You are recommended to use CF cards that have been formatted in your camera p 107 The card supplied with the came...

Page 27: ...ause condensation to form in the card and lead to a malfunction To avoid condensation place the CF card in a sealed plastic bag before moving it into a different temperature zone and allow it to adjust slowly to the new temperature zIf condensation forms on the CF card store it at room temperature until the water droplets have evaporated naturally zDo not use or store CF cards in the following loc...

Page 28: ...lt in rechargeable lithium date time battery charge is low Start from Step 5 to set the date and time 1 Press the ON OFF button until the power lamp lights 2 Press the MENU button The Rec or Play menu is displayed 3 Use the or button to select the Set up menu 4 Use the or button to select and press the SET button Power Lamp ...

Page 29: ... time This battery is recharged by the battery pack while it is in the camera Right after purchasing the camera leave a charged battery pack in the camera or plug in AC Adapter Kit ACK500 sold separately for about 4 hours to charge the date time battery It will charge even when the camera power is turned off If the Date Time menu appears when the camera power is turned on the date time battery cha...

Page 30: ...nguage for the LCD monitor display 1 Press the ON OFF button until the power lamp lights 2 Press the MENU button The Rec or Play menu is displayed 3 Use the or button to select the Set up menu 4 Use the or button to select and press the SET button Power Lamp ...

Page 31: ...T button and pressing the MENU button This function cannot be used while a movie clip is played back or a separately sold printer is connected to the camera 5 Use the or button to select a language and press the SET button 6 Press the MENU button The display will return to the Shooting or Playback screen ...

Page 32: ... on To change the start up sound and image see p 49 51 129 The start up image does not display when the LCD monitor is turned off in shooting mode or when the camera is connected to a TV via the A V Out terminal Turning On the Camera without the Start Up Sound and Start Up Image Hold the SET button down while turning on the power Press the ON OFF button until the power lamp lights green The lens e...

Page 33: ...is accessed even if Auto Power Down is set to Off Press any button except the ON OFF button to turn the LCD monitor back on This time can be changed p 49 Playback Mode Powers down approximately 5 minutes after the last control is accessed on the camera Connected to a Printer sold separately Powers down approximately 5 minutes after the last control is accessed on the camera or on a connected print...

Page 34: ...ected the or icon appears on the LCD monitor To Shoot Images Shooting Mode Slide the mode switch to To Play Back Images Playback Mode Slide the mode switch to When a printer sold separately is connected images can be printed see the Direct Print User Guide When a camera is connected recorded images can be downloaded to and viewed with a computer p 119 ...

Page 35: ...ooting Mode The LCD monitor setting On or Off is saved by the camera when the power is turned off so that the same setting is automatically available when the power is turned on again However the setting may be lost when the power has been turned off after the Change the battery pack message has displayed while the LCD monitor was on in shooting mode In the or mode the LCD monitor turns on regardl...

Page 36: ...e mode switch is set to the LCD monitor will turn on In Index playback mode p 91 the detailed display is not available Press the DISP button The display mode changes as follows with each press Standard Detailed No Information ...

Page 37: ...r blinks orange after the metering preparations are complete and the camera shake icon appears in the LCD monitor Set the flash to or or affix the camera to a tripod to shoot Right after a shot is taken the image and its information appear in the LCD monitor for 2 seconds or for the number of seconds selected if the review time was changed 2 10 sec even if you release the shutter button If the SET...

Page 38: ...tery p 22 Metering Mode p 77 Shooting Method p 63 64 Flash p 58 Movie Recording p 70 Camera Shake Warning p 35 Spot AE Point Frame Mode AF Frame p 76 Shots Remaining or Remaining Movie Time Elapsed Time Digital Zoom p 62 PowerShotS500DIGITALELPH DIGITALIXUS500 3 8x 4 9x 6 1x 7 6x 9 3x 12 0x PowerShotS410DIGITALELPH DIGITALIXUS430 4 3x 5 3x 6 7x 8 2 11 0x Red Quick Shot p 57 Exposure Compensation p...

Page 39: ...ter Mode p 79 Shooting Mode p 53 Exposure Compensation p 78 White Balance p 81 Photo Effect p 84 ISO Speed p 85 Resolution Movies p 55 Flash p 58 Metering Mode p 77 Movie Length Shown on Movie Files p 70 File Number Shooting Date Image Number Playback Mode Detailed Display Histogram Macro Infinity p 60 1 is not available with the PowerShot S410 DIGITAL ELPH DIGITAL IXUS 430 1 ...

Page 40: ...ormat not conforming to Design rule for Camera File System Standards RAW format file File with unrecognized format Histogram Function The histogram is a graph that allows you to judge the brightness of the shot image The greater the bias toward the left in the graph the darker the image The greater the bias toward the right the brighter the image If the image is too dark adjust the exposure compen...

Page 41: ...s especially with close ups If you use the viewfinder to take close up shots portions of the close up subject may not appear in the recorded image Use the LCD monitor when taking close up shots Shows the center of the image View Finder About the Autofocus Function This camera employs AiAF artificial intelligence autofocus technology which uses a broad metering field to calculate the focal distance...

Page 42: ...digital zoom up to approximately 12x with the PowerShot S500 DIGITAL ELPH DIGITAL IXUS 500 and 11x with the PowerShot S410 DIGITAL ELPH DIGITAL IXUS 430 p 62 The digital zoom is unavailable in some modes p 160 Images become coarser the more they are digitally zoomed 1 Press the zoom lever toward or Press the zoom lever toward to zoom in telephoto Press the zoom lever toward to zoom out wide angle ...

Page 43: ...ng Orange Camera shake warning Insufficient exposure Lower Indicator Yellow Macro mode Infinity mode AF lock p 72 Blinking Yellow Focusing difficulty single beep sounds Use the focus lock or AF lock to shoot when the indicator blinks yellow p 72 zAF Frame Status LCD Monitor On AiAF On p 76 Green Frame Metering complete focused AF frame No Frame Focusing difficulty single beep sounds AiAF Off p 76 ...

Page 44: ...ist Beam can be turned off p 47 For example if animals are your subject turn off the beam when shooting in the dark to avoid startling them However please keep in mind the following facts Turning the AF assist Beam off or shooting in dark places may make it more difficult for the camera to focus The red eye reduction lamp may emit when the flash is set to or even if the AF assist Beam is turned of...

Page 45: ...the mode switch to Rec 2 Press the FUNC button The icons of the items that can be adjusted appear at the LCD monitor s left edge 3 Use the or button to select an item See FUNC Menu on the next page for the menu items available 4 Use the or button to select an option Some menu items can only be selected after pressing the SET button to display the next menu Press the SET button again to confirm the...

Page 46: ...ie p 55 FUNC MENU ISO Speed p 85 Photo Effect p 84 Compression p 55 Resolution p 55 Exposure Compensation p 78 1 Long Shutter Mode p 79 White Balance p 81 Items in parentheses show default settings The PowerShot S410 DIGITAL ELPH DIGITAL IXUS 430 menu is different because it does not feature the option ...

Page 47: ...er of the LCD monitor selected The zoom lever lets you select the menu even if the or icon is not selected 4 Use the or button to select an item See Menu Settings and Factory Defaults p 47 for the menu items 5 Use the or button to select an option Menu items followed by an ellipsis can only be selected after pressing the SET button to display the next menu Press the SET button again to confirm the...

Page 48: ...the Shooting mode Shooting Mode Playback Mode My Camera Menu Shooting Mode Playback Mode When the My camera menu is displayed pressing the button returns to the Rec Play menu When the Rec Play menu is displayed pressing the button displays the My camera menu Selects items Selects options ...

Page 49: ... frame On Off p 76 Cont Shooting Sets the speeds of the continuous shooting mode Standard continuous shooting High speed continuous shooting p 63 Self timer Sets the duration of the self timer delay 10 seconds 2 seconds p 64 AF assist Beam Sets the AF assist Beam to on or off On Off p 42 Digital Zoom Sets the digital zoom to on or off On Off p 62 Review Sets the duration images display on the LCD ...

Page 50: ...her p 100 Print Order Selects images and the number of print copies for output to a direct print compatible printer or photo developing service p 110 Transfer Order Specifies settings for images before downloading to a computer p 116 Set up Menu Menu Item Options Reference Page Mute Sets whether or not a beep sounds when the shutter button is pressed or when a menu operation is performed See How t...

Page 51: ...ound played when the shutter releases The shutter sound does not play when a movie is recording p 41 Playback Vol Adjusts the volume of movie sounds and sound memos p 93 p 98 LCD Brightness Adjusts the LCD brightness of the LCD monitor 7 to 0 to 7 Use the or button to adjust the brightness If you press the or button the display returns to the Set up menu You can check the brightness in the LCD mon...

Page 52: ...he camera held vertically are automatically rotated in the display On Off p 86 Language Sets the language used in menus and messages on the LCD monitor English Italiano Deutsch Norsk Français Svenska Nederlands Español Dansk Chinese Suomi Japanese You can also change the language in playback mode by holding the SET button and pressing the MENU button p 28 Video System Sets the video output signal ...

Page 53: ...in the Set up menu When Mute is set to On each sound option will not sound even if they are set individually to On The warning sound however will emit even when Mute is set to On My Camera Menu Menu Item Available Settings Reference Page Theme Selects a common theme for each My Camera settings item p 129 Start up Image Sets the image displayed when the camera power is turned on Start up Sound Sets...

Page 54: ... be reset The Date Time Language and Video System options in the Set up menu p 50 White balance data recorded with the custom white balance function p 82 Newly added My Camera settings p 131 1 Press the ON OFF button until the power lamp lights green Set the mode switch to any position 2 Press and hold the MENU button for more than 5 seconds 3 Use the or button to select OK and press the SET butto...

Page 55: ...the zoom lever to achieve the desired composition relative subject size in the viewfinder p 40 4 Press the shutter button halfway p 41 Two beeps will sound when the camera has finished metering and the upper indicator beside the viewfinder will light green or orange If the LCD monitor is on the AF frame will appear green If the subject is difficult to focus on the lower indicator beside the viewfi...

Page 56: ...tailed information p 34 Erase the image p 105 Magnify the image in the display When pressing the SET button while the image is displayed p 90 Changing the Review Duration The default review time is 2 seconds The review function can be set to Off or changed to any time in the range of 2 to 10 seconds in one second increments 1 In the Rec menu select See Selecting Menus and Settings p 43 2 Use the o...

Page 57: ... 297 mm 8 3 x 11 7 in prints Print up to Letter size 216 x 279 mm 8 5 x 11 in prints Medium 2 1600 x 1200 pixels Print postcard size 148 x 100 mm 6 x 4 in prints Print L size 119 x 89 mm 4 7 x 3 5 in prints Small 640 x 480 pixels Small Send images as e mail attachments Shoot more images Resolution Purpose Large 2272 x 1704 pixels Large Print larger than A4 size 210 x 297 mm 8 3 x 11 7 in prints Pr...

Page 58: ... 430 320 x 240 pixels 160 x 120 pixels 1 In the FUNC menu select or See Selecting Menus and Settings p 43 The current setting is displayed 2 Use the or button to select an option Compression Excluding Movies Select or Resolution Still Images Select or Resolution Movies Select or You can shoot right after selecting an option The menu displays again after the shot allowing you to change the settings...

Page 59: ...ust be on The LCD monitor display freezes while the camera is autofocusing 3 Press the FUNC button The display will return to the Shooting screen 1 Press the DISP button to turn the LCD monitor on 2 In the Rec menu select See Selecting Menus and Settings p 43 3 Use the or button to select On and press the MENU button The display will return to the Shooting screen The icon will display on the LCD m...

Page 60: ...n The flash fires with every shot Flash Off The flash will not fire Slow Synchro The flash timing is adjusted to slow shutter speeds This reduces the chance that the background will be dark when shots are taken at night or in rooms with artificial lighting The red eye reduction lamp fires with each shot Use of a tripod is recommended Setting available U Can be selected for the first image only U U...

Page 61: ...lash is charging The flash fires twice The main flash follows a preparatory pre flash The exposure reading obtained from the subject with the pre flash is used to set the optimal flash intensity for the main flash which is used to capture the image When using the flash be sure to shoot from at least 46 cm 1 5 ft away from your subject for standard photography and at least 30 cm 1 0 ft for macro ph...

Page 62: ... in to 1 0 ft Macro Use this mode to record subjects in the range of 5 to 46 cm 2 0 in to 1 5 ft from the lens tip when at wide angle end and in the range of 30 to 46 cm 1 0 ft to 1 5 ft when at the telephoto end setting Infinity Use this mode to record landscapes and distant objects It can also be used for compositions combining both near and distant objects Setting available U Can be selected fo...

Page 63: ...telephoto end and the wide angle end the distance from lens to subject is the same as when the zoom is set to the telephoto end Distance from Lens to Subject Image Area Telephoto End 30 cm 1 0 ft 107 x 80 mm 4 2 x 3 1 in Wide Angle End 5 cm 2 0 in 58 x 43 mm 2 3 x 1 7 in ...

Page 64: ...hey are digitally zoomed 1 Press the DISP button to turn the LCD monitor on 2 In the Rec menu select See Selecting Menus and Settings p 43 3 Use the or button to select On and press the MENU button The display will return to the Rec screen 4 Press the zoom lever toward The combined optical and digital zoom factor appears in the upper right of the LCD monitor When you press the zoom lever toward th...

Page 65: ...n mode High Speed Continuous Shooting Use this mode to shoot continuously with a short shutter interval You cannot check images while shooting continuously 1 Press the button to display or The continuous shooting function shoots at the following rates Approximately 1 5 frames sec PowerShot S500 DIGITAL ELPH DIGITAL IXUS 500 Approximately 2 2 frames sec PowerShot S410 DIGITAL ELPH DIGITAL IXUS 430 ...

Page 66: ... take a memorable photo with everyone including yourself in the picture The self timer can be used in any shooting mode To cancel the self timer Press the button to display 1 In the Rec menu select See Selecting Menus and Settings p 43 2 Use the or button to select or and press the MENU button The display will return to the Shooting screen 1 Press the button to display or When the shutter button i...

Page 67: ...e Selecting Menus and Settings p 43 2 Use the or button to select or and press the MENU button The display will return to the Shooting screen When is selected the self timer sounds and the blinking gets faster 2 seconds before the shutter activates When is selected the self timer sounds at the same time as the shutter button is pressed The shutter activates in 2 seconds ...

Page 68: ...ge the settings See Functions Available in Each Shooting Mode p 160 3 Shoot p 53 If the subject is difficult to focus on when the shutter button is pressed halfway the beep will sound one time and the lower indicator beside the viewfinder will blink yellow The AF frame will also appear yellow If the AiAF option is set to On p 76 the AF frame will not appear ...

Page 69: ... the overlapping portions Compose each frame so that it overlaps 30 50 of the adjoining image Try to keep the vertical misalignment to less than 10 of the image height Do not include moving items in the overlap Do not try to stitch images that include both distant and close items These items may appear warped or doubled up in the merged image Make the brightness in each image consistent The final ...

Page 70: ... in two sequences in Stitch Assist Left to right horizontally Right to left horizontally 1 Slide the mode switch to Rec and turn the mode dial to 2 Use the or button to select the sequence direction and press the SET button 3 Shoot the first frame in the sequence The exposure and white balance are set and locked with the first image ...

Page 71: ...play images on the TV when shooting in Stitch Assist See Functions Available in Each Shooting Mode p 160 4 Compose the second image so that it overlaps a portion of the first and shoot Use the or button to check or retake the recorded images Minor discrepancies in the overlapping portions can be corrected when the images are stitched together 5 Repeat the procedure for additional images A sequence...

Page 72: ...eously During shooting the recording time in seconds and a red circle appear on the LCD monitor 3 Press the shutter button fully again to stop recording The maximum length of a movie clip 10 frames sec at 15 frames sec at is approximately 30 sec at 3 min at 3 min at according to Canon s standardized tests Recording time vary by the CF card See CF Cards and Estimated Capacities p 148 The maximum le...

Page 73: ... card supplied with the camera may be used without further formatting Be careful not to touch the microphone while recording The AE AF white balance and zoom settings remain fixed for subsequent frames at the values selected for the first frame After a clip is shot the upper indicator beside the viewfinder will blink green while the clip is being written to the CF card You cannot shoot again until...

Page 74: ...ight reflecting back off the glass Subjects with horizontal stripes Shooting with the Focus Lock Shooting with the AF Lock 1 Aim the camera so that an object at the same focal distance as the main subject is centered in the viewfinder or in the AF frame displayed on the LCD monitor 2 Press the shutter button halfway two beeps will sound The focal distance to the object is locked 3 Re aim the camer...

Page 75: ...compose the image Moreover the AF lock is still effective after the picture is taken allowing you to capture a second image with the same focus The AF lock can be released by pressing the zoom lever MENU button or by changing the shooting mode or by turning the LCD monitor off 3 Press the shutter button halfway two beeps will sound and press the button The focal distance to the object is locked Th...

Page 76: ...may be released by pressing the zoom lever MENU button or button or by changing the white balance ISO speed photo effect or the shooting mode or by turning the LCD monitor off 1 Press the DISP button to turn the LCD monitor on 2 Focus on the part of the subject on which you wish to lock the exposure setting 3 Press the shutter button halfway two beeps will sound and press the button The exposure s...

Page 77: ...urn the LCD monitor on 2 Press the button to set the flash to 3 Focus on the part of the subject on which you wish to lock the flash exposure setting 4 Press the shutter button halfway two beeps will sound and press the button The flash will fire a pre flash and lock the flash exposure to the required intensity to illuminate the subject The icon will display 5 Re aim the camera to compose the shot...

Page 78: ...ppear The symbol represents the AF frames as they appear in the LCD monitor The focus is locked to the center AF frame when the digital zoom is used No frame On The camera detects the subject and highlights the AF frames from 9 available points that it will use to determine the focus Off The camera focuses using the center AF frame This is convenient for focusing on a specific part of a subject wi...

Page 79: ...ghtness the direct light and the backlighting and adjusts the settings to the correct exposure for the main subject Center Weighted Average Averages the light metered from the entire frame but gives greater weight to the subject matter at the center Spot Meters the area within the spot AE point at the center of the LCD monitor Use this setting when you want to set the exposure on the subject in th...

Page 80: ...0 1 In the FUNC menu select See Selecting Menus and Settings p 43 The current setting is displayed 2 Use the or button to adjust the exposure compensation The settings can be adjusted in 1 3 stops in the range 2 to 2 You can confirm the effect of the setting in the LCD monitor when it is on You can shoot right after selecting an option The menu displays again after the shot allowing you to change ...

Page 81: ...ENU button The display will return to the Shooting screen 3 In the FUNC menu select and press the SET button See Selecting Menus and Settings p 43 The current setting is displayed 4 Use the or button to select a shutter speed The higher the value the brighter the image and the lower the value the darker the image You can shoot right after selecting a value The menu displays again after the shot al...

Page 82: ...hot Use the LCD monitor to confirm that the image was recorded at the desired brightness Please note that camera shake becomes a factor at low shutter speeds If the camera shake warning appears on the LCD monitor secure the camera to a tripod before shooting Use of the flash may result in an over exposed image If that occurs shoot with the flash set to The following are unavailable Exposure Compen...

Page 83: ...ool white or warm white 3 wavelength fluorescent lighting Fluorescent H For recording under daylight fluorescent or daylight fluorescent type 3 wavelength fluorescent lighting Custom For setting a custom value with a white sheet of paper etc to obtain the optimal white balance for the conditions 1 In the FUNC menu select See Selecting Menus and Settings p 43 The current setting is displayed 2 Use ...

Page 84: ...ish to establish as the standard white color Especially in the following cases as the white balance may not be adjusted in Auto shoot after reading the white balance data in Custom Shooting close ups Shooting subjects of monotone color such as sky sea or forest Shooting with a peculiar source of light such as a mercury vapor lamp 3 Press the FUNC button The display will return to the Shooting scre...

Page 85: ...e the flash when you shoot ISO Speed It is also advisable to use the LCD monitor to compose the shot and to zoom to the telephoto end setting Also the digital zoom should be set to Off Since the white balance data cannot be read in Stitch Assist mode preset the white balance in another shooting mode 3 Aim the camera at the white paper cloth or gray card and press the SET button Aim the camera so t...

Page 86: ...ral hues Low Sharpening Records subjects with softened outlines Sepia Records in sepia tones B W Records in black and white 1 In the FUNC menu select See Selecting Menus and Settings p 43 The current setting is displayed 2 Use the or button to select an effect You can confirm the photo effect in the LCD monitor You can shoot right after selecting an option The menu displays again after the shot al...

Page 87: ...ng selects the optimal ISO speed It will automatically raise the speed when the light from the flash is insufficient to illuminate the subject matter 1 In the FUNC menu select See Selecting Menus and Settings p 43 The current setting is displayed 2 Use the or button to select a speed You can shoot right after selecting an option The menu displays again after the shot allowing you to change the set...

Page 88: ...mera is held vertically to shoot the Intelligent Orientation sensor judges the upper end to be up and the lower end to be down It then regulates the optional white balance exposure and focus for vertical photography This function operates regardless of the On Off status of the Auto Rotate function When changing the camera s orientation between the horizontal and vertical positions you may hear noi...

Page 89: ...are downloaded to a computer On The file number is reset to the start 100 0001 each time a new CF card is inserted New images recorded on CF cards with existing files are assigned the next available number Off The file number of the last image to be shot is memorized so that images recorded to a new CF card start from the next number 1 In the Set up menu select See Selecting Menus and Settings p 4...

Page 90: ... to 100 images However since images shot in continuous shooting and stitch assist are always saved into the same folder a folder may contain more than 100 images The number of images may also exceed 100 if a folder contains images copied from a computer or images shot with other cameras Please note however that the images in folders containing 2001 or more images cannot be played back in this came...

Page 91: ...ther software applications 1 Slide the mode switch to Playback The last recorded image will appear in the display single image playback 2 Use the or button to move between the images Use the button to move to the previous image and the button to move the next image Holding the button down advances the images more rapidly but the images will not appear as clearly ...

Page 92: ... single image playback Hold the SET button down and press the zoom lever toward to cycle through each setting from approximately 2 5 times to approximately 5 and 10 times Hold the SET button down and press the zoom lever toward to cycle back through the levels of magnification from approximately 5 times to 2 5 times and the standard view 2 Use the or button to move around the image Approximate Loc...

Page 93: ...ine Index Playback To return to single image playback Press the zoom lever toward 1 Press the zoom lever toward Up to nine images can be viewed at once in index playback 2 Use the or button to change the image selection Selected Image Movie ...

Page 94: ...ack Press the zoom lever toward 1 Press the zoom lever toward while in index playback The jump bar will display 2 Use the or button to move to the previous set or the next set Hold the SET button down and press the or button to jump to the first or last set Jump Bar ...

Page 95: ...ss the SET button The movie control panel will display Use the or button to adjust the sound volume 3 Use the or button to select Play and press the SET button The movie and sound will play When playback ends the movie stops at the last frame displayed Press the SET button to display the movie control panel Press the SET button again to play from the beginning Volume Level Movie Control Panel ...

Page 96: ...e volume when playing a movie on a TV set p 127 Press the SET button during playback The movie playback pauses Press it again to resume 1 Select a movie and press the SET button p 93 The movie control panel will display 2 Use the or button to select one of the following and press the SET button Exit Ends playback and returns to single image playback Pressing the Menu button also returns to single ...

Page 97: ...duration cannot be edited 1 Use the or button to select a movie and press the SET button 2 Switch to the movie editing mode See Operating the movie control panel p 94 The movie editing panel and the movie editing bar will display 3 Use the or button to select or and the or button to set the portion to which the cut is applied Cut Beginning Cut End Cursor Movie Editing Bar Movie Editing Panel ...

Page 98: ...review of the temporarily edited movie clip plays To stop it press the SET button again 5 Use the or button to select Save and press the SET button Selecting Exit cancels the edits and returns to the movie control panel display 6 Use the or button to select New File or Overwrite and press the SET button New File saves the edited movie under a new file name The pre edit data is left unchanged Overw...

Page 99: ...ertically with Auto Image Rotate p 86 set to On will automatically be rotated to the vertical position when viewed on the camera s LCD monitor 1 In the Play menu select and press the SET button See Selecting Menus and Settings p 43 2 Use the or button to select the image to be rotated and press the SET button Cycle through the 90 270 0 orientations with each press of the SET button 3 Press the MEN...

Page 100: ... Menus and Settings p 43 2 Use the or button to select an image and press the SET button The sound memo control panel will display 3 Use the or button to select Record and press the SET button The recording starts and the elapsed time is displayed Speak towards the microphone of the camera Press the SET button again to stop recording To resume recording press the SET button again Up to 60 seconds ...

Page 101: ... The volume can be adjusted in the Set up menu p 48 1 Display an image with a sound memo attached p 98 and press the SET button Images with sound memos attached have the symbols displayed on them The sound memo control panel will display 2 Use the or button to select Play or Erase and press the SET button Play The sound memo will play Playback will stop when you press the SET button Press the SET ...

Page 102: ...ys the images selected for each slide show in order p 101 1 In the Play menu select and press the SET button See Selecting Menus and Settings p 43 The Slide Show menu will display 2 Use the or button to select Program and the or button to select All Images Show 1 Show 2 or Show 3 See p 102 from step 3 for selecting the playback images in slide shows 1 3 3 Use the or button to select Start and pres...

Page 103: ... inclusion in slide shows 1 3 Up to 998 images may be marked per slide show Images display in the order of their selection 4 Press the MENU button The display will return to the Play menu Pressing the MENU button again returns to the Playback screen Press the SET button The slide show pauses Press the SET button again to restart it Press the or button The previous or next image displays Hold down ...

Page 104: ...etween images and the or button to select or deselect them Selected images display a number corresponding to their selection order and a white checkmark You can press the zoom lever toward to switch to the index mode 3 images and use the same procedures to select images While in index playback pressing the SET button displays the menu for selecting or deselecting all images Use the or button to se...

Page 105: ... that each image displays Choose between 3 10 seconds 15 seconds 30 seconds and Manual Repeat Sets whether the slide show stops when all the slides have been displayed or continues until stopped 1 Display the Slide Show menu See Starting a Slide Show p 100 2 Use the or button to select Set up and press the SET button 3 Use the or button to select or and the or button to select an option Play Time ...

Page 106: ...ted images p 107 1 In the Play menu select and press the SET button See Selecting Menus and Settings p 43 2 Use the or button to select an image to protect and press the SET button The icon appears on protected images You can make the selection of images easier by toggling between single image playback and index playback by pressing the zoom lever toward or 3 Press the MENU button The Play menu di...

Page 107: ...se note that erased images cannot be recovered Exercise adequate caution before erasing a file Protected images cannot be erased with this function 1 Use the or button to select an image for deletion and press the button 2 Use the or button to select Erase and press the SET button To exit instead of erasing select Cancel ...

Page 108: ...annot be recovered Exercise adequate caution before erasing a file Protected images cannot be erased with this function 1 In the Play menu select and press the SET button See Selecting Menus and Settings p 43 2 Use the or button to select OK and press the SET button To exit instead of erasing select Cancel ...

Page 109: ...F cards formatted in other cameras computers or peripheral devices may not operate correctly in this camera When that happens reformat the CF card with this camera If formatting in the camera does not work properly turn the camera off and re insert the CF card Then turn the camera back on and format again 1 In the Set up menu select and press the SET button See Selecting Menus and Settings p 43 2 ...

Page 110: ...images CF card to a photo developing center 1 This camera complies with the PictBridge standard which allows you to print with non Canon PictBridge compliant printers as well 2 Digital Print Order Format About Printing This guide explains DPOF print settings For information on how to print images refer to the Direct Print User Guide supplied with the camera Also refer to your printer s manual Bubb...

Page 111: ... settings z Print For details see the Direct Print User Guide separate from this guide Direct Print Compatible Printing z See Selecting Images for Printing p 110 T z Set the number of print copies p 111 T z See Setting the Print Style p 113 Standard Index Both Date On Off File Numbers On Off For details see the Direct Print User Guide separate from this guide z Select the images to download to a c...

Page 112: ...vice or for printing on a direct print function compatible printer See the Direct Print User Guide for instructions on how to print Selecting Images for Printing There are two ways to select images Singly All images on a CF card the number of print copies is set to one per image 1 In the Play menu select and press the SET button See Selecting Menus and Settings p 43 2 Use the or button to select O...

Page 113: ...e or button to move to an image and the or button to select or deselect it A checkmark displays on selected images You can press the zoom lever toward to switch to the index mode 3 images and use the same procedures to select images 4 Press the MENU button The Print Order menu will reappear Pressing the MENU button again returns to the Play menu Press it again to go back to the Playback screen 3 P...

Page 114: ...e set When it is set to Index the number of copies cannot be set only one copy will be printed Print settings can also be assigned to images with the bundled software ZoomBrowser EX ImageBrowser on a computer 5 Use the or button to select Mark all and press the SET button One copy is set to print for each image When the print type is set to Standard or Both the number of print copies can be set in...

Page 115: ...one image per page Index Prints the selected images together at a reduced size in an index format Both Prints the images in both the standard and index formats Date Adds the date to the print File No Adds the file number to the print 1 In the Play menu select and press the SET button See Selecting Menus and Settings p 43 2 Use the or button to select Set up and press the SET button ...

Page 116: ...inted for the index print The date prints in the format specified in the Date Time menu p 26 3 Use the or button to select or and the or button to select an option Print Type Select Standard Index or Both Date Select On or Off File No Select On or Off 4 Press the MENU button The Print Order menu will reappear Pressing the MENU button again returns to the Play menu Press it again to go back to the ...

Page 117: ...int type resets to Standard and the Date and File No options to Off 1 In the Play menu select and press the SET button See Selecting Menus and Settings p 43 2 Use the or button to select Reset and press the SET button 3 Use the or button to select OK and press the SET button To exit without resetting select Cancel ...

Page 118: ...ers The settings used on the camera comply with the Digital Print Order Format DPOF standards The icon may display for a CF card that has had print settings set by a different DPOF compliant camera These settings will be overwritten by those set by your camera Selecting Images for Transferring 1 In the Play menu select and press the SET button See Selecting Menus and Settings p 43 2 Use the or but...

Page 119: ...es You can press the zoom lever toward to switch to the index mode 3 images and use the same procedures to select images While in index playback pressing the SET button displays the menu for selecting or deselecting all images Use the or button to select Mark all or Clear all and press the SET button 4 Press the MENU button The Transfer Order menu reappears Pressing the MENU button again returns t...

Page 120: ...omputer p 119 and the separate Software Starter Guide With this method you download images using camera button operations after you have installed the appropriate software the computer settings only need to be adjusted for the first download See Connecting the Camera to a Computer p 119 and Downloading Images by Direct Transfer p 123 With this method you download images using computer commands wit...

Page 121: ...l of the above OSs 128MB or more is recommended for editing movies Interface USB Free Hard Disk Space Canon Utilities ZoomBrowser EX 200 MB or more Including the PhotoRecord printing program PhotoStitch 40 MB or more Canon Camera TWAIN Driver 25 MB or more Canon Camera WIA Driver 25 MB or more Display 800 x 600 pixels High Color 16 bit or better is required 1 024 x 768 pixels or better is recommen...

Page 122: ... compliant board are not guaranteed 1 Install the driver and the software applications bundled on the Canon Digital Camera Solution Disk Please see the Software Starter Guide for the installation procedures 2 Use the supplied interface cable to connect the computer s USB port to the camera s DIGITAL terminal To connect the interface cable to the camera s DIGITAL terminal lift the terminal cover wi...

Page 123: ...ameraWindow and CameraWindow Set Auto Launch 3 Slide the camera s mode switch to Play 4 Press the ON OFF button until the power lamp lights green 5 Select Canon CameraWindow in the event dialog that appears on the computer and click OK first time only Windows Proceed to steps 5 and 6 below Macintosh Refer to the Software Starter Guide and download images ...

Page 124: ...indow first time only The Download Image window will display Using the software and computer to download images See the Software Starter Guide Using the Camera to Download Images Direct Transfer Function See Downloading Images by Direct Transfer next page ...

Page 125: ...ansfers and saves to the computer only the images with DPOF Transfer Order settings p 116 Select Transfer Transfers and saves single images to the computer as you view and select them Wallpaper Transfers and saves single images to the computer as you view and select them The transferred images display on the computer desktop 1 Confirm that the Direct Transfer menu is displayed on the camera s LCD ...

Page 126: ...e Direct Transfer menu is displayed The image selection screen will appear directly when the Select Transfer or the Wallpaper option was last selected 2 Use the or button to select or and press the button or SET button 3 Use the or button to select images to download and press the button or SET button The images will download The button will blink blue while downloading is in progress 4 Press the ...

Page 127: ...bundled on the Canon Digital Camera Solution Disk This is useful for downloading images to a computer in which the software is not installed However please note that there are certain limitations to downloading with this method For more details please refer to the supplied For Windows XP and Mac OS X Users leaflet 1 Use the supplied interface cable to connect the computer s USB port to the camera ...

Page 128: ...ard adapter s or card reader s manual for information regarding the connection between the computer and card adapter or card reader 2 Double click the icon of the drive containing the CF card Depending on the operating system the drive containing the CF card may display automatically 3 Copy the CF card s images to the desired folder on the hard disk The images are contained in the xxxCANON folder ...

Page 129: ... 1 Press the ON OFF button to turn the camera off Also turn the television off 2 Connect the AV cable to the camera s A V Out terminal Slip your fingernail under the upper edge of the terminal cover to open it and insert the cable securely 3 Plug the other ends of the AV cable to the VIDEO IN and AUDIO IN jacks on the TV 4 Turn on the TV and switch it to Video mode 5 Slide the mode switch to Shoot...

Page 130: ...output signal can be switched NTSC or PAL to accommodate different regional standards p 50 The default setting varies between regions NTSC Japan U S A Canada Taiwan etc PAL Europe Asia excluding Taiwan Oceania etc If the video system is set incorrectly the camera output may not display properly 6 Press the ON OFF button The image will appear on the TV Shoot or play back images as usual If the imag...

Page 131: ...ation and self timer sounds Each menu item has three choices The option features science fiction related images and sounds The option features animals Changing My Camera Settings 1 Select the My Camera menu See Selecting Menus and Settings p 43 2 Use the or button to select an item 3 Use the or button to select an option Example Start up Image ...

Page 132: ...mera settings If the Mute option in the Set up menu is set to On the beep will not sound even if each sound item is individually set to or On in the My Camera menu p 48 4 Press the MENU button The menu will close In Shooting mode the menu can be closed by pressing the shutter button halfway ...

Page 133: ...nu items You can also use the supplied software to upload your computer s images and sounds to the camera Registering CF Card Images and Sounds 1 Slide the mode switch to Playback 2 Select the My Camera menu See Selecting Menus and Settings p 43 3 Use the or button to select an item 4 Use the or button to select or The icon will display 5 Press the DISP button ...

Page 134: ...press the SET button Start up Operation Self timer and Shutter Sounds Use the or button to select Record and press the SET button Recording will start and automatically stop when the time is exceeded After recording use the or button to select Register Sound and press the SET button Select Exit to return to the My Camera Menu without registering Select Play to play the recorded sound 7 Use the or ...

Page 135: ...r than those described above cannot be used with this camera An example of this function is to record Say Cheese as a self timer sound so that the camera will replay this sound 2 seconds before the photo is taken You could also record cheerful music to bring out the natural smiles of your subjects or so they can strike a pose fitting the music In these ways you can customize your camera by creatin...

Page 136: ...ere is a file with the same name as the directory that the camera is attempting to create or the highest possible file number has already been reached In the Rec Menu set the File Reset option to On Save all the images you wish to retain onto a computer then reformat the CF card Please note that formatting will erase all the existing images and other data Change the battery pack Battery charge is ...

Page 137: ...be added to this image since the format of the existing sound memo is incorrect Cannot register this image You attempted to add a start up image that was created with another camera or a movie clip Protected You attempted to erase a protected image or a protected movie clip Too many marks Too many images have been marked with print settings or transfer settings Cannot process any more Unselectable...

Page 138: ...ange CF card is full Insert a new CF card If required download the images to a computer and erase them from the CF card to make space CF card is not formatted correctly Format CF card See Formatting CF Cards p 107 If reformatting does not work the CF card logic circuits may be damaged Consult the nearest Canon Customer Support Help Desk Cannot play back You attempted to play back images shot with ...

Page 139: ...y pack with a new one Poor contact between battery pack and battery charger Insert battery pack securely into battery charger Ensure that battery charger plug is securely plugged into the power outlet Image is blurred or out of focus Camera moved Be careful not to move the camera while pressing the shutter button Autofocus function hampered by obstruction to AF assist Beam Be careful not to block ...

Page 140: ...tivity and then shoot See Adjusting the ISO Speed p 85 Subject in recorded image is too bright Subject is too close making the flash too strong When using the flash stay at least 46 cm 1 5 ft from the subject Subject is bright in contrast to the background Set the exposure compensation to a negative setting or use the spot metering function Light is shining directly on the subject or reflected off...

Page 141: ... showing on TV monitor Incorrect video system setting Set the video system to the appropriate setting NTSC or PAL for your TV p 50 Shooting in stitch assist The output will not appear on a TV in stitch assist Cancel the stitch assist Zoom does not work Zoom lever pressed during movie recording Adjust the zoom before shooting a movie Reading images from CF card is slow CF card was formatted in anot...

Page 142: ...ause a malfunction in the camera or kit 1 Connect the power cord to the compact power adapter first and then plug the other end into the power outlet 2 Open the battery cover then insert the DC coupler until it is locked Insert the DC coupler while pressing the battery lock as the arrow shows Slide the battery cover closed 3 Open the DC coupler terminal cover and attach the cord to the DC terminal...

Page 143: ...ket Wait until the engine is running again to plug the car battery cable into the cigarette lighter socket The car battery charger can only be used in a negative ground car It cannot be used in a positive ground car 1 With the engine running plug the car battery cable into the cigarette lighter socket and the battery charger 2 Insert the battery pack all the way into the battery charger as shown A...

Page 144: ...ower brush to remove dust and dirt then remove any remaining dirt by wiping the lens lightly with a soft cloth Never use synthetic cleansers on the camera body or lens If dirt remains contact the closest Canon Customer Support Help Desk as listed on the separate Canon Customer Support leaflet Viewfinder and LCD Monitor Use a lens blower brush to remove dust and dirt If necessary gently wipe with a...

Page 145: ...l number of pixels Approx 4 1 million Lens 7 4 W 22 2 T mm 35 mm film equivalent 36 W 108 T mm f 2 8 W f 4 9 T Digital Zoom PowerShot S500 DIGITAL ELPH DIGITAL IXUS 500 Approx 4 1x Up to approx 12x in combination with the optical zoom PowerShot S410 DIGITAL ELPH DIGITAL IXUS 430 Approx 3 6x Up to approx 11x in combination with the optical zoom Optical Viewfinder Real image zoom viewfinder LCD Moni...

Page 146: ...1 5 6 6 ft T Macro 30 cm 46 cm 1 0 1 5 ft W T When sensitivity is set to AUTO Shooting Modes Auto manual stitch assist movie Continuous Shooting High speed PowerShot S500 DIGITAL ELPH DIGITAL IXUS 500 Approx 2 2 shots sec PowerShot S410 DIGITAL ELPH DIGITAL IXUS 430 Approx 2 5 shots sec Normal Approx 1 5 shots sec Large Fine mode with LCD monitor off Self timer Activates shutter after an approx 2 ...

Page 147: ...r to the maximum movie length per shooting 10 frames sec 15 frames sec Playback Modes Single histogram displayable Index 9 thumbnail images Magnified approx 10x max in LCD monitor Sound memos up to 60 sec or Slide show Direct Print Canon Direct Print and Bubble Jet Direct compatible and PictBridge compliant Display Languages 12 languages available for menus and messages English German French Dutch...

Page 148: ...ter the camera s image data at the time of shooting is used and optimized yielding extremely high quality prints Power Source Rechargeable lithium ion battery type NB 1LH NB 1L AC Adapter Kit ACK500 Car Battery Charger CBC NB1 Operating Temperature 0 40 C 32 104 F Operating Humidity 10 90 Dimensions 87 0 x 57 0 x 27 8 mm 3 4 x 2 2 x 1 1 in excluding protrusions Weight Approx 185 g 6 5 oz camera bo...

Page 149: ...y before use Test Criteria Shooting Normal temperature 23º C 73º F alternating between wide angle and telephoto every 20 seconds flash used once in four shots power turned off and on again after every eighth shot LCD monitor set to default brightness Playback Normal temperature 23º C 73º F continuous playback at 3 seconds per image LCD monitor set to default brightness Number of recordable images ...

Page 150: ...76 355 709 2048 x 1536 pixels 18 38 76 154 308 33 68 137 276 552 67 136 274 548 1095 1600 x 1200 pixels 30 61 122 246 491 54 109 219 440 879 108 217 435 868 1734 640 x 480 pixels 120 241 482 962 1891 196 393 788 1563 3122 337 676 1355 2720 5203 Movie 640 x 480 pixels 46 sec 92 sec 186 sec 374 sec 742 sec 320 x 240 pixels 91 sec 183 sec 368 sec 735 sec 1451 sec 160 x 120 pixels 242 sec 486 sec 973 ...

Page 151: ...ormal indicate the compression setting Some CF cards are not sold in some regions FC 32MH FC 64M FC 128M FC 256MH FC 512MSH 2272 x 1704 pixels 14 30 61 123 247 27 54 110 222 442 54 110 220 443 879 1600 x 1200 pixels 30 61 122 246 491 54 109 219 440 879 108 217 435 868 1734 1024 x 768 pixels 53 107 215 431 855 94 189 379 762 1522 174 349 700 1390 2714 640 x 480 pixels 120 241 482 962 1891 196 393 7...

Page 152: ...5 KB 2048 x 1536 1602 KB 893 KB 445 KB 1600 x 1200 1002 KB 558 KB 278 KB 640 x 480 249 KB 150 KB 84 KB Movies 640 x 480 660 KB sec 320 x 240 330 KB sec 160 x 120 120 KB sec Resolution Compression 2272 x 1704 2002 KB 1116 KB 556 KB 1600 x 1200 1002 KB 558 KB 278 KB 1024 x 768 570 KB 320 KB 170 KB 640 x 480 249 KB 150 KB 84 KB Movies 320 x 240 330 KB sec 160 x 120 120 KB sec ...

Page 153: ...Ah Cycle Life Approx 300 times Operating Temperatures 0 40 C 32 104 F Dimensions 32 3 x 49 8 x 10 6 mm 1 3 x 2 0 x 0 4 in Weight Approx 29 g 1 0 oz Rated Input 100 240 V AC 50 60 Hz 0 075 A 100 V 0 045 A 240 V Rated Output 4 2 V DC 0 5 A Charging Time Approx 130 minutes Operating Temperatures 0 40 C 32 104 F Dimensions 90 4 x 56 0 x 28 0 mm 3 6 x 2 2 x 1 1 in Weight Approx 78 g 2 8 oz Rated Input ...

Page 154: ...When charging Battery Pack NB 1LH Rated Input DC 12 24 V 4 3 W Rated Output 4 2 V DC 0 55 A Charging Time Approx 130 minutes Operating Temperatures 0 40 C 32 104 F Dimensions 90 4 x 56 0 x 28 0 mm 3 6 x 2 2 x 1 1 in Weight Approx 106 g 3 7 oz ...

Page 155: ...t images with the optimal brightness However recorded images may sometimes be brighter or darker than the actual image depending on the shooting conditions If this happens adjust the exposure compensation manually Underexposure The whole recorded image is dark which makes white elements of the image appear gray Shooting bright subjects or in backlit conditions may cause the image to be underexpose...

Page 156: ...hibited The ISO speed setting makes full use of the available light resulting in images that convey the feel of the place they were shot Advanced Technique for the Macro mode p 60 Macro mode can make unique images when used with the zoom function For example shooting a flower at maximum wide angle in Macro mode allows the camera to bring both the flower and the background into focus However shooti...

Page 157: ... D Date Time 26 DIGITAL Terminal 14 120 Digital Zoom 62 Direct Interface Cable 15 Direct Transfer 123 DPOF Print Order 110 Print Style 113 Resetting 115 Selecting Images 110 DPOF Transfer Order 116 E Erasing 105 All Images 106 Single Images 105 Exposure 78 F FE Lock 75 File Number 87 Flash 58 Focus Lock 72 FUNC menu 44 H Histogram 38 I Image File Sizes 150 Index Playback 91 Indicator 17 Infinity 6...

Page 158: ...wer saving 31 Print Share Button 16 Printing 108 Protect 104 Q Quick Shot 57 R Rec Menu 47 Red eye Reduction Function 59 Resolution 55 Review Duration 54 Rotate 97 S Self Timer 64 Set up Menu 48 Shooting Mode Auto 53 Functions Available in Each Shooting Mode 160 Manual 66 Movie 70 Stitch Assist 67 Shutter Button 41 Pressing Fully 42 Pressing Halfway 41 Shutter Speed 79 Single Image Playback 89 Sli...

Page 159: ...157 MEMO ...
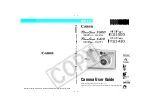
Page 160: ...t has been made to ensure that the information contained in this guide is accurate and complete no liability can be accepted for any errors or omissions Canon reserves the right to change the specifications of the hardware and software described herein at any time without prior notice Canon reserves the right to change the specifications of the hardware and software described herein at anytime wit...

Page 161: ...nstalled and used in accordance with the instructions may cause harmful interference to radio communications However there is no guarantee that interference will not occur in a particular installation If this equipment does cause harmful interference to radio or television reception which can be determined by turning the equipment off and on the user is encouraged to try to correct the interferenc...

Page 162: ...ssist Movie Resolution Large U p 55 Medium 1 U Medium 2 U Small U Movie 1 Movie Movie Compression Superfine U p 55 Fine U Normal U Flash Auto p 58 Red eye Reduction Auto On U Off U Slow Synchro U Quick Shot p 57 Macro Mode U p 60 Infinity Mode U AF Lock p 72 AE Lock p 74 FE Lock p 75 Shooting Method Single U Standard Continuous shooting p 63 High speed continuous shooting 10 sec self timer U p 64 ...

Page 163: ... With the exception of the Date Time Language and Video System settings all the other menu settings and changes made with the camera buttons can be reset to the default values in a single operation p 52 Digital Zoom p 62 Exposure Compensation U p 78 Light Metering Method Evaluative p 77 Center Weighted Average Spot Long Shutter p 79 White Balance U p 81 Photo Effect U p 84 ISO Speed 2 2 2 p 85 Aut...

Reviews: