background image

29

2

Basic Operation

6.

Clearing a Paper Jam or Double Feed Error

If a paper jam or double feed occurs during scanning, a paper jam message appears on the PC and on the scanner’s display panel. 
Use the following procedure to clear the paper jam.

CAUTION

• When removing jammed paper, take care not to cut your hands on the edges of the paper
• Make sure to remove all of the jammed paper. Torn paper remaining in the scanner may cause future jams or damage to the scanner.
• When opening and closing the upper unit, be careful not to get your fingers caught, as this may result in personal injury.

Paper Jam Handling

When a paper jam occurs during scanning, the following 
message appears on the display panel, and transport stops.

Hint

The displayed error code indicates the location of the paper jam.

1.

Remove any documents that remain in the eject tray.

2.

Press the Open/Close button and gently raise the 
upper unit.

3.

Remove the jammed paper.

IMPORTANT

• If paper has stopped in the midst of ejecting to the eject tray, 

raise the upper unit slightly to remove it.

• To remove paper that has stopped inside the scanner, open 

the upper unit as far as it will go.

4.

Close the upper unit slowly (

a

). Make sure that the 

upper unit is completely closed by pushing on both 
edges with both hands until you hear a click (

b

).

5.

Check to verify the last saved image, and resume 
scanning.

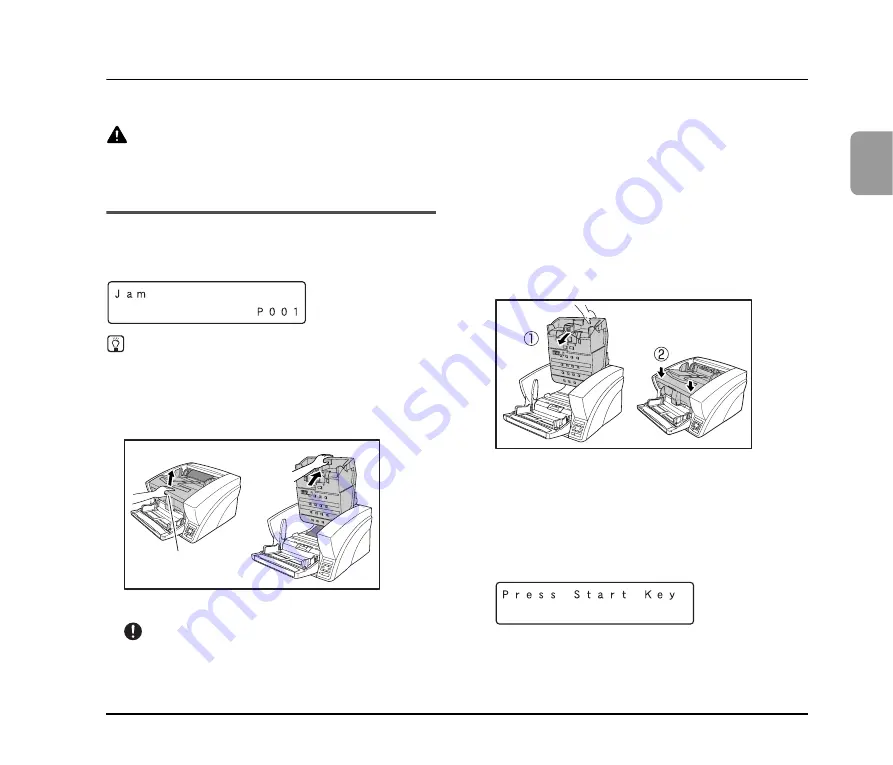
When “Press Start Key” Appears

When the Rapid Recovery System is enabled in the ISIS/
TWAIN driver settings, the following message appears on 
the display panel after you remove the jammed paper.

Open/Close Button

Summary of Contents for DR-X10C - imageFORMULA - Document Scanner

Page 1: ...Please read this manual before using the scanner After you finish reading this manual keep it in a safe place for future reference Reference Guide...

Page 2: ...pressly provided herein Except as expressly permitted under the applicable law you shall not alter modify disassemble decompile or otherwise reverse engineer the SOFTWARE or accompanying documentation...

Page 3: ...ith RESTRICTED RIGHTS Use duplication or disclosure is subject to restrictions as set forth in either subparagraph c 1 ii of the Rights in Technical Data and Computer Software clause at DFARs 252 227...

Page 4: ...ass B limits in Subpart B of Part 15 of FCC Rules Do not make any changes or modifications to the equipment unless otherwise specified in the manual If such changes or modifications should be made you...

Page 5: ...r the safety regulations in each sales region of the Document Scanner DR X10C Model M11063 Trademarks Canon and the Canon logo are registered trademarks of Canon Inc in the United States and may also...

Page 6: ...ow the procedures in the Easy Start Guide to set up the scanner Reference Guide This Manual This manual consists of the basic scanner operating instructions extracted from the User Manual User Manual...

Page 7: ...s IMPORTANT Indicates operational requirements and restrictions Be sure to read these items carefully to operate the scanner correctly and avoid damage to the scanner Hint Indicates a clarification of...

Page 8: ...y 20 4 Document Feeding Methods 22 Selecting the Document Feeding Method 22 5 Scanning 24 About the Job Function 24 CapturePerfect 3 0 25 6 Clearing a Paper Jam or Double Feed Error 29 Paper Jam Handl...

Page 9: ...Scanner 1 Important Safety Instructions 2 Installation Location 2 Power 2 Moving the Scanner 3 Handling 3 Disposal 5 2 Features 6 3 Names and Functions of Parts 10 Front View Feeder Inlet and Eject Ou...

Page 10: ...apidly heated water droplets condensation may form inside the scanner This may result in a noticeable degradation in scanning quality The following conditions are recommended for optimal scanning qual...

Page 11: ...G Note the following precautions whenever using the scanner Failure to do so may result in a fire or electric shock Never use alcohol benzene paint thinner aerosol sprays or any other highly flammable...

Page 12: ...so could case the scanner to overheat creating a risk of fire Never place small metal objects such as staples paper clips or jewelry on the scanner These items may fall into the scanner and cause a f...

Page 13: ...and long hair If anything becomes caught in the scanner immediately disconnect the power cord to stop the scanner Be careful when placing paper in the scanner and when removing jammed paper It is pos...

Page 14: ...Power Switch on p 14 Count Only Mode When operating the scanner as a stand alone device this mode counts the number of loaded document sheets Adjustable Document Feed Tray The home position height of...

Page 15: ...e as a reference the scanner detects a double feed when a page of a different length is fed Prescan At the start of scanning this function prescans the first page of a document and pauses so that you...

Page 16: ...p to A1 size 23 4 33 1 594 841 mm documents when used together with the Long Document Mode MultiStream Function The scanner supports MultiStream which depending on the software application can create...

Page 17: ...cting images Blower Airflow from a fan inside the scanner blows paper particles from the scanning glass Dust Wiper Before scanning a brush mounted on a roller on the opposite side of the scanning glas...

Page 18: ...ntrol Panel See p 11 e Document Guides Adjust to match the width of documents so that ejected documents stack neatly f Eject Paper Stoppers Adjust to match the length of documents to avoid document sp...

Page 19: ...entilation holes Doing so could cause the scanner to overheat creating a fire hazard Control Panel a Display Panel Displays the user mode job info and messages b Enter Key Selects the user mode and ac...

Page 20: ...12...

Page 21: ...ect Trays 17 Preparing the Document Feed Tray 17 Adjusting the Document Guides 18 Preparing the Document Eject Tray 20 4 Document Feeding Methods 22 Selecting the Document Feeding Method 22 5 Scanning...

Page 22: ...er it may not recognize the scanner properly About the Power Switch When the power switch located at the lower left side of the front of the scanner is turned ON the Document Feed Tray opens automatic...

Page 23: ...ss Mode key on the control panel is lit and the Document Feed Tray is raised IMPORTANT A document must meet the following criteria to be scannable When scanning a multipage document pages must be grou...

Page 24: ...oice booklets place the bound edge against the feeder inlet and scan by manual feeding To use the Long Document Mode feed document pages manually one after another Torn documents Extremely thin transl...

Page 25: ...sition which accepts up to 500 sheets For details refer to the User Manual Hint When opening the Document Feed Tray by hand place your fingers in the indents at both sides of the tray and open it gent...

Page 26: ...r the length of your document Adjusting the Document Guides The document guides normally extend at equal distances from the left and right of the center of feeding so that your documents are centered...

Page 27: ...left document guide b 5 Slide the left document guide to the left edge of your documents Resetting the Document Guides To reset the guides so that they are equidistant from the center perform the fol...

Page 28: ...ect Paper Stopper to be adjusted to match the length of your documents Document Guides Slide the document eject guides to match the width of your documents Hint The position of the document eject guid...

Page 29: ...our document Eject Paper Stoppers Raise the appropriate Eject Paper Stopper to stop ejected documents from spilling out of the eject tray Hint The eject paper stoppers are attached to the document tra...

Page 30: ...cannot be automatically transported Continuous Feeding With Continuous Feeding documents loaded in the Document Feed Tray are picked up automatically by the pickup roller and transported by the feed r...

Page 31: ...nked to the Manual Feeding Feed Option setting of the ISIS TWAIN driver When the Bypass Mode key on the control panel is pressed or the Manual Feeding Feed Option is selected the Bypass Mode key light...

Page 32: ...at selection save destination and image data processing settings for each job to be used with the Job Function Hint The Job Registration Tool is a TWAIN compliant application that is installed along w...

Page 33: ...a new e mail message with the scanned images as attachments Scan Page Only one page of the document is scanned Scan Job The scanning conditions and scan mode Scan Batch to File Scan Batch to Printer...

Page 34: ...erfect 3 0 This section describes how to start CapturePerfect 3 0 and scan documents The procedure for using the Scan Batch to File function is described here as an example For details refer to the Ca...

Page 35: ...Properties dialog box for the ISIS driver opens 7 Set the scan settings Hint For details on the Properties dialog box refer to the User Manual 8 From the Scan menu select Scan Batch to File The Scan...

Page 36: ...scanned and when no document is loaded the scanner enters the standby state If the Automatic Feeding Feed Option is enabled scanning is performed automatically whenever a sensor in the Document Feed T...

Page 37: ...the display panel and transport stops Hint The displayed error code indicates the location of the paper jam 1 Remove any documents that remain in the eject tray 2 Press the Open Close button and gentl...

Page 38: ...r jam is deleted before scanning resumes Pressing the Stop key saves the images that were scanned before the paper jam was detected to a file and ends the scan process In this case restart scanning fr...

Page 39: ...pages were fed together rescan the double fed pages 2 Press or to select IGNORE or RETRY and press the Enter key IGNORE Saves the image of the page that was detected as a double feed and resumes scann...

Page 40: ...32...

Page 41: ...ass and Rollers 35 Opening and Closing the Upper Unit 35 Cleaning Rollers with a Cleaning Sheet 36 Cleaning the Glass 37 Cleaning the Platen Rollers 38 Cleaning the Pickup and Feed Rollers 39 Cleaning...

Page 42: ...Feed Guides outward and press the tab indicated by the arrow in the illustration to unlock the cover When closing the cover press the same tab with your finger to lock it When closing the imprinter co...

Page 43: ...than those described above are cleaned by using the Cleaning Mode of the User Mode using a cleaning sheet See Cleaning Rollers with a Cleaning Sheet on p 36 Opening and Closing the Upper Unit To clean...

Page 44: ...orized Canon dealer or service representative Product Name Cleaning Sheets package of 30 Product Code 2418B002 Performing the Cleaning Mode Use the following procedure to perform roller cleaning using...

Page 45: ...ly wrung out cloth Cleaning the Glass The scanner has two types of glass the sensor glass for document detection and the scanning glass for actual scanning Hint The appearance of extraneous spots or s...

Page 46: ...ges Clean the platen rollers periodically using the following procedure Hint The platen rollers are cleaned by wiping while rotating the rollers in three stages 1 Carefully raise the upper unit until...

Page 47: ...arefully lower the upper unit a Press down on both sides of the upper unit to ensure that it is securely closed b Cleaning the Pickup and Feed Rollers Use the following procedure to remove and reinsta...

Page 48: ...r 5 Remove the feed roller 6 Use a moistened well wrung out cloth to wipe off any dust from the rollers Reinstalling Pickup and Feed Rollers 1 Set the pickup roller a in place and push the mounting le...

Page 49: ...Carefully lower the upper unit a Press down on both sides of the upper unit to ensure that it is securely closed b Cleaning the Retard Roller Use the following procedure to remove and reinstall the re...

Page 50: ...out cloth to wipe off any dirt from the roller Reinstalling the Retard Roller 1 Set the retard roller into place in the scanner 2 Align the notches in the roller with the shaft pins in the scanner th...

Page 51: ...ce 4 Replace the roller cover 5 Push the front of the roller cover in until it clicks into place 6 Carefully lower the upper unit a Press down on both sides of the upper unit to ensure that it is secu...

Page 52: ...place the rollers by following the relevant steps in the cleaning procedures See Cleaning the Pickup and Feed Rollers on p 39 See Cleaning the Retard Roller on p 41 When the rollers start to wear out...

Page 53: ...Chapter 4 Practical Examples 1 Messages 46 Status Display 46 Error Messages 47 2 Troubleshooting 49 Trouble Categories 49 Problem and Solution 49...

Page 54: ...g Mode waiting for the cleaning sheet to be inserted Press Start Key Status Waiting Load a document and press the Start key Ready Status The scanner is ready to use Scanning Status Scanning is in prog...

Page 55: ...is open Solution Close lower the upper unit See p 35 Error Code C009 Problem The imprinter cover is open Solution Close the imprinter cover See p 34 Jam Error Code Pxxx Problem Paper has jammed Soluti...

Page 56: ...ecovery System Problem Double feeding of document pages has been detected while scanning with the Rapid Recovery System enabled Solution Remove the double fed document page s from the eject outlet ret...

Page 57: ...lem With Auto USB Power switching is enabled but the scanner does not turn ON when the computer is turned ON Cause The SCSI connection is also being used Solution The SCSI connection does not support...

Page 58: ...art when it should first confirm the following Are the scanner and PC correctly connected with the proper cable Is the scanner s power switch turned ON If this does not solve the problem consider the...

Page 59: ...leaning the rollers contact your local Canon dealer or service representative to purchase a Roller Replacement Kit and replace the rollers pickup feed and retard rollers See Replacing the Transport Ro...

Page 60: ...your document Problem Lines smudges or dirt appear on the scanned image Cause The scanning glass or rollers inside the scanner are dirty Solution Clean the scanning glass and rollers See Regular Maint...

Page 61: ...Chapter 5 Appendix 1 Specifications 54 Unit Specifications 54 Consumables 56 External Dimensions 57 2 Index 58...

Page 62: ...Scanning Speed LTR A4 portrait Black and White 200 dpi Simplex 100 pages min Duplex 200 images min 300 dpi Simplex 100 pages min Duplex 200 images min 400 dpi Simplex 82 pages min Duplex 82 images mi...

Page 63: ...mages min 600 dpi speed priority Simplex 46 pages min Duplex 46 images min 600 dpi image quality priority Simplex 32 pages min Duplex 18 images min Other Double Feed Detection function Deskew Selectab...

Page 64: ...rollers start to wear out problems such as paper jams and misfeeds are more likely to occur If this happens replace the rollers regardless of the page count For information about the roller replacemen...

Page 65: ...57 5 Appendix External Dimensions 33 90 861 mm 21 10 536 mm 22 17 563 mm 14 77 375 mm 17 01 432 mm 20 79 528 mm 5 51 140 mm...

Page 66: ...20 adjusting 20 Documents 15 Double Feed Errors 30 E Eject Paper Stoppers 21 Error Messages 47 H Handling 3 I Installation Location 2 Introduction v J Job Function 24 M Maintenance 34 Manuals v Messag...

Page 67: ...P O BOX 2262 1180 EG AMSTELVEEN THE NETHERLANDS CANON LATIN AMERICA INC 703 WATERFORD WAY SUITE 400 MIAMI FLORIDA 33126 U S A CANON AUSTRALIA PTY LTD 1 THOMAS HOLT DRIVE NORTH RYDE SYDNEY N S W 2113 A...

Reviews: