61
Index
Appendix
Errors and Warnings
Troubleshooting
Settings
Playback
Shooting
Setup and Basics
Learning About the Camera
Accessories
Wireless Features
Wireless Features/Accessories
●
With [ ], the exposure is locked at the level determined when you
press the shutter button halfway. With [ ], [ ], or [ ], the exposure
is not locked then but determined the moment you shoot.
●
You can also set the metering method by choosing MENU > [ 5] tab
> [Metering mode].
Changing the ISO Speed
●
To view the automatically determined ISO speed when you have set
the ISO speed to [AUTO], press the shutter button halfway.
●
Although choosing a lower ISO speed may reduce image graininess,
there may be a greater risk of subject and camera shake in some
shooting conditions.
●
Choosing a higher ISO speed will increase shutter speed, which
may reduce subject and camera shake and increase the flash range.
However, shots may look grainy.
●
You can also adjust the ISO speed by choosing MENU > [ 5] tab >
[ISO speed] > [ISO Speed].
●
You can also configure this setting by touching or dragging the bar on
the shooting screen, or by touching [ ]/[ ].
Auto Correction of Brightness and Contrast (Auto Lighting
Optimizer)
●
Correct brightness and contrast automatically to avoid images that are
too dark or lack contrast.
●
This feature may increase noise under some shooting conditions.
●
When the effect of Auto Lighting Optimizer is too strong and images
become too bright, set it to [Low] or [Disable].
●
Images may still be bright or the effect of exposure compensation may
be weak under a setting other than [Disable] if you use a darker setting
for exposure compensation or flash exposure compensation. For shots
at your specified brightness, set this feature to [Disable].
●
You can also configure auto correction of brightness and contrast by
choosing MENU > [ 5] tab > [Auto Lighting Optimizer].
Image Brightness (Exposure)
Adjusting Image Brightness (Exposure Compensation)
●
You can also configure this setting by choosing MENU > [
4] tab >
[Exposure comp.].
●
You can also configure this setting by touching the exposure
compensation icon on the bottom of the shooting screen and then
touching or dragging the bar displayed, or by touching [–]/[+].
Locking Image Brightness / Exposure (AE Lock)
●
To lock the exposure (and display [ ]), aim the camera at a subject
and press the button.
●
To unlock AE, press the button again. [ ] is no longer displayed.
●
AE: Auto Exposure
●
After the exposure is locked, you can adjust the combination of shutter
speed and aperture value by turning the
dial (Program Shift).
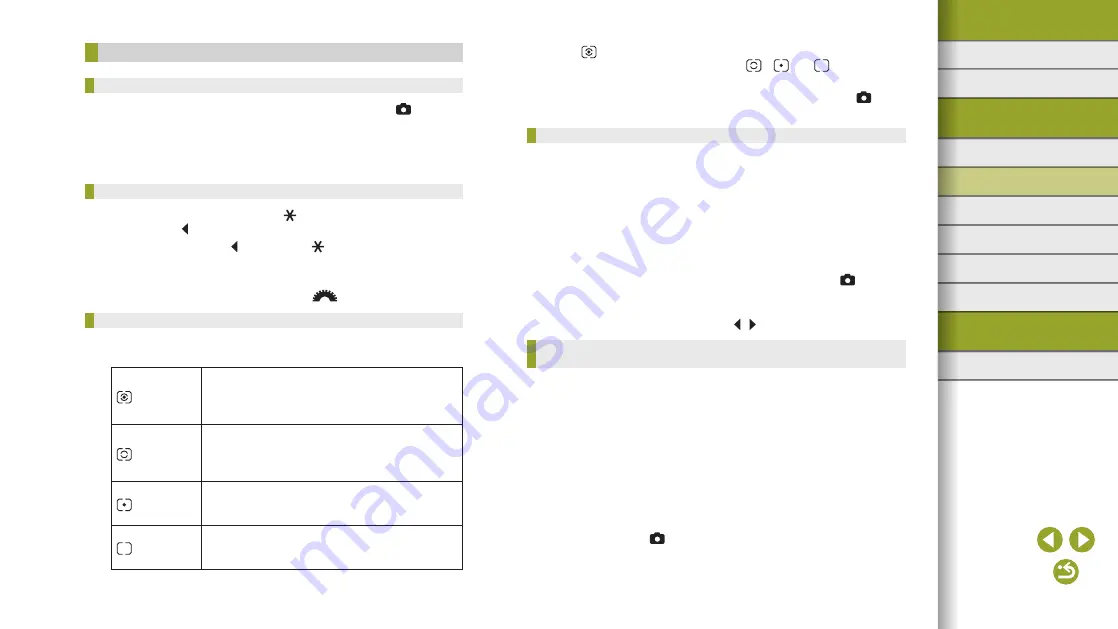
Changing the Metering Method
●
Adjust the metering method (how brightness is measured) to suit
shooting conditions. The following metering modes are available.
Evaluative
metering
For typical shooting conditions, including backlit
shots. Maintains standard exposure of subjects
through automatic adjustments to match the
shooting conditions.
Partial
metering
Effective when the background is much
brighter than the subject due to backlighting,
etc. Metering is restricted to within the circular
metering frame in the center of the screen.
Spot
metering
This is for metering a specific spot of the subject or
scene. Metering is restricted to within the circular
spot metering frame in the center of the screen.
Center-
weighted
average
Determines the average brightness of light across
the entire image area, calculated by treating
brightness in the central area as more important.


