background image

33

5

SEND

IN

G DOCUMENTS

Sequential broadcasting

Sending a document to more than one location

Sequential broadcasting sends one document to more than one location.
You can send to a total of 80 locations as follows:

• One-touch speed dialling

=

9  locations

• Coded speed dialling

= 70  locations

• Regular dialling (Numeric buttons dialling)

=

1  location

You can enter the one-touch speed dialling and coded speed dialling locations in any order. You simply press the 
one-touch speed dialling button, or press [Coded Dial/Directory] followed by the two-digit code.
You can also include one location using regular dialling. Remember that when using regular dialling, you must press 
[Start/Copy] after entering the number.

Documents stored in memory

Printing a list of documents in memory

Your fax can print a list of documents stored in memory, along with the transaction number (TX/RX NO.) of each 
document. Once you know the transaction number of a document in memory, you can print it or delete it. 

Printing a document in memory

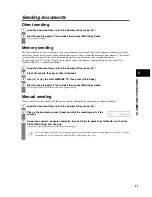
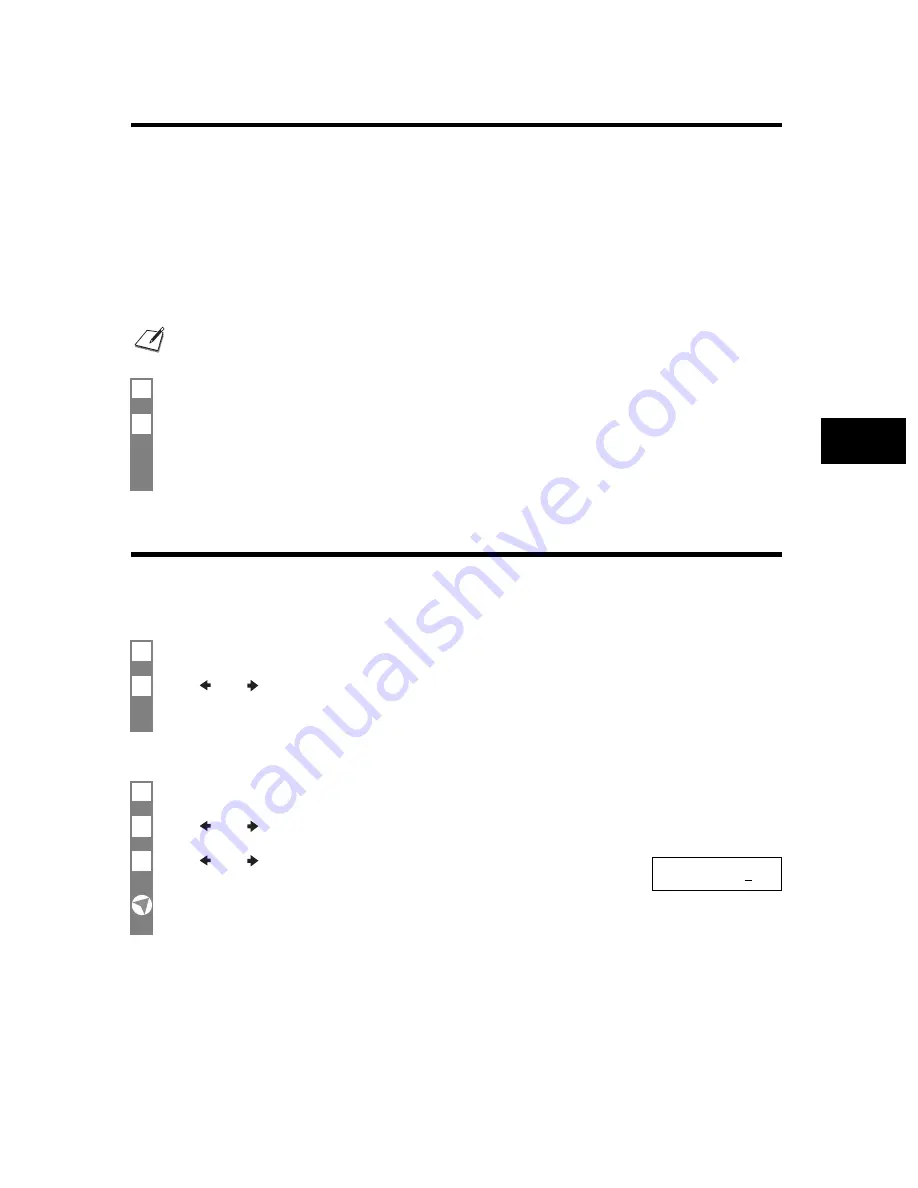
You must press each button within 10 seconds of the preceding one. The fax begins the operation approximately 10 seconds 
after you press the last button.

1

Load the document face up into the document tray (see p. 24).

2

Dial the receiving party’s fax numbers as you need, then press [Start/Copy].

• The fax reads the document into memory and begins sending.
• You can also press [Redial/Pause] to redial the last number dialled with the numeric buttons.
• To cancel a transmission, press [Stop] during dialling or transmission. All transmissions in the sequence are cancelled.

1

Press [Function].

2

Use [

] or [

] to select MEMORY REFERENCE, then press [Start/Copy] twice.

1

Press [Function].

2

Use [

] or [

] to select MEMORY REFERENCE, then press [Start/Copy].

3

Use [

] or [

] to select PRINT DOCUMENT, then press [Start/Copy].

TX/RX NO.

0001

Summary of Contents for FAX-B820

Page 1: ...Canon USER S GUIDE ENGLISH ...

Page 2: ...with one touch coded speed dialling numbers and names 21 Adding voice tags to the one touch coded speed dialling numbers 21 Modifying voice tags 22 Deleting voice tags 22 3 DOCUMENTS AND PAPER Preparing documents 23 Types of documents you can scan 23 Problem documents 23 Loading documents 24 Paper requirements 24 Printable area 24 4 MAKING COPIES Copying documents 25 5 SENDING DOCUMENTS Preparing ...

Page 3: ...voice memos 43 Deleting messages 43 Playing telephone messages 44 Remote control features 44 Registering the password for remote control 44 Using remote control 45 Forwarding telephone messages 47 Setting the forwarding number 47 Setting the number of redial times 47 Setting PIN ENTRY 48 When a forwarded call is received 48 8 SETTINGS AND ACTIVITY REPORTS Selecting a menu 49 Activity reports 54 Ho...

Page 4: ...ll other product and brand names are registered trademarks trademarks or service marks of their respective owners This equipment conforms with the essential requirements of EC Directive 1999 5 EC We declare that this product conforms with the EMC requirements of EC Directive 1999 5 EC at nominal mains input 230V 50Hz although the rated input of the product is 200V 240V 50 60Hz If you move to anoth...

Page 5: ...tion on the topic of the previous sentence or paragraph default A setting that remains in effect unless you change it document The original sheet s of paper you send receive or copy with your fax menu A list of settings from which you select an item to set up or change A menu has a title which appears on the LCD and buttons Used to select an item in a menu Press to select the next item and press t...

Page 6: ...ouch sheet If any of these items are damaged or missing contact your local authorised Canon dealer or the Canon help line immediately This item is only included in some countries Removing the shipping materials 1 Remove the protective piece a 2 Open the printer cover by gently pulling it towards you 3 Open the document tray 4 Remove the shipping tapes b and the protective pieces c Close the printe...

Page 7: ...using the fax FAX B820 B822 only For user convenience the one touch sheet provided with your fax should be fitted over the one touch speed dialling buttons on the left of the operation panel 1 Insert the tabs on the multi purpose tray into the slots on the unit Handset Extension phone i e an additional telephone that you may wish to place away from the fax to answer calls from a different location...

Page 8: ...pter 6 An answering machine can be connected to the FAX B820 B822 only You cannot use the extension phone while the fax is using the phone line Due to the range of specifications Canon cannot guarantee that all answering machines will be compatible with your fax 1 Plug the power cord connector into the rear of the fax 2 Plug the other end of the power cord into a properly grounded AC power outlet ...

Page 9: ...w stock with paper already loaded Do not leave paper stacked in the multi purpose tray for long periods of time since it may bend or curl and cause problems Certain environmental conditions such as extreme temperatures or humidity can cause some paper to misfeed in the multi purpose tray If you have trouble feed one sheet at a time Depending on the density of the printed pages the ink may need tim...

Page 10: ...u are ready to use them Never remove the BJ cartridge unless you are going to replace it Keep the cartridge holder in the home position on the right side of the fax when you are not using the fax 1 Move the paper guide to the left 2 Fan the stack of paper that you want to feed into the fax Then tap the edge of the stack on a flat surface to even the stack 3 Insert the stack face up into the multi ...

Page 11: ...mode displayed on the LCD Otherwise the cartridge holder may not be in its home position causing the BJ cartridge to remain uncapped and dry out Store BJ cartridges out of the reach of children If a child inadvertently ingests ink consult a physician immediately Do not touch the precision components on the BJ cartridge 1 Make sure the fax is plugged in 2 Load the paper in the multi purpose tray 3 ...

Page 12: ...ould be visible through the slot The BJ cartridge tilts slightly to the left in the loaded position 7 Close the printer cover If the AUTO TEST PRINT setting see SYSTEM SETTINGS p 52 is set to ON The fax automatically prints a test page every time you insert a BJ cartridge Do not try to manually move or stop the cartridge holder Do not touch the components shown below or any metal parts 1 Press Fun...

Page 13: ...e R button see below Once you have registered them you simply need to press R before dialling a fax or telephone number Registering the access type and the outside line access number See pp 14 15 for the buttons on the operation panel 1 Press Function then press Start Copy twice 2 Use or to select R KEY SETTING then press Start Copy 3 Use or to select PBX then press Start Copy 4 Use or to select t...

Page 14: ...Mode Resolution Function 5 1 2 3 4 6 7 8 9 ABC DEF GHI JKL MNO PQRS TUV WXYZ 0 FAX B840 Document tray Handset Multi purpose tray Document guide see p 15 Printer cover Microphone LCD TAM LED FAX B840 only Rewind Forward buttons FAX B840 only Numeric buttons see p 15 01 Report 02 Cleaning 03 Send Options 04 R 05 Space 06 Clear 07 Polling 08 Ink Saver 09 Caller History Receive Mode Resolution Functio...

Page 15: ...e p 44 Redial Pause button see pp 29 30 Coded Dial Directory button see p 28 29 Stop button Start Copy button UCanTalk button see p 29 Hook button see p 27 FAX B840 only 7 8 PQRS TUV 9 0 WXYZ 5 JKL 4 GHI 6 MNO 2 1 ABC 3 DEF Button Uppercase Letter Mode A Lowercase Letter Mode a Number Mode 1 Uppercase letter mode A Lowercase letter mode a Number mode 1 ...

Page 16: ...ther letters using the numeric buttons If the next letter you want to enter is under the same numeric button you pressed in step 2 press to move the cursor to the right Then press that same numeric button repeatedly until the letter you want appears To enter a space press Space 1 Press repeatedly until the symbol you want appears 2 If you want to enter another symbol press to move the cursor to th...

Page 17: ...e date and time The date and time appear on the LCD as well as on the documents you send 1 Press Function then press Start Copy three times 2 Use the numeric buttons to enter the date and time using the day month year format DD MM YYYY then press Start Copy Set the time using the 24 hour clock system Precede single digits with a zero Example 3 00 p m 15 00 To change the date format see SYSTEM SETT...

Page 18: ...using the numeric buttons see p 15 16 then press Start Copy 5 Press Stop Registration ends and the fax returns to standby mode 1 Press Function then press Start Copy 2 Use or to select SYSTEM SETTINGS then press Start Copy 3 Use or to select SUMMER TIME then press Start Copy 4 Use or to select ON or OFF then press Start Copy 5 If you selected OFF in step 4 press Stop to return to standby mode If y...

Page 19: ...ATE TIME then press Start Copy twice 15 Set the month week the day of the week and time when the summer time ends as in steps 6 to 12 16 Press Stop Setting ends and the fax returns to standby mode 1 Press Function 2 Use or to select TEL REGISTRATION then press Start Copy twice 3 Use or to select the number of the one touch speed dialling button you want to use for the number If a number is already...

Page 20: ...ak the party s name again After the tone speak into the microphone again 8 To assign additional one touch speed dialling numbers start from step 3 To finish press Stop If voice tag registration fails three consecutive times registration will end If this happens start again from step 1 1 Press Function 2 Use or to select TEL REGISTRATION then press Start Copy 3 Use or to select CODED SPEED DIAL the...

Page 21: ...ing lists Entries with a voice tag are preceded by an icon You cannot receive documents while you are recording a voice tag Also the Caller ID function see p 38 may not work properly 1 Press Function 2 Use or to select TEL REGISTRATION then press Start Copy 3 Use or to select 1 TOUCH SPD DIAL or CODED SPEED DIAL then press Start Copy 4 Use or to select the receiving party you want to add a voice t...

Page 22: ...VOICE TAG then press Start Copy The fax asks you to confirm that you want to redo the voice tag registration 4 Press to select YES and proceed to step 6 on p 21 Press to cancel the procedure 1 Perform steps 1 and 2 on Modifying voice tags above 2 Use or to select DELETE VOICE TAG then press Start Copy The fax asks you to confirm that you want to delete the voice tag 3 Press to select YES to delete...

Page 23: ...tempt to load the following types of document into the fax Wrinkled or creased paper Torn paper Coated paper or glossy paper Thick paper Curled or rolled paper Carbon paper or carbon backed paper Onion skin or thin paper Envelopes Remove all staples paper clips etc before loading the document into the document tray Make sure any glue ink or correction fluid on the paper is completely dry before lo...

Page 24: ...gently insert the top of the document face up into the document tray until it stops You will hear a beep If you have trouble feeding multipage documents from the document tray into the fax remove the stack and tap it on a flat surface to even the edges Be sure to test paper before purchasing large quantities For details on loading paper in the multi purpose tray see p 10 A4 LTR For a multipage doc...

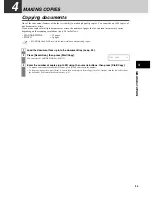
Page 25: ...15 pages PHOTO 3 pages STANDARD and FINE result in the same resolution when making copies 1 Load the document face up into the document tray see p 24 2 Press Resolution then press Start Copy You can select STANDARD FINE or PHOTO 3 Enter the number of copies up to 99 using the numeric buttons then press Start Copy To make a correction to the number of copies press Clear and re enter the number To s...

Page 26: ...fax uses to send or copy documents according to how light or dark your document is The higher the resolution the higher the output quality but the slower the scanning speed 1 Load the document face up into the document tray see p 24 2 Press Resolution to select the resolution You can select STANDARD FINE or PHOTO After about 5 seconds the fax returns to standby mode You can change the resolution s...

Page 27: ... see p 24 2 Dial the receiving party s fax number then press Start Copy twice The fax begins sending 1 Load the document face up into the document tray see p 24 2 Press Function then press Send Options 3 Use or to select MEMORY TX then press Start Copy 4 Dial the receiving party s fax number then press Start Copy twice The fax scans the document into memory and begins sending 1 Load the document f...

Page 28: ...e fax prints an ERROR TX REPORT see p 50 1 Load the document face up into the document tray see p 24 2 Press the one touch speed dialling button under which the number you wish to fax is registered or Press Coded Dial Directory and enter the appropriate two digit coded speed dialling code The registered name and number appear If you make a mistake press Stop Then press the correct one touch speed ...

Page 29: ...o dial displayed press Start Copy to start the document transmission 1 Load the document face up into the document tray see p 24 2 Press UCanTalk Then after the tone speak the voice tag into the microphone 3 With the party s name you wish to dial displayed press Start Copy to start the document transmission If the AUTO VOICE DIAL setting is set to ON the fax automatically starts dialling see p 49 ...

Page 30: ...lling When you are sending a document and the receiving party s line is busy the fax waits the specified time and then dials the same number again You can set the fax to redial several times if previous attempts fail because of a busy signal If all redialling attempts are unsuccessful the fax will cancel the transmission You can set the fax to print an ERROR TX REPORT to remind you that the transm...

Page 31: ...tomatic redialling use or to select OFF then press Start Copy Press Stop to return to standby mode To enable automatic redialling use or to select ON and continue with the steps below 4 Press Start Copy twice 5 Use the numeric buttons to enter the number of times you want the fax to redial then press Start Copy twice 6 Use the numeric buttons to enter the time interval between redialling attempts ...

Page 32: ... Start Copy after entering the number to register it 6 When the set time comes the fax dials and sends the document Delayed sequential broadcasting is applicable for sending one document to more than one location at a later time when multiple fax numbers are dialled see p 33 1 Press Function 2 Use or to select MEMORY REFERENCE then press Start Copy 3 Use or to select DELETE DOCUMENT then press Sta...

Page 33: ...f documents stored in memory along with the transaction number TX RX NO of each document Once you know the transaction number of a document in memory you can print it or delete it Printing a document in memory You must press each button within 10 seconds of the preceding one The fax begins the operation approximately 10 seconds after you press the last button 1 Load the document face up into the d...

Page 34: ...ect DELETE DOCUMENT then press Start Copy 4 Use or to select the transaction number TX RX NO of the document you want to delete then press Start Copy The fax asks you to confirm that you want to delete the document If the LCD does not change after you press or this means only one transaction is stored in memory If you are unsure of the transaction number TX RX NO print the Doc memory list see p 33...

Page 35: ...se Operation Requirements Details FAX ONLY MODE Fax Answers all calls as fax calls Receives documents automatically and disconnects voice calls Separate telephone line for fax use only If you want to be alerted when a fax call is received enable the INCOMING RING setting p 51 FAX TEL AUTO SW Fax Tel mode Fax Tel Automatically switches between fax and voice calls Receives documents automatically an...

Page 36: ...ss Stop Setting ends and the fax returns to standby mode 1 Check that Manual is displayed on the LCD see p 35 2 When you hear the fax or extension phone ring pick up the handset 3 If you hear a person s voice Start your conversation If the caller wants to send a document after talking to you ask them to press the start button on their fax machine When you hear a slow beep press Start Copy on the f...

Page 37: ...ng this feature print quality will be reduced For highest print quality disable this feature 1 Press Function then press Ink Saver 2 Use or to select ON or OFF then press Start Copy The fax returns to standby mode 1 Use or to change the volume VOL 0 to 3 You can set the fax not to store documents in memory if a problem occurs during reception see MEMORY RX p 51 Once the pages are printed they are ...

Page 38: ...JECT list see below OUT OF AREA The fax rejects calls from any callers in an area that does not have the Caller ID service SHOW IN HISTORY Determine if the fax stores phone fax number for rejected calls in memory 5 Use or to select ON YES then press Start Copy If you set to OFF the setting goes on to the next CALL REJECTION setting If you set SHOW IN HISTORY to YES or NO the setting returns to ANO...

Page 39: ...39 6 RECEIVING DOCUMENTS Cancelling receiving 1 Press Stop ...

Page 40: ...ESSAGE Message played when the Fax Tel mode is set The fax receives documents automatically and only rings for voice calls FORWARDING MSG Message played when any new telephone messages are forwarded to a forwarding number 1 Press Function 2 Use or to select MSG REGISTRATION then press Start Copy 3 Use or to select OUTGOING MESSAGE You can record an alternative outgoing message fax telephone switch...

Page 41: ...see p 42 When TOLL SAVER is set to OFF you can specify the number of times the fax will ring 2 The outgoing message is played to the other party 3 If the other party sends a fax after they leave a message or if the call is a fax call the fax is received automatically When the fax is set to MANUAL MODE and MAN AUTO SWITCH has been set to OFF see p 51 TAM MODE will be activated if the fax rings 15 t...

Page 42: ... select TAM SETTINGS then press Start Copy 3 Use or to select TAM MONITOR then press Start Copy 4 Use or to select ON then press Start Copy 5 Press Stop Setting ends and the fax returns to standby mode 1 Press Function then press Start Copy 2 Use or to select TAM SETTINGS then press Start Copy 3 Use or to select TOLL SAVER then press Start Copy twice When TOLL SAVER is set to ON and there are tele...

Page 43: ...es 1 Press Function 2 Use or to select MSG REGISTRATION then press Start Copy 3 Use or to select VOICE MEMO 4 Press Record and speak into the microphone to record your voice memo The remaining recording time is displayed on the LCD 5 Press Stop twice when recording is finished The fax returns to standby mode To play a voice memo repeat steps 1 to 3 above and then press Play 1 Press Function 2 Use ...

Page 44: ...number of telephone messages and the number of the message being played ICM No are displayed whenever a message is played Press to listen to the message again Repeat Press to play the next message Skip Press twice to play the previous message Press Stop to stop playback Press Delete during playback to delete a message Use or to change the volume 1 Press Delete then press to delete all messages A v...

Page 45: ...t is not necessary to enter your password when you use the FORWARDING MSG feature see p 47 If you enter an invalid password you will hear an error tone If you enter two invalid passwords consecutively the call will be disconnected You should enter a remote command within 20 seconds of entering your password If more than 20 seconds elapse after you enter your password and you do not enter a remote ...

Page 46: ...ing 21 Play voice memo 4 Repeat 5 Stop playback 29 Delete voice memo 31 Record outgoing message End recording 32 Record alternative outgoing message End recording 33 Record forwarding message End recording 34 Record FAX TEL switching message End recording 41 Play outgoing message 4 Repeat 5 Stop playback 42 Play alternative outgoing message 4 Repeat 5 Stop playback 43 Play forwarding message 4 Rep...

Page 47: ... recorded you will hear a tone instead of a forwarding message when telephone messages are forwarded 1 Press Function then press Start Copy 2 Use or to select TAM SETTINGS then press Start Copy 3 Use or to select FWD SETTINGS then press Start Copy 4 Use or to select ON then press Start Copy twice 5 Use the numeric buttons to enter the forwarding number then press Start Copy 6 Press Stop Setting en...

Page 48: ...ENTRY is set to OFF see above step 4 is not required If you enter an invalid password you will hear an error tone If you enter two invalid passwords consecutively the call will be disconnected 5 Any new telephone messages will be played 6 When playback ends it will be possible to use the remote control features For the remote control features see pp 45 46 7 Hang up the handset when you have finish...

Page 49: ...ous level press Function 5 Press Stop Setting ends and the fax returns to standby mode If at any stage you want to return to standby mode press Stop If you pause for more than 60 seconds while accessing a menu the fax will automatically return to standby mode FAX B840 only Name Description Settings DATE TIME Set the date and time 24 hour clock using the numeric buttons UNIT TELEPHONE Enter your fa...

Page 50: ...F Name Description Settings TX REPORT Enable disable automatic printing of the transmission report OUTPUT NO Turn off the activity report feature OUTPUT YES Set the fax to print an activity report every time you send a document PRINT ERROR ONLY Print only when an error occurs during sending OUTPUT NO OUTPUT YES PRINT ERROR ONLY RX REPORT Enable disable automatic printing of the reception report OU...

Page 51: ...of time the fax will ring to alert you of an incoming call 22 seconds 10 to 60 DEFAULT ACTION Select the action taken after the F T RING TIME expires DISCONNECT RECEIVE INCOMING RING Set the fax to ring when it receives a call ON OFF RING COUNT Set the number of incoming rings before the fax answers 2 times 1 to 99 MAN AUTO SWITCH Determine if the fax switches to document receive mode after the fa...

Page 52: ... you have difficulties connecting over long distance or noisy lines 14400bps 9600bps 7200bps 4800bps RX START SPEED Set the speed at which the fax starts receiving Set this to a lower speed if you have difficulties connecting over long distance or noisy lines 9600bps 7200bps 4800bps COUNTRY SELECT Set the country OTHERS UK GERMANY FRANCE ITALY SPAIN HOLLAND DENMARK NORWAY SWEDEN FINLAND AUSTRIA BE...

Page 53: ...r of retries REDIAL INTERVAL Set the period of time between redialling attempts ON OFF 2 times 1 to 10 2 minutes 2 to 99 PIN ENTRY PIN confirmation ON OFF TAM MONITOR Allows you to screen all incoming calls ON OFF Name Description Settings CALLER ID Determine if the fax displays the caller s name and phone fax number when receiving a call ON OFF ANONYMOUS Allows you to reject anonymous calls ON OF...

Page 54: ...ologically One touch speed dialling list Lists the numbers and names registered under one touch speed dialling buttons Coded speed dialling list Lists the numbers and names registered under coded speed dialling codes User s data list Lists the current settings of the fax and the registered sender information Doc memory list Lists the documents currently stored in the fax s memory see p 33 TX Trans...

Page 55: ...nds The document will be fed out automatically If the document is not fed out gently pull the document out of the fax see below 1 Gently pull any jammed paper out of the fax as shown then press Stop Pull it gently in either direction If you cannot pull the paper out continue with the steps below 2 Open the document tray 3 Gently pull the document guides to remove the gray cover under the document ...

Page 56: ... such as thinners benzene acetone or any other chemical cleaner to clean the interior of the fax 1 Disconnect the power cord from the fax 2 Wipe the exterior of the fax with a clean soft lint free cloth moistened with water or diluted dishwashing detergent solution 3 When you are finished reconnect the power cord 1 Disconnect the power cord from the fax then open the printer cover Do not touch the...

Page 57: ... or copy will also be dirty Use a soft lint free cloth Do not use tissue paper paper towels or similar materials for cleaning 1 Disconnect the power cord from the fax then open the printer cover 2 While holding the white sheet open clean the components Wipe with a clean soft lint free cloth moistened with water then wipe with a clean soft dry lint free cloth 3 When you are finished close the print...

Page 58: ...artridge while the fax is printing or performing another operation If you need to unplug the fax wait until it returns to standby mode time and receive mode displayed on the LCD Otherwise the cartridge holder may not be in its home position causing the BJ cartridge to remain uncapped and dry out 1 Make sure the fax is plugged in then open the printer cover Do not try to manually move or stop the c...

Page 59: ...This keeps the sheets of paper from sticking together The multi purpose tray may contain too many sheets Make sure the paper stack in the multi purpose tray does not exceed the paper limit mark see p 9 Do not exceed the maximum loading capacity of the multi purpose tray see p 68 Do not force the paper stack into the multi purpose tray Different types of paper may be loaded in the multi purpose tra...

Page 60: ...ere may be other documents being sent from memory Allow time for those documents to finish sending An error may have occurred during sending Print an activity report and check for an error see p 54 The telephone line may not be working properly Make sure there is a dial tone when you press Hook or when you lift the handset If there is no dial tone contact your local telephone company The receiving...

Page 61: ...he fax may have a document stored in memory Print out any documents stored in memory see p 33 An error may have occurred during reception Check the LCD for an error message see p 64 Print an activity report and check for an error see p 54 The multi purpose tray may be empty Make sure paper is loaded in the multi purpose tray see p 10 The sending fax machine may not send the CNG signal that tells t...

Page 62: ...r the reception speed see RX START SPEED p 52 The sending fax machine may not be functioning properly Call the sender and have them check that their fax machine is functioning properly Copying problems The fax does not make a copy The BJ cartridge may need to be replaced Determine if the problem is with the BJ cartridge and replace if necessary see p 58 The document may not have been loaded correc...

Page 63: ...r side The nozzles on the BJ cartridge print head may be clogged Clean the BJ cartridge print head if necessary see p 57 The BJ cartridge may not be installed properly Make sure the BJ cartridge is installed properly see p 11 The BJ cartridge print head may be damaged Determine if the problem is with the BJ cartridge print head see p 57 and replace the BJ cartridge if necessary see p 58 The printo...

Page 64: ...using a G3 machine Contact the other party and ask them to send or receive the document using a G3 machine The touch tone rotary pulse setting on your fax is incorrect Set your fax to the setting that matches your telephone line see p 12 The receiving fax machine did not answer within 55 seconds after all automatic redialling attempts Contact the receiving party and have them check their fax machi...

Page 65: ...nutes then plug it back in Also try replacing the BJ cartridge with a new one see p 58 The waste ink tank which holds the ink used for print head cleaning may be full Contact your local authorised Canon dealer or the Canon help line to have the waste ink tank replaced immediately Clear the paper jam see p 55 During printing the BJ cartridge print head may have become too hot Allow the fax to cool ...

Page 66: ... dialling code you entered has not been registered Register the one touch speed dialling button or coded speed dialling code see pp 19 20 NO OGM The outgoing message has not been recorded Record an outgoing message see p 40 REC D IN MEMORY The fax received the document in memory because paper or ink ran out a paper jam occurred or the incorrect BJ cartridge was installed Load paper in the multi pu...

Page 67: ...mory at the time of power failure During a power failure The following restrictions apply to the function of the fax during a power failure or while the power is turned off You cannot use the fax to make telephone calls Also if your fax is connected to a telephone you may not be able to make telephone calls You cannot send receive or copy documents You can receive voice calls only if a telephone o...

Page 68: ...Jet printing Paper tray capacity Maximum 50 sheets 75 g m2 Paper type Plain cut sheet paper A4 Letter Legal Paper weight 64 g m2 to 90 g m2 Paper thickness 0 09 mm to 0 13 mm Image memory Up to 120 A4 size pages standard resolution Auto dial functions One touch speed dialling Registration for 9 numbers Coded speed dialling Registration for 70 numbers Ink cartridge Canon BX 3 Black BJ cartridge Car...

Reviews: