background image

Handset

B-2

A

ttach

ing

 the O

pti

onal

 Hands

et t

o the

 Mac

hin

e

B

Attaching the Handset to Your Machine

To attach the handset to your machine, follow these steps:

1

Use a screwdriver to remove the two covers on the left side of the machine.

2

Remove the screws from the plugs and insert the plugs into the holes on the handset cradle.

3

Insert the plugs with the handset cradle in the holes on the machine.

NOTE

If you have difficulty inserting the plugs, turn the machine so that the left side is facing you and the right side is 
placed against a wall. This will allow you to insert the plugs without the machine moving.

Summary of Contents for FAX-L380

Page 1: ...per Handling Sending and Receiving Faxes Speed Dialling Making Copies The Menu System Quick Reference Guide Setting up the Machine Document and Paper Handling Sending and Receiving Faxes Speed Diallin...

Page 2: ...Hz although the rated input of the product is 200V 240V 50 60Hz If you move to another EU country and are experiencing trouble please call the Canon Help Desk For Europe Only H12425 FAX L380 Model Nam...

Page 3: ...e Energy Star guidelines for energy efficiency Super G3 is a phrase used to describe the new generation of fax machines that use ITU T V 34 standard 33 6Kbps modems Super G3 High Speed Fax machines al...

Page 4: ...as a Class 1 Laser Product under IEC 60825 1 1993 and EN 60825 1 1994 200V 240V model The label shown below is attached to the laser scan machine on the product This product has been classified under...

Page 5: ...mbling the Machine 2 5 Attaching Components 2 5 Document Output Tray 2 5 Output Tray 2 5 Installing the Paper Cassette 2 6 Making Connections 2 7 Connecting the Machine to Your PC 2 7 Connecting the T...

Page 6: ...4 13 Chapter 5 Speed Dialing Speed Dialing Methods 5 1 One Touch Speed Dialing 5 2 Storing Numbers for One Touch Speed Dialing 5 2 Changing or Deleting a Number Name Stored Under a One Touch Speed Di...

Page 7: ...ing Machine AnsMode 7 5 Using the Machine With an Answering Machine 7 5 Receiving Faxes in Memory When a Problem Occurs 7 6 Receiving While Performing Other Tasks 7 7 Canceling an Incoming Fax 7 7 Cha...

Page 8: ...ssion Results and Sending Reservation 11 2 Deleting a Fax Job 11 2 Confirming and Deleting a Copy Job 11 3 Confirming and Deleting a Print Job 11 3 Confirming and Deleting a Report Job 11 4 Chapter 12...

Page 9: ...General A 1 Plain Paper Fax A 2 Copier A 3 Telephone A 3 Printer A 4 Printable Area Papers A 5 Printable Area Envelopes A 6 Document Sizes A 7 Printer Driver A 8 Appendix B Attaching the Optional Hand...

Page 10: ...lains how to get the most out of the documentation that comes with the machine and gives important safety instructions Welcome Thank you for purchasing the new Canon FAX L380 We are sure that your mac...

Page 11: ...r ECM capable machine Automatic switching between fax and voice calls The machine can automatically distinguish between fax and voice calls so that you can receive both through a single phone line Ans...

Page 12: ...00 dpi Printing resolution is 1200 600 dpi Copy enlargement reduction The machine can reduce or enlarge copies in the range between 50 and 200 of their original size Collate copy The machine can sort...

Page 13: ...P runs properly Hardware Environment Using the CARPS software requires following computer environment IBM or IBM compatible PC CD ROM drive or network environment with the access to CD ROM PC equipped...

Page 14: ...m your PC Type Conventions Used in This Guide This Guide follows the conventions below to emphasize certain information that will help you use your machine correctly and safely CAUTION Cautions tell y...

Page 15: ...loset or cabinet or on shelves unless adequate ventilation is available See Choosing a Location for Your Machine on p 2 1 for guidelines on how much space the machine needs for ventilation Operate the...

Page 16: ...perate normally when you follow the operating instructions Adjust only those controls that are covered by the operating instructions in this User s Guide or you can damage the machine and require exte...

Page 17: ...d remains between 10 and 32 5 C Make sure the area s relative humidity is always between 20 and 80 Keep the machine away from direct sunlight If possible place the machine near an existing telephone o...

Page 18: ...ve or ship the machine in the future Carefully remove all items from the box You should have someone help by holding the box while you lift the machine and its protective packaging out of the carton M...

Page 19: ...hich you can purchase from your Canon dealer For best results use a cable that is no more than 5 meters long Removing Shipping Materials In order to protect your machine during shipping the machine ha...

Page 20: ...of the machine that needs regular service or replacement is the Cartridge T The Cartridge T Starter comes with your machine but you should purchase the regular Cartridge T for replacement Although Ca...

Page 21: ...d its components To see how the machine will look fully assembled see Getting Acquainted With Your Machine on p 2 11 Attaching Components NOTE Make sure the tabs are inserted into the slot completely...

Page 22: ...ing Up Your Machine 2 Installing the Paper Cassette 1 Pull out the paper cassette 2 Attach the cassette extension to the cassette 3 Attach the extension cover on the back of the machine 4 Insert the p...

Page 23: ...n phone to the answering machine and then the answering machine to your machine If you connect a data modem to your machine and you use it extensively or others access your PC frequently through the d...

Page 24: ...nsion cord can cause the machine to malfunction Unplug the machine only by pulling on the plug itself Never pull on the cord Do not plug the machine into an outlet shared with an appliance such as an...

Page 25: ...play When you connect the power cord to an AC outlet for the first time after purchase DISPLAY LANGUAGE will appear in the LCD display after PLEASE WAIT In this case set the language for the LCD displ...

Page 26: ...OUNTRY SELECT does not appear after DATA ENTRY OK is displayed Setting is completed and the machine enters the Fax standby mode If COUNTRY SELECT appears after DATA ENTRY OK is displayed Go to step 2...

Page 27: ...documents b ADF Automatic Document Feeder Holds documents and feeds them automatically into the scanning machine c Document output tray Documents come out here d Slide guides Adjust to the width of do...

Page 28: ...Handset jack Connect the handset optional c Extension phone jack Connect an extension phone d Telephone line jack Connect the telephone cable e Face up cover Open it when you output paper face up or...

Page 29: ...buttons to enter numbers and names when registering information and to dial fax telephone numbers j Tone button Use this button to use tone dialing temporarily when your machine is set for pulse dial...

Page 30: ...this panel to access the registration buttons a Report button Use this button to print activity reports b Receive Mode button Use this button to select the receive mode for receiving faxes c R button...

Page 31: ...job is saved in memory or when the reserve copy or other functions are operating or when the In Use Memory indicator lights up When paper jams occur When an error code appears and the Alarm indicator...

Page 32: ...iorate Do not stand the cartridge on end and do not turn it upside down If toner becomes caked in the cartridge it may prove impossible to free it even by shaking the cartridge Keep the cartridge away...

Page 33: ...MABLE Installing Replacing the Toner Cartridge The machine uses a Canon Cartridge T The procedure on the next page explains how to install the cartridge for the first time and how to replace it when t...

Page 34: ...protective shutter of the drum in any way 5 Hold the cartridge on a flat stable surface with one hand and break the tab and pull out the seal completely with the other hand 6 Open the printer cover NO...

Page 35: ...rtridge and position the arrow mark on the cartridge towards the inside of the machine as shown below 8 Align the projections on both sides of the cartridge to the guides in the machine and slide the...

Page 36: ...aper jams NOTE Do not use damp curled wrinkled or torn paper as these can cause paper jams or poor print quality Highly textured extremely smooth or shiny paper does not print well The laser printing...

Page 37: ...ng Paper in the Cassette 1 Pull out the paper cassette 2 Adjust the rear paper end guide to match the paper size 3 Load the paper into the cassette Make sure the paper stack sits below the hooks 4 Adj...

Page 38: ...aper jams may occur Testing the Machine After you have assembled your machine installed the toner cartridge loaded plain paper in the paper cassette you can make sure the machine is printing properly...

Page 39: ...the machine returns to standby mode and loses all information you had entered up to that point You will then have to start again Entering Numbers Letters and Symbols Each numeric button has a number a...

Page 40: ...enter the letter or number Press the button repeatedly until the letter or number you want appears To enter two letters or symbols that are under the same button Press the numeric button press the sa...

Page 41: ...ed document in small type By identifying the documents you send the receiving party can recognize your fax messages at a glance Here is a sample document with the identifying information When using sp...

Page 42: ...meric buttons to enter your fax telephone number max 20 digits including spaces press OK To enter a plus sign before the number press repeatedly until it appears For details on how to enter or delete...

Page 43: ...ou can select from the following TOUCH TONE for tone dialing ROTARY PULSE for pulse dialing 5 Press Stop Reset to return to standby mode Setting the Summer Time Some countries adopt the summer time sy...

Page 44: ...fifth week depending on the selected month 8 Press or to select the day of the week on which the summer time starts press OK twice 9 Use the numeric buttons to enter the time at which the summer time...

Page 45: ...ing paper wrapped tightly in its original package Store paper in a dry location out of direct sunlight To prevent curling store paper flat not upright If the paper is curled uncurl it before loading i...

Page 46: ...presents both the recommended area for optimum print quality and the entire area where the machine can technically print from your computer Printing area light shade Canon recommends that you print wi...

Page 47: ...aper in the cassette The cassette holds up to approx 250 sheets of 64 g m2 paper or approx 20 envelopes Loading Paper in the Cassette 1 Fan the paper stack first then tap the edges on a flat surface t...

Page 48: ...e down logo side and load it so that the top of the paper feeds first in the cassette 5 Pinch and slide the width slide guides to fit the paper stack Make sure the paper stack does not exceed the load...

Page 49: ...After that reload it in the cassette NOTE Select ENVELOPE for envelopes For details on loading envelopes in the cassette see Loading Envelopes in the Cassette on p 4 5 For information on how to use no...

Page 50: ...e length slide guide to fit the size of the envelopes you want to load IMPORTANT If the slide guides are not adjusted correctly for the size of the envelopes the quality of your printouts may be adver...

Page 51: ...u do not completely insert the cassette into the machine paper jams may occur 10 Specify the paper size and type Press Menu OK Press or to select 1 CASSETTE press OK twice Press or to select ENVELOPE...

Page 52: ...the paper in the cassette 1 Slide the slide guides to fit the size of the paper you want to load IMPORTANT If the slide guides are not adjusted correctly for the size of the paper the quality of your...

Page 53: ...n the following ranges VERTICAL SIZE 127 mm to 356 mm HORIZONTAL SIZE 76 mm to 216 mm 4 Specify the paper type Press or to select the appropriate paper type press OK Press Stop Reset to return to stan...

Page 54: ...st Not loading it this way will result in a paper jam 3 Specify the paper size Press Menu press OK Press or to select 2 MP TRAY press OK twice Press or to select ENVELOPE press OK Press or to select t...

Page 55: ...the Document and the Paper Loading When you load a document in the ADF the orientation of the document and the orientation of the paper in the cassette or in the multi purpose feeder are as shown belo...

Page 56: ...face down paper output IMPORTANT Do not open or close the face up cover while copying and printing Paper Type and Paper Output Area Select the suitable paper output area depending on the paper type a...

Page 57: ...fold up the document feeder tray when printing many pages Face Up Paper Output Area The paper is delivered with the printed side up out of the face up paper output on the back side of the machine This...

Page 58: ...Dial followed by a two digit code assigned to that number Group Dialing Send a document to a pre defined group of fax numbers The numbers must already be stored as One Touch Speed Dialing numbers or...

Page 59: ...es press OK twice For details on how to enter or delete numbers see Entering Numbers Letters and Symbols on p 3 1 Open the One Touch Speed Dial panel press Space to enter spaces between numbers spaces...

Page 60: ...ed 4 Press Stop Reset to return to standby mode To change the number and or name 3 Open One Touch Speed Dial panel press Clear to delete the previous entry 4 Press the numeric buttons to enter the new...

Page 61: ...ou wish to fax The name registered under that One Touch Speed Dial button is displayed If no name is registered the number registered under that button will be displayed If you mistakenly press the wr...

Page 62: ...ng GROUP DIAL appears 5 Use the numeric buttons to enter the telephone number max 120 digits including spaces and pauses press OK twice For details on how to enter or delete numbers see Entering Numbe...

Page 63: ...is also deleted 4 Press Stop Reset to return to standby mode To change the number and or name 3 Open One Touch Speed Dial panel press Clear to delete the previous entry 4 Press the numeric buttons to...

Page 64: ...number to which you wish to fax The name registered under that Coded Speed Dialing code is displayed If no name is registered the number registered under that code will be displayed If you mistakenly...

Page 65: ...TRATION press OK 3 Use or to select 3 GROUP DIAL press OK To register a group under a One Touch Speed Dial button 4 Use or the One Touch Speed Dial button to select an unused One Touch Speed Dial butt...

Page 66: ...ing You can review the numbers registered under the group by pressing or If you want to delete one of these numbers from the group open the One Touch Speed Dial panel press Clear ERASING END is displa...

Page 67: ...h Speed Dial button or Coded Speed Dialing code is displayed If no name is registered GROUP DIAL is displayed If you press a One Touch Speed Dial button or Coded Speed Dialing code that has no group o...

Page 68: ...the display returns to dial entry mode 2 Press a numeric button to enter the first letter of the name of the party you are searching for For example if you want to search for a name that starts with t...

Page 69: ...chine must meet the following requirements When loading a multi page document Size Max 216 356 mm W L Min 148 105 mm Quantity Up to 50 A4 size 50 letter size or 20 legal size sheets 1 sheet for sizes...

Page 70: ...Feeder ADF Make sure any glue ink or correction fluid on the paper is completely dry before loading the document into the Automatic Document Feeder ADF If you have a document that will not feed into t...

Page 71: ...ke sure your document s text and graphics do not extend into these margins Loading Documents in the ADF 1 Fan the edges that will feed into the machine first then tap the edges of multiple page docume...

Page 72: ...age document do the following 1 Remove the stack and tap it on a flat surface to even the edges 2 Gently insert the stack into the Automatic Document Feeder ADF until it stops NOTE If you have further...

Page 73: ...nt and images much smaller than the print in this sentence and its resolution is eight times of STANDARD Set the resolution as follows 1 Press FAX If you are already in the Fax standby mode you can sk...

Page 74: ...ory default setting the scanning density set using Exposure will remain unchanged See Chapter 15 The Menu System You can set the level of each scanning density LIGHT STANDARD DARK in the DENSITY CONTR...

Page 75: ...ling Use the numeric buttons to dial the recipient s fax number One Touch Speed Dialing Press the One Touch Speed Dial button 1 to 32 under which you have registered the number you want to send to See...

Page 76: ...With Memory Sending on p 6 11 You can store up to 5 fax jobs in the memory Follow this procedure for memory sending 1 Load the document in the ADF press FAX For details on the types of documents you c...

Page 77: ...nts on p 6 1 and Loading Documents in the ADF on p 6 3 2 Press FAX If you are already in the Fax standby mode you can skip this step 3 Adjust any necessary settings for your document Press Image Quali...

Page 78: ...ess Stop Reset OK Scanning is canceled After All Documents Are Scanned 1 While documents are being sent press Stop Reset The machine asks you to confirm that you want to cancel 2 Press to cancel sendi...

Page 79: ...hine is waiting to redial follow the procedure described in Deleting a Fax Job on p 11 2 To cancel while the machine is redialing do the following Wait until the machine begins redialing While the mac...

Page 80: ...ic redialing or OFF to disable it press OK If you selected ON Go to step 6 If you selected OFF Go to step 8 6 Press OK again use or the numeric buttons to enter the number of times you want the machin...

Page 81: ...the numeric buttons or Redial Pause Be sure to press OK after your entry with the numeric keys To send a fax to more than one location do the following 1 Load the document in the ADF For details on t...

Page 82: ...you want to review the numbers you entered use the or to scroll through the numbers 5 Press Start The machine then scans the document into memory and begins sending it to the destinations in numerica...

Page 83: ...ents on p 6 1 and Loading Documents in the ADF on p 6 3 2 Press FAX If you are already in the Fax standby mode you can skip this step 3 Adjust any necessary settings for your document Press Image Qual...

Page 84: ...he machine scans the document into memory NOTE If the machine memory becomes full while scanning your document MEMORY FULL appears in the LCD display If this happens you cannot send the document at a...

Page 85: ...e Mode Main Use Operation Requirements FaxOnly Fax Answers all calls as fax calls It receives faxes automatically and disconnects voice calls Separate telephone line for fax use only FaxTel Fax Tel Au...

Page 86: ...a fax machine or a telephone You can select a time between 0 and 30 seconds the default is 8 seconds F T RING TIME When your machine is set to receive both fax and telephone calls automatically the te...

Page 87: ...tting 22 sec Fax tone is detected and the FAX L380 switches to receive mode The machine disconnects the call Not all fax machines are capable of sending a fax tone For those cases if you set the F T S...

Page 88: ...ode the machine rings every time it receives a call whether the call is from a telephone or a fax machine NOTE Make sure the REMOTE RX setting in the RX SETTINGS menu is enabled See p 15 11 for detail...

Page 89: ...automatically and disconnects all voice calls In FaxOnly Mode you can control whether or not the machine rings when it receives a fax call To set this option from the machine operation panel see p 15...

Page 90: ...es a document into its memory the LCD displays one of the following messages These messages show the action you must take to correct the problem Cause The toner cartridge ran out of toner or is not in...

Page 91: ...while you are making copies or printing the machine stores the incoming fax in memory Then as soon as you finish making copies or printing the machine automatically prints the fax If you are entering...

Page 92: ...by a telephone call from the receiver NOTE Your fax can be set up to function in both roles Your fax can poll to receive a document or it can be polled to send a document that it is holding Before Yo...

Page 93: ...nel press Polling 3 Use or to select 2 POLLING RX press OK 4 Enter the destination s using any of the following 4 methods One Touch Speed Dialing Press the desired One Touch Speed Dial button s Coded...

Page 94: ...ument or until you delete the document see p 8 6 1 Press Menu 2 Press or to select 4 FAX SETTINGS press OK 3 Press or to select 6 POLLING BOX press OK 4 Press or to select 1 SETUP FILE press OK 5 Pres...

Page 95: ...er it is sent Select this setting if you expect that the document will be polled by more than one fax machine 11 Press Stop Reset to return to standby mode Scanning a Document into the Memory for Poll...

Page 96: ...4 Press or to select 2 CHANGE DATA press OK 5 Enter the password up to 7 digits using the numeric buttons press OK If you have not previously set a password skip this step and go to step 6 For detail...

Page 97: ...ou have not previously set a password skip this step and go to step 6 For details on how to enter or delete numbers see Entering Numbers Letters and Symbols on p 3 1 The polling box is deleted NOTE If...

Page 98: ...connected through a PBX or other telephone switching system you have to dial the outside line access number first and then dial the number of the party you are calling You can register the type of acc...

Page 99: ...set a number up to 20 digits long including the P at the end 8 Press Stop Reset to return to standby mode Dialing Long Distance When you register a long distance number you may have to insert a pause...

Page 100: ...ne enables you to use tone dialing once you have connected to the number you are calling This allows you to take advantage of many services that require tones such as selecting options from telephone...

Page 101: ...procedure to enable restriction of your machine 1 Press Menu 2 Press or to select 4 FAX SETTINGS press OK 3 Press or to select 7 SYSTEM SETTINGS press OK 4 Press or to select 2 LOCK PHONE press OK 5 P...

Page 102: ...of your machine 1 Follow steps 1 to 4 of Enabling Restriction of Your Machine on p 9 4 2 Press or to select OFF press OK NOTE The display contents differ depending on the country 3 Press Stop Reset to...

Page 103: ...F on p 6 3 2 Press COPY If you are already in the Copy standby mode you can skip this step 3 Use the numeric buttons to enter the number of copies You can set up to 99 copies 4 Adjust any necessary se...

Page 104: ...enu If you intend to make a copy and print with a thermal transfer printer using the same sheet of paper make the copy first Failure to do so may make copies dirty or cause a paper jam When copying on...

Page 105: ...ontal sizes of the paper 6 Press Stop Reset to return to standby mode Specifying the Paper Type PLAIN PAPER is selected as the default paper type When making copies on paper other than plain paper you...

Page 106: ...ep 2 Press Enlarge Reduce 3 Press or to select the copy ratio press OK You can select from the following 200 MAX 141 A5 A4 100 70 A4 A5 50 MIN NOTE If the PAPER SIZE GROUP setting of COPY SETTINGS men...

Page 107: ...he numeric buttons to enter the copy ratio press OK You can enter the copy ratio from 50 to 200 selectable in 1 increments Even after entering the copy ratio you can use or to adjust the copy ratio To...

Page 108: ...2 Press Image Quality repeatedly until the image quality you want appears You can select from the following TEXT for text only documents TEXT PHOTO for documents with text and photographs PHOTO for p...

Page 109: ...ss Copy If you are already in the Copy standby mode you can skip this step 2 Press Exposure twice to select the manual mode 3 Press or to adjust the copy exposure press OK For a lighter copy exposure...

Page 110: ...et AUTO SORT to ON in the COPY SETTINGS menu See p 15 5 Follow the procedure below to set the Collate Copy function to ON 1 Press Menu 2 Press or to select 3 COPY SETTINGS press OK 3 Press or to selec...

Page 111: ...Press Exposure to select the scanning exposure See Adjusting the Exposure Density on p 10 6 Press Enlarge Reduce to select the copy ratio See Setting Enlarging Reducing on p 10 4 5 Press Start The mac...

Page 112: ...opy Job You Reserved 1 Press Stop Reset while the machine is printing out 2 Press or to display the job to be deleted press OK 3 Press for YES The reserved copy job is deleted NOTE To cancel deleting...

Page 113: ...S REPORT STATUS Confirming Transmission Status Follow the procedure below to confirm the sending or receiving status 1 Press System Monitor repeatedly until FAX MONITOR is displayed press OK NOTE To r...

Page 114: ...eturn to standby mode press Stop Reset If you perform the procedure above when there is no sending reservation and transmission jobs NO DOC STORED will appear and the display will return to the displa...

Page 115: ...job NO COPY JOBS EXIST is displayed 2 Press or to confirm the job number and the quantity of copies 3 If you want to delete the copy job press OK 4 If you decide to delete the job press for YES NOTE T...

Page 116: ...rbled characters Confirming and Deleting a Report Job 1 Press System Monitor four times NOTE If there is no job NO REPORT JOBS EXIST is displayed 2 If there is one report job and if you want to delete...

Page 117: ...y if you want to check the report before the 20 transactions are completed Follow this procedure to print the Activity Report 1 Press FAX If you are already in the Fax standby mode you can skip this s...

Page 118: ...CTIVITY REPORT and matching the transaction number of the TX REPORT with a transaction number in the ACTIVITY REPORT you can find out exactly how many attempts were made to send the document how many...

Page 119: ...9 58 FAX 8334423 WORLD ESTATE INC 001 MULTI TX RX REPORT TX RX NO 0013 PGS 1 TX RX INCOMPLETE TRANSACTION OK 01 732 2233 JOHN BARRISTER 03 1 914 438 3619 SEYMOUR GREEN ERROR INFORMATION THE SLEREXE CO...

Page 120: ...n set the machine to print the RX REPORT every time you receive a document or only if an error occurs during receiving See p 15 7 for details on setting this option 31 12 2003 09 58 FAX 8334423 WORLD...

Page 121: ...list of documents deleted from the memory as a result of the power failure is printed automatically NOTE If there are one or more documents in the image memory when the power is cut off the machine w...

Page 122: ...list you want to print press OK You can select from the following 1 TOUCH LIST CODED DIAL LIST GROUP DIAL LIST If you selected 1 TOUCH LIST or CODED DIAL LIST press or to select SORT or NO SORT depend...

Page 123: ...ID 08 732 2233 ADAM BOOKS CPA 06 761 1298 JOHN BARRISTER 03 1 516 911 4411 NATALIE SMITH 02 722 2655 ROBERT STUART 01 1 914 438 3619 SEYMOUR GREEN NOT SORTED 31 12 2003 10 32 FAX 8334423 WORLD ESTATE...

Page 124: ...ists 12 8 Reports and Lists 12 Group Dial List 31 12 2003 13 36 FAX 8334423 WORLD ESTATE INC 001 GROUP DIAL TEL LIST 05 CANON GROUP 01 876 2398 CANON TX 02 613 9076 CANON OH 01 225 7823 CANON NY 10 23...

Page 125: ...LCD returns to standby mode NOTE The LCD returns to standby mode and the USER S DATA LIST is printed You can also print the USER S DATA LIST using Report Open One Touch Speed Dial panel press Report...

Page 126: ...l panel press Report Press or to select 4 DOC MEMORY LIST press OK The machine prints the DOCUMENT MEMORY LIST and the LCD returns to standby mode NOTE Once you know the transaction number of a docume...

Page 127: ...D displays REC PAPER JAM and OPEN PRINTER COVER CAUTION There are some areas inside the machine and cartridge which are subject to high voltages and high temperatures Take adequate precaution when per...

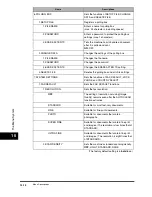
Page 128: ...it out from the multi purpose feeder 2 Pull out the cassette completely 3 If a paper jam occurs when using the paper cassette hold both sides of the jammed paper and pull it out from the machine 4 Ins...

Page 129: ...as its surface is very delicate and susceptible to finger oil and scratches which may lead to print deterioration To avoid possible damage to the printer do not touch the pins near the left end of th...

Page 130: ...ace is on the inside of the roll then gently pull the rolled up paper out of the machine 9 If the leading edge of the paper is visible but has not entered the imaging area pull the paper forwards and...

Page 131: ...e a permanent reduction in print quality 10 Open the face up cover and push down the green paper release levers on both sides of the face up paper output 11 Gently pull the jammed paper between the ou...

Page 132: ...Installing Replacing the Toner Cartridge on p 2 17 IMPORTANT After you replace the cartridge and close the printer cover the machine should be ready for operating If the machine returns to the ready...

Page 133: ...normality has occurred in the printer Reset the machine by opening the printer cover and then closing it If the message remains unplug the machine from the power supply and call your service represent...

Page 134: ...ple jobs are being printed Then you can shift to the next job If you use PRINTER RESET of the Menu all the print jobs are deleted See 15 14 REC PAPER JAM There is a paper jam Clear the paper jam See p...

Page 135: ...e the paper stack in the cassette does not exceed the capacity of the cassette Load paper in the multi purpose feeder one by one See pages 4 8 to 4 10 If you load paper while making copies do not load...

Page 136: ...tte into the machine as far as it will go and make sure the cassette is not tilted or inserted at an angle Paper feeds skewed Printing is skewed Q Is paper loaded correctly A Make sure the paper stack...

Page 137: ...do not feed correctly Q Are the transparencies loaded correctly A Make sure the transparencies in the cassette or the transparency in the multi purpose feeder is loaded properly and that the slide gui...

Page 138: ...e installed in a proper location A Check that the machine is installed in the proper location For information about specifications of the machine see Appendix A Specifications For safety warnings and...

Page 139: ...telephone line type See Setting the Telephone Line Type on p 3 5 Q Is the document loaded A Remove the document stack it if necessary and load it in the ADF correctly Q Is the One Touch Speed Dial bu...

Page 140: ...nd have them check their fax machine Q Did the receiving fax machine answer within 55 seconds after all automatic redialing attempts A Contact the other party and have them check their fax machine For...

Page 141: ...have set AnsMode confirm that an answering machine is connected to the machine and that it is turned on with an outgoing message properly recorded If you set 3 MAN AUTO SWITCH to ON in FAX SETTINGS of...

Page 142: ...ally Manual Mode on p 7 4 Cannot receive a document manually Q Is the machine set to receive manually A For the machine to receive faxes manually the receive mode must be set to Manual mode See Chapte...

Page 143: ...images are blotched or uneven Q Are the telephone lines in proper condition Or do you have a good connection A ECM Error Correction Mode for sending receiving should eliminate such problems However if...

Page 144: ...correct telephone line type pulse tone A Make sure the machine is set for the correct telephone line type See Setting the Telephone Line Type on p 3 5 The telephone disconnects while you are talking...

Page 145: ...o See Loading Paper in the Cassette on p 2 21 Q Did you connect the power cord to the machine just now A Wait for a while After connecting the power cord the machine cannot scan documents immediately...

Page 146: ...eft in the cartridge A Replace the cartridge if necessary See Installing Replacing the Toner Cartridge on p 2 17 Q Is the exposure adjusted correctly A Adjust the exposure correctly using Exposure See...

Page 147: ...he Menu See 5 TONER SAVER MODE on p 15 4 The printouts are partly missing or shaded when you make copies on heavy paper Q Is the paper type set correctly A Select HEAVY PAPER or HEAVY PAPER H in PAPER...

Page 148: ...ssette or multi purpose feeder unplug the machine and wait approx 3 minutes to 5 minutes then plug it in again If the problem is fixed the Alarm indicator will turn off and the LCD will return to the...

Page 149: ...ocal authorized Canon dealer or the Canon help line Do not attempt to disassemble or repair the machine yourself NOTE Attempting to repair the machine yourself may void the limited warranty Before con...

Page 150: ...he machine in after cleaning to avoid this happening If RECEIVED IN MEMORY appears in the LCD display follow steps on p 7 6 to print out the document If you disconnect the machine while it is waiting...

Page 151: ...re the black lines are appearing on printouts If you have trouble getting the glass clean wipe with a cloth moistened with water or a mild neutral detergent and then wipe the glass dry with another cl...

Page 152: ...4 3 Maintaining Your Machine 14 1 Disconnect the power cord 2 Open the operation panel by gently pulling it up 3 Release the hook on the right inside the ADF by pushing it with your finger 4 Open the...

Page 153: ...oth to wipe up paper dust around the rollers 6 Clean the shaded areas of the operation panel and the machine Dirt and dust particles that collect on the underside of the operation panel also affect th...

Page 154: ...ly affected 1 Disconnect the power cord 2 If the machine is connected to a telephone or your computer remove the telephone line or printer cable 3 Open the printer cover 4 Grip the end of the cartridg...

Page 155: ...the submenu you want to change press OK NOTE For details on submenus see Menu Descriptions on p 15 2 After selecting the item or value with or press OK to enter the setting If you press Stop Reset bef...

Page 156: ...PER TYPE Sets the paper type to be used in the paper cassette PLAIN PAPER TRANSPARENCY PLAIN PAPER L HEAVY PAPER HEAVY PAPER H 2 MP TRAY 1 PAPER SIZE Sets the paper size for the multi purpose feeder A...

Page 157: ...switches to the mode you set in DEFAULT SETTINGS after the AUTO CLEAR function activates CURRENT MODE The machine does not automatically switch to the mode you set in DEFAULT SETTINGS even after the...

Page 158: ...NNING END TONE Adjusts the volume of the done tone sounded when the machine finished scanning ON 1 to 3 ERROR ONLY 1 to 3 OFF The volume is turned off 7 LINE MONITOR VOL Adjusts the line monitor volum...

Page 159: ...e is adjusted manually The exposure can be adjusted in 9 steps center 3 STD ZOOM RATIO Selects the copy ratio 050 to 200 100 4 STANDARD COPY QTY Select the copy quantity 01 to 99 01 5 AUTO SORT Set th...

Page 160: ...33600bps 14400bps 9600bps 7200bps 4800bps 2400bps 4 RX START SPEED Sets the transmission speed for all documents you receive 33600bps 14400bps 9600bps 7200bps 4800bps 2400bps 2 UNIT NAME You can regi...

Page 161: ...ignore these settings PSTN The fax is connected to the outside line PBX The fax is connected through a PBX Select one of the following settings depending on the type of PBX in service Two settings ar...

Page 162: ...ccurs OUTPUT YES Prints a report every time you receive a document 3 ACTIVITY REPORT Enables disables automatic printing of an ACTIVITY REPORT after every 20 transactions ON Prints the ACTIVITY REPORT...

Page 163: ...ed dialing ON Scanning begins automatically in 5 or 10 seconds after you enter the phone number OFF Press Start to scan document Otherwise AUTO CLEAR function activates and the LCD returns to standby...

Page 164: ...fax In Energy Saver mode the fax may ring one or two times ON The machine rings when it receives a fax if a telephone is connected RING COUNT Sets the number of incoming rings before the machine answ...

Page 165: ...et automatically FIXED REDUCTION Reducing size is preset 97 95 90 75 2 SELECT REDUCE DIR VERTICAL ONLY Reduction is performed in the vertical direction only HORIZ VERTICAL Reduction is performed in th...

Page 166: ...ox and all of its settings 7 SYSTEM SETTINGS Sets the functions of FAX DEFAULT LOCK PHONE and COUNTRY SELECT 1 FAX DEFAULT Sets the FAX DEFAULT functions 1 RESOLUTION Sets the fax resolution OFF The s...

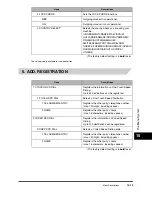
Page 167: ...scriptions 1 1 TOUCH SPD DIAL Registers the information on One Touch Speed Dialing Up to 32 destinations can be registered 1 TOUCH SPD DIAL Selects a One Touch Speed Dial button 1 TEL NUMBER ENTRY Reg...

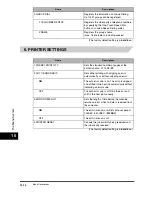
Page 168: ...ion 01 to 99 01 2 AUTO ERROR SKIP Sets either printing with skipping an error automatically or without skipping an error ON The auto error skip is on The error is skipped and shifted to the next job a...

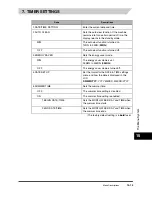
Page 169: ...RGY SAVER Sets the energy saver mode ON The energy saver mode is set 03MIN to 30MIN 05MIN OFF The energy saver mode is turned off 4 DATE SETUP Set the format for the DATE TIME settings menu and how th...

Page 170: ...ORT The printout of the list is sorted 2 CODED DIAL LIST Prints the Coded Dial List 1 NO SORT The printout of the list is not sorted 2 SORT The printout of the list is sorted 3 GROUP DIAL LIST Prints...

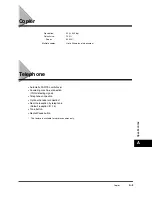
Page 171: ...ansmission when memory is full Liquid crystal display 20 2 Display languages ENGLISH FRENCH SPANISH GERMAN ITALIAN DUTCH FINNISH PORTUGUESE NORWEGIAN SWEDISH DANISH SLOVENE CZECH HUNGARIAN RUSSIAN Pow...

Page 172: ...mm 7 7 lines mm Super fine mode 8 pels mm 15 4 lines mm Ultra fine mode 16 pels mm 15 4 lines mm Scanning image processing Ultra High Quality Image Processing System UHQ Halftones 256 levels of gray 9...

Page 173: ...G detecting signal Telephone connection Optional handset connection Remote reception by telephone Default reception ID 25 Tone button Redial Pause button This feature is available for certain countrie...

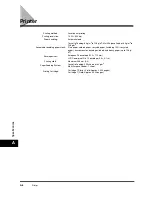
Page 174: ...2 Plain paper colored paper recycled paper including 100 recycled paper transparencies envelopes labels and heavy paper up to 128 g m2 Envelope sizes European DL envelope 220 110 mm U S Commercial No...

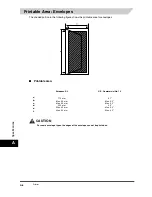
Page 175: ...area in the following figure shows the printable area for papers Printable area A4 size Letter size Legal size a b c d e f 210 mm Max 5 0 mm Max 5 0 mm 297 mm Max 5 0 mm Max 5 0 mm 8 5 Max 0 2 Max 0 2...

Page 176: ...gure shows the printable area for envelopes Printable area CAUTION For some envelope types the edges of the envelope can not be printed on European DL U S Commercial No 10 a b c d e f 110 mm Max 5 0 m...

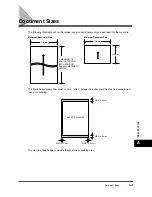
Page 177: ...e below shows how much of a A4 letter or legal size document the machine scans when faxing or scanning The margin at each edge is outside the machine s scanning area Maximum Document Size Minimum Docu...

Page 178: ...Me A 150 MHz Pentium processor or higher At least 32 MB of RAM and 100 MB of available hard disk space Windows 2000 A 133 MHz Pentium processor or higher At least 32 MB of RAM Windows 2000 Professiona...

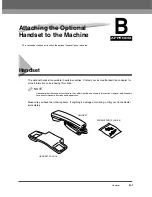
Page 179: ...Contact your local authorized Canon dealer for more information on purchasing this option NOTE Please note that the shape of your handset may differ from the one shown in this section However both han...

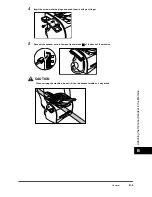
Page 180: ...he left side of the machine 2 Remove the screws from the plugs and insert the plugs into the holes on the handset cradle 3 Insert the plugs with the handset cradle in the holes on the machine NOTE If...

Page 181: ...he Machine B 4 Insert the screws into the plugs and push them in with your finger 5 Connect the handset cord to the input jack marked at the back of the machine CAUTION When carrying the machine do no...

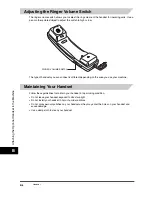
Page 182: ...type of handsets you can connect is different depending on the area you use your machine Maintaining Your Handset Follow these guidelines to maintain your handset in top working condition Do not leav...

Page 183: ...N capacity of 4 Your FAX has an R E N value of 1 unless otherwise stated and so does the optional handset You can therefore use additional equipment with a total R E N value of up to 2 If the R E N v...

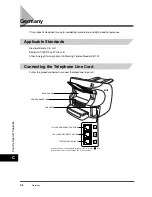
Page 184: ...22 Class B Other Energy Start compliant CE Marking Telefax Standard DTS Connecting the Telephone Line Cord Follow the procedure below to connect the telephone line cord REAR COVER POWER CONNECTOR USB...

Page 185: ...also receive voice calls If you use an answering machine which does not correspond to DIN44015 compatibility problems may occur with your machine Purchase an answering machine licensed in Germany To c...

Page 186: ...must register the numbers in the machine s memory See also One Touch Speed Dialing Coded Speed Dialing and Group Dialing Automatic Document Feeder ADF The device included in the machine that feeds th...

Page 187: ...tons Cursor The underline symbol you see on the LCD display when you register numbers and names in the machine Press or to move the cursor D Delayed sending The ability to send a document at a preset...

Page 188: ...you can pick up the handset With this feature one telephone line can be shared by both the telephone and the fax FINE The resolution setting for documents with very small characters and lines G G3 Gr...

Page 189: ...ar dialing you can redial a number manually simply by pressing Redial Pause on the operation panel The last number called is the number redialed Memory broadcast Allows you to send a scanned fax to as...

Page 190: ...rty calls the fax machine holding the document to be sent and requests that it be sent Printable area The area of a sheet of paper on which a printer can reproduce text or graphics the printing area i...

Page 191: ...g ID number to start remote reception Report A document printed by the machine and containing information about the faxes it has sent or received Resolution The density of dots for any given output de...

Page 192: ...setting The ability to set the machine to match the telephone dialing system your telephone line uses touch tone or rotary pulse Toner A black resin coated powder contained in the toner cartridge The...

Page 193: ...DGE message 7 6 CHANGE PAPERSIZE message 13 7 CHECK DOCUMENT message 13 7 CHECK PRINTER message 13 7 Clear button 2 14 Coded Dial button 2 14 Coded Speed Dial List 12 7 Coded Speed Dialing 5 1 6 7 cha...

Page 194: ...xposure button 2 13 Extension cover 2 12 Extension phone jack 2 12 F F T RING TIME 7 2 F T SWITCH ACTION 7 2 Face up cover 2 12 FAX button 2 13 FAX MONITOR 11 1 FAX SETTINGS 15 6 FaxOnly Mode 7 1 7 5...

Page 195: ...PBX 9 1 Polling receiving 8 2 sending 8 3 Polling box changing settings 8 5 deleting 8 6 scanning document into the memory 8 4 setting up 8 3 Polling button 2 14 Power Cord 2 2 connecting 2 8 Power so...

Page 196: ...s removing 2 3 Slide guides 2 11 Space button 2 14 Specifications A 1 Speed Dialing Lists 12 6 START AGAIN message 13 8 Start button 2 13 Stop Reset button 2 13 Summer time setting 3 5 SUPPLY REC PAPE...

Reviews: