Chapter 3
3-27
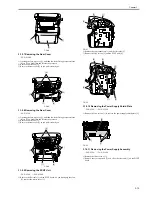
F-3-186
2) Remove the two screws [1] on the back side.
F-3-187
3) Open the operation panel. As you disengage the claw [1], remove the left
cover [2].
F-3-188
3.2.1.6 Removing the SCNT Unit
0011-6322
/ / FAX-L390 / / / FAX-L380S
1) Remove the flat cable [1] on the SCNT board. As you disengage the claw
[2], remove the motor cover [3].
F-3-189
2) Remove the four connectors [1] and the flat cable [2].
3) Remove the five screws [3] and the SCNT unit [4].
F-3-190
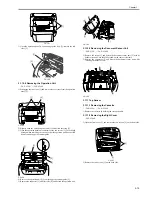
3.2.1.7 Removing the Document Guide Unit
0011-4771
/ / FAX-L390 / / / FAX-L380S
1) Slightly open the operation panel unit [1], and detach the stopper [2].
2) Open the operation panel unit, and remove the four screws [3]; detach the
document guide unit [4] while keeping it slack.
F-3-191
3.2.1.8 Removing the Contact Sensor
0011-4772
/ FAX-L390 / FAX-L380S
1) Remove the screw [1], and slightly lift the contact sensor [2].
1) Remove the screw [1]. As you disengage the claw [2], slightly lift the
contact sensor [3].
F-3-192
2) Remove the screw [1] and the connector [2] at the back of the contact
sensor, and detach the contact sensor [3] from the sensor holder.
[2]
[1]
[1]
[1]
[2]
[1]
[2]
[3]
[1]
[3]
[2]
[3]
[3]
[4]
[1]
[3]
[3]
[4]
[2]
[3]
[2]
[2]
[1]
Summary of Contents for FAX-L380S Series
Page 1: ...Jan 19 2006 Service Manual FAX L380S Series ...
Page 2: ......
Page 6: ......
Page 14: ...Contents ...
Page 15: ...Chapter 1 PRODUCT DESCRIPTION ...
Page 16: ......
Page 18: ......
Page 30: ......
Page 31: ...Chapter 2 TECHNICAL REFERENCE ...
Page 32: ......
Page 34: ......
Page 44: ......
Page 45: ...Chapter 3 DISASSEMBLY AND ASSEMBLY ...
Page 46: ......
Page 52: ......
Page 111: ...Chapter 4 MAINTENANCE AND INSPECTION ...
Page 112: ......
Page 114: ......
Page 127: ...Chapter 5 TROUBLESHOOTING ...
Page 128: ......
Page 167: ...Chapter 6 APPENDIX ...
Page 168: ......
Page 170: ......
Page 175: ...Jan 19 2006 ...
Page 176: ......


