background image

Delayed Sending

6-15

Sen

d

ing F

a

x

e

s

6

Delayed Sending

Your machine allows you to scan a document into its memory and send it automatically at a preset 
time. By using this feature, you can take advantage of lower long distance rates at night, for example.
You can set up to 141 destinations (210 destinations for the FAX-L390 model) and up to 20 
reservations for delayed sending.

1

Load the document in the ADF.

For details on the types of documents you can fax, their requirements, and how to load documents, see 
“Document Requirements,” on p. 6-1, and “Loading Documents in the ADF,” on p. 6-3.

2

Press [FAX].

If you are already in the Fax standby mode, you can skip this step.

3

Adjust any necessary settings for your document.

Press [Image Quality] to select the fax resolution. (See “Adjusting the Image Quality (Resolution),” on p. 6-4.)

Press [Exposure] to select the scan density. (See “Adjusting the Exposure (Density),” on p. 6-5.)

4

Open One-Touch Speed Dial panel 

 press [Delayed Transmission].

5

Use the numeric buttons to enter the time at which you want to send the document 

 press [OK].

Enter the time using the 24-hour clock system. Precede single digits with a zero.

Example:

9:30 a.m. = 09:30

4:30 p.m. = 16:30

T E L =

D E L A Y E D   T X
T X   T I M E   S E T T N G   1 0 : 0 0

Summary of Contents for FAX L380S

Page 1: ...Please read this guide before operating this equipment After you finish reading this guide store it in a safe place for future reference ...

Page 2: ... CD ROM Guides with this symbol are PDF manuals included on the accompanying CD ROM Setting up the Machine Installing CARPS Feature Overviews Maintenance and Troubleshooting Starter Guide Setting up the Machine Document and Paper Handling Sending and Receiving Faxes Speed Dialling Making Copies Maintenance Troubleshooting The Menu System User s Guide This Document CD ROM Installing CARPS Software ...

Page 3: ...irements of EC Directive 1999 5 EC at nominal mains input 230 V 50Hz although the rated input of the product is 200 240 V 50 60Hz This equipment has been tested in a typical system to comply with the technical requirements of EMC Directive Use of shielded cable is required to comply with the technical requirements of EMC Directive If you move to another EU country and are experiencing trouble plea...

Page 4: ...AR guidelines for energy efficiency The International ENERGY STAR Office Equipment Program is an international program that promotes energy saving through the use of computers and other office equipment The program backs the development and dissemination of products with functions that effectively reduce energy consumption It is an open system in which business proprietors can participate voluntar...

Page 5: ...duct is hermetically sealed within the protective housing and external cover No radiation can leak from the product in the normal operation of the product by the user This product is classified as a Class 1 Laser Product under IEC 60825 1 1993 and EN 60825 1 1994 200V 240V model The label shown below is attached to the laser scan machine on the product ...

Page 6: ...pe Conventions Used in This Guide 1 5 Illustrations Used in This Guide 1 5 Safety Instructions 1 6 Customer Support 1 7 Chapter 2 Setting Up Your Machine Choosing a Location for Your Machine 2 1 Unpacking Your Machine 2 2 Do You Have Everything 2 2 Removing Shipping Materials 2 3 Replaceable Parts 2 4 Assembling the Machine 2 5 Attaching Components 2 5 Document Output Tray 2 5 Output Tray 2 5 Inst...

Page 7: ...he Multi Purpose Feeder 4 8 Loading an Envelope in the Multi Purpose Feeder 4 9 Orientation of the Document and the Paper Loading 4 11 Selecting the Paper Output Area 4 12 Paper Type and Paper Output Area 4 12 Face Down Paper Output Area 4 13 Face Up Paper Output Area 4 13 Chapter 5 Speed Dialing Speed Dialing Methods 5 1 One Touch Speed Dialing 5 2 Storing Numbers for One Touch Speed Dialing 5 2 ...

Page 8: ...xes and Phone Calls Automatically FaxTel Mode 7 2 Setting the Options for FaxTel Mode 7 2 What Happens When FaxTel Mode is Selected 7 3 Receiving Faxes Manually Manual Mode 7 4 Receiving Faxes Automatically FaxOnly Mode 7 5 Using an Answering Machine AnsMode 7 5 Using the Machine With an Answering Machine 7 5 Receiving Faxes in Memory When a Problem Occurs 7 6 Receiving While Performing Other Task...

Page 9: ...s 11 4 Enlarging Reducing Using Custom Copy Ratios 11 5 Improving Copied Image 11 6 Adjusting the Image Quality Resolution 11 6 Adjusting the Exposure Density 11 6 Adjusting Automatically 11 6 Adjusting Manually 11 7 Special Features 11 8 Collate Copy 11 8 Reserve Copy 11 9 Confirming the Copy Job You Reserved 11 10 Deleting the Copy Job You Reserved 11 10 Chapter 12 System Monitor Checking the St...

Page 10: ...rint Quality Problems 14 22 Printing Problems 14 24 If You Cannot Solve the Problem 14 25 Chapter 15 Maintaining Your Machine Cleaning the Machine 15 1 Cleaning the Machine s Exterior 15 2 Cleaning the ADF Area 15 2 Transporting the machine 15 5 Chapter 16 The Menu System Accessing the Menu 16 1 Menu Descriptions 16 2 1 PAPER SETTINGS 16 2 2 COMMON SETTINGS 16 3 3 COPY SETTINGS 16 5 4 FAX SETTINGS...

Page 11: ...dom C 1 Connecting External Device C 1 Ringer Equivalence Number R E N C 1 Germany C 2 Applicable Standards C 2 Connecting the Telephone Line Cord C 2 Connecting a Telephone C 3 Connecting an Answering Machine C 3 Customer Support C 3 Glossary Index ...

Page 12: ...how to get the most out of the documentation that comes with the machine and gives important safety instructions Welcome Thank you for purchasing the new Canon FAX L380S L390 models We are sure that your machine will meet your printing and copying needs easily and conveniently as well as your fax and phone requirements ...

Page 13: ...ystem The machine uses Canon s Ultra High Quality Image Processing System to provide enhanced definition in faxed photos Error Correction Mode ECM The machine s Error Correction Mode ECM reduces transmission errors while communicating with another ECM capable machine Automatic switching between fax and voice calls The machine can automatically distinguish between fax and voice calls so that you ca...

Page 14: ...economy printing mode which allows you to reduce toner consumption by approx 30 Copier Features Up to 99 copies The machine can make up to 99 copies of a document at a time at a rate of up to 18 copies per minute Resolution The machine scans documents at 300 300 dpi Printing resolution is 1 200 dpi enhanced 600 dpi Copy enlargement reduction The machine can reduce or enlarge copies in the range be...

Page 15: ...e used in the following system environments Operating System Windows 98 Windows Me Windows 2000 or Windows XP x86 architecture Computer Any computer on which Windows 98 Windows Me Windows 2000 or Windows XP runs properly Hardware Environment Using the CARPS software requires following computer environment IBM or IBM compatible PC CD ROM drive or network environment with the access to the CD ROM PC...

Page 16: ...to print from your PC Type Conventions Used in This Guide This Guide follows the conventions below to emphasize certain information that will help you use your machine correctly and safely CAUTION Cautions tell you how to avoid actions that could injure you or damage your machine NOTE Notes provide advice for using your machine more effectively describe operating restrictions and tell how to avoid...

Page 17: ... overheating which can cause it to operate abnormally and create a fire risk take care not to block or cover these openings Do not operate the machine on a bed sofa rug or other similar soft surface or near a radiator or other heat source Do not place the machine in a closet or cabinet or on shelves unless adequate ventilation is available See Choosing a Location for Your Machine on p 2 1 for guid...

Page 18: ...ns in this User s Guide or you can damage the machine and require extensive repair work If the machine is dropped or its cabinet damaged If the machine begins performing poorly and you cannot correct the problem by following the procedures in Chapter 14 Troubleshooting This product emits low level electromagnetic waves If you use a cardiac pacemaker and feel abnormalities please move away from thi...

Page 19: ... Machine Before unpacking your machine follow these guidelines to choose an appropriate location for the machine CAUTION Please review the information provided in Safety Instructions on p 1 6 to make sure you are installing your machine for safe use Put the machine in a cool dry clean well ventilated place Make sure the area is free from dust Make sure the location is not affected by extreme tempe...

Page 20: ...rything As you unpack the machine save the carton and packing material in case you want to move or ship the machine in the future Carefully remove all items from the box You should have someone help by holding the box while you lift the machine and its protective packaging out of the carton Make sure you have the following items MAIN UNIT DOCUMENT OUTPUT TRAY OUTPUT TRAY FAX L380S FAX L390 ...

Page 21: ... purchase from your Canon dealer For best results use a cable that is no more than 5 meters long Removing Shipping Materials In order to protect your machine during shipping the machine has been packed with protective material that you must remove before using Follow these steps NOTE The actual shipping materials may differ in shape quantity and position from the ones shown in the illustrations be...

Page 22: ...s the Cartridge T The Cartridge T Starter comes with your machine but you should purchase the regular Cartridge T for replacement Although Canon manufactures many types of toner cartridges the Cartridge T is the only one designed to be used with your machine The Cartridge T can be purchased at any Canon authorized dealer ...

Page 23: ...nts To see how the machine will look fully assembled see Getting Acquainted With Your Machine on p 2 11 Attaching Components NOTE Make sure the tabs are inserted into the slot completely Document Output Tray Insert the tabs into the slots on the back of the machine Output Tray Insert the tray into the corresponding slots ...

Page 24: ...Setting Up Your Machine 2 Installing the Paper Cassette 1 Pull out the paper cassette 2 Attach the cassette extension to the cassette 3 Attach the extension cover on the back of the machine ...

Page 25: ...tension phone as well as an answering machine connect the extension phone to the answering machine and then the answering machine to your machine If you connect a data modem to your machine and you use it extensively or others access your PC frequently through the data modem you may want a dedicated telephone line for your data modem Connecting the Machine to Your PC Your machine has a USB port th...

Page 26: ... domestic use only and requires 200 240 V AC Do not use it outside the country where it was purchased Use only the power cord that came with the machine Using a longer cord or extension cord can cause the machine to malfunction Unplug the machine only by pulling on the plug itself Never pull on the cord Do not plug the machine into an outlet shared with an appliance such as an air conditioner comp...

Page 27: ...h the machine still needs to warm up before you can use it While the machine is warming up the message PLEASE WAIT appears in the LCD display When you connect the power cord to an AC outlet for the first time after purchase DISPLAY LANGUAGE will appear in the LCD display after PLEASE WAIT In this case set the language for the LCD display and the country See Setting the Display Language and Country...

Page 28: ...he display changes from PLEASE WAIT to the DISPLAY LANGUAGE menu 1 Use or to select the preferred language for the LCD display press OK If COUNTRY SELECT does not appear after DATA ENTRY OK is displayed Setting is completed and the machine enters the Fax standby mode If COUNTRY SELECT appears after DATA ENTRY OK is displayed Go to step 2 2 Use or to select the country where you are using the machi...

Page 29: ...Setting Up Your Machine 2 Getting Acquainted With Your Machine Before using your machine look over the diagrams on these pages to become familiar with the machine s components Front View FAX L380S ...

Page 30: ...machine c Document output tray Documents come out here d Slide guides Adjust to the width of documents e Operation panel Controls the machine f Output tray Outputs printouts g Printer cover Open it when you install the cartridge or remove jammed paper h Multi purpose feeder Used when printing paper one by one manually i Cassette Holds the paper supply FAX L390 ...

Page 31: ...Setting Up Your Machine 2 Rear View FAX L380S FAX L390 ...

Page 32: ...04 08 07 06 05 11 12 10 09 16 15 14 13 18 20 19 17 1 2 4 5 6 7 8 0 ABC DEF GHI JKL MNO PQRS TUV WXYZ T 9 COPY FAX P FAX L380S 3 OK 01 02 03 04 08 07 06 05 11 12 10 09 16 15 14 13 18 20 19 17 1 2 4 5 6 7 8 0 ABC DEF GHI JKL MNO PQRS TUV WXYZ T 9 COPY FAX P FAX L390 ...

Page 33: ...e optional handset still in the handset cradle s Directory button Use this button to look up fax telephone numbers registered for speed dialing t Coded Dial button Use this button to dial a fax telephone number that you have registered for Coded Speed Dialing u Redial Pause button Use this button to redial the last number that was dialed using the numeric buttons or to enter pauses in a fax number...

Page 34: ...in the following status When printing out copies faxes or other pages When sending or receiving faxes While a copy job is saved in memory or when the reserve copy or other functions are operating or when the In Use Memory indicator lights up When paper jams occur When an error code appears and the Alarm indicator flashes When no paper is loaded in the cassette Setting the Energy Saver Mode Manuall...

Page 35: ...ot stand the cartridge on end and do not turn it upside down If toner becomes caked in the cartridge it may prove impossible to free it even by shaking the cartridge Keep the cartridge away from computer screens disk drives and floppy disks The magnet inside the cartridge may harm these items Never touch the drum protective shutter When holding the cartridge avoid touching the drum protective shut...

Page 36: ...BLE Installing Replacing the Toner Cartridge The machine uses the Canon Cartridge T The procedure on the next page explains how to install the cartridge for the first time and how to replace it when the toner runs out When the message REPLACE CARTRIDGE appears the toner in the cartridge may simply be unevenly distributed Before replacing the cartridge follow the instructions on p 2 19 to evenly di...

Page 37: ...upward Do not forcefully move or push the protective shutter of the drum in any way 5 Hold the cartridge on a flat stable surface with one hand and break the tab and pull out the seal completely with the other hand 6 Open the printer cover NOTE If you are replacing the old cartridge with the new one remove the old cartridge from the machine Then discard INSTRUCTIONS DRUM PROTECTIVE SHUTTER TAB ...

Page 38: ... position the arrow mark on the cartridge towards the inside of the machine as shown below 8 Align the projections on both sides of the cartridge to the guides in the machine and slide the cartridge completely into the machine 9 Close the printer cover ...

Page 39: ...ure to do so may cause paper jams NOTE Do not use damp curled wrinkled or torn paper as these can cause paper jams or poor print quality Highly textured extremely smooth or shiny paper does not print well The laser printing process uses high temperatures to fuse toner to the paper Use paper that will not melt vaporize discolor or emit dangerous fumes at temperatures near 170 C For example do not u...

Page 40: ...g steps Failure to do so may cause the machine tip over and result in personal injury 2 Adjust the length slide guide to match the paper size For the FAX L390 model be sure to properly attach the stopper of the paper size rear guide for the correct paper size by inserting the tabs into the matching slots on the paper cassette 3 Adjust the width slide guides or paper width guides to match the paper...

Page 41: ...S model 5 Even out the edges of the paper stack Make sure the height of the paper stack does not exceed the load limit mark 6 Insert the cassette into the machine as far as it will go NOTE If you do not completely insert the cassette into the machine paper jams may occur HOOKS HOOKS LOAD LIMIT MARK HOOK HOOK LOAD LIMIT MARK ...

Page 42: ...n entry for more than a specified period of time the machine returns to standby mode and loses all information you had entered up to that point You will then have to start again The time until the machine returns to the standby mode can be specified in a range of 1 to 9 minutes You can also turn off the AUTO CLEAR function See Chapter 16 The Menu System Entering Numbers Letters and Symbols Each nu...

Page 43: ... or the number mode 1 You can see what mode you are in by the character indicated on the top right corner of the LCD display 2 Use the numeric buttons to enter the letter or number Press the button repeatedly until the letter or number you want appears Lowercase Uppercase Button 1 _ _ 2 ABC abc 3 DEF def 4 GHI ghi 5 JKL jkl 6 MNO mno 7 PQRS pqrs 8 TUV tuv 9 WXYZ wxyz 0 _ Uppercase Lowercase Number...

Page 44: ...pears at the top of the faxed document in small type By identifying the documents you send the receiving party can recognize your fax messages at a glance Here is a sample document with the identifying information When using speed dialing the top line also includes the name registered under the speed dialing button or code you entered xxxx THE DATE AND TIME YOU SENT THE DOCUMENT YOUR FAX TELEPHONE...

Page 45: ... to select 4 FAX SETTINGS press OK four times 3 Use the numeric buttons to enter your fax telephone number Max 20 digits including spaces press OK For details on how to enter or delete numbers see Entering Numbers Letters and Symbols on p 3 1 4 Press Menu or to select 2 UNIT NAME press OK 5 Use the numeric buttons to enter your name Max 24 characters including spaces press OK TIMER SETTINGS 2 AUTO...

Page 46: ...ress OK 4 Press or to select the telephone line type press OK You can select from the following TOUCH TONE for tone dialing ROTARY PULSE for pulse dialing 5 Press Stop Reset to return to standby mode Setting the Summer Time Some countries adopt the summer time system that shifts the clock time ahead or back according to the change in seasons You can select if the time information in your machine c...

Page 47: ...t the day of the week on which the summer time starts press OK twice 9 Use the numeric buttons to enter the time at which the summer time compensation is made press OK three times Use the 24 hour format for the time e g 2 00 p m as 14 00 and precede single digits with a zero 10 Press or and OK to select the month week day of the week and time when the summer time ends as in steps 6 to 9 for the 1 ...

Page 48: ...ay not be suitable for the machine If you have any questions about paper and transparencies contact your local authorized Canon dealer or the Canon help line Paper Storage In order to prevent paper jams do the following To prevent moisture buildup store remaining paper wrapped tightly in its original package Store paper in a dry location out of direct sunlight To prevent curling store paper flat n...

Page 49: ...imum print quality and the entire area where the machine can technically print from your computer Printing area light shade Canon recommends that you print within this area Paper Cassette Multi Purpose Feeder Paper Size FAX L380S A4 B5 A5 LTR EXECUTIVE Envelope COM10 MONARCH DL ISO C5 Free Size 216 mm 356 mm Max 76 mm 127 mm Min FAX L390 A4 LTR A4 B5 A5 LTR LGL EXECUTIVE Envelope COM10 MONARCH DL ...

Page 50: ... and result in personal injury NOTE The paper in the multi purpose feeder is fed prior to the paper in the cassette The cassette holds up to approx 250 sheets FAX L380S 500 sheets FAX L390 of 64 g m2 paper or approx 20 envelopes Only for the FAX L380S model Loading Paper in the Cassette 1 Pull out the cassette completely 2 Pinch and slide the length slide guide to fit the size of the paper stack y...

Page 51: ...n the paper stack first then tap the edges on a flat surface to even the stack 5 Load the paper stack in the cassette with the print side down When you load paper with a logo on position the paper with the print side down logo side and load it so that the top of the paper feeds first in the cassette ...

Page 52: ...ogether with the extra paper and tap the edges After that reload it in the cassette NOTE Select ENVELOPE for envelopes For details on loading envelopes in the cassette see Loading Envelopes in the Cassette on p 4 5 For information on how to use non standard size paper see Loading Paper in the Multi Purpose Feeder on p 4 8 or Loading an Envelope in the Multi Purpose Feeder on p 4 9 Only for the FAX...

Page 53: ...gently 3 Run a pen or other rounded object along the back flaps to flatten them The flaps should not bulge more than 5 mm 4 Tap the edges on a flat surface to even the envelopes 5 Pull out the cassette completely 6 Pinch and slide the length slide guide to fit the size of the envelopes you want to load FLAP ...

Page 54: ... first If the envelope to be loaded has a flap on the short edge this edge must enter the machine first Not loading it this way will result in a paper jam 8 Pinch and slide the width slide guides to fit the envelopes Make sure the envelopes do not exceed the load limit mark HOOKS LOAD LIMIT MARK HOOK HOOK ...

Page 55: ...multi purpose feeder NOTE The paper in the multi purpose feeder is fed prior to the paper in the cassette 1 Slide the slide guides to fit the size of the paper you want to load IMPORTANT If the slide guides are not adjusted correctly for the size of the paper the quality of your printouts may be adversely affected 2 Insert the paper straightly into the multi purpose feeder with the print side up ...

Page 56: ...llowing ranges VERTICAL SIZE 127 mm to 356 mm HORIZONTAL SIZE 76 mm to 216 mm 4 Specify the paper type Press or to select the appropriate paper type press OK Press Stop Reset to return to standby mode Loading an Envelope in the Multi Purpose Feeder Use the multi purpose feeder when you want to copy or print an envelope one by one IMPORTANT The recommended envelopes are COM10 MONARCH DL and ISO C5 ...

Page 57: ...ing it this way will result in a paper jam 3 Specify the paper size Press Menu press OK Press or to select 2 MP TRAY press OK twice Press or to select ENVELOPE press OK Press or to select the appropriate envelope type press OK twice NOTE You can select FREESIZE instead of ENVELOPE as the paper size When FREESIZE is selected you can specify vertical and horizontal sizes of the envelope in the follo...

Page 58: ...ent and the Paper Loading When you load a document in the ADF the orientation of the document and the orientation of the paper in the cassette or in the multi purpose feeder are as shown below DOCUMENT COPY PAPER CASSETTE MULTI PURPOSE FEEDER ...

Page 59: ...area depending on your purpose by opening or closing the rear cover Open the rear cover for face up paper output or close the rear cover for face down paper output IMPORTANT Do not open or close the rear cover while copying and printing Paper Type and Paper Output Area Select the suitable paper output area depending on the paper type and your purpose Paper Type Paper Output Area The Number of Outp...

Page 60: ...er than paper on the output tray Doing so may result in paper jams It is recommended to fold up the document feeder when printing many pages Face Up Paper Output Area The paper is delivered with the printed side up out of the face up paper output on the back side of the machine This way is convenient for printing on transparencies envelopes or labels which tend to curl because the paper is deliver...

Page 61: ...ine provides several ways to dial fax telephone numbers automatically One Touch Speed Dialing Dial a fax telephone number by pressing the One Touch Speed Dial button that the number is assigned to Coded Speed Dialing Dial a fax telephone number by pressing Coded Dial followed by a two digit code a three digit code for the FAX L390 model assigned to that number Group Dialing ...

Page 62: ...er between 01 and 31 press OK twice If a number is already stored under the button you select that number appears If the button you select is registered for Group Dialing GROUP DIAL appears 4 Use the numeric buttons to enter the telephone number Max 120 digits including spaces and pauses press OK twice For details on how to enter or delete numbers see Entering Numbers Letters and Symbols on p 3 1 ...

Page 63: ... to select the One Touch Speed Dial button you want to change or delete press OK twice To delete a number 3 Open One Touch Speed Dial panel press Clear to delete the number press OK When you delete a number the name registered for that number is also deleted 4 Press Stop Reset to return to standby mode To change the number and or name 3 Open One Touch Speed Dial panel press Clear to delete the pre...

Page 64: ... of documents you can fax their requirements and how to load documents see Document Requirements on p 6 1 and Loading Documents in the ADF on p 6 3 2 Press FAX If you are already in the Fax standby mode you can skip this step 3 Adjust any necessary settings for your document Press Image Quality to select the fax resolution See Adjusting the Image Quality Resolution on p 6 4 Press Exposure to selec...

Page 65: ...Press or to select a two digit code 00 99 press OK twice You can also select a code by pressing Coded Dial and entering the two digit code with the numeric buttons If a number is already registered under the code you select that number is displayed If the code you select is registered for group dialing GROUP DIAL appears Select or enter a three digit code 000 to 168 for the FAX L390 model 5 Use th...

Page 66: ...You can also select a code by pressing Coded Dial and entering the two digit code with the numeric buttons Select or enter a three digit code 000 to 168 for the FAX L390 model To delete a number 3 Open One Touch Speed Dial panel press Clear to delete the number press OK When you delete a number the name registered for that number is also deleted 4 Press Stop Reset to return to standby mode To chan...

Page 67: ...documents as follows 1 Load the document in the ADF For details on the types of documents you can fax their requirements and how to load documents see Document Requirements on p 6 1 and Loading Documents in the ADF on p 6 3 2 Press FAX If you are already in the Fax standby mode you can skip this step 3 Adjust any necessary settings for your document Press Image Quality to select the fax resolution...

Page 68: ... you need to change the TIME OUT setting See p 16 9 for more details If an error occurs during sending the machine will print an error report If this happens try sending the fax again See Faxing Problems on p 14 15 for details about errors NOTE You can also use Coded Speed Dialing to send a document to more than one location at a time For details see Group Dialing on p 5 9 and Sequential Broadcast...

Page 69: ...is stored under a One Touch Speed Dial button or a Coded Speed Dialing code Create groups for group dialing as follows 1 Press Menu 2 Use or to select 5 ADD REGISTRATION press OK 3 Use or to select 3 GROUP DIAL press OK To register a group under a One Touch Speed Dial button 4 Use or the One Touch Speed Dial button to select an unused One Touch Speed Dial button 01 to 31 press OK twice If a group ...

Page 70: ...eed Dial button s To enter a number stored under a Coded Speed Dialing code press Coded Dial enter the two digit code for the number using the numeric buttons For multiple entries press Coded Dial between each entry Enter a three digit code for the FAX L390 model NOTE You cannot register numbers in the groups that have not been registered for One Touch or Coded Speed Dialing You can review the num...

Page 71: ... desired One Touch Speed Dial button s To enter a number stored under a Coded Speed Dialing code press Coded Dial enter the two digit code for the number using the numeric buttons For multiple entries press Coded Dial between each entry Enter a three digit code for the FAX L390 model NOTE You cannot register numbers in the groups that have not been registered for One Touch or Coded Speed Dialing Y...

Page 72: ...roup press Stop Reset start again The name registered under that One Touch Speed Dial button or Coded Speed Dialing code is displayed If you press a One Touch Speed Dial button or Coded Speed Dialing code that has no group or fax number registered under it the LCD displays NOT REGISTERED Make sure you press the correct One Touch Speed Dial button or enter the correct Coded Speed Dialing code and t...

Page 73: ...e Fax standby mode you can skip this step 2 Press Directory NOT REGISTERED appears if there are no numbers registered and the display returns to dial entry mode 3 Press a numeric button to enter the first letter of the name of the party you are searching for For example if you want to search for a name that starts with the letter H press 4 GHI twice 4 Press OK Entries starting with the letter you ...

Page 74: ...cribes how to use your machine to send faxes Preparing to Send a Fax Document Requirements The documents you load into the machine must meet the following requirements When loading a multi page document Size Max 216 356 mm W L Min 148 105 mm ...

Page 75: ...r is completely dry before loading the document into the Automatic Document Feeder ADF If you have a document that will not feed into the machine properly make a photocopy of the document then load the copy instead Scanning Area The margins shown in the illustration below are outside the machine s scanning area Make sure your document s text and graphics do not extend into these margins WRINKLED O...

Page 76: ...e edges that will feed into the machine first then tap the edges of multiple page documents on a flat surface to even the stack 2 Adjust the document guides to the width of the document 3 Load the document in the ADF The document is now ready for scanning ...

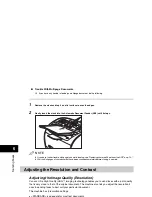
Page 77: ...mmed Paper from the ADF on p 14 7 Wait until all pages of your document have been scanned completely before starting a new job Adjusting the Resolution and Contrast Adjusting the Image Quality Resolution Canon s Ultra High Quality UHQ imaging technology enables you to send faxes with a print quality that is very close to that of the original document The machine also lets you adjust the resolution...

Page 78: ... not proceed with any other operation the LCD display returns to standby mode Adjusting the Exposure Density You can adjust the lightness darkness of the document pages before you scan for sending You can select the scanning density from the following LIGHT for documents with dark text or color STANDARD for normal printed or written text DARK for documents with light text or color 1 Press FAX If y...

Page 79: ...tem Sending Methods Memory Sending To use memory sending you load the document dial the fax number press Start See p 6 8 for more details on memory sending Since the machine is multitasking you can even scan a document into the memory while sending a document receiving a document or printing a report Manual Sending Via the Handset Use manual sending via the handset if you want to speak with the ot...

Page 80: ...igit code 00 99 under which you have registered the number you want to send to See Chapter 5 Speed Dialing for details on registering and using Coded Speed Dialing Enter a three digit code 000 to 168 for the FAX L390 model Group Dialing Send a document to a pre defined group of fax numbers The numbers must already be stored as One Touch Speed Dialing numbers or Coded Speed Dialing numbers See Chap...

Page 81: ... new fax job while the machine is waiting to redial the other party s number automatically For details on how to set the machine to redial automatically see Automatic Redialing With Memory Sending on p 6 11 Follow this procedure for memory sending 1 Load the document in the ADF For details on the types of documents you can fax their requirements and how to load documents see Document Requirements ...

Page 82: ...ual sending 1 Load the document in the ADF For details on the types of documents you can fax their requirements and how to load documents see Document Requirements on p 6 1 and Loading Documents in the ADF on p 6 3 2 Press FAX If you are already in the Fax standby mode you can skip this step 3 Adjust any necessary settings for your document Press Image Quality to select the fax resolution See Adju...

Page 83: ...nts see Removing Jammed Paper from the ADF on p 14 7 After All Documents Are Scanned 1 While documents are being sent press Stop Reset The machine asks you to confirm that you want to cancel 2 Press to cancel sending If you change your mind and want to continue sending press for NO The machine prints an ERROR TX REPORT if a transmission report is set to print automatically See 1 TX C AN C EL DU R ...

Page 84: ...g Up Automatic Redialing on p 6 11 Canceling Automatic Redialing If you press Stop Reset when waiting to redial the LCD displays standby mode but you are still in automatic redialing To cancel redialing while the machine is waiting to redial follow the procedure described in Deleting a Fax Job on p 12 2 To cancel while the machine is redialing do the following Wait until the machine begins rediali...

Page 85: ...tomatic redialing or OFF to disable it press OK If you selected ON Go to step 6 If you selected OFF Go to step 8 6 Press OK again use or the numeric buttons to enter the number of times you want the machine to redial press OK twice 7 Press or the numeric buttons to select the time interval between redialings press OK AU T O R E DI AL ON AUTO REDIAL 1 REDIAL TIMES R ED I A L T IM E S 0 2TIMES REDIA...

Page 86: ... numeric buttons or Redial Pause You can enter the One Touch Speed Dialing and Coded Speed Dialing destinations in any order You can also include one destination that you dial manually using the numeric buttons or Redial Pause Be sure to press OK after your entry with the numeric keys To send a fax to more than one location do the following 1 Load the document in the ADF For details on the types o...

Page 87: ...buttons After entering the first One Touch Speed Dial button or Coded Speed Dialing code you have 5 seconds to enter another speed dialing button or code before the machine begins sending automatically If you have entered more than one speed dialing button or code the machine waits for 10 seconds before it begins sending If you do not want the machine to send automatically you need to change the T...

Page 88: ...heir requirements and how to load documents see Document Requirements on p 6 1 and Loading Documents in the ADF on p 6 3 2 Press FAX If you are already in the Fax standby mode you can skip this step 3 Adjust any necessary settings for your document Press Image Quality to select the fax resolution See Adjusting the Image Quality Resolution on p 6 4 Press Exposure to select the scan density See Adju...

Page 89: ...e last digit or press Clear to delete an entire entry when you use the numeric buttons 7 Press Start The machine scans the document into memory NOTE If the machine memory becomes full while scanning your document MEMORY FULL appears in the LCD display If this happens you cannot send the document at a delayed time You can only register one preset sending operation at a time The machine is a multita...

Page 90: ...est suit your requirements consider how you want to use the machine Receive Mode Main Use Operation Requirements FaxOnly Fax Answers all calls as fax calls It receives faxes automatically and disconnects voice calls Separate telephone line for fax use only FaxTel Fax Tel Automatically switches between fax calls and voice calls Receives faxes automatically and rings for voice calls Telephone connec...

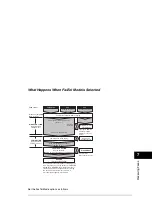
Page 91: ...r machine handles incoming calls by adjusting the settings below Setting the Options for FaxTel Mode RING START TIME When a call comes in the machine checks to see if it is a person wishing to speak to you or a fax machine trying to send a document If your machine does not have enough time to detect the fax tone it assumes the call is from a telephone Use the RING START TIME setting to increase th...

Page 92: ...22 sec F T SWITCH ACTION Choose between RECEIVE factory default setting and DISCONNECT DISCONNECT RECEIVE Factory default setting Fax tone is detected and the machine switches to receive mode The machine disconnects the call Not all fax machines are capable of sending a fax tone For those cases if you set the F T SWITCH ACTION to RECEIVE the machine switches to receive mode automatically and start...

Page 93: ...ngs vary depending on the current country selection Receiving Faxes Manually Manual Mode To use this mode you must have the optional handset or a telephone connected to the machine In Manual Mode the machine rings every time it receives a call whether the call is from a telephone or a fax machine NOTE Make sure the REMOTE RX setting in the RX SETTINGS menu is enabled See p 16 11 for details If you...

Page 94: ...ng Faxes Automatically FaxOnly Mode When the machine is set up for a dedicated line set FaxOnly Mode to automatically receive documents whenever a call comes over the fax line The machine assumes all incoming calls are from fax machines sending documents It receives the documents automatically and disconnects all voice calls In FaxOnly Mode you can control whether or not the machine rings when it ...

Page 95: ...ecomes full you will not be able to receive the remaining pages Contact the other party and ask them to resend the remaining pages of the fax If the machine receives a document into its memory the LCD displays one of the following messages These messages show the action you must take to correct the problem Cause The toner cartridge ran out of toner or is not installed properly Action Make sure the...

Page 96: ...r printing the machine stores the incoming fax in memory Then as soon as you finish making copies or printing the machine automatically prints the fax If you are entering registration information the fax is printed as soon as it is received and does not go into memory Canceling an Incoming Fax To cancel an incoming fax follow this procedure 1 Press Stop Reset 2 Press to Stop Reset receiving or to ...

Page 97: ... fax and requests the other fax to send a document that it is holding Unlike normal sending and receiving in polling the receiver always calls the sender This is called polling to receive a document The sender sends the document in response to the polling by a telephone call from the receiver NOTE Your fax can be set up to function in both roles Your fax can poll to receive a document or it can be...

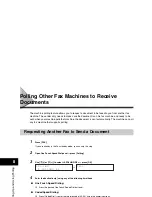
Page 98: ...ically The machine can poll any fax machine that supports polling Requesting Another Fax to Send a Document 1 Press FAX If you are already in the Fax standby mode you can skip this step 2 Open One Touch Speed Dial panel press Polling 3 Use or to select 2 POLLING RX press OK 4 Enter the destination s using any of the following 4 methods One Touch Speed Dialing Press the desired One Touch Speed Dial...

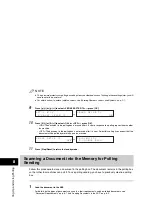
Page 99: ...LING BOX of the Menu The polling box holds the document in the memory until the other party prompts polls your fax to send the document or until you delete the document see p 8 6 1 Press Menu 2 Press or to select 4 FAX SETTINGS press OK 3 Press or to select 6 POLLING BOX press OK 4 Press or to select 1 SETUP FILE press OK 5 Press or to select 1 FILE NAME press OK 6 Enter a file name for the pollin...

Page 100: ...fter it is sent Select this setting if you expect that the document will be polled by more than one fax machine 11 Press Stop Reset to return to standby mode Scanning a Document into the Memory for Polling Sending Follow this procedure to store a document in the polling box The document remains in the polling box so that other fax machines can poll it To use polling sending you have to previously ...

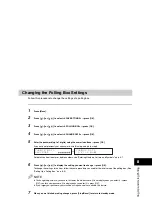
Page 101: ... see Entering Numbers Letters and Symbols on p 3 1 6 Press or to display the setting you want to change press OK To change the settings for an item follow the same procedure you used for the initial setup of the polling box See Setting Up a Polling Box on p 8 3 NOTE To change the password you have to first enter the old password it is not displayed as you enter it press OK enter a new password it ...

Page 102: ...y set a password skip this step and go to step 6 For details on how to enter or delete numbers see Entering Numbers Letters and Symbols on p 3 1 The polling box is deleted NOTE If there is any document stored in the polling box you cannot delete the polling box and the message CANNOT DELETE appears on the LCD display If you want to delete the polling box delete the document stored in the polling b...

Page 103: ...strator s ID and password protect all the settings in the SYSTEM SETTINGS menu You need to enter the System Administrator s ID and password when you are using Department ID management and want to operate the machine as the System Administrator In this case you do not need to enter the System Administrator s password when accessing the SYSTEM SETTINGS menu Otherwise you need to enter the System Adm...

Page 104: ...m 1 to 9999999 using the numeric keys press OK 6 Record the System Administrator s ID and password and store it in a safe location NOTE You need to enter the System Administrator s ID and password when you are using Department ID management and want to operate the machine as the System Administrator In this case you do not need to enter the System Administrator s password when accessing the SYSTEM...

Page 105: ...tem Administrator s ID the system password is also canceled 6 Enter a new System Administrator s ID and password of up to seven digits from 1 to 9999999 using the numeric keys press OK For details about entering the System Administrator s ID and password refer to steps 5 to 7 of Setting the System Administrator s ID and Password on p 9 2 The new password is displayed as you enter it 7 Press Stop R...

Page 106: ...ses NOTE The user restrictions registered in your machine will be printed at the end of the USER S DATA LIST See User s Data List on p 13 11 Setting Operation Restrictions You can create up to 100 Department IDs and passwords to restrict sending operations on the machine Follow this procedure to restrict the access to all of these features Sending documents Copying documents and manually printing ...

Page 107: ...D from 1 to 9999999 If you set the Department ID as 111 it will be shown as 0000111 When you are requested to enter the Department ID however it is sufficient to enter 111 You can delete the numbers you entered by pressing Clear 8 Press or until 1 PASSWORD appears press OK 9 Enter the password for the department of up to seven digits using the numeric keys press OK NOTE If you do not want to enter...

Page 108: ...ys press OK NOTE You can set the TX limit from 0 to 999999 If you set the TX limit to 0 no transmission can be performed by the department 14 Repeat steps 7 to 12 to set restrictions for other Department IDs and passwords 15 When you are finished press Stop Reset to return to standby mode NOTE To operate the machine with restrictions ON see Operating the Machine with Restrictions ON on p 9 8 TX LI...

Page 109: ...K 3 If the prompt PASSWORD is displayed enter the System Administrator s password using the numeric keys press OK 4 Press or until 2 DEPT ID MANAGEMNT appears press OK 5 Press or to display ON press OK 6 Press or until 3 RESTRICTIONS appears press OK 7 Select the feature you want to turn OFF or ON To turn OFF or ON restricted printing Press or until 1 RESTRICT PRINTING appears press OK Press or to...

Page 110: ...R DEPT ID when the machine is in standby mode the restriction is turned ON Enter the Department ID using the numeric keys press OK 2 If the message DEPT ID PASSWORD is displayed enter the Department password using the numeric keys press OK 3 Continue operating the machine NOTE To return to standby mode with the message ENTER DEPT ID press ID DE P T I D P AS S WO RD 31 12 2005 SAT 15 11 FaxOnly STA...

Page 111: ...ASSWORD is displayed enter the System Administrator s password using the numeric keys press OK 4 Press or until 2 DEPT ID MANAGEMNT appears press OK 5 Press or to display ON press OK 6 Press or until 2 COUNT MANAGEMENT appears press OK twice To check the print counter Press or until 1 PRINT COUNT appears press OK S YS T E M S ET T IN GS P AS S W OR D D E PT I D M AN AG E MN T ON P R IN T CO U NT 1...

Page 112: ...on p 9 4 Press or to scroll through the Department IDs 7 To reset the counter press Menu twice press or until 2 COUNT RESET appears press OK 8 Press or to display ON or OFF press OK To reset the counter select 1 ON If you do not want to reset the counter select OFF 9 Press Stop Reset to return to standby mode CO U NT RE S ET 1 ON ...

Page 113: ... A PBX Private Branch Exchange is an on site telephone switchboard If your machine is connected through a PBX or other telephone switching system you have to dial the outside line access number first and then dial the number of the party you are calling You can register the type of access and the outside line access number under R so that you only have to press R before dialing the number you wish...

Page 114: ...o enter or delete numbers see Entering Numbers Letters and Symbols on p 3 1 7 Press Redial Pause to enter a pause press OK NOTE If you select PREFIX you can set a number up to 20 digits long including the P at the end 8 Press Stop Reset to return to standby mode Dialing Long Distance When you register a long distance number you may have to insert a pause either within or after the R K EY SE T TI N...

Page 115: ...e a pulse line the machine enables you to use tone dialing once you have connected to the number you are calling This allows you to take advantage of many services that require tones such as selecting options from telephone touch line services 1 Press FAX If you are already in the Fax standby mode you can skip this step 2 Lift the handset if you have installed the optional handset or Press Hook Th...

Page 116: ...you make calls using the handset or Hook Enabling Restriction of Your Machine Follow this procedure to enable restriction of your machine 1 Press Menu 2 Press or to select 4 FAX SETTINGS press OK 3 Press or to select 7 SYSTEM SETTINGS press OK 4 Press or to select 3 LOCK PHONE press OK 5 Press or to select ON press OK NOTE LO C K P H ON E ON SYSTEM SETTINGS 4 COUNTRY SELECT ...

Page 117: ...ollow steps 1 to 4 of Enabling Restriction of Your Machine on p 10 4 2 Press or to select OFF press OK NOTE The display contents differ depending on the country 3 Press Stop Reset to return to standby mode Restriction of the machine is now disabled Anyone can make calls LO CK P HO N E OFF SYSTEM SETTINGS 4 COUNTRY SELECT ...

Page 118: ...aper output trays After you return to the office you can review the contents of the memory and enter the memory lock password to print all of the documents stored in memory Turning Memory Lock ON and Setting the Password After Memory Lock is turned ON the machine automatically enters the Memory Lock mode The documents received when the machine is in the Memory Lock mode are stored in memory until ...

Page 119: ...LOCK PASSWORD 0 to 9999999 This password protects the Memory Lock settings Setting a password is recommended You must use this password to unlock the memory so you can print documents stored in memory Use the numeric buttons to enter a password up to seven digits press OK 2 REPORT Sets the machine to print reports This setting affects only reports that print automatically such as an Activity Repor...

Page 120: ... s convenient features is its ability to make up to 99 high quality copies of a document To make copies do the following 1 Load the document in the ADF For details on how to place or load documents see Loading Documents in the ADF on p 6 3 2 Press COPY If you are already in the Copy standby mode you can skip this step ...

Page 121: ... of a small size or heavy paper etc the copy speed may be slightly slower than usual The paper type should be selected in the Menu If you intend to make a copy and print with a thermal transfer printer using the same sheet of paper make the copy first Failure to do so may make copies dirty or cause a paper jam When copying onto transparencies remove each transparency from the output tray as it is ...

Page 122: ...mode Specifying the Paper Type PLAIN PAPER is selected as the default paper type When making copies on paper other than plain paper you can specify the paper type according to the following Specifying the paper type can prevent poor copy quality or the printout not being printed correctly 1 Press Menu 2 Press or to select 1 PAPER SETTINGS press OK 3 Press or to select 1 CASSETTE or 2 MP TRAY press...

Page 123: ... Enlarging Reducing Using Preset Copy Ratios 1 Press COPY If you are already in the Copy standby mode you can skip this step 2 Press Enlarge Reduce 3 Press or to select the copy ratio press OK You can select from the following 200 MAX 141 A5 A4 100 70 A4 A5 50 MIN NOTE PR E S ET RA T IO 1 0 0 P R E SE T R A TI O 7 0 A4 A5 70 A4 TEXT 01 ...

Page 124: ... enter the copy ratio press OK You can enter the copy ratio from 50 to 200 selectable in 1 increments Even after entering the copy ratio you can use or to adjust the copy ratio To increase the copy ratio press To decrease the copy ratio press NOTE To reset the copy ratio press Enlarge Reduce several times to display DIRECT 100 ratio press OK Z OO M 5 0 2 0 0 1 0 0 Z O OM 5 0 2 00 80 80 A4 TEXT 01 ...

Page 125: ...mode you can skip this step 2 Press Image Quality repeatedly until the image quality you want appears You can select from the following TEXT for text only documents TEXT PHOTO for documents with text and photographs PHOTO for photographs NOTE Copy exposure automatically changes to manual mode when TEXT PHOTO or PHOTO is set Adjusting the Exposure Density You can adjust the copy exposure automatica...

Page 126: ...xposure twice to select the manual mode 3 Press or to adjust the copy exposure press OK For a lighter copy exposure press For a darker copy exposure press NOTE When setting the exposure lighter the indicator moves to the left When setting the exposure darker the indicator moves to the right D E NS I TY L T DK 100 A4 TEXT 01 ...

Page 127: ... It is convenient when you make multiple copies of multiple page documents To use this feature you need to set AUTO SORT to ON in the COPY SETTINGS menu See p 16 5 Follow the procedure below to set the Collate Copy function to ON 1 Press Menu 2 Press or to select 3 COPY SETTINGS press OK 4 3 2 1 4 3 2 1 4 3 2 1 4 3 2 1 Set 3 sets of copies Copy 1 Copy 2 Copy 3 ...

Page 128: ...nsity on p 11 6 Press Enlarge Reduce to select the copy ratio See Setting Enlarging Reducing on p 11 4 4 Press Start The machine begins scanning NOTE After printing of the current copy job is complete the next copy job begins If the memory becomes full while scanning MEMORY FULL appears in the LCD When the ADF is used for scanning the document being scanned stops in the ADF All of the scanned docu...

Page 129: ...ing the Copy Job You Reserved 1 Press Stop Reset while the machine is printing out 2 Press or to display the job to be deleted press OK 3 Press for YES The reserved copy job is deleted NOTE To cancel deleting the copy job press for NO SE LE C T J O B T O C ANCEL 0 04 4 0 2 30 RESERVATION NO PRINTING BLANK WAITING NO PAPER PAPER JAM ETC NO OF COPY NO OF DOCUMENT S E LE C T J O B TO CANCEL 0 04 5 01...

Page 130: ...ort Jobs Use System Monitor to confirm and delete the jobs When using System Monitor the LCD displays the jobs in the following order in each mode In Copy mode In Fax mode COPY STATUS FAX MONITOR FAX MONITOR COPY STATUS PRINT STATUS PRINT STATUS REPORT STATUS REPORT STATUS ...

Page 131: ...checking the sending time TX RX NO or fax number 3 Press or to confirm the sending result and reservation NOTE To return to standby mode press Stop Reset If you perform the procedure above when there is no sending reservation and transmission jobs NO DOC STORED will appear and the display will return to the display shown in step 2 Deleting a Fax Job Follow the procedure below to delete the documen...

Page 132: ...d the quantity of copies 3 If you want to delete the copy job press OK 4 If you decide to delete the job press for YES NOTE To cancel deleting the job press for NO Once the job is deleted the job cannot be restored Confirming and Deleting a Print Job 1 Press System Monitor three times NOTE If there is no job NO PRINT JOBS EXIST is displayed CO P Y S T AT U S 0 0 0 3 0 3 02 C AN C E L CO P YI N G Y...

Page 133: ...LCD display garbled characters Confirming and Deleting a Report Job 1 Press System Monitor four times NOTE If there is no job NO REPORT JOBS EXIST is displayed 2 If there is one report job and if you want to delete it press OK 3 If you decide to delete the job press for YES 4 If there are multiple report jobs press or to select the job you want to delete 5 Press OK C AN C E L R EP OR T Y E S NO R ...

Page 134: ...ansaction operations your machine has performed Machine prints sending and receiving transactions together in the same report When sending a document to many locations Broadcast the transaction number will be the same for each transmission in the group You can also print the Activity Report manually if you want to check the report before the 20 transactions are completed Follow this procedure to p...

Page 135: ...31 12 08 49 BELZER INC 1 213 978 3314 5005 AUTO RX ECM 1 NG 00 20 1 STOP 31 12 09 08 R LOUIS 1 213 978 3314 0008 TRANSMIT 2 NG 00 00 0 995 31 12 09 34 ADAM BOOK CPA 732 2233 0009 TRANSMIT 1 OK 00 18 ST TIME DESTINATION TEL ID NO MODE PGS RESULT IF MARKED WITH AN IT ALREADY HAS BEEN PRINTED OUT TRANSACTION NUMBER ERROR CODE DEPARTMENT ID DEPT ID 0001111 ST TIME DESTINATION TEL ID NO MODE PGS RESULT...

Page 136: ...during the last attempt to transmit Please note that the usage time does not reflect the total usage time used to transmit all pages of the document when retry occurs By printing an ACTIVITY REPORT and matching the transaction number of the TX REPORT with a transaction number in the ACTIVITY REPORT you can find out exactly how many attempts were made to send the document how many pages were sent i...

Page 137: ...DORSET BH25 8ER TELEPHONE BOOLE 945 13 51617 FAX 123456 Our Ref 350 PJC EAC December 27 2005 Dr P N Cundall Mining Surveys Ltd Holroyd Road Reading Berks WHEN YOU SET THE FAX TO PRINT THE FIRST PAGE OF THE DOCUMENT TRANSMISSION OK TX RX NO 0006 DEPT ID 0001111 DESTINATION TEL 20 545 8545 DESTINATION ID JOHN BARRISTER ST TIME 31 12 09 48 TIME USE 00 16 PAGES SENT 1 RESULT OK TX REPORT 31 12 2005 09...

Page 138: ...achine to print the RX REPORT every time you receive a document or only if an error occurs during receiving See p 16 8 for details on setting this option RECEPTION OK TX RX NO 5008 DESTINATION TEL 1 213 978 3314 DESTINATION ID ST TIME 31 12 09 07 TIME USE 00 17 PGS 1 RESULT OK RX REPORT 31 12 2005 09 58 FAX 123xxxx WORLD ESTATE INC 001 ...

Page 139: ...eted from the memory as a result of the power failure is printed automatically NOTE If there are one or more documents in the image memory when the power is cut off the machine will print the Memory Clear Report when the power is restored unless the machine is running out of paper or toner TX RX NO MODE DESTINATION TEL ID PGS SET TIME ST TIME 0001 DELAYED TX 01 ADAM BOOKS CPA 1 30 12 10 07 23 30 0...

Page 140: ...select 2 SPEED DIAL LIST press OK 4 Press or to select the list you want to print press OK You can select from the following 1 TOUCH LIST CODED DIAL LIST GROUP DIAL LIST If you selected 1 TOUCH LIST or CODED DIAL LIST press or to select SORT or NO SORT depending on what order you want the destinations to be printed Select 1 NO SORT to print the list in key number order press OK or Select 2 SORT to...

Page 141: ...98 JOHN BARRISTER 08 732 2233 ADAM BOOKS CPA 1 TOUCH LIST 31 12 2005 10 32 FAX 123xxxx WORLD ESTATE INC 001 NOT SORTED NO DESTINATION TEL DESTINATION ID 08 732 2233 ADAM BOOKS CPA 06 761 1298 JOHN BARRISTER 03 1 516 911 4411 NATALIE SMITH 02 722 2655 ROBERT STUART 01 1 914 438 3619 SEYMOUR GREEN 31 12 2005 10 32 FAX 123xxxx WORLD ESTATE INC 001 SORTED 1 TOUCH LIST ...

Page 142: ...xxx WORLD ESTATE INC 001 NOT SORTED NO DESTINATION TEL DESTINATION ID 08 732 2233 ADAM BOOKS CPA 01 555 1234 BILL 04 1 617222322 HUNT INVESTMENTS 03 1 516 911 4411 NATALIE SMITH 02 1 914 438 3619 SEYMOUR GREEN 31 12 2005 10 32 FAX 123xxxx WORLD ESTATE INC 001 SORTED CODED DIAL LIST CODED DIAL LIST FAX L380S NO DESTINATION TEL DESTINATION ID 31 12 2005 10 32 FAX 123xxxx WORLD ESTATE INC 001 NOT SOR...

Page 143: ...8 CANON TX 02 613 9076 CANON CA GROUP DIAL TEL LIST 31 12 2005 13 36 FAX 123xxxx WORLD ESTATE INC 001 FAX L380S 05 CANON GROUP 001 225 7823 CANON NY 010 233 7766 CANON CA 01 876 2398 CANON TX 02 613 9076 CANON CA GROUP DIAL TEL LIST 31 12 2005 13 36 FAX 123xxxx WORLD ESTATE INC 001 FAX L390 ...

Page 144: ...ER S DATA LIST 1 Press Menu 2 Press or to select 9 PRINT LISTS press OK twice The machine prints the USER S DATA LIST and the LCD returns to standby mode NOTE The LCD returns to standby mode and the USER S DATA LIST is printed You can also print the USER S DATA LIST using Report Open One Touch Speed Dial panel press Report press or to select 1 USER DATA press OK 1 PAPER SETTINGS CASSETTE PAPER SIZ...

Page 145: ...SSETTE PAPER SIZE A4 PAPER TYPE PLAIN PAPER MP TRAY PAPER SIZE A4 SCANNING C 7 SYSTEM SETTINGS SYS ADMIN INFO SYS ADMIN ID DEPT ID MANAGEMNT ON DEPT ID COPY LIMITS TX LIMITS 0001234 001000 001000 0002222 002000 002000 RESTRICTIONS RESTRICT PRINTING OFF RESTRICT TX OFF TOTAL MEMORY 8 240MB MAIN ECab 01 02 MAIN2 WLD 02 01 ECONT 0027 USER S DATA LIST 31 12 2005 13 36 FAX 123xxxx WORLD ESTATE INC 001 ...

Page 146: ...ess Menu 2 Press or to select 9 PRINT LISTS press OK 3 Press or to select 3 DEPT INFO LIST press OK 4 Enter the system password The machine prints the DEPT INFO LIST and the LCD returns to standby mode DEPT ID PRINT COUNT COPY LIMITS SEND COUNT TX LIMITS 0001234 10 25 0002222 1 14 0003333 5 2 DEPT INFO LIST 31 12 2005 17 15 FAX 123xxxx WORLD ESTATE INC 001 ...

Page 147: ...t Press or to select 4 DOC MEMORY LIST press OK The machine prints the DOCUMENT MEMORY LIST and the LCD returns to standby mode NOTE Once you know the transaction number of a document stored in memory you can delete it See Deleting a Fax Job on p 12 2 TX RX NO MODE DESTINATION TEL ID PGS SET TIME ST TIME 0046 DELAYED TX 01 Canon TOKYO 1 31 12 10 07 23 30 0047 TRANSMIT 02 Canon ITALIA 3 31 12 10 26...

Page 148: ...s or to select 4 CANCEL REPORT press OK 4 Press or to select YES press OK Printing is canceled If you do not want to cancel the report press or to select NO press OK If there are multiple jobs Press or to select the report you want to cancel press OK Press or to select YES press OK NOTE If you want to cancel multiple jobs select one job at a time and cancel them one by one ...

Page 149: ...if you cannot solve the problem by yourself Clearing Jams This section describes how to remove jammed paper Removing Jammed Paper from Inside the Machine When print media jams inside the machine the LCD displays REC PAPER JAM and OPEN PRINTER COVER CAUTION There are some areas inside the machine and cartridge which are subject to high voltages and high ...

Page 150: ...inside of the machine These items might be damaged if they come into contact with the parts inside the machine When removing the jammed paper do not touch the transfer roller shaded part as its surface is very delicate and susceptible to finger oil and scratches which may lead to print deterioration To avoid possible damage to the printer do not touch the pins near the left end of the transfer rol...

Page 151: ...ides of the face up paper output 4 Hold both sides of the jammed paper and carefully move it inward then gently pull it out 5 Roll the leading end of the paper outwards so that the printed surface is on the inside of the roll then gently pull the rolled up paper out of the machine ...

Page 152: ...ge of the paper has already entered the imaging area gently pull out the paper at the face up paper output rollers until the edge of the paper appears IMPORTANT Do not pull the jammed paper forward from the cassette It may cause a malfunction Do not pull the jammed paper upward the toner on the paper will stain the printer and cause a permanent reduction in print quality ...

Page 153: ... machine 8 Carefully pull the jammed paper straight out through the rollers If the jammed paper is badly folded similar to the folds of an accordion ease the jammed paper loose and then pull it out of the machine 9 Push the paper release levers back to their original position and close the rear cover ...

Page 154: ... state for operating confirm that the paper release levers are pushed back to their original position and check to see that jammed paper is not left in the machine If paper jam occurs when using the cassette 1 Pull out the cassette completely 2 Hold both sides of the jammed paper and pull it out from the machine at a downward angle 3 Insert the cassette to the machine 4 Open and close the printer ...

Page 155: ...isplays CHECK DOCUMENT 1 Widen the slide guides until they stop and remove the paper so as not to be caught by the slide guides Open the ADF and gently remove the jammed paper from the ADF NOTE After removing jammed paper even edges of the document before loading it in the ADF again ...

Page 156: ...ne by opening the printer cover and then closing it The ADF roller rotates without feeding documents Fan the edge that will feed into the machine first then tap the edge of multiple page documents on a flat surface to even the stack The document has stopped in the ADF because you pressed Stop Reset while scanning Remove the document in the ADF See p 14 7 CHECK PRINTER An abnormality has occurred i...

Page 157: ...ee pages 14 1 to 14 7 and reload paper in the cassette or multi purpose feeder Then reset the machine by opening the printer cover and then closing it RECEIVED IN MEMORY The machine received the fax in memory because paper or toner ran out a paper jam occurred or incorrect paper size was loaded Load correct paper size in the cassette replace the cartridge or clear the paper jam See p 7 6 REMOVE MP...

Page 158: ...ssage Cause Action SYSTEM ERROR Exxx An error of some kind has occurred in the machine Unplug the machine from the power supply and wait for approx 3 minutes to 5 minutes then plug it in again If this does not solve the problem unplug the machine and call your service representative TX RX NO nnnn When the machine sends or receives a fax it assigns a unique identification number nnnn Write down the...

Page 159: ...hem check their fax machine If you are making an overseas call add a pause to the number Check with the other party and send the document to a G3 fax machine If the other party does not have a G3 fax machine try sending your document using a transmission mode the other party s fax machine supports 0009 No paper is loaded in the cassette or the cassette is not set properly Load paper in the cassett...

Page 160: ...r the paper in the multi purpose feeder is loaded properly and that the slide guides are adjusted correctly See Loading Paper on p 4 3 Q Is the cassette inserted into the machine correctly A Push the cassette into the machine as far as it will go and make sure the cassette is not tilted or inserted at an angle Paper feeds skewed Printing is skewed Q Is paper loaded correctly A Make sure the paper ...

Page 161: ...e feeder A Load only one type of paper A Make sure you load paper that meets the paper requirements for the machine See Chapter 4 Paper Handling Transparencies do not feed correctly Q Are the transparencies loaded correctly A Make sure the transparencies in the cassette or the transparency in the multi purpose feeder is loaded properly and that the slide guides are adjusted correctly See Loading P...

Page 162: ...ects other than paper on the output tray See Face Down Paper Output Area on p 4 13 Q Is the machine installed in a proper location A Check that the machine is installed in the proper location For information about specifications of the machine see Appendix A Specifications For safety warnings and cautions see Choosing a Location for Your Machine on p 2 1 Envelopes do not feed correctly Q Are the e...

Page 163: ...ile After connecting the power cord the machine cannot scan documents immediately Q Is the machine set for the correct telephone line type pulse tone A Make sure the machine is set for the correct telephone line type See Setting the Telephone Line Type on p 3 5 Q Is the document loaded A Remove the document stack it if necessary and load it in the ADF correctly Q Is the One Touch Speed Dial button...

Page 164: ... Is BUSY NO SIGNAL shown on the ERROR TX REPORT A The fax telephone number you dialed is busy Try sending the document later A The other party s fax machine is not working Contact the other party and have them check their fax machine Q Did the receiving fax machine answer within 55 seconds after all automatic redialing attempts A Contact the other party and have them check their fax machine For an...

Page 165: ...tically A For the machine to receive faxes automatically the receive mode must be set to FaxOnly mode FaxTel mode or AnsMode See Chapter 7 Receiving Faxes If you have set AnsMode confirm that an answering machine is connected to the machine and that it is turned on with an outgoing message properly recorded If you set 3 MAN AUTO SWITCH to ON in FAX SETTINGS of the Menu the machine will receive fax...

Page 166: ...set or a telephone connected to the unit Q Is the sending fax machine able to send the CNG signal that tells the machine that the incoming signal is a fax A Some fax machines cannot send the CNG signal that tells the machine the incoming call is a fax In such cases you will have to receive the fax manually See Receiving Faxes Manually Manual Mode on p 7 4 Cannot receive a document manually Q Is th...

Page 167: ... more information see Chapter 4 Paper Handling or Chapter 11 Making Copies Faxed images are blotched or uneven Q Are the telephone lines in proper condition Or do you have a good connection A ECM Error Correction Mode for sending receiving should eliminate such problems However if the telephone lines are in poor condition you may have to try again Then call the sender to resend the document Q Is t...

Page 168: ...line type pulse tone A Make sure the machine is set for the correct telephone line type See Setting the Telephone Line Type on p 3 5 The telephone disconnects while you are talking Q Is the telephone line connected in securely A Check that the telephone cables are connected securely to the jacks on the machine the telephone jack on your wall and the jack on your telephone See Connecting the Teleph...

Page 169: ...ing the Toner Cartridge on p 2 18 Q Is the cassette inserted completely into the machine A Insert the cassette as far as it will go See Loading Paper in the Cassette on p 2 22 Q Did you connect the power cord to the machine just now A Wait for a while After connecting the power cord the machine cannot scan documents immediately Q Is the document loaded correctly A Remove the document stack it if n...

Page 170: ...cartridge installed correctly A Make sure the cartridge is installed correctly See Installing Replacing the Toner Cartridge on p 2 18 Q Is any toner left in the cartridge A Replace the cartridge if necessary See Installing Replacing the Toner Cartridge on p 2 18 Q Is the exposure adjusted correctly A Adjust the exposure correctly using Exposure See Adjusting the Exposure Density on p 11 6 Copies a...

Page 171: ...DE to OFF in COMMON SETTINGS of the Menu See 5 TONER SAVER MODE on p 16 4 The printouts are partly missing or shaded when you make copies on heavy paper Q Is the paper type set correctly A Select HEAVY PAPER or HEAVY PAPER H in PAPER TYPE in PAPER SETTINGS of the Menu See Loading Paper on p 4 3 The printouts are missing when you make copies on rough paper Q Is the paper type set correctly A Select...

Page 172: ... the problem is fixed the Alarm indicator will turn off and the LCD will return to the standby mode If the Alarm indicator remains flash unplug the machine and contact your local authorized Canon dealer or the Canon help line Printout does not match paper size Q Is the paper stack loaded and aligned correctly in the cassette or is paper loaded in the multi purpose feeder correctly A Make sure the ...

Page 173: ...lug it immediately and contact your local authorized Canon dealer or the Canon help line Do not attempt to disassemble or repair the machine yourself NOTE Attempting to repair the machine yourself may void the limited warranty Before contacting your local authorized Canon dealer or the Canon help line make sure you have the following information about your machine The machine s name FAX L380S L390...

Page 174: ...ing the machine When the power cord is disconnected any documents stored in memory will be erased if you leave the machine unplugged for 1 hour or more Be sure to plug the machine in after cleaning to avoid this happening If RECEIVED IN MEMORY appears in the LCD display follow steps on p 7 6 to print out the document If you disconnect the machine while it is waiting to send a document you will hav...

Page 175: ...power cord back in Cleaning the ADF Area Black lines may appear in printouts when the ADF is used to feed documents This is caused by paste ink correction fluid or other foreign matters in the read area of the ADF Use a clean soft cloth to wipe the read area clean Take particular care to clean at the locations where the black lines are appearing on printouts If you have trouble getting the glass c...

Page 176: ...ollers are dirty the documents you send or print will also be dirty Clean with a soft cloth that will not scratch the glass or rollers Use a soft dry clean cloth to wipe up paper dust around the rollers 4 Clean the shaded areas of the operation panel and the machine Dirt and dust particles that collect on the underside of the operation panel also affect the quality of documents you SCANNING GLASS ...

Page 177: ...nished close the operation panel by pressing it down from the center NOTE Be sure to close the operation panel until it locks into place Otherwise the machine will not function properly 6 Plug the power cord back in ...

Page 178: ...affected 1 Disconnect the power cord 2 If the machine is connected to a telephone or your computer remove the telephone line or printer cable 3 Open the printer cover 4 Grip the end of the cartridge and remove it from the machine In order to avoid direct sunlight place the cartridge in the protective bag that the cartridge came in when you purchased it 5 Close the printer cover 6 Pull out the cass...

Page 179: ...er explains the procedure to access the menus and their contents Accessing the Menu 1 Press Menu 2 Press or to select the menu you want to change press OK 3 Press or to select the submenu you want to change press OK A D DI T IO N AL FU N CTIONS 3 C O PY SE T TI N GS COPY SETTINGS 1 STD IMAGEQUALITY ...

Page 180: ...C5 FAX L390 A4 LTR 2 PAPER TYPE Sets the paper type to be used in the paper cassette FAX L380S PLAIN PAPER TRANSPARENCY PLAIN PAPER L HEAVY PAPER HEAVY PAPER H FAX L390 PLAIN PAPER PLAIN PAPER L 2 MP TRAY 1 PAPER SIZE Sets the paper size for the multi purpose feeder A4 B5 A5 LTR LGL EXECUTIV ENVELOPE You can select from DL ISO C5 COM10 or MONARCH FREESIZE Horizontal and vertical size can be specif...

Page 181: ...tion activates DEFAULT MODE The machine automatically switches to the mode you set in DEFAULT SETTINGS after the AUTO CLEAR function activates CURRENT MODE The machine does not automatically switch to the mode you set in DEFAULT SETTINGS even after the AUTO CLEAR function activates 3 VOLUME CONTROL Adjusts the volume of the machine 1 KEYPAD VOLUME Adjusts the keypad volume ON 1 to 3 OFF The volume...

Page 182: ... 1 to 3 OFF The volume is turned off 6 SCANNING END TONE Adjusts the volume of the done tone sounded when the machine finished scanning ON 1 to 3 ERROR ONLY 1 to 3 OFF The volume is turned off 7 LINE MONITOR VOL Adjusts the line monitor volume ON 1 to 3 2 OFF The volume is turned off 4 PRINT EXPOSURE Adjusts the exposure to one of 5 levels center 5 TONER SAVER MODE Sets the toner saver mode ON The...

Page 183: ...adjusted manually The exposure can be adjusted in 9 steps center 3 STD ZOOM RATIO Selects the copy ratio 050 to 200 100 4 STANDARD COPY QTY Select the copy quantity 01 to 99 01 5 AUTO SORT Set the auto sort ON The auto sort function is turned on OFF The auto sort function is turned off 6 PAPER SIZE GROUP The paper size group can be selected If the paper size group is changed the preset copy ratios...

Page 184: ...one line is set for rotary pulse dialing 3 TX START SPEED Sets the transmission speed for all documents you send 33600bps 14400bps 9600bps 7200bps 4800bps 2400bps 4 RX START SPEED Sets the transmission speed for all documents you receive 33600bps 14400bps 9600bps 7200bps 4800bps 2400bps 2 UNIT NAME You can register your name or your company name within 24 characters including spaces 3 TX TERMINAL ...

Page 185: ... SETTING Sets how the fax connects to PBX If your fax machine is not connected through a PBX you can ignore these settings PSTN The fax is connected to the outside line PBX The fax is connected through a PBX Select one of the following settings depending on the type of PBX in service Two settings are available HOOKING PREFIX If you select PREFIX you can set a number up to 20 digits long including ...

Page 186: ... occurs OUTPUT YES Prints a report every time you receive a document 3 ACTIVITY REPORT Enables disables automatic printing of an ACTIVITY REPORT after every 20 transactions ON Prints the ACTIVITY REPORT OFF No ACTIVITY REPORT is printed 3 TX SETTINGS Sets the transmission functions 1 ECM TX ECM Error Correction Mode transmission is turned on or off ON All transmissions are conducted with ECM if th...

Page 187: ...mber is entered by using speed dialing ON Scanning begins automatically in 5 or 10 seconds after you enter the phone number OFF Press Start to scan document Otherwise AUTO CLEAR function activates and the LCD returns to standby mode after 2 minutes 4 RX SETTINGS Sets the reception functions 1 ECM RX ECM Error Correction Mode reception is turned on or off ON All receptions are conducted with ECM if...

Page 188: ...en the machine is set to FaxOnly OFF The machine does not ring when it receives a fax In Energy Saver mode the fax may ring one or two times ON The machine rings when it receives a fax if a telephone is connected RING COUNT Sets the number of incoming rings before the machine answers 01 to 99TIMES 02TIMES 4 MAN AUTO SWITCH Sets whether the machine switches to document receive mode after ringing fo...

Page 189: ... set automatically FIXED REDUCTION Reducing size is preset 97 95 90 75 2 SELECT REDUCE DIR VERTICAL ONLY Reduction is performed in the vertical direction only HORIZ VERTICAL Reduction is performed in the horizontal and vertical direction OFF Image reduction is turned off 2 TONER SUPPLY LOW Allows you to set how the machine responds when the toner supply is low RX TO MEMORY The machine receives all...

Page 190: ...he polling box 1 FILE NAME Changes the file name 2 PASSWORD Changes the password 3 ERASE AFTER TX Changes the ERASE AFTER TX setting 3 DELETE FILE Deletes the polling box and all of its settings 7 SYSTEM SETTINGS Sets the functions of MEMORY LOCK RX FAX DEFAULT LOCK PHONE and COUNTRY SELECT 1 MEMORY LOCK RX Sets the Memory Lock functions OFF Prints a document as soon as the machine receives it ON ...

Page 191: ...nt documents PHOTO Suitable for documents that contain photographs SUPER FINE Suitable for documents that contain fine print and images The resolution is four times that of STANDARD ULTRA FINE Suitable for documents that contain fine print and images The resolution is eight times that of STANDARD 2 SCAN DENSITY Sets the machine s standard scanning density OFF LIGHT STANDARD DARK 3 LOCK PHONE Sets ...

Page 192: ...D DIAL Registers the information on Coded Speed Dialing CODED SPD DIAL Selects a Coded Speed Dialing code 1 TEL NUMBER ENTRY Registers the other party s telephone number Max 120 digits including spaces 2 NAME Registers the other party s name Max 16 characters including spaces 3 GROUP DIAL Registers the information on Group Dialing 1 TEL NUMBER ENTRY Registers the other party s telephone numbers by...

Page 193: ...error time out is on Sets time out period 005SEC to 300SEC 015SEC OFF The error time out is off 4 PRINTER RESET Cancels the job currently being received and the job already received The factory default setting is in bold face Name Descriptions 1 DATE TIME SETTING Enter the current date and time 2 AUTO CLEAR Sets the auto clear function If the machine remains idle for a certain period of time the d...

Page 194: ...g is in bold face Name Descriptions SYSTEM SETTINGS PASSWORD Enter the system password protecting the system settings You do not have to do this if the system settings are not yet password protected 1 SYS ADMIN INFO Set the System Administrator s ID and password to protect the system settings You cannot use 0 for the System Administrator s ID If you set the System Administrator s ID to 0 the regis...

Page 195: ...COUNT 2 SEND COUNT 2 COUNT RESET Reset the counter 1 ON 2 OFF 3 RESTRICTIONS Prints out a list of items set or registered in the Menu 1 RESTRICT PRINTING OFF ON Set the printing limits ON or OFF If RESTRICT PRINTING is turned ON the printing operations such as printing reports manually or documents stored in memory are counted in the COPY LIMITS function 2 RESTRICT TX OFF ON Set the sending restri...

Page 196: ...T Prints the Coded Dial List 1 NO SORT The printout of the list is not sorted 2 SORT The printout of the list is sorted 3 GROUP DIAL LIST Prints the Group Dial List 3 DEPT INFO LIST Prints out the DEPT INFO LIST When DEPT ID is set enter the DEPT ID to print the DEPT INFO LIST 4 CANCEL REPORT Cancels printout of the report Select report you want to cancel the printout REPORT STATUS Displays the re...

Page 197: ...a compression system MH MR MMR JBIG Modem type FAX modem Modem speed 33600 31200 28800 26400 24000 21600 19200 16800 14400 12000 9600 7200 4800 2400 bps automatic fallback Transmission speed Approx 3 seconds page transmitting from memory Transmission reception memory Approx 8 MB DRAM JBIG storage Approx 510 pages LCD displays memory used Liquid crystal display 20 2 ...

Page 198: ...05 g m2 One page document 50 240 g m2 Transmission time Approx 3 seconds G3 JBIG Resolution Standard mode 8 pels mm 3 85 lines mm Fine mode 8 pels mm 7 7 lines mm Photo mode 8 pels mm 7 7 lines mm Super fine mode 8 pels mm 15 4 lines mm Ultra fine mode 16 pels mm 15 4 lines mm Scanning image processing Ultra High Quality Image Processing System UHQ Halftones 256 levels of gray 9 density adjustment...

Page 199: ...ions Based on 75 g m2 paper Based on Canon FAX Standard Chart No 1 A4 standard mode ...

Page 200: ...r Answering machine connection CNG detecting signal Telephone connection Optional handset connection Remote reception by telephone Default reception ID 25 Resolution 300 300 dpi Default size 100 Zoom 50 200 Multiple copies Up to 99 copies of a document ...

Page 201: ...es envelopes and heavy paper up to 128 g m2 Envelope sizes European DL envelope 220 110 mm U S Commercial No 10 envelope 9 5 4 1 in Printing width Maximum 206 mm A4 Paper Feeding System Cassette Feeding 250 sheets FAX L380S 500 sheets FAX L390 of 64 g m2 Multi Purpose Feeder 1 sheet Printing Cartridge The Canon genuine Cartridge T Starter Yield Approx 2 500 page of printouts based on 5 coverage of...

Page 202: ...ntable Area Papers The shaded area in the following figure shows the printable area for papers Printable area A4 size LTR size LGL size a b c 210 mm Max 5 0 mm Max 5 0 mm 8 5 Max 0 2 Max 0 2 8 5 Max 0 2 Max 0 2 ...

Page 203: ...ble Area Envelopes The shaded portion in the following figure shows the printable area for envelopes Printable area European DL U S Commercial No 10 a b c 110 mm Max 5 0 mm Max 5 0 mm 4 1 Max 0 2 Max 0 2 b c e f d ...

Page 204: ...d smallest documents you can feed into the machine The figure below shows how much of a A4 LTR or LGL size document the machine scans when faxing or scanning Multi page document 356 mm One page document 1 m 216 mm 148mm 105mm Minimum Document Size Maximum Document Size ...

Page 205: ...ntium processor or higher At least 32 MB of RAM and 115 MB of available hard disk space Windows 2000 A 133 MHz Pentium processor or higher At least 64 MB of RAM Windows 2000 Professional or 128 MB of RAM Windows 2000 Server and 500 MB of available hard disk space Windows XP A 300 MHz Pentium processor or higher At least 64 MB of RAM and 500 MB of available hard disk space 256 color SVGA monitor or...

Page 206: ...rtain countries Contact your local authorized Canon dealer for more information on purchasing this option NOTE Please note that the shape of your handset may differ from the one shown in this section However both handsets have exactly the same functions and performance Make sure you have the following items If anything is damaged or missing notify your Canon dealer immediately ...

Page 207: ... the plugs and insert the plugs into the holes on the handset cradle 2 Insert the plugs with the handset cradle in the holes on the machine NOTE If you have difficulty inserting the plugs turn the machine so that the left side is facing you and the right side is placed against a wall This will allow you to insert the plugs without the machine moving ...

Page 208: ...3 Insert the screws into the plugs and push them in with your finger 4 Connect the handset cord to the input jack marked at the back of the machine CAUTION When carrying the machine do not lift it by the handset cradle as it may break ...

Page 209: ...sets you can connect is different depending on the area you use your machine Maintaining Your Handset Follow these guidelines to maintain your handset in top working condition Do not leave your handset exposed to direct sunlight Do not install your handset in hot or humid conditions Do not spray aerosol polishes on your handset as they may enter the holes on your handset and cause damage Use a dam...

Page 210: ...cific Features United Kingdom Connecting External Device If the connectors of the external devices cannot be connected to the jacks on the machine you will need to purchase one or more B T adaptors to connect them as follows ...

Page 211: ...dustrial purposes Applicable Standards Electrical Safety CE GS Radiation CISPR Pub 22 Class B Other Energy Start compliant CE Marking Telefax Standard DTS Connecting the Telephone Line Cord Follow the procedure below to connect the telephone line cord POWER CONNECTOR REAR COVER USB PORT ...

Page 212: ...ity problems may occur with your machine Purchase an answering machine licensed in Germany To connect an answering machine with a telephone integrated you need a TAE connection box with NF code Connect the answering machine to the F code jack and the machine to the N code jack of the connection box To connect an answering machine without a telephone integrated use a connection box with NFN code NO...

Page 213: ...rican Standard Code for Information Interchange A set of definitions for the bit composition of characters and symbols ASCII defines 128 symbols using 7 binary bits and 1 parity bit Auto FAX TEL switching See FAX TEL switching Automatic dialing Dialing fax or telephone numbers by pressing one or three buttons To use automatic dialing you must register the numbers in the machine s memory See also O...

Page 214: ...ally starts to receive the fax transmission The majority of fax machines in use today can send and detect CNG signals Coded Speed Dialing An automatic dialing method that allows you to dial a fax or telephone number by pressing Coded Dial and a two digit code a three digit code for the FAX L390 model using the numeric buttons Cursor The underline symbol you see on the LCD display when you register...

Page 215: ...ll is from a fax or telephone If the call is from another fax the transmission is automatically received If the call is from a telephone the machine rings to let you know so you can pick up the handset With this feature one telephone line can be shared by both the telephone and the fax FINE The resolution setting for documents with very small characters and lines G G3 Group 3 fax machine Defined b...

Page 216: ...andset or telephone M Manual receiving A method of receiving faxes in which you answer all incoming calls using the optional handset If you hear a slow beep it indicates an incoming fax transmission from another machine Just press Start to receive the incoming fax Manual redialing When you use regular dialing you can redial a number manually simply by pressing Redial Pause on the operation panel T...

Page 217: ... or switchboards Pressing Redial Pause enters a pause between digits of a telephone number Photo The document setting you use for sending or copying documents with intermediate tones such as photographs Polling One fax machine requesting another to send a document The receiving party calls the fax machine holding the document to be sent and requests that it be sent Printable area The area of a she...

Page 218: ...ephone that is connected to the machine Remote reception Activating fax reception by answering a telephone that is connected to the machine but that is not located near the machine You need to dial a remote receiving ID number to start remote reception Report A document printed by the machine and containing information about the faxes it has sent or received Resolution The density of dots for any ...

Page 219: ...pulse dialing In some countries on line data services may require that you use tone dialing Tone pulse setting The ability to set the machine to match the telephone dialing system your telephone line uses touch tone or rotary pulse Toner A black resin coated powder contained in the toner cartridge The machine applies the toner to the surface of the photosensitive drum inside the machine via an ele...

Page 220: ... B B T adaptor C 1 Broadcasting 6 13 Coded Speed Dialing 5 1 6 7 changing or deleting numbers 5 6 storing numbers 5 5 using 5 7 Collate copy 1 3 11 8 COMMON SETTINGS 16 3 Connection power cord 2 8 telephone line 2 8 USB port 2 7 COPY button 2 14 COPY SETTINGS 16 5 COPY STATUS 12 1 Copying 11 1 enlarging reducing 11 4 specifying the paper size 11 2 specifying the paper type 11 3 Counter Information...

Page 221: ... 2 13 F F T RING TIME 7 2 F T SWITCH ACTION 7 2 FAX button 2 14 FAX MONITOR 12 1 FAX SETTINGS 16 6 FaxOnly Mode 7 1 7 5 FaxTel Mode 7 1 7 2 7 3 I ID button 2 15 Image Quality button 2 14 In Use Memory indicator 2 14 INCORRECT PAPER SIZE message 14 8 INSTALL CARTRIDGE message 14 8 L LCD display 2 14 LCD Messages 14 8 Long distance dialing 10 2 M Maintenance cleaning 15 1 handset B 4 MAKING SPACE IN...

Page 222: ...eset copy ratio 11 4 PRINT LISTS 16 18 PRINT STATUS 12 1 Recording paper loading in the cassette 2 22 4 3 loading in the multi purpose feeder 4 8 printing areas 4 2 requirements 4 1 Redial Pause button 2 15 Redialing automatically 6 11 canceling 6 11 manually 6 11 setting up 6 11 Regular Dialing 6 7 Removing Jammed Paper from the ADF 14 7 REPLACE CARTRIDGE message 14 9 Report button 2 15 REPORT ST...

Page 223: ... 8 Telephone Line Cord 2 2 Telephone line jack 2 13 Telephone line type setting 3 5 TIMER SETTINGS 16 15 Tone button 2 14 Tone dialing 10 3 Toner cartridge handling and storing 2 17 installing and replacing 2 18 Transfer roller 14 2 Transporting 15 5 TTI 3 3 TX Report 13 4 TX RX NO nnnn 14 10 U Unpacking 2 2 USB port 2 13 connecting 2 7 User s Data List 13 11 ...

Page 224: ...K LTD Woodhatch Reigate Surrey RH2 8BF United Kingdom CANON DEUTSCHLAND GmbH Europark Fichtenhain A10 47807 Krefeld Germany CANON ITALIA S p A Via Milano 8 20097 San Donato Milanese MI Italy CANON LATIN AMERICA INC 703 Waterford Way Suite 400 Miami Florida 33126 U S A CANON AUSTRALIA PTY LTD 1 Thomas Holt Drive North Ryde Sydney N S W 2113 Australia CANON CHINA CO LTD 15F North Tower Beijing Kerry...

Reviews: