background image

34

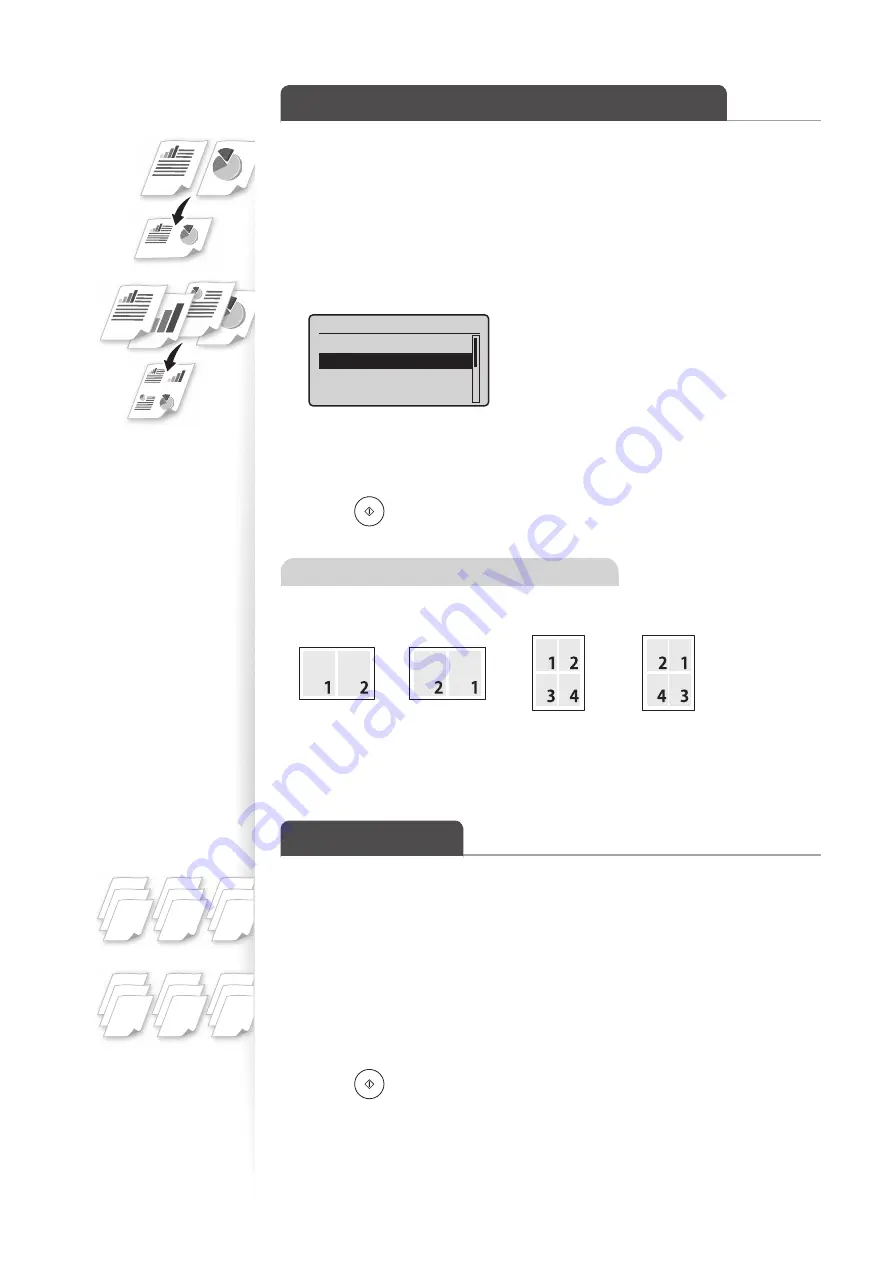
 Copy Multiple Pages onto One Sheet

You can combine multiple pages (two or four pages) onto one copy sheet.

Place your documents (

p.19).

Switch to the Copy mode (

p.16).

Press [

] or [

] to highlight <N on 1>, and then press [OK].

Press [

] or [

] to highlight <2 on 1> or <4 on 1>, and the press [OK].


N on 1
 Off

 2 on 1

 4 on 1
 ID Card Copy

Press [

] or [

] to highlight the desired scan size, and then press [OK].

• 

For example, set scan size to <

LTR

> to scan the entire page of an LTR-size 

document.

Press [ 

 ] (Start).

Specifying the page layout manually

If you select <

Select Layout

> at step 4 above, you may specify the desired page layout.

<2 in 1(1)>

<2 in 1(2)>

<4 in 1(1)>

<4 in 1(2)>

Collate Copies

You can arrange copies into sets arranged in page order by using the <

Collate

> function 

when making multiple copies of multiple documents.

Place your documents (

p.19).

Switch to Copy mode (

p.16).

Press [

] or [

] to highlight <Collate>, and then press [OK].

Press [

] or [

] to highlight <On>, and then press [OK].

Press [ 

 ] (Start).

1

2

3

1

2

3

1

2

3

1

1

1

2

2

2

3

3

3

<ON>

<OFF>

Summary of Contents for FAXPHONE L190

Page 1: ...Guide For information about advanced operations and specifications see the e Manual included on the User Software CD ROM This guide describes the basic use of the machine Read this guide after finishing the machine setup Read Important Safety Instructions first ĺp Keep this manual for future reference ...

Page 2: ...achine e Manual The e Manual includes information about all functions and configurations of the machine This manual is included on the User Software CD ROM Use the e Manual s search function to easily find the information you want Basic Operation Guide The Basic Operation Guide describes common use and basic functions of the copy fax and print functions This Manual ...

Page 3: ...ribed operations IMPORTANT IMPORTANT Indicates operational requirements and restrictions Be sure to read these items carefully to operate the machine correctly and avoid damage to the machine or property Indicates a clarification of an operation or additional explanations for a procedure Reading these notes is highly recommended Keys and Buttons Used in This Manual In this manual the following sty...

Page 4: ...ceiving in the Memory p 63 Store received faxes in the memory Print or forward the received fax after confirming the sender 2 Sided Printing Print copies received faxes or documents on both sides of paper Copy P 33 Print P 39 Fax P 52 Multiple Documents onto Single Page Print multiple pages onto a single page Copy P 34 Print P 40 ...

Page 5: ...nt at custom ratios Poster Printing p 42 Magnify and divide a single page image to print on multiple sheets of paper Make a poster by combining the prints together Watermark Printing p 43 Add watermarks such as COPY or DRAFT to the document Sequential broadcasting p 56 Send the same document to multiple destinations at a time Delayed Sending p 56 Scan a document and set a time to send it 1 2 Polli...

Page 6: ...Type 26 Switch to the Quiet Mode 27 Switch to the Sleep Mode 27 Use the Toner Saver Mode 28 Copy Make a Basic Copy 30 Enlarge or Reduce Copies 31 Adjust the Image Quality for Copy 31 Adjusting the density 31 Selecting the Document Type 32 Adjusting the Sharpness 32 Make Double Sided Copies 33 Copy Multiple Pages onto One Sheet 34 Collate Copies 34 Copy a Double Sided ID Card 35 View and Cancel Cop...

Page 7: ...s 54 Searching the Address Book 55 Redialing 55 Sending a Fax to Multiple Destinations Sequential Broadcast 56 Sending a Fax at a Preset Time 56 Sending a Fax to an International Destination Adding Pauses 57 Calling a Recipient before Sending a Fax 58 Receive a Fax Receive Mode 59 Using the Machine for Fax Only 60 Using the Machine for Faxing and Phoning 60 Using the Answering Machine 61 Using the...

Page 8: ...er Cartridges 76 Replacing the Toner Cartridge 76 Manage Using the Report and List Functions 79 Troubleshooting Clear Jams 82 Clearing Document Jams in the Feeder 83 Clearing Paper Jams Inside the Machine 84 Resolve a Displayed Message 87 Resolve an Error Code 88 Improve Output Quality 89 Resolve a Problem 91 FAQ 92 If a Power Failure Occurs 93 Recycling Used Cartridges 93 The Clean Earth Campaign...

Page 9: ...ents on the Platen Glass 20 Load Documents in the Feeder 20 Load Paper 22 Loading Paper in the Paper Cassette 22 Loading Small Size Paper 24 Loading Envelopes or Paper with a Letterhead 25 Setting a Paper Size and Type 26 Switch to the Quiet Mode 27 Switch to the Sleep Mode 27 Use the Toner Saver Mode 28 Basic Operation This chapter describes overall information about the machine and how to place ...

Page 10: ...cover Open when using paper that is larger than LTR size Paper level indicator Shows the remaining amount of paper Document return tray Returns documents after scanning Feeder cover Open this cover to clear paper jams P 83 Document feeder tray Place your documents in this tray Document guides Adjust these guides to fit the document Feeder Automatically feeds documents into the machine p 20 Handset...

Page 11: ...m of space around the machine Power button Turn the power ON or OFF Scanning area Scans documents from the feeder Output tray Printed documents are output here Paper stopper Use the paper stopper to prevent paper from falling out of the output tray Paper cassette Auto Load paper here p 22 Paper guides Adjust these guides to fit the paper Small paper guide Attach this guide to hold the small size p...

Page 12: ...paper Toner cover Open this cover to access the toner cartridge or clear paper jams Paper exit guide Open this guide to clear paper jams p 84 Toner guides When inserting the toner cartridge fit the protrusions on the toner cartridge into these guides ...

Page 13: ...te the serial number on the back cover of this guide for reference when contacting the Canon Customer Center Power socket Connect the power cord USB port Connect to a computer via a USB cable Handset jack Connect the handset Telephone line jack Connect a telephone line External device jack Connect and external telephone Rear cover Open this cover to clear paper jams p 86 ...

Page 14: ... Press to select the image quality for copy or the scanning resolution for the sending document 2 Sided Press to print on both sides of paper Reset Press to reset the settings Status Monitor Cancel Press to view or cancel jobs You can also check the status of the machine p 36 p 65 Press to scroll up and down or to increase or decrease a value Press to return to the previous screen proceed to the n...

Page 15: ... Keys Press to specify recipients registered to one touch keys p 54 Processing Data Indicator The indicator blinks while sending or receiving data and remains lit when jobs are waiting in memory Error Indicator The indicator blinks when an error occurs Press Back or to return to the previous screen Press Menu If you close the menu before you press OK the changes made to the settings are not saved ...

Page 16: ...Fax Mode Displays the recipient s number To change the settings 1 Press or to highlight an item and then press OK 2 Press or to specify the values and then press OK Copy Press Start 100 LTR Density 0 Original Type Text 2 Sided Off 1 01 Copy Mode Displays the copy ratio paper source paper size and number of copies To change the settings 1 Press or to highlight an item and then press OK 2 Press or t...

Page 17: ...mbols and numbers Press a key several times until the desired character is displayed Press to delete the last character Press and hold to delete all text Press to move the cursor To enter a space move the cursor to the end of the text and then press Enter Text Enter characters with the alphanumeric keys Example Enter CANON1 Press to switch the entry mode to A Press 2 until the letter C appears on ...

Page 18: ...leep Time Auto Reset Time 4 Press or to highlight Current Time Settings and then press OK To change the display format for the date or time specify Date Display Type or 12 24 Hour Clock To use daylight savings time set Daylight Savings to On and then specify the starting date and the ending date 5 Use the numeric keys to enter the date and time and then press OK To move the cursor press or To swit...

Page 19: ...ips attached Transparency Check available documents Size Width x Length 81 2 215 9mm 113 4 297mm Maximum Weight Maximum 4 4 lb 2 kg Capacity 1 Sheet Check available documents Size Width x Length 81 2 216mm 81 2 216mm 51 2 140mm 51 2 140mm 5 127mm 5 127mm 14 356mm 14 356mm Min Min Max Max Capacity For 80 g m2 50 Sheets 50 Sheets Weight 2 sided document 2 sided document 16 0 lb Bond to 27 9 lb 16 0 ...

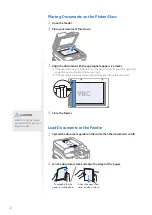
Page 20: ...ent with the arrow mark If the document is a transparency place white paper above the document A5 STMT B5 A4 LTR 4 Close the feeder Load Documents in the Feeder 1 Spread the document guides a little wider than the document s width 2 Fan the document stack and align the edges of the pages Thoroughly fan the paper in small batches Align the edges a few times on a flat surface CAUTION When closing th...

Page 21: ...PORTANT IMPORTANT If the document guides are too loose or too tight this may result in misfeeds or paper jams IMPORTANT IMPORTANT While scanning documents do not add or remove documents When scanning is complete remove the document from the document return tray to avoid paper jams Do not scan the same document more than 30 times When a document is scanned repeatedly the paper can become wrinkled e...

Page 22: ...ot use any of the following Wrinkled or creased paper Curled or rolled paper Torn paper Damp paper Paper printed with a thermal transfer printer Do not copy on the reverse side 2 Step Check if the type of paper is appropriate If the setting is different from the size of the loaded paper an error message appears or printing is not performed correctly Loading Paper in the Paper Cassette This section...

Page 23: ...ck meets the back of the paper cassette Make sure that the paper stack does not exceed the load limit guides A A 4 Adjust the paper guides tightly to the width and length of the paper IMPORTANT IMPORTANT If the paper guides are too loose or too tight this may result in misfeeds or paper jams 5 Close the front cover and the lower front cover 6 Specify the loaded paper size and type p 26 ...

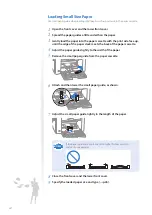
Page 24: ...he edge of the paper stack meets the back of the paper cassette 4 Adjust the paper guides tightly to the width of the paper 5 Remove the small paper guide from the paper cassette 6 Attach and then lower the small paper guide as shown 7 Adjust the small paper guide tightly to the length of the paper IMPORTANT IMPORTANT If the paper guides are too loose or too tight this may result in misfeeds or pa...

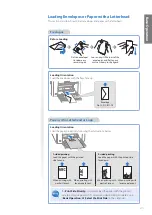
Page 25: ... C5 Paper with a Letterhead or Logo Loading Orientation Load the paper properly by following the instructions below 1 sided printing Load the paper with the printed side face up 2 sided printing Load the paper with the printed side face down When printing with portrait layout When printing with landscape layout When printing with portrait layout When printing with landscape layout ABC If Print Sid...

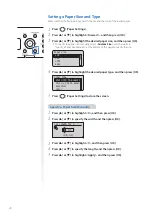
Page 26: ...ally at the bottom of this page to specify the size Paper Size LTR LGL STMT EXEC 4 Press or to highlight the desired paper type and then press OK Paper Type Plain 16 lb Bond 24 Plain L 16 lb Bond Recycled Color 5 Press Paper Settings to close the screen Specify a Paper Size Manually 1 Press or to highlight X and then press OK 2 Press or to specify the width and then press OK Set Length for X 3_ 0 ...

Page 27: ... is performing jobs To lower or set Off Entry Tone or Job Done Tone refer to the Basic Operation Adjusting the Volume in the e Manual Switch to the Sleep Mode You can switch to and cancel the Sleep mode by pressing Energy Saver When the Processing Data indicator is lit or blinking the machine will not enter the Sleep mode because an operation is in progress or an error has occurred By default the ...

Page 28: ... light colors may not be clearly reproduced 1 Press Menu 2 Press or to highlight Preferences and then press OK 3 Press or to highlight Toner Saver Mode and then press OK Preferences Sound Volume Control Display Settings Toner Saver Mode Paper Feed Method Sw 4 Press or to highlight Copy or Fax and then press OK 5 Press or to highlight On or Off and then press OK 6 Press Menu to close the screen ...

Page 29: ...the density 31 Selecting the Document Type 32 Adjusting the Sharpness 32 Make Double Sided Copies 33 Copy Multiple Pages onto One Sheet 34 Collate Copies 34 Copy a Double Sided ID Card 35 View and Cancel Copy Jobs 36 Change the Default Copy Settings 36 Copy This chapter describes basic copy functions ...

Page 30: ...ight this may result in misfeeds or paper jams 2 Switch to the Copy mode p 16 3 Enter the desired copy quantity 1 to 99 with the alphanumeric keys Press Clear to delete the entered copy quantity Copy Press Start 100 LTR Density 0 Original Type Text 2 Sided Off 1 01 4 Press Start Canceling Copy Jobs Press Stop twice ...

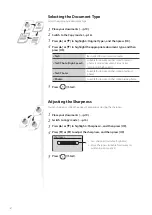
Page 31: ...stom Ratio 100 Direct 400 Max 200 5 Press Start Adjust the Image Quality for Copy Relation between the density and document type If Density is set to Auto Density Original Type will be changed to Text Adjusting the density You can make the density brighter or darker than the original documents 1 Place your documents p 19 2 Switch to the Copy mode p 16 3 Press or to highlight Density and then press...

Page 32: ...os Scanned documents are at a low resolution at high speed Text Photo Suitable for documents that contain text and photos Photo Suitable for documents that contain large photos 5 Press Start Adjusting the Sharpness You can sharpen or soften the edges of images by adjusting the sharpness 1 Place your documents p 19 2 Switch to Copy mode p 16 3 Press or to highlight Sharpness and then press OK 4 Pre...

Page 33: ... format and then press OK 2 Sided Off 1 2 Sided 2 2 Sided 2 1 Sided 5 Press Start When placing your documents in the feeder Copying starts automatically When placing your documents on the platen glass 1 Place the next page on the platen glass and then press Start Press Start for every scanning 2 After scannning all your documents press or to highlight Start Copying and then press OK Specifying the...

Page 34: ...scan size to LTR to scan the entire page of an LTR size document 6 Press Start Specifying the page layout manually If you select Select Layout at step 4 above you may specify the desired page layout 2 in 1 1 2 in 1 2 4 in 1 1 4 in 1 2 Collate Copies You can arrange copies into sets arranged in page order by using the Collate function when making multiple copies of multiple documents 1 Place your d...

Page 35: ...T B5 A4 LTR A5 STMT5mm 5mm A5 STMT B5 A4 LTR A5 STMT5mm 5mm To place the card vertically To place the card horizontally 2 Switch to the Copy Mode p 16 3 Press or to highlight N on 1 and then press OK 4 Press or to highlight ID Card Copy and then press OK 5 Press Start 6 Turn and place the card A5 STMT B5 A4 LTR A5 STMT 7 Press Start The copy ratio is automatically set to 100 You can only use Lette...

Page 36: ...n is returned to the default screen after auto reset is performed 1 Press Menu 2 Press or to highlight Copy Settings and then press OK 3 Press or to highlight Change Defaults and then press OK 4 Press or to highlight the desired option and then press OK No of Copies Select the copy quantity Density Make the density lighter or darker Original Type Select the image quality 2 Sided Copy 1 sided docum...

Page 37: ...ribes basic print functions Before using the printing functions connect the machine to a computer and install the printer driver on the computer See the Starter Guide to learn how to install the printer driver You cannot specify printing options with the printer driver and another application at the same time Your computer screen may differ from the images shown here depending on your operating sy...

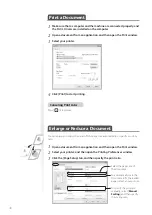
Page 38: ... a Document You can enlarge or reduce the data to fit the paper size automatically or specify a custom ratio 1 Open a document from an application and then open the Print window 2 Select your printer and then open the Printing Preferences window 3 Click the Page Setup tab and then specify the print ratio Select the paper size of the document To automatically scale the document to fit the loaded pa...

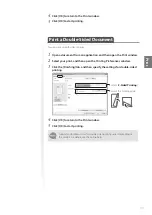
Page 39: ...n the Print window 2 Select your print and then open the Printing Preferences window 3 Click the Finishing tab and then specify the settings for double sided printing Select 2 Sided Printing Select the binding edge 4 Click OK to return to the Print window 5 Click OK to start printing Supported document sizes for double sided printing varies depending on the models For details see the online help ...

Page 40: ...ent from an application and then open the Print window 2 Select your printer and then open the Printing Preferences window Click the Page Setup tab and then specify the number of pages and a page layout Select the number of pages to print on a single page Select the page layout 3 Click OK to return to the Print window 4 Click OK to start printing You cannot enlarge or reduce the documents manually...

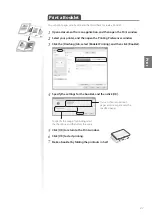
Page 41: ...erences window 3 Click the Finishing tab select Booklet Printing and then click Booklet 4 Specify the settings for the booklet and then click OK You can choose to print all pages at once or print only the specified pages To specify the margin for binding select the check box and then enter the value 5 Click OK to return to the Print window 6 Click OK to start printing 7 Make a booklet by folding t...

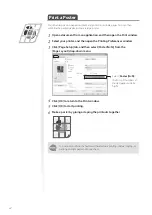
Page 42: ...and then open the Printing Preferences window 3 Click Page Setup tab and then select Poster N N from the Page Layout drop down menu Select Poster N N N N is split numbers of divided pages wide by high 4 Click OK to return to the Print window 5 Click OK to start printing 6 Make a poster by gluing or taping the printouts together You cannot combine this feature with watermark printing manual scaling...

Page 43: ... then specify the settings for watermark printing Select the desired watermark Select to add watermarks 4 To create a new watermark click Edit Watermark and then enter the new text Add the edited watermark Delete the selected watermark from the list Enter the text for the watermark Specify watermark options 5 Click OK to return to the Print window 6 Click OK to start printing You can register up t...

Page 44: ...tor Cancel 2 Press or to highlight Print Job Status and then press OK 3 View the details of a print job or cancel the job Press or to view the print job status Press OK to view the detailed information To cancel the job press or to highlight Cancel and then press OK 4 Press Status Monitor Cancel to close the screen ...

Page 45: ... 57 Calling a Recipient before Sending a Fax 58 Receive a Fax Receive Mode 59 Using the Machine for Fax Only 60 Using the Machine for Faxing and Phoning 60 Using the Answering Machine 61 Using the Machine Primarily for Phoning 61 Receiving Faxes in Manual Mode 62 Receive a Fax from Memory 63 Switching to Memory Lock Mode 63 Viewing and Canceling Received Fax Documents 64 Printing Received Fax Docu...

Page 46: ...the One Touch Keys p 54 1 Switch to the Fax mode and then press Address Book Display the address book menu All Display all registered destinations A Z YZ Display registered destinations sorted by name Display registered coded dialing codes Display the number of registered destinations in a group Display registered one touch keys Press or to switch to the menu screen or a screen for searching regis...

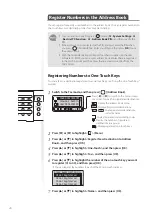
Page 47: ...s Back to close the screen Registering Numbers to Coded Dialing Codes To send a fax to a destination that is registered to a coded dialing code see Using the Coded Dialing Codes p 54 1 Switch to the Fax mode and then press Address Book 2 Press or to highlight Menu 3 Press or to highlight Register New Destination to Address Book and then press OK 4 Press or to highlight Coded Dial and then press OK...

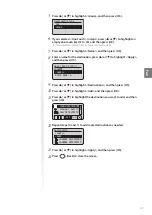
Page 48: ...screen Registering Recipients for Group Dialing You can register a group of multiple recipients to a one touch keys or a coded dialing code It is useful when sending a fax to multiple destinations at once IMPORTANT IMPORTANT Register group addresses to an unused one touch key or coded dialing codes Make sure that you leave some unused one touch keys or coded dialing codes for group dialing Individ...

Page 49: ...on press or to highlight Apply and then press OK Name Max 16 char CANON Apply Entry Mode A 9 Press or to highlight Destinations and then press OK 10 Press or to highlight Add and then press OK 11 Press or to highlight the destination you want to add and then press OK CANON 0123456789 GroupA 2 Destin User01 01234567 All A Z 12 Repeat steps 10 and 11 to add more destinations as needed Destination Ap...

Page 50: ...w destinations to the group Address Book Details View the details for the destination Delete From Address Book Delete destinations from the address book 4 Select the desired destination and then press OK 5 Select the desired option and then edit or delete the destination 6 Press Back to close the screen Adjust the Image Quality for Fax Adjusting the Density You can adjust the density of a fax dark...

Page 51: ...text documents 200 dpi x 200 dpi Photo For documents that contain photographs 200 dpi x 400 dpi Superfine For documents that contain very fine text 5 Send a fax to the desired destination p 53 Adjusting the Sharpness You can sharpen or soften the edges of images by adjusting the sharpness 1 Place your documents p 19 2 Switch to the Fax mode p 16 3 Press or to highlight Sharpness and then press OK ...

Page 52: ...ocument is calendar type 5 Send a fax to the desired destination p 53 Changing the Default Settings You can change the default settings that is applied when the machine is restarted Reset is pressed or the screen is returned to the default screen after auto screen is performed 1 Press Menu 2 Press or to highlight Fax TX Settings and then press OK 3 Press or to highlight TX Function Settings and th...

Page 53: ...sent after the scanning is finished When placing documents on the platen glass 1 Press or to highlight the size of the original document and then press OK 2 After placing next page press Start Press Start for each page 3 When all pages are scanned completely press or to highlight Start Sending and then press OK If the recipient s line is busy or an error occurs the machine automatically redials th...

Page 54: ...lution 200 X 1 User01 01234567 5 Press Start Using the Coded Dialing Codes You can easily send faxes to a destination registered to a coded dialing code You can send faxes to multiple destinations at once if a group is registered to a coded dialing code 1 Place your documents p 19 2 Switch to the Fax mode p 16 3 Adjust the image quality of the documents as needed p 50 4 Press Coded Dial 5 Enter th...

Page 55: ... desired recipient and then press OK 7 Press Start to start sending Redialing If you send faxes by entering the fax number manually the last three destinations are stored in the memory You can send faxes to the stored destinations 1 Place your documents p 19 2 Switch to the Fax mode p 16 3 Press Redial Pause 4 Press or to highlight the destination and then press OK Redial 012XXXXXX 5 Press Start t...

Page 56: ...ination 01 01 2012 12 52AM Address Book Coded Dial 4 Specify the destination and then press OK 5 Repeat steps 3 4 to enter additional destinations as needed Specify Next Destination New is available up to 10 destinations To confirm or delete destinations press or to highlight Confirm Edit Destination and then press OK 6 Press Start Sending a Fax at a Preset Time You can automatically send a pre sc...

Page 57: ...the international access code to reduce this problem 1 Place your documents p 19 2 Switch to the Fax mode p 16 3 Use the alphanumeric keys to enter the international access code For details about international access codes contact your telephone service provider 4 Press Redial Pause to enter a pause The letter P is displayed to indicate the pause The default pause added before the number is two se...

Page 58: ...e handset or an external telephone to the machine If they are not connected use another telephone to make sure the recipient to switch the fax mode to receive fax 1 Place your documents p 19 2 Switch to the Fax mode p 16 3 Lift the handset or telephone receiver A dial tone sounds 4 Dial the recipient s fax number 5 Ask the recipient to allow his or her machine to receive faxes 6 When you hear a be...

Page 59: ...tch mode See Using the Machine for Faxing and Phoning p 60 Manual mode See Using the Machine Primarily for Phoning p 61 Connect an answering machine to the machine Connect an external telephone to the machine If necessary For details about each mode see RX Mode in the e Manual Depending on the connected telephone you may not normally receive a fax If you are using an external telephone that has fa...

Page 60: ... the number of rings Using the Machine for Faxing and Phoning Set the fax receive mode to Fax Tel Auto Switch 1 Switch to the Fax mode p 16 2 Press or to highlight RX Mode and then press OK 3 Press or to highlight Fax Tel Auto Switch and then press OK RX Mode Auto Fax Tel Auto Switch Manual Answering Machine 4 Specify ring settings Ring Start Time Specify how long the machine will attempt to detec...

Page 61: ...RX Mode Auto Fax Tel Auto Switch Manual Answering Machine When a Fax or Call Comes In The connected answering machine answers the call and if the call is a fax the machine starts receiving the fax If the call is a voice call the answering machine answers and records the caller s message Before use the answering machine set the number of rings before the answering machine activates to at least two ...

Page 62: ... answer a call in manual mode the call is a fax Follow the procedure below to manually switch to receive mode When Using the Handset 1 If you hear a beep when you answer the call switch to the Fax mode 2 Press or to highlight Start Receiving and then press OK 3 Hang up the handset When Using an External Telephone 1 If you hear a beep when you answer the call press and Remote RX ID 2 Hang up the re...

Page 63: ...ter consecutive digits that consist of only 0 as a PIN Report Print Set the RX Result Report to print automatically when faxes are received into the memory Off Do not print the RX Result Report On Print the RX Result Report To use this feature you must also activate the RX Result Report item Report Reports Settings RX Result Report The default setting is Off Memory Lock Time Set this feature to re...

Page 64: ...fax job press or to highlight Delete press or to highlight Yes and then press OK To forward the fax press or to highlight Forward specify destination and then press OK Printing Received Fax Documents When the memory receiving is deactivated all faxes stored in the memory are automatically printed IMPORTANT IMPORTANT The machine do not support the function to select fax documents to print Delete th...

Page 65: ...o select Delete or Forward p 64 5 Press Status Monitor Cancel to close the screen Change the Fax Settings You can change the fax settings for sending and receiving to suit your needs Changing Fax Sending Settings 1 Press Menu 2 Press or to highlight Fax TX Settings and then press OK 3 Press or to highlight Basic Settings or TX Function Settings and then press OK 4 Press or to highlight the desired...

Page 66: ...t ECM TX Off On The Error Correction Mode ECM automatically detects and corrects errors during fax communication Using the ECM function can diminish send errors even over poor connections Pause Time 1 to 2 to 15 seconds Specify the length of pauses added to fax destination numbers Auto Redial Off On Redial Times 1 to 2 to 10 times Redial Interval 2 to 99 minutes Redial When Err Occurs Off On Set a...

Page 67: ...ons Specifying a destination with the numeric keys Registering new destinations to the address book one touch keys or coded dialing codes Changing destinations that are registered to the address book one touch keys or coded dialing codes Allow Fax Driver TX Off On Specify whether or not to allow faxes to be sent via a computer s fax driver Restrict Sending From History Off On Specify whether or no...

Page 68: ...Times 1 to 2 to 99 times Specify whether or not the external telephone will ring during an incoming call if RX Mode is set to Auto or Fax Tel Auto Switch After the external telephone rings for specified times the machine automatically starts receiving the fax if the call is a fax If the call is a voice call the machine rings only when RX Mode is set to Fax Tel Auto Switch Remote RX Off On Remote R...

Page 69: ...s 01 01 2011 SAT 02 07 PM TX RX NO 5001 P 0001 Continue Print When Toner Is Nearly Out Off On Specify whether or not to continue printing received faxes when the toner is nearly out Changing Communication Management Settings 1 Press Menu 2 Press or to highlight System Settings and then press OK 3 Press or to highlight Communication Management Settings and then press OK 4 Press or to highlight the ...

Page 70: ...g start speed if you have difficulty sending or receiving faxes Memory Lock Settings Off On Memory Lock PIN Seven digit number Print Report Off On Memory Lock Time Off On Generally received documents are immediately printed However you can specify whether or not to store received faxes in memory before printing You can then print the stored faxes at any time or delete them without printing to save...

Page 71: ...rtridges 75 Checking the Toner Level 75 Conserving the Toner to Extend the Life of Toner Cartridges 76 Replacing the Toner Cartridge 76 Manage Using the Report and List Functions 79 Maintenance and Management This chapter describes how to clean the machine replace the toner cartridge and explains the report and list functions used for managing the machine ...

Page 72: ...e power cord and then turn ON the power Cleaning the Exterior 1 Turn OFF the machine and disconnect all the cables from the machine 2 Remove any documents from the platen glass or feeder 3 Clean the exterior of the machine and ventilation slots with a soft well wrung out cloth dampened with water or a mild detergent that has been diluted with water 4 Wait for the printer to dry completely 5 Reconn...

Page 73: ... as it becomes very hot during use If you get toner on your hands or clothing If toner gets on your hands or clothing wash them immediately with cold water Washing with warm water makes it impossible to remove the toner stains Cleaning the Fixing Unit Clean the fixing unit when black streaks appear on printed pages 1 Press Menu 2 Press or to highlight Adjustment Maintenance and then press OK 3 Pre...

Page 74: ...eaning the machine do not use tissue paper paper towels or similar materials for cleaning They can generate static electricity Cleaning the Feeder 1 Turn OFF the machine and disconnect all the cables from the machine 2 Remove any documents from the feeder 3 Open the feeder cover clean the rollers with a well wrung out cloth dampened with water and then wipe them with a soft and dry cloth When clea...

Page 75: ... the toner cartridge 5 6 times to evenly distribute the toner p 76 Check the toner level as needed See the bottom of this page When the Toner is nearly out message appears on the display the incoming faxes will be stored in the memory without printing You can also set to print the received faxes however the printed documents may be light or blurred Press Menu Fax RX Settings RX Print Settings Cont...

Page 76: ...to evenly distribute the toner 3 Insert the toner cartridge 4 Close the toner cover and then lower the scanning platform Replacing the Toner Cartridge You can purchase replacement toner cartridges from your local authorized Canon dealer Supported genuine Canon toner cartridge Canon Cartridge 128 Starter CAUTION If toner gets on your hands or clothing wash them immediately with cold water Do not wa...

Page 77: ...carefully pull the sealing tape completely out 20 50 cm IMPORTANT IMPORTANT When pulling out the sealing tape Do not pull the sealing tape at an angle or up and down If the tape breaks it may not be pulled out completely Even if the sealing tape stops at midpoint pull it out of the toner cartridge completely If any tape remains in the toner cartridge this may result in poor print quality If you ar...

Page 78: ...eaner or result in a dust explosion due to static discharge CAUTION If you get toner on your hands or clothing Wash them immediately with cold water Washing with warm water sets the toner making it impossible to remove the toner stains Do not allow the toner to scatter Do not pull out the sealing tape forcefully or stop before it is removed as this may cause toner to spill out If toner gets into y...

Page 79: ...Fax communication history 4 Follow the on screen instructions to print the report or list 5 Press Report to close the screen To set the report not to be printed automatically If an error occurs while sending or receiving faxes report is printed automatically Confirm the error code printed on the report and resolve the problem p 88 Job No Address Name Start Time Call Length Sheets Result 0123 01234...

Page 80: ...80 Memo ...
Page 81: ...Clearing Paper Jams Inside the Machine 84 Resolve a Displayed Message 87 Resolve an Error Code 88 Improve Output Quality 89 Resolve a Problem 91 Troubleshooting This chapter describes how to clear paper jams and offers solutions to problems you may be having ...

Page 82: ...o stain your skin or clothing When removing jammed documents or paper If paper is jammed remove it carefully so that no pieces of paper remain inside the machine according to the displayed message Also do not put your hand in an area other than indicated areas as this may result in personal injuries or burns IMPORTANT IMPORTANT If the jammed paper is torn Remove all torn pieces to avoid further ja...

Page 83: ...dure below to remove jammed documents 1 Open the feeder cover and lift the lock release lever 2 Remove any jammed document by pulling it gently 3 Hold the green grip and then open the inner cover 4 Remove any jammed document by pulling it gently 5 Close the inner cover 6 Replace the release lever and close the feeder cover ...

Page 84: ...the scanning platform and then open the toner cover 2 Remove the toner cartridge 3 Remove any jammed paper by pulling it gently 4 Push up the green colored part A and then pull the paper exit guide B to open B A 5 Remove any jammed paper by pulling it gently 6 Lift the paper exit guide and then firmly close it Ensure that each end of the paper exit guide is closed ...

Page 85: ... edge emerges hold both sides of the jammed paper and carefully pull it out 9 Insert the toner cartridge close the toner cover and then lower the scanning platform CAUTION A A A B Do not touch the fixing unit A Touching the fixing unit A may cause burns as it becomes very hot during use Do not touch the transfer roller B Touching the transfer roller may damage the machine ...

Page 86: ... then remove any paper loaded in the paper cassette 2 Remove any jammed paper by pulling it gently 3 Reload paper into the paper cassette and then close the front cover 3 Step Step Check and remove the jammed paper in the rear cover 1 Open the rear cover 2 Remove any jammed paper by pulling it gently 3 Close the rear cover ...

Page 87: ... full If there are any jobs waiting to be sent or printed wait until the jobs are complete Split the job into smaller subsets or reduce the scanning resolution and try to send them again p 51 Memory is full Scanning canceled Print Print pages successfully scanned or cancel the job Split the job into smaller subsets or change the Original Type Change the document type in Photo Text order Cart parts...

Page 88: ...t what type of fax machine is being used and then send the document to a G3 fax machine If the recipient does not have a G3 fax machine send the document again using a communication mode that is compatible with the recipient s fax machine 012 The recipient s machine has run out of paper Ask the recipient to ensure that paper is loaded in their machine 018 You cannot send a fax because the line is ...

Page 89: ...rly p 22 Change the Special Mode V setting from the operation panel Paper creases Verify that the appropriate paper is being used p 22 Print a test page with new paper Verify that the paper is loaded properly p 19 Remove any foreign objects inside the machine Change the Special Mode V setting from the operation panel Printing is uneven Verify that the appropriate paper is being used p 22 Print a t...

Page 90: ...e Special Print Adjustment settings from the printer driver Smudge marks of spattering toner appear around the text or as patterns Verify that the appropriate paper is being used p 22 Change the Special Mode U settings from the operation panel The overall print result is dark Adjust the copy density settings p 31 If the machine is exposed to direct sunlight or strong light move the machine to anot...

Page 91: ...the following information ready when you contact Canon Product name Serial number Place of purchase Nature of problem Steps you have taken to solve the problem and the results If you cannot solve the problem Verify that the cables are connected properly and that the power is switched ON See the Starter Guide 1 Verify that the Error indicator is not on or blinking Make sure that paper is loaded pro...

Page 92: ...ng a voice call A Set the fax receive mode to Answering Machine and then set the answering machine to activate after a few rings The machine will detect a fax signal before the answering machine activates if the answering machine is set to activate after at least two rings For details about how to change the number of rings see the answering machine s manual Fax Q The connected external telephone ...

Page 93: ...ion The remaining Clean Earth initiatives are supported in the U S through sponsorships of the National Park Foundation the National Wildlife Federation and The Nature Conservancy and in Canada through donations to the World Wildlife Fund Canada and The Nature Conservancy of Canada Since its inception The Canon Cartridge Recycling Program has collected huge amount of cartridges that otherwise woul...

Page 94: ...of empty cartridges into the Canon collection box Seal the box Apply the Canon Canada Inc Canada Post label provided in this brochure Canon s labels are specially marked so that Canon pays the postage Deliver to any local Canada Post outlet or franchise Customers who hold a Commercial pick up agreement with Canada Post may have their collection box picked up Working to preserve endangered species ...

Page 95: ...NG Do not disassemble or modify the machine There are high temperature and high voltage components inside the machine which may result in a fire or electrical shock Do not allow children to touch or play with the power cord and cables or internal or electrical parts Doing so may result in serious personal injury Please contact an authorized Canon dealer if the machine makes an unusual noise emits ...

Page 96: ... guide only If you are uncertain about the legality of using your product to scan print or otherwise reproduce any particular document and or of the use of the images scanned printed or otherwise reproduced you should consult in advance with your legal advisor for guidance Paper Money Money Orders Certificates of Deposit Postage Stamps canceled or uncanceled Identifying Badges or Insignias Selecti...

Page 97: ...duct identifier that has the format US AAAEQ TXXXX The digits represented by are the REN without a decimal point e g 10 is a REN of 1 0 An FCC compliant telephone line cable and modular plug is provided with this equipment This equipment is designed to be connected to the telephone network or premise wiring using a compatible modular jack that is Part 68 compliant This equipment may not be used on...

Page 98: ...me cases the company s inside wiring associated with a single line individual service may be extended by means of a certified connector assembly telephone extension cord The customer should be aware that compliance with the above conditions may not prevent deterioration of service in some situations Repairs to certified equipment should be made by an authorized Canadian maintenance facility design...

Page 99: ...Gouvernement canadien et désignée par le fournisseur Toute réparation ou modification que pourrait faire I utilisateur de cet appareil ou tout mauvais fonctionnement donne à la compagnie de télécommunication le droit de débrancher I appareil Pour sa propre protection I utilisateur doit s assurer que les prises de terre de I appareil d alimentation les lignes téléphoniques et les tuyaux métalliques...

Page 100: ...Success NY 11042 U S A CANON EUROPA N V Bovenkerkerweg 59 61 1185 XB Amstelveen The Netherlands CANON CHINA CO LTD 15F Jinbao Building No 89 Jinbao Street Dongcheng District Beijing 100005 PRC CANON SINGAPORE PTE LTD 1 HarbourFront Avenue 04 01 Keppel Bay Tower Singapore 098632 CANON AUSTRALIA PTY LTD 1 Thomas Holt Drive North Ryde Sydney NSW 2113 Australia CANON GLOBAL WORLDWIDE SITES http www ca...

Reviews: