background image

Video

58

2

Select (

) the scene you 

want to delete.

This step is not necessary to delete 
all scenes.

3

Delete the scene(s).


[

DELETE]  

Desired 

option  

[YES]  

[OK]  

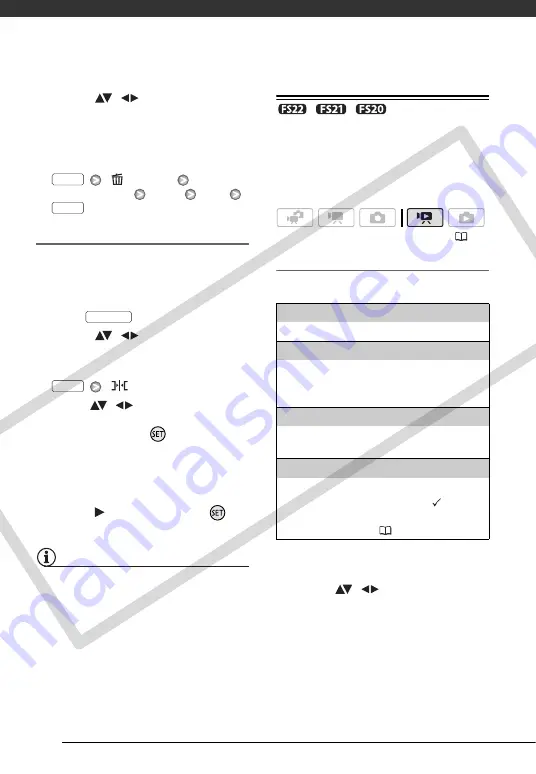
Moving Scenes in the Playlist

Move the scenes in the playlist to play 
them back in the order of your choice.

1

Open the playlist index screen.

In the original movies index screen, 
press .

2

Select (

) the scene you 

want to move.

3

Open the screen to move scenes.


  [

  MOVE]

4

Move (

) the orange marker 

to the desired position of the 
scene and press 

.

The original position of the scene 
and the current position of the 
marker are displayed at the bottom 
of the screen.

5

Select (

) [YES] and press 

 to 

move the scene.

NOTES

You may not be able to move scenes in 
the playlist if there is not enough space 
available in the memory.

/

/

 Copying Scenes

You can copy original movies or the 
entire playlist only from the built-in 
memory to the corresponding location 
on the memory card.

Copying Original Movies

Options

1

Open the original movies index 
screen of the built-in memory.

2

Select (

) the scene you 

want to copy to the memory card, 
or a scene recorded on the date 
you want to copy.

This step is not necessary to copy all 
scenes or previously selected 
scenes.

FUNC.

FUNC.

PLAYLIST

FUNC.

(

25)

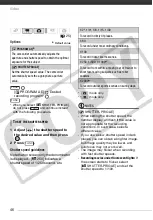
[ALL SCENES]

Copies all the scenes to the memory card.

[ALL SCENES (THIS DATE)]

Copies to the memory card all the scenes that 
were recorded on the same day as the selected 
scene.

[ONE SCENE]

Copies only the scene marked with the orange 
selection frame to the memory card.

[SELECTED SCENES]

Copies to the memory card all the scenes 
selected in advance (marked with a 


checkmark). Refer to 

Pre-selecting Recordings 

from the Index Screen (

42).

COP

Y

Summary of Contents for FS20

Page 1: ...PUB DIE 323 Digital Video Camcorder Instruction Manual COPY...

Page 2: ...of the following measures Reorient or relocate the receiving antenna Increase the separation between the equipment and receiver Connect the equipment into an outlet on a circuit different from that t...

Page 3: ...ns should be followed 17 Cleaning Unplug this product from the wall outlet before cleaning Do not use liquid or aerosol cleaners The product should be cleaned only as recommended in this manual 18 Acc...

Page 4: ...product c If the product has been exposed to rain or water d If the product does not operate normally even if you follow the operating instructions Adjust only those controls that are covered by the o...

Page 5: ...use functions The following are just but a few examples of the many functions that can enrich your shooting experience Dual Shot 25 With Dual Shot mode recording is as simple as pressing a single but...

Page 6: ...Controller only and Accessories 23 Adjusting the Position and Brightness of the LCD Screen 25 Basic Operation of the Camcorder 25 Operating Modes 26 Joystick and Joystick Guide 27 Using the Menus 28...

Page 7: ...cting Recordings from the Index Screen 43 Deleting Scenes 44 Advanced Functions 44 Special Scene Recording Programs 45 Controlling Shutter Speed and Other Functions while Shooting 47 Mini Video Light...

Page 8: ...nd Exposure Bracketing 67 Histogram Display 67 Protecting Photos 68 Copying Photos 69 Other Functions You Can Use When Taking Photos 69 Printing Photos 69 Printing Photos 70 Selecting the Print Settin...

Page 9: ...zer etc 88 Memory Operations Initialization etc 88 Display Setup LCD Brightness Language etc 90 System Setup Speaker Volume Beep etc 92 Date Time Setup 93 Trouble 93 Troubleshooting 97 List of Message...

Page 10: ...ing terms are used in this manual When not specified as memory card or built in memory the term memory by itself refers to both only Scene refers to one movie unit from the point you press the button...

Page 11: ...t Date of Purchase Model Name FS22 A FS21 A FS20 A FS200 A Purchased From Serial No Dealer Address Dealer Phone No Special Scene Recording Programs Recording in a very bright ski resort or capturing t...

Page 12: ...Utility Ver 1 For transferring music for Video Snapshot and slideshow playback to the camcorder PIXELA Application Disc Ver 1 Disc 2 CD ROM ImageMixer 3 SE Ver 4 Video Tools For managing editing and p...

Page 13: ...o Snapshot button 47 print share button 70 80 DISP on screen display button 54 67 BATT INFO button 18 USB terminal 75 AV OUT H terminal 75 MIC terminal red 55 Speaker 38 Strap mount 22 ACCESS memory a...

Page 14: ...o button 35 stop button 38 Zoom out W wide angle button 35 play pause button 38 START STOP button 34 FUNC button 27 84 Joystick 26 PHOTO button 60 Zoom lever 35 POWER button Tripod socket 105 Battery...

Page 15: ...button 27 86 PLAYLIST button 56 Navigation buttons frame reverse button 39 fast reverse button 39 play button 38 pause button 38 stop button 38 PHOTO button 60 Zoom buttons 35 SET button frame advance...

Page 16: ...86 Pre recording function 49 Memory operation 18 Number of scenes recorded record pause Time code hours minutes seconds while recording Remaining recording time On the memory card In the built in memo...

Page 17: ...mber of photos available 18 On the memory card In the built in memory Self timer 49 AF frame 87 Joystick guide 26 Mini video light 47 Focus and exposure lock 60 Camcorder shake warning 87 Remote senso...

Page 18: ...will ensure that the remaining recording time will be displayed accurately Depending on the conditions under which the camcorder and the battery pack are used the actual battery charge may not be ind...

Page 19: ...times and recording playback times with a full battery pack refer to the tables on pages 112 113 1 Connect the power cord to the compact power adapter 2 Plug the power cord into a power outlet 3 Conn...

Page 20: ...de it toward the lens until you hear a click IMPORTANT Turn off the camcorder before connecting or disconnecting the compact power adapter After turning off the camcorder important data is updated in...

Page 21: ...ry packs continue to discharge naturally Therefore charge them on the day of use or the day before to ensure a full charge We recommend that you prepare battery packs to last 2 to 3 times longer than...

Page 22: ...EMOTE is not set to OFF 90 Otherwise replace the battery Accessories Fasten the grip belt Adjust the grip belt so that you can reach the zoom lever with your index finger and the button with your thum...

Page 23: ...trap through the rear bracket on the camcorder 2 Thread the strap through the padded handgrip and then pass it through the front bracket on the camcorder 3 Fasten the grip belt as necessary attach the...

Page 24: ...the brightness of the screen to dim normal or bright To set the screen to dim turn on LCD DIMMER s 88 To toggle between normal and bright or to turn off LCD DIMMER perform the following procedure Whil...

Page 25: ...amcorder s settings to your preference Turn the camera mode dial to to set the camcorder to mode You do not need to worry about any settings and can shoot video using just 34 or take photos using just...

Page 26: ...e following settings in advance before setting the camcorder to mode Recording mode of movies Size quality of photos Widescreen Auto slow shutter All settings in the SYSTEM SETUP menu LCD screen dimme...

Page 27: ...and settings refer to the appendix Menu Options Lists 84 Selecting a FUNC Menu Option in Recording Mode 1 Press 2 Select the icon of the function you want to change from the left side column Menu ite...

Page 28: ...ss You can press to close the menu at any time Setting the Date and Time You will need to set the date and time of the camcorder before you can start using it The DATE TIME screen will appear automati...

Page 29: ...e NOTES If you changed the language by mistake select the menu item with the mark and change the setting The displays and that appear in some menu screens refer to the name of buttons on the camcorder...

Page 30: ...Preparations 30 To adjust for daylight saving time select the area name marked with a FUNC COPY...

Page 31: ...k for the Speed Class logo on the package Inserting and Removing a Memory Card Make sure to initialize all memory cards before using them with this camcorder 32 1 Turn off the camcorder Make sure that...

Page 32: ...to use Press For each media you can check the total used and approximate available space The approximate available space will depend on the recording mode for movies or size quality for photos curren...

Page 33: ...riginal recordings cannot be recovered Make sure you back up important recordings in advance using an external device 77 Music files for Video Snapshot will also be erased Use the supplied software Mu...

Page 34: ...ailing to do so may result in permanent data loss or damage to the memory Do not open the memory card slot cover Do not disconnect the power source or turn off the camcorder Do not change the operatin...

Page 35: ...ital Zoom The camcorder offers three types of zoom optical advanced and digital zoom In mode all three types are available In mode only the advanced zoom is available in mode only the optical zoom is...

Page 36: ...sses the image digitally to obtain a larger zoom range without any deterioration in image quality When recording movies with a 16 9 aspect ratio the field of view picture angle will change Refer to th...

Page 37: ...on the shooting conditions 1 With the camcorder on and in a recording mode close the LCD panel A beep will sound and the ON OFF CHG power charge indicator will change to orange to indicate the camcor...

Page 38: ...again to pause the playback Press to stop the playback and return to the index screen 1 Push the joystick to display the joystick guide 2 Push the joystick to select the top row 3 Adjust the volume T...

Page 39: ...he joystick guide Select the middle row Push the joystick toward or Alternatively press or on the wireless controller Frame Advance Reverse only In playback pause mode press or on the wireless control...

Page 40: ...te You can search for all the recordings you made on a particular date for example to find all the movies you shot during a special event POINTS TO CHECK Selecting scenes by recording date is availabl...

Page 41: ...t recordings appear in black 3 Move the cursor to the desired date When you move the cursor to a date displayed in white a thumbnail showing a photo from the first scene recorded on that date will be...

Page 42: ...screen in order to perform certain actions on them collectively all at once mode Delete 43 copy only 58 or add the selected scenes to the playlist 56 mode Delete 65 copy only 68 or protect 67 the sel...

Page 43: ...space on the memory To delete scenes in the playlist refer to Deleting Scenes from the Playlist 57 Options 1 Select the scene you want to delete or a scene recorded on the date you want to delete This...

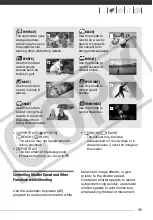
Page 44: ...the memory 32 You may not be able to delete scenes recorded or edited using another device Special Scene Recording Programs Recording in a very bright ski resort or capturing the full colors of a suns...

Page 45: ...cord subjects moving quickly use slower shutter speeds to add motion blur emphasizing the feel of movement PORTRAIT The camcorder uses a large aperture achieving a focus on the subject while blurring...

Page 46: ...image quality may be lower and autofocus may not work well The image may flicker when recording with fast shutter speeds Recording movies under fluorescent lights If the screen starts to flicker sele...

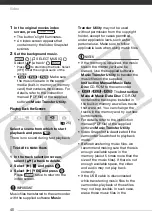
Page 47: ...se the supplied software Music Transfer Utility to transfer in advance the music files on the supplied Instruction Manual Music Data Disc CD ROM For details refer to the software s instruction manual...

Page 48: ...s for personal use Make sure to follow applicable laws when using music files NOTES If the memory is initialized the music files in the memory will also be erased Use the supplied software Music Trans...

Page 49: ...llowing operations are not performed before 3 seconds have elapsed Turning on pre recording Exiting standby mode Stopping a recording Pre recording will be turned off when any of the following operati...

Page 50: ...the automatic backlight correction POINTS TO CHECK Select a recording program other than FIREWORKS Automatic Backlight Correction When shooting subjects with a strong light source behind them you can...

Page 51: ...to autofocus Infinity Focus Use this function when you wish to focus on faraway subjects such as mountains or fireworks Instead of step 3 in the previous procedure Push the joystick toward and hold i...

Page 52: ...ups Subjects in a single color sky sea or forest Under mercury lamps and certain types of fluorescent lights Image Effects You can use the image effects to change the color saturation and contrast to...

Page 53: ...art recording with a fade in Activate the selected fader while recording then press to fade out and pause the recording mode Activate the selected effect while recording or in record pause mode mode A...

Page 54: ...isplays on off in the following sequence mode All displays on Most displays off mode All displays on Data code only All displays off mode All displays on Regular displays only removes the histogram an...

Page 55: ...operating mode is changed to or mode Using an External Microphone You can attach a commercially available microphone for recording movies When recording in very quiet surroundings the built in microp...

Page 56: ...he confirmation screen appears press The video from the division point to the end of the scene will appear as a new scene in the index screen NOTES In this mode the scene playback will pause only at p...

Page 57: ...hat were originally recorded in the built in memory You may not be able to add scenes to the playlist if they were recorded or edited using another device or if there is not enough space available in...

Page 58: ...ugh space available in the memory Copying Scenes You can copy original movies or the entire playlist only from the built in memory to the corresponding location on the memory card Copying Original Mov...

Page 59: ...ANT Observe the following precautions while the ACCESS indicator is on or flashing Failing to do so may result in permanent data loss Do not open the memory card slot cover Do not disconnect the power...

Page 60: ...s fully The ACCESS indicator will flash as the photo is being recorded IMPORTANT Observe the following precautions while the ACCESS indicator is on or flashing Failing to do so may result in permanent...

Page 61: ...ded use LW 1152x648 To print photos on wide sized photo paper or to view photos on a TV with a 16 9 aspect ratio L 1152x864 or L 1024x768 To print photos up to L size 9 x 13 cm 3 5 x 5 in or postcard...

Page 62: ...and press Viewing Photos When the camera mode dial is set to or 1 Press Even if the camcorder is off pressing will turn on the camcorder in playback mode The original movies index screen appears afte...

Page 63: ...p Function When you have recorded a large number of photos you can jump 10 or 100 photos at a time 1 Push the joystick to display the joystick guide 2 Select and press 3 Select JUMP 10 PHOTOS or JUMP...

Page 64: ...computer Photos whose file names have been changed NOTES When playing back a slideshow make sure the music files are in the same media built in memory or memory card that contains the photos For deta...

Page 65: ...memory and those recorded on the memory card Refer to Selecting What Recordings to Play Back 40 2 Select the photo you want to delete This step is not necessary to delete all photos or previously sel...

Page 66: ...cording conditions and subjects The actual number of frames per second will be lower when the shutter speed is 1 30 or slower Number of photos per second Normal speed 3 photos High speed 5 photos Maxi...

Page 67: ...ff the histogram by pressing 54 Protecting Photos You can protect photos from accidental erasure Protecting Single Photos 1 Open the photo selection screen PROTECT PROTECT appears on the screen 2 Sele...

Page 68: ...tion YES OK If you selected SELECTED PHOTOS or ALL PHOTOS you can press to interrupt the operation while it is in progress This step is not required when copying a single photo IMPORTANT Observe the f...

Page 69: ...onnect the camcorder to the printer using the supplied USB cable Connection Refer to Connection Diagrams 75 If the device type selection screen appears select PC PRINTER and press Select in advance th...

Page 70: ...rder using the compact power adapter Refer also to the printer s instruction manual If you have no intention to use the optional DW 100 DVD Burner you can set USB SETTING to PC PRINTER 90 so the devic...

Page 71: ...the camcorder and printer and turn off the camcorder PAPER PAPER SIZE Available paper sizes vary depending on the printer model PAPER TYPE Select PHOTO FAST PHOTO PLAIN or DEFAULT PAGE LAYOUT Select D...

Page 72: ...any device other than this camcorder If BUSY does not disappear disconnect the USB cable and restore the connection after a short while Print Orders You can mark in advance the photos you want to pri...

Page 73: ...ndex Screen Options PRINT ORDER Desired option YES OK Printing the Photos Marked with Print Orders 1 Connect the camcorder to the printer using the supplied USB cable Connection Refer to Connection Di...

Page 74: ...to page 71 Restarting Printing Open the print settings menu as explained in step 2 In the print settings menu select RESUME and press The remaining photos will be printed Printing cannot be restarted...

Page 75: ...al Access Open the LCD panel Connection Type Analog Output only Connect to a TV or VCR with audio video input terminals If the TV cannot automatically detect and change the aspect ratio 90 change TV T...

Page 76: ...ruction manual of the connected TV 4 Set the camcorder to mode 38 or mode 62 Start the playback of movies or photos NOTES We recommend powering the camcorder using the compact power adapter Sound from...

Page 77: ...tallation Guide Saving your Recordings without a Computer If you prefer to save your recordings without having to use a computer you can use the optional DW 100 DVD Burner to create DVD discs of your...

Page 78: ...ection screen appears select DVD BURNER and press When the connection is completed NO DISC will be displayed 3 Insert a brand new disc into the DVD burner Use the OPEN CLOSE button on the DVD burner t...

Page 79: ...external device and make sure it is compatible IMPORTANT While the camcorder is connected to the DVD burner do not open the memory card slot cover and do not remove the memory card Observe the followi...

Page 80: ...rder Stop playback NOTES We recommend powering the camcorder using the compact power adapter By default on screen displays will be embedded in the output video signal You can change the displays by re...

Page 81: ...work correctly depending on the software and the specifications settings of your computer If you wish to use the image files on your computer make copies of them first Use the copied files retaining...

Page 82: ...o cancel the transfer select CANCEL and press or press 1 Select a transfer option and press 2 Select the photo you wish to transfer and press SELECT TRANSFER Repeat this step to select other photos to...

Page 83: ...s to set the transfer order A checkmark appears in the box next to the transfer order icon Press again to cancel the transfer order 4 Repeat steps 2 3 to mark additional photos with transfer orders or...

Page 84: ...FUNC Menu Recording Modes Appendix Menu Options Lists Menu item Setting options Recording programs PROGRAM AE SHUTTER PRIO AE 45 PORTRAIT SPORTS NIGHT SNOW BEACH SUNSET SPOTLIGHT FIREWORKS 44 White b...

Page 85: ...iew NO YES 68 From the index screen ALL PHOTOS ONE PHOTO SELECTED PHOTOS CANCEL 68 ADD TO PLAYLIST 2 ALL SCENES THIS DATE ONE SCENE SELECTED SCENES CANCEL 56 DIVIDE 4 56 MOVE 3 58 PROTECT From single...

Page 86: ...ilizer is designed to compensate for a normal degree of camcorder shake The image stabilizer may not be able to successfully eliminate all blur if the camcorder or the subject is moving too much The i...

Page 87: ...s automatically fixed on it OFF No AF frame will appear and the photo will be recorded immediately after you press When the recording program is set to FIREWORKS focus priority is automatically set to...

Page 88: ...r of photos are approximate and based on the recording mode and photo quality size settings currently in use In the CARD INFO screen you can also verify the Speed Class of the memory card The maximum...

Page 89: ...the LCD screen so you can check the audio recording level while recording TV SCREEN When set to ON the camcorder s on screen displays will appear also on the screen of a TV or monitor connected using...

Page 90: ...operated with the wireless controller BEEP A beep will accompany some operations like turning on the camcorder the self timer countdown etc POWER SAVE In order to save power when the camcorder is powe...

Page 91: ...ion protocol to use when connecting the camcorder to an external device using the USB cable DVD BURNER To connect exclusively to the optional DW 100 DVD Burner PC PRINTER To connect to a computer a pr...

Page 92: ...t the date format to be used for most on screen displays and if selected for the date printed on photos Menu item Setting options T ZONE DST List of world time zones 29 DATE TIME 28 DATE FORMAT Y M D...

Page 93: ...until its temperature is below 40 C 100 F Charge the battery pack in temperatures between 0 C and 40 C 32 F and 104 F The battery pack is damaged Use a different battery pack The camcorder cannot com...

Page 94: ...he camcorder will not focus Autofocus does not work on the subject Focus manually 51 Lens is dirty Clean the lens with a soft lens cleaning cloth 108 Never use tissue paper to clean the lens A vertica...

Page 95: ...nscreen Displays lights up in red Battery pack is exhausted Replace or charge the battery pack 19 appears on the screen The camcorder cannot communicate with the battery pack attached so the remaining...

Page 96: ...ctual levels This is not a malfunction The picture is displayed correctly but there is no sound from the built in speaker Speaker volume is turned off Adjust the volume 38 If the STV 250N Stereo Video...

Page 97: ...SETTING is set to PC PRINTER Set it to DVD BURNER or to CONNECT SET 90 List of Messages Following the list of messages for the camcorder you can find separate lists for printing related messages 103 a...

Page 98: ...The memory card in the camcorder was initialized using a computer Initialize the memory card with this camcorder 32 CANNOT ENTER THE STANDBY MODE NOW The camcorder cannot enter the standby mode if the...

Page 99: ...is exhausted Replace or charge the battery pack 19 CHECK THE CARD Cannot access the memory card Check the memory card and make sure it is inserted correctly 31 A memory card error occurred The camcord...

Page 100: ...because there was not enough available space in the memory Delete some scenes 43 PLAYLIST IS FULL CANNOT DIVIDE THE SCENE Scene could not be divided The playlist cannot contain more than 99 scenes De...

Page 101: ...B cable and decrease the number of photos on the memory card to fewer than 1 800 If a dialog box appeared on the computer screen close it Disconnect the USB cable and restore the connection after a sh...

Page 102: ...formed Wait until the DVD burner dries completely before resuming use 108 The disc may not be loaded correctly Try removing the disc and reinserting it ERROR READING THE DATA Error while reading the r...

Page 103: ...r camcorder has a different compression or was edited on a computer HARDWARE ERROR Cancel printing Turn off the printer and turn it back on Check the printer status If the printer is equipped with a b...

Page 104: ...d that may require repairs Canon PIXMA printers the printer s green power lamp and orange error lamp flash alternately Disconnect the USB cable and turn off the printer Unplug the printer s power cord...

Page 105: ...right subject Do not use or store the camcorder in dusty or sandy places The camcorder is not waterproof avoid also water mud or salt If any of the above should get into the camcorder it may damage th...

Page 106: ...not bear the Intelligent System mark For your safety battery packs that do not bear the Intelligent System mark 112 will not be charged even if you attach them to this camcorder or to the optional CG...

Page 107: ...r adapter to the camcorder and leave it connected for about 24 hours with the camcorder off Lithium Button Battery Do not pick up the battery using tweezers or other metal tools as this will cause a s...

Page 108: ...mcorder Body Use a soft dry cloth to clean the camcorder body Never use chemically treated cloths or volatile solvents such as paint thinner Lens If the lens surface is dirty the autofocus may not wor...

Page 109: ...pply between 100 and 240 V AC 50 60 Hz Consult a Canon Service Center for information on plug adapters for overseas use Playback on a TV Screen You can only play back your recordings on TVs compatible...

Page 110: ...cks that are pre installed in the built in memory of the FS22 FS21 FS20 MUSIC 2 contains tracks different from those in MUSIC 1 Use tracks from both folders to your liking or to restore the pre instal...

Page 111: ...ideo Cable CA 570 Compact Power Adapter SC 2000 Soft Carrying Case WS 30 Wrist Strap SS 600 SS 650 Shoulder Strap SD SDHC memory card BP 808 Battery Pack Computer TV WL D88 Wireless Controller Card re...

Page 112: ...le are approximate and vary according to charging conditions and initial charge of the battery pack When the camcorder charges an exhausted battery pack for the first 20 minutes it can be used for 3 t...

Page 113: ...ted operations such as start stop zooming and power on off Shoulder Strap You can attach a shoulder strap for more security and portability Recording mode XP SP LP Usage time Maximum recording time 21...

Page 114: ...ontroller D83 0770 000 STV 250N Stereo Video Cable 3067A002AA D82 0590 002 IFC 400PCU USB Cable 9370A001AA WS 30 Wrist Strap D81 1530 000 Optional Accessories CG 800 Battery Charger 2590B002AA SS 650...

Page 115: ...in memory 32 GB XP 7 hr 20 min SP 11 hr 5 min LP 20 hr 50 min Built in memory 16 GB XP 3 hr 40 min SP 5 hr 30 min LP 10 hr 20 min Built in memory 8 GB XP 1 hr 50 min SP 2 hr 45 min LP 5 hr 10 min 4 GB...

Page 116: ...hotos 1152 x 864 1152 x 648 640 x 480 pixels 1024 x 768 640 x 480 pixels 1 This camcorder supports Exif 2 2 also called Exif Print Exif Print is a standard for enhancing the communication between camc...

Page 117: ...y 100 240 V AC 50 60 Hz Rated output consumption 8 4 V DC 1 5 A 29 VA 100 V 39 VA 240 V Operating temperature 0 40 C 32 104 F Dimensions 52 x 29 x 90 mm 2 1 x 1 1 x 3 5 in Weight 135 g 4 8 oz Battery...

Page 118: ...ay 41 Condensation 108 Connections to external devices 75 Continuous shooting 66 Copying1 Movies 58 Photos 68 D Data code 89 Date and time 28 Date format 92 Daylight saving time 29 Time zone 29 Deleti...

Page 119: ...uick Start function 37 R Recording Movies 34 Photos 60 Recording mode 35 Recording programs 44 45 Recording time 35 Remote sensor 1 22 RESET 96 Reviewing photos 86 S Screen icons 16 SD SDHC memory car...

Page 120: ...e trademarks of Apple Inc registered in the U S and other countries Manufactured under license from Dolby Laboratories Dolby and the double D symbol are trademarks of Dolby Laboratories Other names an...

Page 121: ...ndling accident improper maintenance or failure to follow operating instructions B If the Equipment is defective as a result of leaking batteries sand dirt or water damage C If defects or damages are...

Page 122: ...ish of the Equipment media nor does it apply to Equipment purchased outside Canada If the Equipment contains a hard disk drive Canon Canada recommends that data stored on that drive be duplicated or b...

Page 123: ...s call the Canon Canada Information Center toll free in Canada only at 1 800 OK CANON 1 800 652 2666 Si vous avez des questions veuillez t l phoner 1 800 OK CANON 1 800 652 2666 sans frais au Canada s...

Reviews: