background image

COPYRIGHT © 1999 CANON INC.        CANON CLC1120/1130/1150 REV.0 MAR. 1999 PRINTED IN JAPAN (IMPRIME AU JAPON)

vii

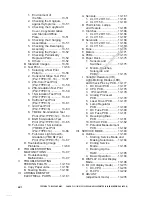
CHAPTER 5  LASER EXPOSURE SYSTEM

I.

OPERATIONS .............................5-1
A. Functions................................5-1
B. Sequence of Operations

(laser exposure system) .........5-2

II.

GENERATING THE BD
SIGNAL .......................................5-3

III.

LASER DRIVER CIRCUIT ..........5-4
A. Controlling the Laser

System ...................................5-4

B. Controlling the Temperature

of the Laser Unit .....................5-5

IV.

LASER SCANNER MOTOR .......5-6

V.

DISASSEMBLY/ASSEMBLY .......5-7
A. Electrical Parts .......................5-8

1. Removing the Original

Scanner Motor
Dirver PCB .......................5-8

2. Removing the Laser

Scanner Unit ....................5-8

3. Removing the Laser

Controller PCB/Laser
Driver PCB .................... 5-10

4. Adjusting Laser Power .. 5-11
5. Adjusting the Laser ....... 5-13

2. Bank Note Detection

Mechanism .................... 4-14

P. CMYBk/RGB Integration ..... 4-15
Q. Texture Processing ............. 4-15
R. Color Conversion ................ 4-15

V.

DISASSEMBLY/ASSEMBLY .... 4-16
A. Electrical Parts .................... 4-17

1. Removing the CCD

Unit ................................ 4-17

2. Removing the Analog

Processor PCB ............. 4-18

3. Removing the Image

Processor PCB (IP-MAIN,
IP-ED, IF, IP-ECO) ........ 4-19

CHAPTER 6  IMAGE FORMATION SYSTEM

I.

IMAGE FORMATION SYSTEM ..... 6-1
A. Outline ....................................6-1
B. Controlling

the C Sensor ..........................6-3

C. Sequence of Operations (image

formation system) ..................6-7

II.

IMAGE STABILIZATION ..............6-8
A. Outline ....................................6-8
B. Controlling the Surface Potential

of the Drum ......................... 6-10
1. Outline ........................... 6-10
2. Measuring the Surface

Potential of the Drum .... 6-10

3. Measuring the Dark Area

Potential Attenuation ..... 6-11

4. Controlling the Environment

Contrast Potential .......... 6-11

5. Setting the Grid Bias and

the Developing Bias ...... 6-12

6. Sequence of Operations

(initial drum surface
potential control timing) .. 6-13

7. Auto Gradation Correction in

User Mode .................... 6-14

8. Checking the LED Activation

for the Potential
Measurement Circuit ..... 6-14

III.

CONTROLLING THE CHARGING
MECHANISM ........................... 6-17
A. Controlling the Primary

Charging Mechanism and
the Grid Bias ....................... 6-17
1. Operation ...................... 6-17
2. Protection Circuit ........... 6-17

B. Controlling the

Developing Bias .................. 6-18
1. Operation ...................... 6-18
2. When Controlling the M

Developing Bias ............ 6-19

fineline6

service-repairmanual.com

Summary of Contents for FY8-13G3-000

Page 1: ...T 1999 CANON INC CANON CLC1120 1130 1150 REV 0 MAR 1999 PRINTED IN JAPAN IMPRIME AU JAPON REVSION 0 MAR 1999 FY8 13G3 000 COLOR LASER COPIER 1120 1130 1150 fineline6 s e r v i c e r e p a i r m a n u a l c o m ...

Page 2: ...ANY QUESTIONS REGARDING INFORMATION CONTAINED HEREIN SHOULD BE DIRECTED TO THE COPIER SERVICE DEPARTMENT OF THE SALES COMPANY THIS DOCUMENTATION IS INTENDED FOR ALL SALES AREAS AND MAY CONTAIN IN FORMATION NOT APPLICABLE TO CERTAIN AREAS COPYRIGHT 1999 CANON INC Printed in Japan Imprimé au Japon Use of this manual should be strictly su pervised to avoid disclosure of confidential information Prepa...

Page 3: ...System discusses the principles of operation used for the mechanical electrical operations of the copier s image processing system It also explains the timing at which the various units involved are operated and shows how they may be disassembled assembled and adjusted Chapter 5 Laser Exposure System discusses the principles of operation used for the mechanical electrical operations of the copier ...

Page 4: ... the purpose of specific functions and the relationship between electrical and mechanical systems with reference to the timing of operation In the diagrams represents the path of mechanical drive where a signal name accompanies the symbol the arrow indicates the direction of the electric signal The expression turn on the power means flipping on the power switch closing the front door and closing t...

Page 5: ...lexing unit RDF E2 Feeds a large number of originals automatically for continuous copying Accepts double sided originals CLC Film Projector D1 Projects 35mm negative or positive film large size negative film or transparencies for making color copies Editor F1 Enables selecting areas and colors using a point pen Stapler Sorter F1 Sorts or groups copies Staples sorted copies CLC Buffer Path Unit 1 L...

Page 6: ...fineline6 s e r v i c e r e p a i r m a n u a l c o m ...

Page 7: ...roduct 1 17 B CDRH Regulations 1 18 C Handling the Laser Assembly 1 19 D Safety of Toner 1 21 VII IMAGE FORMATION 1 22 A Outline 1 22 B Auxiliary Process 1 24 1 Post Cleaning Charging 1 24 I OUTLINE OF OPERATIONS 2 1 A Functional Construction 2 1 B Electrical Circuitry 2 2 1 Outline 2 2 2 CPU PCB 2 2 3 Control Panel 2 2 II BASIC SEQUENCE OF OPERATIONS 2 4 A At Power On 2 4 B Basic Sequence of Oper...

Page 8: ...er Drive Assembly 3 11 1 Removing the Scanner Drive Motor 3 11 2 Adjusting the Tension of the Belt When Mounting the Scanner Drive Motor 3 11 3 Routing the Scanner Cable 3 11 CHAPTER 4 IMAGE PROCESSING SYSTEM I OUTLINE 4 1 II CCD CCD DRIVE 4 2 A Controlling the CCD 4 2 B CCD Driver Circuit 4 2 III ANALOG IMAGE PROCESSING 4 3 IV DIGITAL IMAGE PROCESSING 4 4 A Outline 4 4 B Shading Correction 4 6 a ...

Page 9: ... Processor PCB 4 18 3 Removing the Image Processor PCB IP MAIN IP ED IF IP ECO 4 19 CHAPTER 6 IMAGE FORMATION SYSTEM I IMAGE FORMATION SYSTEM 6 1 A Outline 6 1 B Controlling the C Sensor 6 3 C Sequence of Operations image formation system 6 7 II IMAGE STABILIZATION 6 8 A Outline 6 8 B Controlling the Surface Potential of the Drum 6 10 1 Outline 6 10 2 Measuring the Surface Potential of the Drum 6 ...

Page 10: ... Black Toner 6 35 2 Controlling the Supply of Black Toner 6 35 3 Measuring the Concentration of Black Toner patch detection 6 36 4 Detecting Dirt on the Window 6 38 5 Sequence of Operations measurement 6 39 6 Error Code E020 Related to Control of Toner Concentration 6 40 E Supplying Toner 6 48 V PHOTOSENSITIVE DRUM CLEANER ASSEMBLY 6 49 A Outline 6 49 B Controlling the Reciprocating Mechanism of t...

Page 11: ... 2 Scoop Up Sheet Assembly 6 81 2 Points to Note When Handling the Pre Cleaning Sensor Assembly 6 81 H Black Toner Concentration Sensor Assembly 6 82 1 Removing the Black Toner Concentration Sensor 6 82 2 Removing the No 2 Blade 6 82 I Cleaner Blade Reciprocating Motor 6 83 1 Removing the Reciprocating Motor Assembly 6 83 J Waste Toner Feeding Assembly 6 83 1 Removing the Waste Toner Feedscrew Ass...

Page 12: ...ing the Separation Drum Sheet 7 41 1 Outline 7 41 2 External Brush 7 42 3 Polishing Roller 7 42 E Sequence of Operations transfer drum 7 44 VI DETECTING JAMS 7 45 A Outline 7 45 B Sequence of Operations jam detection 7 47 VII DISASSEMBLY ASSEMBLY PICK UP ASSEMBLY 7 48 A Pickup Assembly 7 49 1 Construction 7 49 2 Removing the Cassette Pickup Assembly Duplexing Pickup Assembly 7 49 3 Removing the Pi...

Page 13: ...ch Assembly 7 80 7 Removing the Registration Roller 7 81 8 Replacing the Registration Roller Releasing Spring Clutch Assembly 7 85 C Transfer Cleaner Unit 7 86 1 Removing the Transfer Cleaner Unit 7 86 2 Removing the Transfer Cleaner Brush 7 86 3 Removing the Scraper upper lower of the Transfer Cleaner Unit 7 86 4 Removing the Transfer Drum Cleaner Assembly Filter 7 87 5 Applying Lubricant to the ...

Page 14: ...Removing the Fixing Lower Roller 8 17 7 Difference among Fixing Rollers upper lower front rear 8 18 8 Removing the Fixing Upper Thermistor 8 19 9 Removing the Fixing Lower Thermistor 8 19 10 Removing the Fixing Thermal Switch lower 8 20 11 Removing the Fixing Thermal Switch upper 8 20 12 Adjusting the Fixing Nip 8 20 B Fixing Cleaner Assembly 8 21 1 Removing the Fixing Upper Cleaning Belt 8 21 2 M...

Page 15: ... Assembly Cover 9 18 6 Transfer Drum Frame Right Cover 9 19 7 Removing the Copyboard Glass 9 19 8 Removing the Upper Cover 9 20 B Control Panel 9 21 1 Removing the Control Panel 9 21 2 Removing the Control Panel PCB 9 21 3 Removing the LCD PCB 9 21 4 Removing the Numeric Key pad PCB 9 22 C Editor 9 23 1 Removing the Editor Controller PCB 9 23 2 Removing the Editor Mirror 9 24 D Flywheel 9 25 1 Rem...

Page 16: ... 10 22 3 Removing the Right Cover 10 22 4 Removing the Upper Cover 10 22 B Paper Deck Related Work 10 23 1 Removing the Deck from the Copier 10 23 2 Removing the Compartment 10 25 3 Changing the Deck Paper Size 10 26 4 Adjusting the Deck Registration 10 27 5 Adjusting the Position of the Roll 10 27 C Drive System 10 28 1 Removing the Deck Pickup Clutch CL102 10 28 2 Removing the Deck Pickup Motor ...

Page 17: ...Copier 11 35 3 Checking Operations 11 37 4 Removing from the Copier 11 46 VII INSTALLING THE REMOTE DIAGNOSTIC DEVICE II 11 47 1 Installing to the Copier 11 47 VIII INSTALLING THE CASSETTE HEATER 11 56 CHAPTER 12 MAINTENANCE AND SERVICING I PERIODICALLY REPLACED PARTS 12 1 II CONSUMABLES AND DURABLES 12 2 A Copier 12 2 B Side Paper Deck 12 3 III SCHEDULED SERVICING CHART 12 4 IV SCHEDULED SERVICIN...

Page 18: ...ALFUNCTIONS 13 97 A Troubleshooting Malfunctions 13 97 V TROUBLESHOOTING FEEDING FAULTS 13 150 A Copy Paper Jams 13 150 B Feeding Faults 13 160 VI ARRANGEMENT OF ELECTRICAL PARTS 13 161 A Sensors 13 161 1 CLC1120 1130 13 161 2 CLC1150 13 163 B Thermistors Lamps and Heaters 13 165 C Clutches 13 166 1 CLC1120 1130 13 166 2 CLC1150 13 167 D Solenoids 13 168 1 CLC1120 1130 13 168 2 CLC1150 13 169 E Fa...

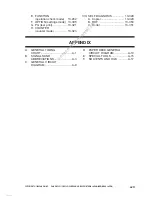
Page 19: ...A 3 C GENERAL CIRCUIT DIAGRAM A 9 D PAPER DECK GENERAL CIRCUIT DIAGRAM A 13 E SPECIAL TOOLS A 15 F SOLVENTS AND OILS A 17 E FUNCTION operation check mode 13 282 F OPTION settings mode 13 305 G PG test print 13 321 H COUNTER counter mode 13 323 VIII SELF DIAGNOSIS 13 329 A Copier 13 329 B RDF 13 350 C Sorter 13 351 fineline6 s e r v i c e r e p a i r m a n u a l c o m ...

Reviews: