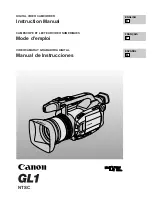
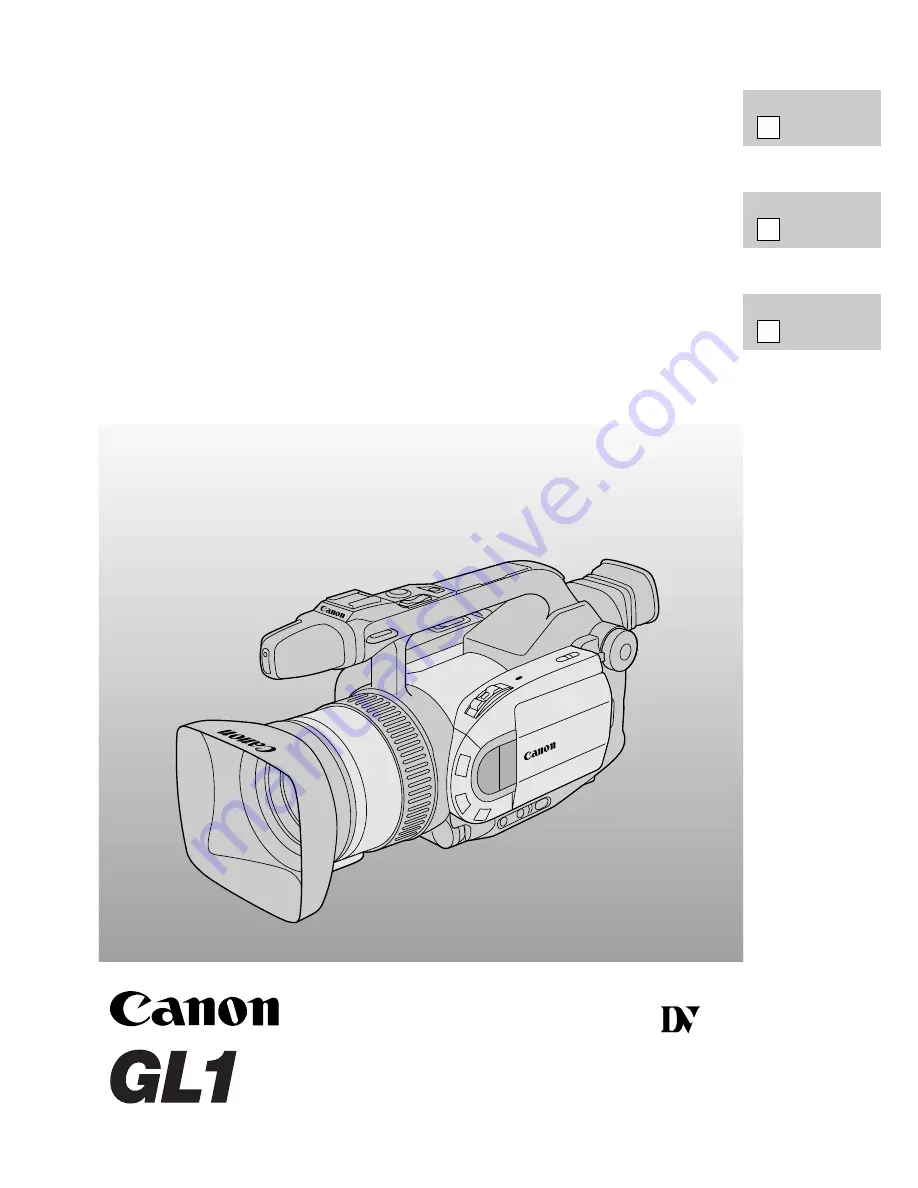
background image

DIGITAL VIDEO CAMCORDER

Instruction Manual

CAMESCOPE ET LECTEUR VIDEO NUMERIQUES

Mode d’emploi

VIDEOCAMARA Y GRABADORA DIGITAL

Manual de Instrucciones

ENGLISH

FRANÇAIS

ESPAÑOL

E

F

Es

Mini

Digital
Video
Cassette

NTSC

Summary of Contents for GL1

Page 1: ... VIDEO CAMCORDER Instruction Manual CAMESCOPE ET LECTEUR VIDEO NUMERIQUES Mode d emploi VIDEOCAMARA Y GRABADORA DIGITAL Manual de Instrucciones ENGLISH FRANÇAIS ESPAÑOL E F Es Mini Digital Video Cassette NTSC ...

Page 2: ...ment into an outlet on a circuit different from that to which the receiver is connected Consult the dealer or an experienced radio TV technician for help Use of shielded cable is required to comply with class B limits in Subpart B of Part 15 of FCC Rules Do not make any changes or modifications to the equipment unless otherwise specified in the manual If such changes or modifications should be mad...

Page 3: ...n to replace your obsolete outlet Do not defeat the safety purpose of the polarized plug 12 Power Cord Protection Power cords should be routed so that they are not likely to be walked on or pinched by items placed upon or against them Pay particular attention to plugs and the point from which the cords exit the product 13 Outdoor Antenna Grounding If an outside antenna is connected to the product ...

Page 4: ...as been dropped or the cabinet has been damaged f When the product exhibits a distinct change in performance This indicates a need for service 20 Replacement Parts When replacement parts are required be sure the service technician has used replacement parts that are specified by Canon or that have the same characteristics as the original part Unauthorized substitutions may result in fire electric ...

Page 5: ... Shift 59 Adjusting Camera Sharpness 60 Adjusting Color Phase 61 Using the Zebra Pattern 62 Adjusting the White Balance 63 For Playback Displaying Data Code 65 Searching the Tape Photo Search Date Search 67 Returning to a Pre Marked Position 68 The Dubbing Function 69 Using the Dubbing Function for the First Time 70 Cut In and Cut Out Adjustments 73 Simple Editing to a VCR 74 Dubbing with Digital ...

Page 6: ... manual thoroughly there are many sophisticated features which will add to your recording enjoyment Getting started To get started we suggest that you master the basic operations of the camcorder first before moving on to use its full range of features For quick reference in addition to the contents and index please refer to Finding Your Way Around the GL1 p 8 Screen Displays p 95 Troubleshooting ...

Page 7: ...le to transfer your favorite still pictures to a PC for image enhancement and printout Optical Image Stabilizer Canon s optical technology stabilizes your recordings even in long telephoto shots 2 5 LCD Screen An LCD screen makes it easy for you to shoot colorful well composed video It is also great for playback Choose to operate the GL1 using the Manual recording program to access the complete se...

Page 8: ... DISPLAY DATA CODE button p 23 65 95 Self timer button p 54 RESET button p 94 Speaker p 27 LCD screen p 25 LCD panel open button p 25 Program selector Easy Recording Auto Manual Sand Snow Spotlight Shutter Priority Aperture Priority Viewfinder p 82 FF button p 28 REW button p 28 PLAY button p 28 PAUSE button p 28 STOP button p 28 REC button p 75 77 Image stabilizer button p 33 Power source attachm...

Page 9: ...rminal p 75 Audio video terminal p 30 S video terminal p 30 DC 5V terminal MIC terminal p 31 80 Grip belt p 82 Cassette compartment cover p 19 Cassette compartment p 19 OPEN button p 19 Standby lever p 21 Stereo microphone p 80 REMOTE terminal p 74 headphone terminal p 27 Viewfinder focusing lever p 82 Carrying handle Start stop button p 21 Focus ring p 58 EJECT button p 19 ...

Page 10: ...EC SEARCH button p 47 ND FILTER button p 42 FOCUS A M button p 58 EXPOSURE dial p 55 D E digital effects ON OFF button p 52 WHITE BALANCE SELECT button p 63 Accessory shoe p 45 Tally lamp p 38 Remote sensor p 36 Power indicator p 28 Strap attachment bar p 82 WHITE BALANCE set button p 63 Record review button p 47 REC SEARCH button p 47 ...

Page 11: ... 35 PHOTO button p 43 TV SCREEN button p 35 95 SELF TIMER button p 54 DATA CODE button p 65 95 REC PAUSE button p 75 ZERO SET MEMORY button p 68 Transmitter Zoom buttons p 24 SET button p 35 MIX BALANCE buttons p 86 Controller buttons p 35 Search buttons p 67 SEARCH SELECT button p 67 AUDIO MONITOR button p 86 AUDIO DUB button p 81 A V INSERT button p 79 REMOTE SET button p 37 button p 29 button p...

Page 12: ...loppy Disk Still Image Recorder CB 900 Car Battery Adapter CA 910 Compact Power Adapter CH 910 Dual Battery Charger Holder Available soon DC 905 DC Coupler SS 650 Shoulder Strap BP 900 Series Battery Pack BP 900 Series Battery Pack HC 4000 System Case Video Head Cleaning Cassette WD 58 Wide converter Available soon 220EX Speedlite 380EX Speedlite 550EX Speedlite BP 900 Series Battery Pack Stereo M...

Page 13: ...m recording time will be almost doubled Battery pack Playback time using the LCD screen BP 914 1 hr 25 min BP 915 1 hr 35 min BP 930 3 hrs 10 min BP 930R 2 hrs 55 min BP 941 4 hrs 15 min These figures show how long you can view playback with the LCD after attaching a fully charged battery pack Playback time will be shortened at low temperatures WD 58 Wide converter This lens decreases focal length...

Page 14: ...accessories or products bearing the same mark C A NON GENU I N E V I D E O A C C E S S O R Y Provided accessories WL D73 Wireless Controller D83 0532 000 CA 910 Compact Power Adapter D85 1022 201 DC 905 DC Coupler D85 1170 201 BP 915 Battery Pack D85 0952 201 SS 650 Shoulder Strap D81 1350 000 S 150 S video Cable D82 0330 202 STV 250N Stereo Video Cable D82 0590 201 Lens Hood D52 0110 000 Lens Cap...

Page 15: ...to the lens with the Canon logo facing to the left 3 Twist it into position clockwise so that the Canon logo is to the top You do not need to assert any pressure screw the hood lightly into place 4 Finally tighten the locking screw To remove reverse the above procedure Since the lens hood cuts stray light that may cause flare and ghost images and protects the lens be sure to attach the hood when y...

Page 16: ...ng the camera to an AC outlet 1 2 3 4 Use the power adapter and the DC coupler to provide your camera with instant power from an AC outlet 1 Attach the DC coupler to the camera Extend the viewfinder and rotate it upwards Align the edge of the DC coupler with the line on the camera Slide the coupler down in the direction of the arrow until it clicks into place 2 Connect the DC coupler to the adapte...

Page 17: ...ndicator glows steadily when the battery pack is fully charged 3 Take the battery pack off the adapter and attach it to the camera Extend the viewfinder and rotate it upwards Align the triangle on the battery pack with the line on the camcorder then slide the battery in the direction of the arrow until it clicks into place 4 Remove the battery pack after use Press and hold the BATTERY RELEASE butt...

Page 18: ... 3 4 in 63 127 5 43 mm Weight 10 7 8 oz 310 g Weight and dimensions are approximate Errors and omissions excepted Subject to change without notice 18 E Quick Overview CA 910 Compact Power Adapter When replacement or repair of any product including power supply is required please return it to the nearest authorized Canon Service Center and have it repaired or replaced with the same number product o...

Page 19: ...d the REC SAVE tab to the top Remove the cassette by pulling it straight out 5 Press the P mark on the compartment until it clicks 6 Click the cover back into place D is a trade mark Notes After loading a cassette use record search p 47 to find the point where you want to start recording Do not interfere with the cassette compartment while it is opening or closing or attempt to close the cover Be ...

Page 20: ...de the tab back so the hole is closed To protect the tape heads transfer cassettes directly from the tape case to the camcorder do not open the tape protect cover or touch the tape itself Do not use cassettes where the tape has been damaged or spliced they may damage the camcorder Do not insert anything into the small holes on the cassette or cover them with cellophane tape Handle cassettes with c...

Page 21: ...ord pause mode turn the standby lever to LOCK and back to STANDBY or slide the POWER switch off and back on 3 Turn the program selector to Easy Recording mode This selects the camera s Easy Recording program It allows you to simply point and shoot without making any manual adjustments see p 48 4 Press the start stop button to begin recording There are two start stop buttons to give you control fro...

Page 22: ...or the sound from the speaker when recording For tips on how to make better videos see page 31 For extra recording time set REC MODE in the camera menu to LP The flashing of the tally lamp may be reflected into the lens during close up recording or when recording through glass You may therefore decide to turn it off p 38 REC MODE SP see p 34 Notes When recording and playing back tapes in LP mode t...

Page 23: ...ions One beep sounds when you turn the power on A series of beeps also sound during the self timer countdown right before the camera s automatic shut off and upon any unusual condition of the camera Beeps are not recorded on the tape You can turn them OFF through the menu BEEP ON see p 34 Microphone attenuator Use the microphone attenuator if during recording or audio dubbing you need to lower the...

Page 24: ...ndle adjust the picture angle but not the zoom speed Set the handle top zoom control to one of three speeds Open the camera menu and select ZOOM HANDLE then set it to LOW MEDIUM or FAST The speed of the zoom control on the wireless controller cannot be adjusted 20 optical zoom The zoom control continues to work as usual You can freely zoom in and out between 1 and 40 or 1 and 100 magnification the...

Page 25: ...finder is also activated when the panel is in this position From this position you may also push the panel flat against the camera with the screen facing outwards 90 K Notes Avoid touching the LCD screen when moving the LCD panel Do not hold the camera by the LCD panel or the viewfinder Make sure you open the LCD panel at 90 before attempting to rotate it backwards or forwards Always rotate the LC...

Page 26: ...he tape Effective dots more than 99 99 Allowing the subject to monitor recording When you turn the LCD panel so that it faces the opposite direction see diagram opposite you can let your subject monitor recording or you can include yourself in the picture You can choose the display style reversed mirror on or not mirror off from the camera menu MIRROR ON see p 34 Note If you choose the mirror on t...

Page 27: ...ower the volume A VOLUME bar appears in the display to indicate the current volume It disappears in four seconds You can turn off the volume completely by pressing the button until OFF appears You can also adjust the headphone volume separately from the built in speaker either during VCR mode or camera mode The volume level is the same regardless of mode The levels you adjust for the built in spea...

Page 28: ...he cover to use the handle top buttons To end playback press the STOP 3 button To wind the tape forwards stop playback and press the FF 1 button To wind the tape backwards stop playback and press the REW button If the playback picture is rough mosaic like noise clean the video heads using a Canon DVM CL Digital Video Head Cleaning Cassette or a commercially available digital video head cleaning ca...

Page 29: ...yback To play back in reverse at about 1 5 normal speed press the 4a button and then the SLOW M button during normal playback Press PLAY e to return to normal playback The camera automatically returns to 1 reverse playback after about 30 seconds of slow playback Reverse Playback To play back in reverse at normal speed press the 4a button during normal forward playback Press the PLAY e button to re...

Page 30: ...era to a VCR set the input selector on the VCR to LINE If your TV or VCR has audio video input terminals A V VIDEO INPUT AUDIO L R STV 250N Stereo Video Cable DV IN OUT IN OUT Connect the camera using the STV 250N Stereo Video Cable Connect the white plug to the white audio terminal L left Connect the red plug to the red audio terminal R right Connect the yellow plug to the yellow video terminal V...

Page 31: ...to bright sunlight or it may melt The light is concentrated by the viewfinder lens Change the angle of the viewfinder so that the sun doesn t shine into it Make sure that the fastening screw of the tripod is no longer than 1 4 inch 5 5 mm or it will damage the camera For greater creative control you can connect an external microphone to the MIC terminal We recommend a microphone with a built in po...

Page 32: ...angle Without moving your feet turn your waist to the starting position Start recording and after a few seconds begin to turn slowly from the waist Hold the final image for a few seconds before you stop recording Tilt Tilt the camera up to exaggerate the height of the subject Tilt down from the top of a building for example as an introduction to subjects at the bottom Long shot Medium shot Composi...

Page 33: ...nt you can record stable images even if you are shooting from a moving car Before you start recording push the i on off button to turn the image stabilizer on or off The i mark appears in the display when the stabilizer is on The image stabilizer cannot be turned off when the program selector is set to the Easy Recording position Notes The camcorder remembers your selection if you turn the standby...

Page 34: ...NDLE LO OFF C PHASE C E SHARPN S S CAM MENU A L L A T Y SEL SETSET UCL MEN OSE OD M E MP REC CAM MENU B EP E R R R I M SEL SETSET UCL MEN OSE ON OFF ON O W N N D I REE C S OFF M C A I T D LAY T D ISP DEC D ET T IME S 9 9 9 1 1 10 00 AM T Z ST N Y ONE D TV N SCREE D M E E O MOD F M 16 9 OFF W L E 1 REMO T A D IO U ODE M 12bi t AE S IF H T 0 O W R G C PHASE C E SHARPN S S R G L ON SP T OFF M C A I T...

Page 35: ... at one time Pointers at the top bottom of the screen indicate that there are more options that you can scroll through Unavailable functions appear in purple Factors such as recording program determine which functions are available You may often find it convenient to use the wireless controller to move around the menus Press its MENU button to enter leave the menu and use the arrow keys in place o...

Page 36: ...oller Special playback p 29 Photo date search p 67 Zero set memory p 68 Audio mix p 86 A V insert p 78 Audio dubbing p 80 16ft Insert two AA batteries following the and markings Be careful not to reverse the polarity of the batteries Notes When using the wireless controller in brightly lit places or outdoors the effective range will be less The camera may have difficulty picking up the remote cont...

Page 37: ... Continue to press simultaneously for over two seconds Be sure to set the wireless controller to the same mode as the camera To confirm the mode settings for the camera and the wireless controller follow the following steps Notes If your wireless controller isn t working make sure the camera and the wireless controller are both set to the same mode Check the mode the camera is set to by pushing an...

Page 38: ...he lens during close up recording or when recording through glass You may therefore decide to turn it off TALLY LAMP ON see p 34 1 Open the camera menu and point the arrow at TALLY LAMP 2 Select the OFF setting and close the menu The tally lamp no longer flashes during recording but it will still light up when the camera receives a signal from the wireless controller ...

Page 39: ... be displayed for about four seconds each time you turn the power on The camera automatically accounts for the number of days in a month and leap year Setting the time zone daylight saving time 1 Set the camera to record pause mode PAUSE appears in the display 2 Open the menu and select T ZONE DST 3 Press the menu dial in The time zone display appears on the screen Your camcorder s time zone is fa...

Page 40: ... 12 13 14 15 16 17 18 19 20 21 22 23 2 3 5 6 7 9 8 10 4 12 11 13 24 19 20 18 17 21 23 22 15 14 16 1 Put the camera in record pause mode 2 Open the menu and select D TIME SET The year display starts to flash 3 Turn the menu dial up and down to change the year Press the dial in to move to another part of the display Once you move from the year the next part of the display starts flashing 4 Set the m...

Page 41: ...he six second auto date appears for six seconds 6SEC DATE OFF see p 34 Date and time display You can choose to display or hide the date and time display during recording When the date and time display is set to ON the date and time show in the display but the time zone disappears in about four seconds It is not recorded onto your tape D T DISPLAY OFF see p 34 1 Put the camera in record pause mode ...

Page 42: ... ON flashes in the display to advise you to switch the ND filter on However it doesn t appear in the Manual mode or during exposure lock ND OFF with the OFF flashing warns you that the ND filter is no longer suitable for the current conditions If this warning appears turn the ND filter off by pressing the ND FILTER button again Notes You cannot turn the ND filter on off during exposure lock or whi...

Page 43: ...u press the button halfway down PHOTO flashes at the bottom right of the display Exposure is locked the instant the photo button is pressed halfway down During autofocus F flashes white in the display as the camcorder adjusts the focus and it is displayed continuously as a green mark when the camera is ready to take the still picture To change the still picture before recording release the button ...

Page 44: ...y and the camera immediately takes the photo For even greater versatility attach a Canon Speedlite for flash photography available as optional accessories see page 45 when taking still pictures directly from record pause mode Only take photos where it is bright enough to see the image in the display If you want to use an effect make sure you set it before you take your picture you cannot use the f...

Page 45: ...een S lights up constantly in the display Although it is possible to record a still image while the Speedlite is still charging the flash will not go off In addition the Speedlite cannot charge while you are holding the PHOTO button halfway down S disappears from the display while the camera records the still picture If the S mark does not appear in the display when you turn the Speedlite on make ...

Page 46: ...n It is also possible to transfer your favorite still pictures to a PC for image enhancement and print out If you are going to play back movie normally we recommend recording in normal movie mode 1 Set the camera to record pause mode 2 Slide the MOVIE MODE switch to FRAME FRAME appears in the display Notes Frame mode cannot be used with the Easy Recording program Frame video may not appear complet...

Page 47: ...n record pause mode you can use record review to play back the last few seconds of your recording and then return automatically to record pause mode You can quickly make sure that a scene has recorded properly and then go on to shoot the next scene without producing any noise in the picture 1 Make sure the camera is in record pause mode 2 Press and release the c record review button while you chec...

Page 48: ...rding situation The name of your selected recording program appears constantly on the left of the display with the exception of the AUTO Recording program whose n mark is displayed and then disappears after 4 seconds Notes Avoid changing programs during recording as the brightness of the image may change suddenly The specialized AE programs are not suitable for all kinds of lighting The image may ...

Page 49: ...1 60 and 1 15000 of a second When shooting outside on clear bright days the camera will often set a large F number to adjust the amount of light entering the camera throwing the focus off Setting a fast shutter speed or decreasing the amount of light with the ND filter can help correct this If you try to set a shutter speed that is either too high or too low for the shooting conditions the indicat...

Page 50: ...the aperture Notes The f 1 6 f 2 4 Av values are not available when you zoom in near the telephoto end The Av values are reset if you turn the power off or change the recording program If you use the STANDBY lever however the camera remembers your chosen values Manual See also p 55 Select this program for total creative freedom when operating the camcorder You can set aperture and shutter speeds c...

Page 51: ... series of still images giving an effect similar to slow motion Black and White Records the image in black and white Slim The image appears compressed horizontally Stretch The image appears compressed vertically Fade Trigger When you start recording the scene gradually fades in from a black screen When you stop recording it gradually fades out Set the fade trigger each time you wish to use it both...

Page 52: ...tton If you have chosen FADE T FADE T stops flashing If you have chosen any other effect it will take effect on the screen 6 Press the start stop button to start stop recording If you have chosen FADE T the scene fades in from black together with the sound and FADE T starts to flash again in the display If you wish to use the fade trigger again press the D E ON OFF button If not you can select a d...

Page 53: ...lecting the audio mode The GL1 can record sound in two audio modes 16 bit 48 kHz 2 channel for the highest sound quality 12 bit 32 kHz 2 from 4 channels for recording on two channels stereo 1 leaving two channels stereo 2 free for you to add new sound at a later date 1 To switch the mode open the camera or VCR menu and select AUDIO MODE 2 Select a mode and close the menu The name of your chosen mo...

Page 54: ... into record pause mode Notes Initially the tally lamp flashes once a second then just before recording it starts flashing more quickly for a few seconds before the camera starts to record If you have the beep turned on it sounds each time the tally lamp flashes before recording To cancel the self timer before the countdown has begun press the self timer button again To cancel the self timer once ...

Page 55: ...bers between f 1 6 and f 11 and CLOSE to shut the iris completely See About the iris p 56 6 Press the EXPOSURE dial in once more The arrow moves next to the gain value 7 Turn the EXPOSURE dial to increase or decrease the gain Set the gain to 0dB 3dB 6dB 9dB or 12dB See About the gain p 56 Notes The shutter speed F number and gain values are all reset if you slide the POWER switch to OFF If you use...

Page 56: ... 8000 sec 1 4000 sec 1 3000 sec About the iris Turn the EXPOSURE dial toward for a shorter depth of field or for a greater depth of field Available F numbers Under very bright conditions when you have set the F number to f 11 blurring of the image may occur Check the image in the viewfinder while setting the aperture F1 6 F1 8 F2 F2 2 F2 4 F2 6 F2 8 F3 2 F3 4 F3 7 F4 F4 4 F4 8 F5 2 F5 6 F6 2 F6 7 ...

Page 57: ... very dark or if the subject is spotlit E LO CK 0 E LO CK 11 E LO CK 0 E LO CK 11 EXPOSURE Exposure adjustment When the exposure is locked you can adjust it manually making the picture brighter or darker in order to deal with difficult lighting conditions or to manipulate the mood of the scene The camera s iris can be manually set to any position from fully closed to fully open EXPOSURE Notes You ...

Page 58: ...away from the focusing ring This is convenient when shooting through glass 1 Turn the program selector to any recording program other than Easy Recording program 2 Push the FOCUS A M button so that MF appears in the display 3 Using the zoom lever zoom all the way in to the telephoto end 4 Rotate the focusing ring to adjust the focus 5 Use the zoom lever to reframe the subject To resume autofocus p...

Page 59: ...scenes Using AE Shift 1 Turn the program selector to the Auto Tv or Av recording program 2 Open the camera menu and select AE SHIFT 3 Turn the menu dial to choose your desired level Levels are from 2 to 2 in 0 25 intervals excluding 1 75 and 1 75 The higher the setting the brighter the image 4 Close the menu Note AE shift does not function in the Easy Manual Sand Snow or Spotlight Recording progra...

Page 60: ...lect C SHARPNESS from the camera menu 2 Set your desired sharpness level Adjust toward for a sharper picture and toward to soften the contour CP custom preset appears in the display C SHARPNESS see p 34 Change the sharpness level before shooting for more creative videos ...

Page 61: ...C color PHASE from the camera menu 2 Set your desired color level Adjust toward R for a redder picture and toward G for a greener picture CP custom preset appears in the display Adjusting Color Phase Change the color phase level before shooting for more creative videos ...

Page 62: ...lay to highlight areas of overexposure Use as a guide to setting the aperture iris and shutter speed Using the Zebra Pattern Note The camera does not record the zebra pattern it is only shown in the display ZEBRA OFF see p 34 MENU 1 Open the camera menu and select ZEBRA 2 Select the ON setting and close the menu ...

Page 63: ...g press the WHITE BALANCE SELECT button T U appears in the display when you set the white balance to the indoor outdoor modes b To set the white balance manually q Point the camera at a white object such as a sheet of paper and zoom in until it fills the display w Press the WHITE BALANCE SELECT button W appears in the display e Press the WHITE BALANCE W set button W flashes quickly in the display ...

Page 64: ...at once You cannot set the white balance manually or use the indoor outdoor modes when the program selector is set to the Easy Recording program The camera returns to auto white balance when the program selector is turned to Easy Recording When you turn the camera on the white balance returns to auto white balance If you then press the WHITE BALANCE W set button the camera will remember your last ...

Page 65: ...the camera Press it once to display once more to hide it You can also choose which type of data code to display either the date time camera data or both A data code containing the date and time the recording was made and other camera data shutter speed exposure and gain settings is automatically recorded on a special data section of the tape DATA CODE DISPLAY DATA CODE DATA CODE DATE TIME see p 34...

Page 66: ... sure that you slide the tab on the cassette so that it exposes the hole the switch position is usually labeled SAVE or ERASE OFF The data code will read in the following situations During playback of a blank section of tape If the tape was recorded before entering the date and time in the camera s memory If the tape was recorded on a camera without a data code function If noise or tape damage pre...

Page 67: ...ve times to move forward five still pictures or days PHOTO SEARCH DATE SEARCH appears in the middle of the display alongside the or mark and number to search through The date also appears during date search When the camcorder locates the indicated date or still picture it enters playback or still playback mode Notes Press 3 stop to stop mid search If you begin a search very close to the start of a...

Page 68: ...in the display The tape counter with  indication disappears from the display and the time code reappears Notes The zero set memory may not function correctly where there is a break between recordings on the tape You can also use zero set memory to mark a position on a tape in record pause mode When you then play back the tape pressing rewind will take you back to the pre marked position There may...

Page 69: ... Video 3 Turn on the VCR and load a blank cassette See your VCR instruction manual 4 Open the VCR menu and select DUB MODE When you select DUB MODE all the displayed information is also displayed on the screen of the TV connected your VCR However this information will not be recorded onto the tape in the VCR Preparing for Dubbing The camcorder s Dubbing Function controls your VCR by using the same...

Page 70: ...Turn the menu dial to scan the numbers Press the menu dial in to select the number corresponding your brand of VCR Turn the menu dial to scan the letters TRANSMITTING DATA appears in the display each time you turn the menu dial After you scan past the last letter for each number the number advances to the next number 2 If the setting is correct the VCR will start recording automatically This will ...

Page 71: ...ote control signals vary depending on model and brand First choose the right RECORDER setting for your VCR The number indicates the VCR brand The letter indicates the set of signals Notes Once you find the correct setting remember this and do not change it unless you change VCRs See p 73 for details of the cut in and cut out adjustments If you try all the numbers and letters but the VCR has still ...

Page 72: ...nable to use the wireless controller 4 Press e on the body of the camera Recording starts NOW DUBBING CUT OUT PUSH a appears in the display 5 When you reach the end of the scene you want to record press a on the body of the camera The camera returns to playback pause mode and the VCR automatically switches to record pause mode When you finish dubbing press the MENU button The camera returns to VCR...

Page 73: ... a scene starts is called the cut in point and the point where it ends is called the cut out point Some VCR models take a second or more to actually start recording after they receive the command signal If this happens you could lose the beginning of the scene CUT IN ADJ prevents this by sending the command a little early Similarly some models take some time to react to the command to stop recordi...

Page 74: ...e to the VCR as follows 1 Connect the camera to the VCR See Connections for Playback on a TV Screen on p 30 2 Prepare the TV and VCR Turn on the TV and set it to the video channel or set the TV VIDEO selector to VIDEO Turn on the VCR and set its input selector to LINE Load a blank cassette and put the VCR in record pause mode See your TV and VCR instruction manuals for details 3 Turn the camera s ...

Page 75: ...ot appear so on the TV image or not recorded at all You may not be able to dub tapes recorded with the copyright protective signal Use a Canon CV 150F DV cable optional to connect two digital devices together When you are recording from the GL1 make sure you connect the cable to the GL1 before connecting the other end of the cable to the recording device When you are recording to the GL1 slide the...

Page 76: ... on the TV image or not recorded at all You may not be able to dub tapes recorded with the copyright protective signal The GL1 cannot record or play back tapes with closed captioning 1 Connect the camera to the VCR TV or other camcorder See Connections for Playback on a TV Screen on p 30 2 Prepare the TV and VCR Turn on the TV and set it to the video channel or set the TV VIDEO selector to VIDEO T...

Page 77: ...eo and A V IN OUT terminals automatically work as input terminals 4 Press the pause button Recording starts 5 When you get to the point where you want to stop recording press the stop button or the pause button Recording stops 6 Repeat steps 1 to 5 until your edited recording is complete Notes You can monitor the picture in the viewfinder or LCD If your VCR or TV is a monaural type connect only th...

Page 78: ...de on the tape recording may be interrupted or you may not be able to insert A V correctly The playback tape Use only tapes without non recorded portions If there are non recorded portions or changes in the recording mode you may not be able to insert A V correctly You cannot insert A V in the following cases The playback tape has been poorly recorded During special playback fast forward playback ...

Page 79: ... tape 7 When you get to the starting point of the scene to be inserted push the pause button on the camera A V insert starts 2a changes to 2 8 When you get to the point where you want to stop inserting press the stop button of the camera Inserting stops and A V INSERT disappears from the display The camera returns to stop mode If instead of pressing 3 STOP you press a PAUSE the camera returns to t...

Page 80: ... viewfinder as you add new sound Always check the new sound with the speaker or the headphones if you have the docking unit attached To connect the external microphone You can add sound to the original sound on a prerecorded tape from audio products AUDIO IN or with the internal or an external microphone MIC IN Audio added through audio dubbing is dubbed onto Stereo 2 The original sound will not b...

Page 81: ...to the point where you want to stop dubbing press the stop button and then stop play on the other audio device if AUDIO IN Audio dubbing stops and AUDIO DUB disappears from the display The camera returns to stop mode You can also set zero set memory p 68 at the place you want to stop audio dubbing then every time you return to that position audio dubbing will cancel If instead of pressing 3 STOP y...

Page 82: ...d zoom control effectively For extra security and portability attach the shoulder strap before using the camera Pass the ends through the attachment bars and adjust the length as shown In record pause mode adjust the viewfinder focusing lever to suit your eyesight The viewfinder extends straight out and rotates upwards for comfortable viewing Store the camera with the viewfinder flush with the bod...

Page 83: ...tant different levels will be shown when you subject the battery pack and camcorder to different conditions How much power is left When to recharge Remaining time indicator You can recharge a lithium ion battery pack whenever it is convenient Unlike a conventional battery pack it does not have to be fully discharged first However as the battery pack will naturally discharge itself over time it is ...

Page 84: ...e lithium battery installed into the camera unit allows the camera to remember settings such as the date and time even when the battery pack is disconnected It is automatically recharged when you attach a power source to the camcorder When you first use the camera bring the backup battery to full charge by connecting a power source to the camera for a full day about 24 hours You do not need to tur...

Page 85: ... Keep it away from fire or it might explode Do not expose the battery pack to temperatures greater than 140 F 60 C Do not leave it near a heater or inside a car in hot weather for example Do not try to disassemble or modify it Do not drop or knock it Do not get it wet ...

Page 86: ...the output Press AUDIO MONITOR on the wireless controller Four settings appear as you push the button STEREO1 for just stereo 1 STEREO2 for just stereo 2 MIX FIXED for an equal mix of stereo 1 and 2 MIX VARI mix variable for when you want to mix the balance between stereo 1 and 2 To simply choose STEREO1 STEREO2 or MIX FIXED make sure your choice appears on the display If you choose MIX VARI you c...

Page 87: ...d a tape recorded with multiple channel audio 2 Open the VCR menu and select OUTPUT CH 3 Select the output channel Refer to the following list Selecting audio output channels Tape recorded on multiple channels main sub main only sub only OUTPUT CH setting L R L L R R Played back sound Tape recorded with stereo sound L R channels L channel only R channel only OUTPUT CH L R see p 34 ...

Page 88: ...t hand You can grip the camera from the side grip or the top handle Either gripping position allows you to start stop recording take a photo and zoom in and out Lock the top controls to prevent accidental operation by sliding across the LOCK lever Choose the grip LOCK PHOTO START STOP Standard holding style Grip the camera using the top handle and steady the lens with the other hand Low angle reco...

Page 89: ...when you are recording in rain or mist There is a risk of electric shock if water gets inside the camera contact qualified service personnel as soon as possible Protect the lens Sand and dust can damage the lens be especially careful on windy days Handle the camera gently Vibration or shock can cause damage Do not use the viewfinder LCD panel or microphone as a carrying handle Do not swing the cam...

Page 90: ...ad and Tobago USA Venezuela Maintenance Using the camera abroad LCD Clean the LCD screen using a commercially available glass cleaner Where there is a big change in temperature moisture may form on the surface of the screen Wipe clean with a soft dry cloth At low temperatures the display may appear to be much darker than usual This is not a fault and as the screen warms up the display will return ...

Page 91: ... approximately four seconds Then the power indicator flashes and the h mark flashes in the display If there is a cassette in the camera it stops automatically and REMOVE THE CASSETTE is displayed for approximately four seconds and then v flashes in the display If you have the beep turned on it will sound five times The camera may not detect the condensation immediately the condensation warning may...

Page 92: ... to LOCK p 21 The camera has not been used for a long while it is not a malfunction Take off the battery and reattach The lens cap is attached You are attempting to play back or record from a copyright protected cassette p 75 The video heads are badly contaminated p 90 The camera is on manual focus p 58 The viewfinder lens needs adjusting p 82 The lens is dirty p 90 Refer to this checklist first i...

Page 93: ...to the notes on p 52 The POWER switch is not set to VCR p 28 The cassette is not loaded p 19 The tape has reached the end When recording in dark places a bright light in the scene may cause a vertical light bar smear to appear This is a normal feature of camcorders The video heads need cleaning p 90 The video heads need cleaning p 90 The TV VIDEO selector on the TV isn t set to VIDEO p 30 The spea...

Page 94: ...camera body behind the LCD panel p 8 using the tip of a ball point pen or similar Camera functions return to their default settings Remove the cable and then reconnect it or turn the power off and back on again This is not a malfunction Problem The wireless controller doesn t work The tally lamp doesn t flash There are air bubbles inside the lens After sliding the POWER switch to CAMERA there is v...

Page 95: ...n off the displays to give you a clear screen for playback Set the camera to VCR mode open the VCR menu page 34 and choose the DISPLAYS option Set the displays to OFF PLAYBK and then close the menu The LCD screen will now be completely blank but the camera will continue to show warning caution displays when necessary Turning off the LCD screen displays To display the date and time on a connected T...

Page 96: ... SEARCH VCR menu p 34 Record set up menu p 70 The remote sensor is turned off p 37 Self timer countdown p 54 Audio mode p 53 Data code p 65 Photo mode p 43 Setting the AF F mark flashes white AF locked F mark lights up green Timer Movie mode p 46 Recording programs p 48 Flash is charging S mark flashes white p 45 or charged S mark lights up green p 45 0 0 1 0sec SEL F T 1 0sec T R N T R N 0 0 0 0 ...

Page 97: ... The iris is closed ND Filter p 42 Manual focus is selected p 58 White balance is p 63 Set W Indoor T Outdoor U AE Shift p 59 Camera Sharpness p 60 and Color Phase p 61 The 16 9 effects the display flashes when the effect has been selected and appears steadily when it is activated p 52 Digital effects the display flashes when the function has being selected and appears steadily when it is activate...

Page 98: ...S STRI E R E COPY D PROTECT CTED RIGHT STRI E DUBBING Caution phrases The camera displays various caution phrases they appear for 4 seconds before disappearing When you start recording the camera counts from 0SEC to 10SEC Shots which are shorter than 10 seconds may be difficult to edit later On the other hand if you are not planning to edit the recording remember that a shot which does not contain...

Page 99: ... sec Minimum illumination 6 lx using the auto program Recommended illumination More than 100 lx Filter diameter 58 mm Viewfinder 0 55 inch color LCD approx 180 000 pixels LCD screen 2 5 in measured diagonally 6 4 cm 122 000 pixels approx Microphone Stereo electret condenser microphone DV Terminal Special 4 pin connector conforms to IEEE 1394 Output level Video terminal ø 3 5 mm 1 Vp p 75 Ω unbalan...

Page 100: ... Cut out 73 Î Date and Time 39 DC Coupler 6 16 Demo Mode 23 Digital Effects 51 Digital Video 7 Digital Zoom 7 24 Displaying Data Code 65 Dubbing Function 69 DV Dubbing 75 Easy Recording 48 Effects 51 Exposure 55 57 External Microphone 80 Ï F Number 56 Fade Trigger 51 Fast Forward 28 Feedback 30 Finding Your Way Around the GL1 8 11 Flash Photography 45 Focusing 58 Frame Mode 46 Ì Gain 56 Grip Belt ...

Page 101: ... Í S video 6 30 Sand and Snow 50 Screen Displays 95 Self Timer 54 Sharpness 60 Shoulder Strap 6 82 Shutter Speed 56 16 9 52 SP Mode 22 Specifications 99 Speedlite 45 Spotlight 50 STANDBY Lever 21 Still Pictures 43 Storage 89 System Diagram 12 Ê Tally Lamp 36 Tape Protection 20 Telephoto 24 Temperature 85 89 Time Code 98 Tripod 31 Troubleshooting 92 TV 30 95 Tv Recording Mode 49 Ë Using the Camera ...

Page 102: ...s all defects encountered in normal use of the DV Camcorder and does not apply in the following cases a Loss of or damage to the DV Camcorder due to abuse mishandling improper packaging by you alteration accident leaking batteries exterior nicks scratches or dents electrical current fluctuations failure to follow operating instructions maintenance and environmental instructions prescribed in CUSA ...

Page 103: ...digital video equipment is used for commercial professional or industrial purposes This limited warranty does not cover the cabinet exterior finish of the digital video equipment video cassette tapes head cleanings nor does it apply to digital video equipment purchased outside Canada TO OBTAIN WARRANTY SERVICE Ship your Canon digital video equipment in its original carton box or equivalent properl...

Page 104: ...N CANADA INC MONTREAL 5990 Côte de Liesse Quebec H4T 1V7 If you have any questions call the Canon Canada Information Center toll free at 1 800 828 4040 Canada only Si vous avez des questions veuillez téléphoner sans frais au Canada 1 800 828 4040 Canada seulement MEXICO CANON MEXICANA S DE R L DE C V Periferico Sur No 4124 Col Ex Rancho de Anzaldo C P 01900 México D F México CENTRO Y SURAMÉRICA CA...

Reviews: