Set the minimum filling level
Introduction
NOTE
The [Minimum filling level] setting is only applied when, on the printer control panel, the [Next
output tray] setting is set to [When tray is full] (under [System] -> [Setup] -> [Workflow profile] ->
[Output]).
Purposes
The [Minimum filling level] setting has the following purposes.
• Maximise the time that the printer can run unattended.
• Keep sets together.
Scenarios
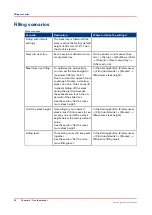
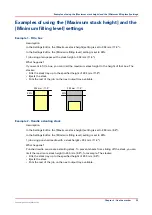
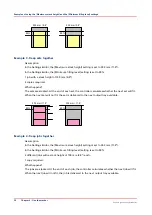
The minimum filling level is a percentage of the specified maximum stack height. The following
scenarios can occur.
Scenarios to keep sets together
When
Then
A job is completed before the minimum filling
level is reached
The next job is delivered to the same output
tray.
A job exceeds the minimum filling level
The stack will be ejected after the job is ready.
A set is completed before the minimum filling
level is reached
The next set is delivered to the same output
tray.
A set exceeds the minimum filling level
The controller calculates whether the next set
can be added to the stack.
If the total stack height, including the next set,
is still lower than the maximum stack height,
then the next set is added to the stack.
If the total stack height, including the next set,
will become higher than the maximum stack
height, then the next set is added to the next
output tray available. The stack will be ejected
after the current set is ready.
Procedure
1.
Access the Settings Editor on the PRISMAsync controller.
2.
Enter the key operator password.
3.
Click [Preferences] -> [Print job defaults].
4.
Scroll down to the [Stacker] section.
5.
Click [Minimum filling level].
6.
Enter the desired filling level.
You can define a percentage from 1% - 100% in steps of 1%. The factory default value is 80%. This
value makes sure that, in most cases, sets are kept together.
7.
Click [OK].
Set the minimum filling level
24
Chapter 4 - Use the stacker
Canon High Capacity Stacker-H1
Summary of Contents for High Capacity Stacker-H1
Page 1: ...Operation guide High Capacity Stacker H1 ...
Page 4: ...Contents 4 Canon High Capacity Stacker H1 ...
Page 5: ...Chapter 1 Preface ...
Page 8: ...Notes for the reader 8 Chapter 1 Preface Canon High Capacity Stacker H1 ...
Page 9: ...Chapter 2 Parts and their function ...
Page 15: ...Chapter 3 Basic instructions ...
Page 19: ...Chapter 4 Use the stacker ...
Page 29: ...Chapter 5 Troubleshooting ...
Page 31: ...Error location labels Chapter 5 Troubleshooting 31 Canon High Capacity Stacker H1 ...
Page 43: ...Chapter 6 Options ...
Page 46: ...Use the EasyLift to unload the stacker 46 Chapter 6 Options Canon High Capacity Stacker H1 ...
Page 47: ...Appendix A Specifications ...
Page 50: ...Index 50 Canon High Capacity Stacker H1 ...
Page 51: ......


