


Troubleshooting
40
Troubleshooting
Troubleshooting
Troubleshooting
Troubleshooting
Troubleshooting usually falls into one of the following categories. In this chapter you will
find the most common printing problems. Refer to the User's Guide for additional
information on topics not covered in this section.
• "Cannot Install the Printer Driver
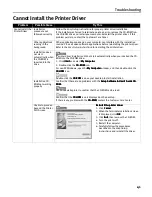
Cannot Install the Printer Driver
Cannot Install the Printer Driver
Cannot Install the Printer Driver" on page 41
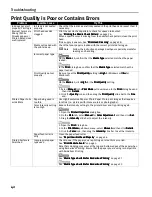
• "Print Quality is Poor or Contains Errors
Print Quality is Poor or Contains Errors
Print Quality is Poor or Contains Errors
Print Quality is Poor or Contains Errors" on page 42
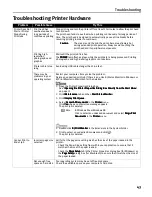
• "Troubleshooting Printer Hardware
Troubleshooting Printer Hardware
Troubleshooting Printer Hardware
Troubleshooting Printer Hardware" on page 43
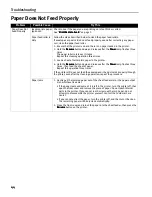
• "Paper Does Not Feed Properly
Paper Does Not Feed Properly
Paper Does Not Feed Properly
Paper Does Not Feed Properly" on page 44
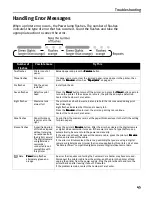
• "Handling Error Messages
Handling Error Messages
Handling Error Messages
Handling Error Messages" on page 45
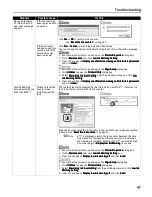
• "An Error Message Appears on the Screen
An Error Message Appears on the Screen
An Error Message Appears on the Screen
An Error Message Appears on the Screen" on page 46
Note
If you encounter any problem during installation or operation of your
printer, quickly scan all topics to find a resolution. If the problem
persists, contact the Customer Care Center. See "Canon offers a full
Canon offers a full
Canon offers a full
Canon offers a full
range of customer technical support options
range of customer technical support options
range of customer technical support options
range of customer technical support options" on page 56.
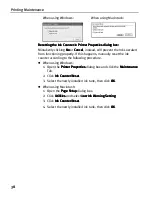
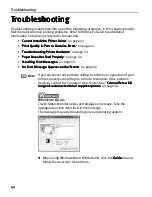
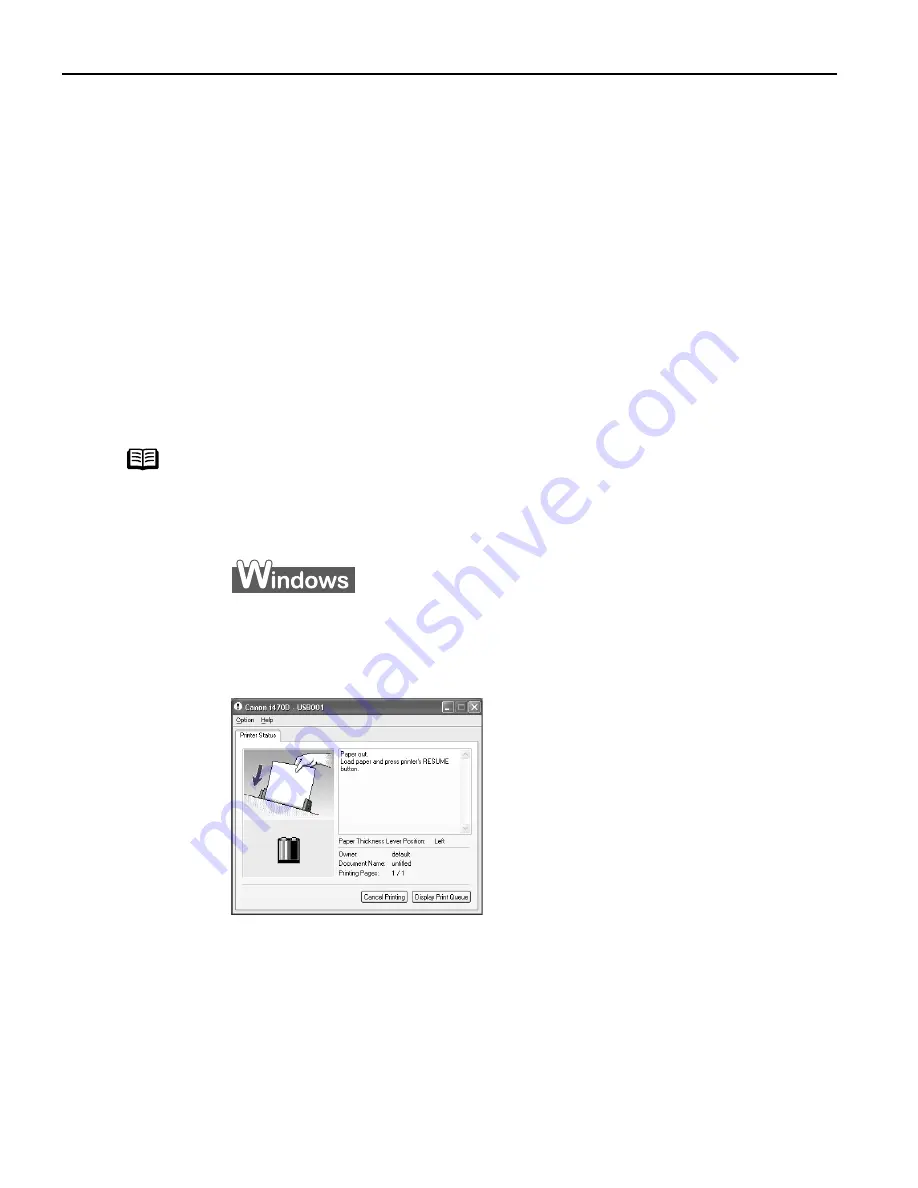
When Error Occurs
The BJ Status Monitor opens and displays a message. Take the
appropriate action described in the message.
The message may vary depending on your operating system.
z
When using Windows Me or Windows 98, click the Guide
Guide
Guide
Guide tab and
follow the on-screen instructions.


