background image

Glossary

4-2

4

Appendix

Glossary

A

Authentication

A system process which validates a user's logon information.  The user's name and 
password must be registered in the system beforehand, and if the system detects a 
match, access is granted, depending on the user's access rights and permissions.

B

BOOTP

BOOTstrap Protocol. A protocol that enables a client machine to automatically obtain 
network setup information from a server over a TCP/IP network. BOOTP enables a 
client to automatically locate such information as the host name, domain name, and 
IP address, so that it is not necessary to enter these items manually.

C

CA Certificate

A digital certificate issued by a third party CA (Certificate Authority), to be used for 
identification purposes in digital business transactions.

Confidential Fax Inbox

A type of inbox for storing received fax/I-fax documents. If received fax/I-fax 
documents match the forwarding conditions, they are forwarded to the Confidential 
Fax Inbox corresponding to the forwarding conditions, without being printed. The 
documents can then be printed whenever necessary. If a password is set for a 
Confidential Fax Inbox, it is necessary to enter a password to print the documents.

Cookie

A file left on a user's computer when the user visits a Web site. A cookie allows the 
Web site to recognize the user on subsequent visits. Cookies are generally used to 
enable a user to automatically sign on to certain Web sites and to customize the 
features offered by such sites.

Summary of Contents for image runner 3025

Page 1: ...Please read this guide before operating this product After you finish reading this guide store it in a safe place for future reference ENG Remote UI Guide Remote UI Guide...

Page 2: ......

Page 3: ...imageRUNNER 3045 3035 3030 3025 Remote UI Guide 0 Ot...

Page 4: ...earn the various functions of the machine Tutorial CD CD ROM Basic Operations Troubleshooting Reference Guide CD ROM Copying and Mail Box Instructions Copying and Mail Box Guide CD ROM Sending and Fax...

Page 5: ...tallation and Instructions Fax Driver Guide CD ROM Installing MEAP Applications and Using the Login Service MEAP SMS Administrator Guide CD ROM To view the manual in PDF format Adobe Reader Acrobat Re...

Page 6: ...ettings Chapter 4 Appendix Includes the glossary and index How This Manual Is Organized Considerable effort has been made to ensure that this manual is free of inaccuracies and omissions However as we...

Page 7: ...nabling the Remote UI 1 10 Starting the Remote UI 1 12 Chapter 2 Checking and Managing Functions Device Status and Information Display 2 2 Job Management 2 4 Managing Print Jobs 2 5 Managing Copy Send...

Page 8: ...orwarding Settings File Overwrite Import 3 29 Saving Additional Functions Settings in Files Export 3 31 Loading Additional Functions Settings Files Overwrite Import 3 32 Saving the Printer Settings 3...

Page 9: ...ndling precautions and instructions that should be observed for safety CAUTION Indicates a caution concerning operations that may lead to injury to persons or damage to property if not performed corre...

Page 10: ...examples of how keys and buttons to be pressed are expressed in this manual Touch Panel Display Keys Key Name Examples System Settings Done Control Panel Keys Key Icon Key Name Examples Additional Fu...

Page 11: ...e not displayed on the web browser Therefore screen shots of computer operation screens used in this manual may differ from the ones you actually see depending on the model or options that come with y...

Page 12: ...ating system Windows 2000 Microsoft Windows 98 operating system Windows 98 Microsoft Windows Millennium Edition operating system Windows Me Microsoft Windows XP Home Edition operating system Windows X...

Page 13: ...are trademarks of Netscape Communications Corporation Java and all Java based trademarks and logos are trademarks or registered trademarks of Sun Microsystems Inc in the United States and other count...

Page 14: ...EITHER EXPRESS OR IMPLIED EXCEPT AS PROVIDED HEREIN INCLUDING WITHOUT LIMITATION THEREOF WARRANTIES AS TO MARKETABILITY MERCHANTABILITY FITNESS FOR A PARTICULAR PURPOSE OF USE OR NON INFRINGEMENT CAN...

Page 15: ...This chapter describes the features and benefits of the Remote UI and how to start it Overview of the Remote UI 1 2 System Requirements 1 8 Before You Start the Remote UI 1 9 Enabling the Remote UI 1...

Page 16: ...mputer and the machine In order to use the Remote UI you must first enter an IP Internet Protocol address for the machine from the control panel and set up the necessary network connection Once this i...

Page 17: ...display the current status and settings for the machine and the status of all information and job processing You can manage the machine from a computer connected to the network without having to perf...

Page 18: ...m a computer without using the machine s control panel Takes you to the Remote UI top page Displays information such as the product name printer status scanner status and fax status Displays the machi...

Page 19: ...ments in the machine s inboxes in the TIFF format by clicking Mail Box NOTE To view images in the TIFF format you need an application that supports the TIFF format e g Imaging for Windows To view imag...

Page 20: ...the Remote UI Link to MEAP Portal A list of the MEAP Multifunctional Embedded Application Platform applications can be displayed by clicking http the IP address of the device 8000 for Link to MEAP Po...

Page 21: ...epartment ID Management is set to Off and a System Manager is not specified depending on the login services you are using all users may be considered as Administrators without authentication See Chapt...

Page 22: ...ater IMPORTANT Available browsers may be limited depending on the login services for the MEAP function you are using For instructions on how to use the login services see the MEAP SMS Administrator Gu...

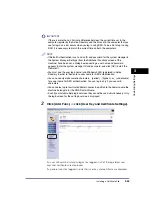
Page 23: ...Information Settings in System Settings is configured IMPORTANT Connection via a proxy server is not possible If your system environment has a proxy server perform the following setting Settings vary...

Page 24: ...assword using numeric keys press Log In Out NOTE If the desired setting is not displayed press or to scroll to the desired setting 2 Select On select whether to use SSL Select Off to disable the Remot...

Page 25: ...10 seconds and then turn ON the main power IMPORTANT The Remote UI setting is made effective only after turning the machine s main power OFF and then ON NOTE For information on how to turn ON and OFF...

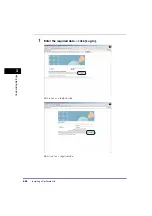
Page 26: ...r system administrator 1 Start your web browser 2 Enter the appropriate URL into Address or Location http the IP address of the device NOTE If a login service is not set it is unnecessary to proceed t...

Page 27: ...Starting the Remote UI 1 13 1 Using the Remote UI 3 Enter the required data click Log In SDL is set as a login service SSO is set as a login service...

Page 28: ...l Functions screen of the machine have been set a dialog box requesting a user name and password appears Enter the system manager ID and password and click OK to start the Remote UI You must use the u...

Page 29: ...ing Copy Send and Fax Jobs 2 8 Managing Receive Jobs 2 10 Managing Inboxes 2 12 User Inboxes 2 13 Memory RX Inbox 2 18 Confidential Fax Inboxes 2 22 Printing PDF PS or Image Files Directly Direct Prin...

Page 30: ...ck the machine s current status such as the amount of paper remaining in the various paper sources and to check for any errors You can also obtain information on the machine s system manager the locat...

Page 31: ...ion Device Information Displays information related to the machine such as the system manager s information and the location where the machine is installed Device Features Displays the optional equipm...

Page 32: ...ay in System Settings from the Additional Functions screen is set to Off Receive Job and Log are not displayed NOTE The job management operations available using the Remote UI are the same as those th...

Page 33: ...tails of each item are shown below Stops the output of print jobs that are sent from computers printer driver This button cannot be used to stop the output of other types of jobs such as copy jobs or...

Page 34: ...each item are shown below NOTE The types of log that appear under the Print Job Log drop down list vary depending on the optional equipment attached For more information on each type of job see the R...

Page 35: ...order of items saved in the file are identical to the ones displayed on each job log NOTE The latest 100 jobs are displayed in the job log The jobs other than the latest 100 jobs are not saved in the...

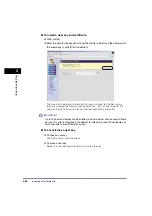
Page 36: ...anagement is set a dialog box prompting you to enter the Department ID and password appears Enter the Department ID and password click OK To cancel a job Click Status Click Select next to the job that...

Page 37: ...played on each job log NOTE The latest 100 jobs are displayed in the job log The jobs other than the latest 100 jobs are not saved in the log The latest 100 send and receive jobs are displayed in the...

Page 38: ...entered the file is saved as rx csv The type and order of items saved in the file are identical to the ones displayed on the receive job log NOTE The latest 100 jobs are displayed in the job log The...

Page 39: ...details of forwarded jobs from the forwarding status screen For more information see Chapter 6 Receiving Documents in the Sending and Facsimile Guide To display the details of a forwarded job Click Fo...

Page 40: ...d in User Inboxes can be sent only if the Universal Send Kit is activated or the optional Super G3 FAX Board or Super G3 Multi Line FAX Board is installed Memory RX Inbox Documents received in memory...

Page 41: ...Fax Inboxes are available only if the Universal Send Kit is activated or the optional Super G3 FAX Board or Super G3 Multi Line FAX Board is installed User Inboxes 1 Click Mail Box select User Inboxes...

Page 42: ...ase Document After Printing check box To change the print settings Click Change Print Settings in the Print Settings pane Change the necessary print settings Use the scroll bar to view edit additional...

Page 43: ...cument and clicking the buttons under Document Order you can change the order in which the documents are sent Move to top Move up one level Move down one level Move to bottom If you want the document...

Page 44: ...ove up one level Move down one level Move to bottom To insert a document into another document Click Document Insertion Specify the document you want to insert click Next Enter the necessary settings...

Page 45: ...displayed To display the image file click OK To cancel displaying the image file click Cancel 5 If you want to specify the inbox name protect the inbox with a password or set the storing period click...

Page 46: ...ard or Super G3 Multi Line FAX Board is installed Memory RX Inbox 1 Click Mail Box select Memory RX Inbox from the menu that appears under Mail Box click MEMORY RX INBOX If Department ID Management is...

Page 47: ...ve to bottom If you want the document to be automatically deleted after it is sent select the Delete After Sending check box Click Address Book under Address Settings to display a list of destinations...

Page 48: ...Guide 3 To display the details of the document click the document name You can also click Type to display the document details 4 If you want to protect the inbox with a password click Settings Select...

Page 49: ...D and password click OK If the Divided Data RX Inbox is set with a password enter the password click OK 2 If you want to select and perform an operation on a document select the check box next to the...

Page 50: ...G3 FAX Board or Super G3 Multi Line FAX Board is installed 1 Click Mail Box select Confidential Fax Inboxes from the menu that appears under Mail Box click the number of the desired inbox If Departme...

Page 51: ...et each item as necessary click OK To change the name of a Confidential Fax Inbox enter the new name in Name The maximum number of characters that you can enter for a Confidential Fax Inbox name is 24...

Page 52: ...if the optional PS Printer Kit is activated The image files that you can print directly are TIFF and JPEG files Direct printing may take a while to start after clicking Start Print Do not click Start...

Page 53: ...using the pathname click File Path enter the pathname in the entry box To specify the location using the URL click URL enter the URL in the entry box enter a user name and password in the User and Pa...

Page 54: ...ing to your preference Scroll down if desired settings are not displayed To restore the settings to their original values click Reset 5 Click Start Print To check the files that have been sent to the...

Page 55: ...ant to store the file in from the drop down list To check the files that have been sent to the machine to be printed click to Job List on the message box that appears after you click Start Print NOTE...

Page 56: ...int range and print settings click Start Print If you want to specify the pages to print by the page number click Pages enter the page numbers Only the setting for the item whose radio button is selec...

Page 57: ...e of the destination folder IMPORTANT Group addresses can be managed only if the Universal Send Kit is activated or the optional Super G3 FAX Board or Super G3 Multi Line FAX Board is installed E mail...

Page 58: ...displayed To also display addresses set with an access number enter the access number in Access Number click Refresh To only display addresses that are not set with an access number click None Access...

Page 59: ...red in a User Inbox can be printed and sent to other destinations To store an address Click Register New Address Specify the type of address from the Type drop down list enter the necessary informatio...

Page 60: ...ddress to display its details Click Edit You can edit the name of a group address by clicking Edit on the Group Property screen In addition you can also edit the individual addresses stored under the...

Page 61: ...f the desired one touch button on the Address Book One touch screen You can also display the Register New Address screen by clicking the number to the left of Unregistered If you want to store one tou...

Page 62: ...ch item are shown below NOTE If you click you can display the top page of the Remote UI of a remote copy printer To edit a remote copy printer address Click on the IP address of the remote copy printe...

Page 63: ...Loading an Address Book 3 25 Saving Forwarding Settings in Files Export 3 28 Loading a Forwarding Settings File Overwrite Import 3 29 Saving Additional Functions Settings in Files Export 3 31 Loading...

Page 64: ...ager ID and System Password appears enter the System Manager ID and System Password NOTE Some of the system settings available using the Remote UI are the same as those that you can access from the co...

Page 65: ...Add Func select System from the menu that appears under Add Func NOTE If the System Manager ID and password have been set a dialog box prompting you to enter the System Manager ID and password appears...

Page 66: ...me the message is cleared from the touch panel display if you press Done However the message is redisplayed after the Auto Clear mode initiates Remote UI If you specify this setting the contents of th...

Page 67: ...umber of the contact person Comment E mail Enter a comment for the contact person 64 characters maximum 6 Specify the support information URL Specify the URL for support This information is displayed...

Page 68: ...is different from the number entered for Address Book Password an error dialog box appears Selecting this check box specifies Access Number Management for the Address Book Once Access Number Managemen...

Page 69: ...allow To add an allowed domain enter the domain name and click Add To edit an allowed domain select the domain from the drop down list enter the new domain name and click Replacement To delete an allo...

Page 70: ...e canceled Make sure that all processing is complete before restarting the machine IMPORTANT If the System Manager Settings are not set the machine cannot be restarted from the Remote UI After you cha...

Page 71: ...zing Settings 5 Click OK CAUTION When the machine is restarted all the jobs currently underway are canceled Make sure that all processing is complete before restarting the machine NOTE It takes approx...

Page 72: ...rver function is available only if the Universal Send Kit is activated or the optional Super G3 FAX Board or Super G3 Multi Line FAX Board is installed NOTE The LDAP server settings available using th...

Page 73: ...in the LDAP server from which to start searching Use SSL Set whether to use SSL or not If this check box is selected SSL will be used SSL is the acronym of Secure Socket Layer An HTTP protocol with t...

Page 74: ...Edit LDAP Server screen by clicking to the left of the server name To delete an LDAP server On the Register LDAP Server screen click Select for the LDAP server that you want to delete click Delete cli...

Page 75: ...UI are the same as those that you can access from the control panel of the machine by pressing Additional Functions System Settings Forwarding Settings For instructions on using the control panel to...

Page 76: ...x for the receiving mode Condition Name Enter a name for the forwarding condition If you select the Enable This Forwarding Condition check box this forwarding condition will be enabled Forwarding Cond...

Page 77: ...the Specify Forwarding Time check box you can specify the time when forwarding is enabled To enable forwarding every day select Everyday set the start and end time If you want to enable forwarding on...

Page 78: ...ick Select from Confidential Fax Box click the Confidential Fax Inbox drop down list select the desired Confidential Fax Inbox to forward documents to If you want to send a link via e mail to the Conf...

Page 79: ...E mail Priority To delete a forwarding condition On the Forwarding Settings screen click Select for the forwarding condition that you want to delete click Delete the Selected Conditions A triangular m...

Page 80: ...d Reader C1 is attached to the machine NOTE The Department ID Management settings available using the Remote UI are the same as those that you can access from the control panel of the machine by press...

Page 81: ...hundred If you want to display another group click Dept ID Group drop down list select a group from the drop down list IMPORTANT If the optional Card Reader C1 is attached Register New Department and...

Page 82: ...nd perform operations on inboxes If the optional Card Reader C1 is attached this check box does not appear Limit Functions This setting enables you to select the function for which you want to set Dep...

Page 83: ...attached you cannot delete a department 5 Click OK when the confirmation dialog box appears 6 To change the password and page limit setting click the desired Department ID change the necessary fields...

Page 84: ...ons screen is available only if the Universal Send Kit is activated or the optional Super G3 FAX Board or Super G3 Multi Line FAX Board is installed During an Export operation the screen display does...

Page 85: ...u that appears under Add Func click Address Book click Export If a password is set for the Address Book a dialog box prompting you to enter the password appears Enter the Address Book password click O...

Page 86: ...have a decryption function fax and file server addresses set with a password may not be imported or may not be imported correctly If you want to import the exported address book into an address book o...

Page 87: ...rol panel settings return to their default settings or standard mode You cannot import a file while the machine is scanning NOTE You can register up to 1 800 addresses in the Address Book 200 of these...

Page 88: ...ess Book click Import If a password is set for the Address Book a dialog box prompting you to enter the password appears Enter the Address Book password click OK NOTE If the System Manager ID and pass...

Page 89: ...rwrite as the Import Method the addresses in the file are registered after all the addresses stored in the machine are deleted NOTE If you select LDAP Format only e mail addresses and fax numbers can...

Page 90: ...ID and password appears Enter the System Manager ID and password click OK 2 Click Start Export The contents of the Address Book are exported If you want to encrypt the passwords of the exported addre...

Page 91: ...Overwrite Import You can load forwarding settings into the machine from saved files 1 Click Add Func select Import Export from the menu that appears under Add Func click Forwarding Settings click Impo...

Page 92: ...er back ON After importing forwarding settings the Remote UI cannot be used to perform other operations until the machine is restarted Turn OFF the main power of the machine wait 10 seconds and turn t...

Page 93: ...g box prompting you to enter the System Manager ID and password appears Enter the System Manager ID and password click OK 2 Click Start Export IMPORTANT If the System Manager ID is not set when the Ad...

Page 94: ...s settings into the machine from saved files 1 Click Add Func select Import Export from the menu that appears under Add Func click Additional Functions click Import NOTE If the System Manager ID and p...

Page 95: ...rint totals saved in the file The machine must be restarted to enable the imported Additional Functions settings After importing turn OFF the main power of the machine wait 10 seconds and turn the mai...

Page 96: ...from the menu that appears under Add Func click Printer Settings click Export NOTE If the System Manager s ID and password are set a dialog box prompting you to enter the System Manager ID and passwo...

Page 97: ...the machine is scanning 1 Click Add Func select Import Export from the menu that appears under Add Func click Printer Settings click Import NOTE If the System Manager ID and password are set a dialog...

Page 98: ...available by pressing Additional Functions on the machine s control panel the following settings are accessed from other menus within the Remote UI Mail Box Settings Specify settings by clicking Mail...

Page 99: ...password appears Enter the System Manager ID and password click OK 2 Click the type of custom setting that you want to specify 3 Specify all the necessary fields click OK IMPORTANT If you are changin...

Page 100: ...NOTE For more information on each setting see other manuals relating to the function that needs to be set For information on how to turn ON and OFF the main power of the machine see Chapter 1 Before Y...

Page 101: ...use the machine to malfunction IMPORTANT In order to back up restore inbox documents it is necessary to have an SMB server connected to the network If you back up restore inbox documents without resta...

Page 102: ...Backup Destination for Inbox Documents You can specify the address user name password and file path of the SMB server used to backup inbox documents 1 Click Add Func select Custom Settings from the m...

Page 103: ...limit is set to allow only one user the data will not be able to be restored correctly If you select to encrypt the backup data the backup process may take longer Host IP Address The unique name used...

Page 104: ...ect Custom Settings from the menu that appears under Add Func click Backup click Execute You can confirm the status of the backup process in Backup Status Select All or Changes for the backup method A...

Page 105: ...data to restore from the list click Execute The inbox documents will be restored after you restart the machine the main power of the machine is turned OFF and then ON again NOTE If you want to displa...

Page 106: ...d in the machine you can also install a CA certificate file from your computer to use for encrypted SSL communication You can install a key pair and server certificate file created on a computer a CA...

Page 107: ...System Manager ID and password click OK 2 Click Register Key and Certificate 3 Click Install 4 Enter the path for the key pair and certificate file to install click Start Installation The maximum num...

Page 108: ...the Network Guide 1 Click Add Func select Custom Settings from the menu that appears under Add Func click CA Certificate Settings NOTE If a System Manager ID and password are set a dialog box prompti...

Page 109: ...Erasing a User Signature Certificate and Key Pair This function installs checks erases a user certificate and key pair contained in a digital signature file IMPORTANT This function is available only i...

Page 110: ...Installing a Certificate File 3 48 3 Customizing Settings 1 Enter the required data click Log In SDL is set as a login service SSO is set as a login service...

Page 111: ...word and click OK to start the Remote UI You must use the user login name pre Windows 2000 registered in Active Directory in order to then enter a user name for SSO authentication You can use only alp...

Page 112: ...y excluding the file path and file extension p12 or pfx Specify the name of the file to install so that it will not exceed twenty characters IMPORTANT Up to 100 user certificates can be installed with...

Page 113: ...4 1 CHAPTER Appendix This section contains the glossary and index Glossary 4 2 Index 4 11...

Page 114: ...ertificate issued by a third party CA Certificate Authority to be used for identification purposes in digital business transactions Confidential Fax Inbox A type of inbox for storing received fax I fa...

Page 115: ...CP IP network Many of the settings required to set up TCP IP which is the standard protocol of the Internet can be made automatically using DHCP Digital signature A code that can be attached to an ele...

Page 116: ...that describe how data is transmitted across the Internet Internet Protocol enables data from one computer to be split into packets and sent to another computer with a specific IP address IP address I...

Page 117: ...etwork whether on the public Internet or on a corporate intranet Log on Entering a user name and password as a means of user authentication to start a computer session or gain access to a service M ME...

Page 118: ...ssion without compromising the quality of the text The resulting file or data size is smaller than that achieved by conventional PDF and is therefore recommended for jobs that are to be sent over the...

Page 119: ...uch as a scanner or printer in producing an image Expressed in terms of dots per inch dpi Low resolution causes font characters and graphics to have a jagged appearance Higher resolution means smoothe...

Page 120: ...key which is known only to the recipient of the message Standard Use this setting to send normal typewritten or printed documents containing only text and no drawings photographs or illustrations See...

Page 121: ...t the start of each image data record indicates the type of data represented TX Abbreviation for Transmission Sending U UFR II Ultra Fast Rendering II A printing algorithm for realizing high speed ren...

Page 122: ...rmation when logging on using a login service This prevents unauthorized access and alterations to the signed document X X 509 DER X 509 is a standard for digital key certificates defined by the ITU I...

Page 123: ...Jobs With Unknown IDs 3 20 Authentication 4 2 B Before using the Remote UI Enabling the Remote UI 1 9 1 10 Specify the network settings 1 9 BOOTP 4 2 C CA Certificates 3 44 4 2 Clear All Counts 3 20 C...

Page 124: ...s 3 28 Exporting the Address Book 3 23 Importing Additional Functions settings 3 32 Importing forwarding settings 3 29 Importing the Address Book 3 26 Inbox management About inbox management 2 12 Conf...

Page 125: ...6 PS 4 7 R RARP 4 7 Receive jobs managing 2 10 Remote UI 4 7 Resolution 4 7 RX 4 7 S Send jobs managing 2 8 Server certificate 4 7 Setting 1 10 Setting up machine remotely 1 4 SMB 4 7 SMB server 4 7...

Page 126: ...Index 4 14 4 Appendix T TCP IP 4 9 TIFF 4 9 Trademarks xi TX 4 9 U UFR II 4 9 Ultra Fine 4 9 URL 4 9 User signature 4 10 X X 509 DER 3 44 4 10...

Page 127: ......

Page 128: ...m CANON DEUTSCHLAND GmbH Europark Fichtenhain A10 47807 Krefeld Germany CANON ITALIA S p A Via Milano 8 20097 San Donato Milanese MI Italy CANON LATIN AMERICA INC 703 Waterford Way Suite 400 Miami Flo...

Reviews: