background image

COLOUR LASER COPIER

1100

Reference Guide

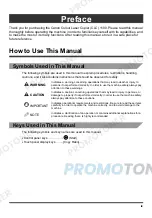
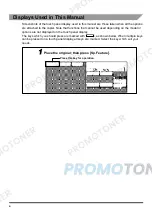
Summary of Contents for imageCLASS 1100

Page 1: ...COLOUR LASER COPIER 1100 Reference Guide...

Page 2: ...als for the Machine The manuals for this machine are divided as follows Please refer to them for detailed information Basic Operation Troubleshooting Reference Guide This Document Copying Instructions...

Page 3: ...nsumables Troubleshooting Handling Options Appendix Includes the Copier Specifications and Index Chap 1 Chap 2 Chap 3 Chap 4 Chap 5 Chap 6 Considerable effort has been made to make sure that this manu...

Page 4: ...apter 1 Before You Start Using This Copier About the Installation Location and Handling 1 2 Installation Precautions 1 2 Avoid Installing the Copier in the Following Locations 1 2 Select a Safe Power...

Page 5: ...2 7 Changing the Display of the Basic Features Screen 2 9 Changing Settings for the Energy Saver Mode 2 10 Specifying Inch Entry 2 11 Specifying Confirmation Window Auto Display 2 12 Specifying Auto...

Page 6: ...Resemblance of Prints to Their Counterparts in Offset Printing SWOP Emulation 2 45 Selecting the Image Type Based on the Type of Image to Print Original Type Selection for Printer 2 46 Checking the Co...

Page 7: ...5 7 Parts and Their Functions 5 8 Functions of the Feeder 5 9 Acceptable Originals 5 10 Feeding Originals from the Original Tray 5 11 Feeding Originals from the Single Sheet Document Feeder 5 13 Remov...

Page 8: ...ffer Pass Unit 5 47 Removing Paper Jams in the Stapler Sorter 5 50 When Outputting to the Non sort Bin 5 51 When Outputting to a Sort Bin 5 55 Removing Paper Jams in the Sort Bins 5 59 Replacing the S...

Page 9: ...sed in this manual Control panel keys Start Touch panel display keys Copy Ratio WARNING Indicates a warning concerning operations that may lead to death or injury to persons if not performed correctly...

Page 10: ...at functions that cannot be used depending on the model or options are not displayed on the touch panel display The keys which you should press are marked with as shown below When multiple keys can be...

Page 11: ...to get an appropriate image Laser Safety This Printer is certified as a Class 1 laser product under EN60825 1 1994 This means that the printer does not produce hazardous laser radiation Since radiatio...

Page 12: ...m is invisible the following labels are attached to the inside of covers where there is danger of exposure to laser radiation 220V 240V model only This printer has been classified under EN60825 1 1994...

Page 13: ...trademarks of their respective owners Copyright 2001 by Canon Inc All rights reserved No part of this publication may be reproduced or transmitted in any form or by any means electronic or mechanical...

Page 14: ...other metal objects Cups vases flowerpots and other containers filled with water or liquids CAUTION Do not install the machine in unstable locations such as on unsteady platforms or on inclined floors...

Page 15: ...ock Insert the power cord completely into the outlet as failure to do so may result in a fire or electrical shock As a general rule do not use extension cords Using an extension cord may result in a f...

Page 16: ...hen moving the machine Otherwise power cord or interface cable may be damaged resulting in fire or electrical shock Do not drop paper clips staples or other metal objects inside the machine Also do no...

Page 17: ...as during consecutive holidays Do not place your hand in the part of the bins where stapling is performed when a stapler sorter is attached as this may result in personal injury Laser beam can be har...

Page 18: ...xviii Do not remove the caution label attached to the cover of the laser scanner unit If the laser beam escapes from the machine exposure may cause serious damage to your eyes...

Page 19: ...a short circuit and result in a fire Clean the machine using a firmly wrung cloth dampened with a mild detergent mixed with water Do not use alcohol benzene paint thinner or other flammable substances...

Page 20: ...its surroundings as this may result in burns or electrical shock When removing jammed paper or supplying the toner take care not to allow the toner to come into contact with your hands or clothing as...

Page 21: ...gets in your eyes or mouth wash them immediately with cold water and consult a physician Consumables WARNING Do not burn used toner bottles or fixing oil bottles as this may cause toner or oil remaini...

Page 22: ...righted Whilst certain reproduction of copyright work may be permitted for fair dealing such as for research for private study or for the purpose of criticism or review reproduction of a copyrighted i...

Page 23: ...Turning On the Power 1 16 Turning Off the Power 1 19 Using the Touch Panel Display 1 20 Frequently Used Keys on the Touch Panel Display 1 20 Understanding How Keys Are Displayed 1 21 Adjusting the Co...

Page 24: ...the Copier in the Following Locations Avoid locations subject to extremes of temperature and humidity whether low or high For example avoid installing the copier near water faucets hot water heaters...

Page 25: ...f copies or use the copier for an extended period of time in a poorly ventilated room It is recommended that you ventilate the room to make the working environment as comfortable as possible Avoid loc...

Page 26: ...ference and vibrations generated by the copier during a Copy job can adversely affect the operation of such equipment Avoid installing the copier near televisions radios or similar electronic equipmen...

Page 27: ...d Do not plug the copier into a multi plug power strip Doing so might cause a fire The power cord may become damaged if it is often stepped on or if heavy objects are placed on it Continued use of a d...

Page 28: ...ier Some parts inside the copier are subject to high voltages and temperatures Take adequate precaution when inspecting the inside of the copier Do not carry out any inspections not described in this...

Page 29: ...cessary Do not turn the power switch off or open the front doors while the copier is in operation This might result in paper jams Do not use flammable sprays such as spray glue near the copier There i...

Page 30: ...s Copier For safety reasons turn off the power switch of the copier when it will not be used for a long period of time such as at night As an added safety measure unplug the power cord when the copier...

Page 31: ...ass for copying It also automatically turns over the originals when making copies of two sided originals The RDF E3 is hereinafter referred to as the feeder cDocument Tray dControl Card The Control Ca...

Page 32: ...es you to perform manual feed copying eSecurity key For managing the use of the copier and preventing unauthorised copies See In Order to Avoid Unauthorised Use of Copier on p xxii fPower switch Press...

Page 33: ...ner box fToner supply port Refill toner for all the colours through their respective ports gToner box hRight front door Open this door when clearing a paper jam iTransfer drum knob Feeds paper around...

Page 34: ...on enables the copier to automatically sense if the original is in black and white or colour eFull Colour key Press to make copies in full colour fBlack key Press to make copies in black and white onl...

Page 35: ...ly entered values or characters oNumber keys Press to enter numerical values pID key Press when setting the Department ID Management function qInterrupt key Press to interrupt a Copy job when you need...

Page 36: ...atures Screen aMode keys Sp Feature Press to select a Special Features function Mode Memory Press to store and recall copy settings Recall Press to recall previously specified copy settings bMessage d...

Page 37: ...Dark Press Light or Dark to manually adjust the copy exposure Press A to copy the original without copying the background colour l Original Type Press to specify the type of the original to be copied...

Page 38: ...his section explains how to turn the power to ON and OFF Turning On the Power 1 Make sure that the power plug is firmly inserted into the power outlet WARNING Never remove or insert the power plug wit...

Page 39: ...played until the copier is ready to make copies NOTE Once the Please wait Auto Start is possible message appears on the touch panel display you can specify the Auto Start function See Chapter 1 Basic...

Page 40: ...e specified The standard copy settings are as follows Copy quantity 1 Paper selection Auto Paper Selection Exposure adjustment AE OFF Exposure Centre Copy ratio 1 1 100 Original type selection Text Im...

Page 41: ...9 Before You Start Using This Copier 1 If the message Enter your Dept ID and Password with the Number keys appears Enter the department ID and password Turning Off the Power 1 Press the power switch t...

Page 42: ...een retaining the programmed settings in the Additional Functions screen Press to cancel the function mode that is being set or has already been set in screens other than the Additional Functions scre...

Page 43: ...hat is they become greyed out You cannot press keys that are greyed out which means that you cannot set those functions in combination with the presently specified function mode CAUTION Press the keys...

Page 44: ...ontrast of the Touch Panel Display If the touch panel display is difficult to see use the display contrast dial on the control panel to adjust its brightness NOTE To make the touch panel display light...

Page 45: ...g the keys displayed on the touch panel display or Number keys on the control panel as shown below Entering Alphabets Example Enter CANON 1 Press Entry Mode until Uppercase is displayed above it Press...

Page 46: ...alphabet Then reenter the correct alphabet You can also delete all alphabets you have entered by pressing Clear You can only enter up to 10 alphabets 3 When you are finished entering the alphabets pr...

Page 47: ...r To enter alphabets press Entry Mode to select Uppercase NOTE If you make a mistake when entering symbols use or to position the cursor then press Backspace to delete the symbol Then reenter the corr...

Page 48: ...mple 1_1 2 shows inch entry when specifying the Zoom Programme function 1 To enter 1 1 2 inches press 1 _ 1 and 2 using the number keys on the touch panel display The entered values are displayed as s...

Page 49: ...nsert the Control Card into the card slot See Control Card on p 5 72 Operations After Turning the Power On After turning the power on and the copier is ready to make copies the screen for entering the...

Page 50: ...ng This Copier 2 Press ID The Basic Features screen appears on the touch panel display NOTE If the department ID and or password that you entered is incorrect the message This number has not been stor...

Page 51: ...ssword appears NOTE To perform copy operations again reenter the department ID and password If you do not press ID after you are finished copying any subsequent copy will be added to your department I...

Page 52: ...wake it up for normal operation NOTE You can set the energy saving level to 10 25 or 50 or specify Return to Standard Mode See Changing Settings for the Energy Saver Mode on p 2 10 Auto Drawer Switch...

Page 53: ...remaining in the currently selected drawer or paper deck option There are four different indicators as shown below This indicator shows the remaining amount of paper in all drawers and the paper deck...

Page 54: ...th your copier Usage Guide Pressing Guide after selecting a function brings up a screen with an explanation for that function Use this guide function if you do not understand how to use the function y...

Page 55: ...ide while the Basic Features screen or Special Features screen is displayed The Guide Menu screen appears on the touch panel display as shown below The Guide Menu screen Example When making copies of...

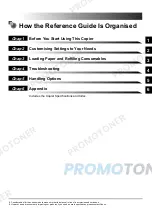
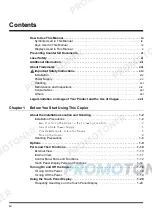
Page 56: ...Universal Functions 1 34 1 Before You Start Using This Copier...

Page 57: ...ure Level Switch 2 16 Designating the Feeding Location for Transparencies 2 16 Designating the Feeding Location for Thin Paper 2 18 Specifying Colour Palette Sheet Settings Change Colour Sheet 2 19 Sp...

Page 58: ...the Gradation for Print Output Print Gradation Adjustment 2 44 Increasing the Resemblance of Prints to Their Counterparts in Offset Printing SWOP Emulation 2 45 Selecting the Image Type Based on the T...

Page 59: ...le you to customise the copier s various settings to suit your needs NOTE Settings specified in the Additional Functions screen are not changed even when you press Reset Accessing the Additional Funct...

Page 60: ...ttings for For an overview of the settings you can change by pressing each of the keys in the Additional Functions screen see An Overview of Additional Functions Settings on p 2 5 NOTE The Custom Sett...

Page 61: ...Off P 2 13 Drawer Eligibility for APS ADS For each paper feeding location On Off P 2 14 Audible Tones Entry Tone Error Tone Job Done Tone All On Off P 2 15 Exposure Level Switch 9 Levels 17 Levels P 2...

Page 62: ...r increments 1 hour P 2 35 Adjustment Cleaning Zoom Fine Adjustment X Y 0 1 0 to 1 0 in 0 1 increments P 2 36 Exposure Recalibration 2 to 2 0 P 2 38 Gradation Auto Adjustment Perform the adjustment P...

Page 63: ...o frequently used functions The functions that can be specified include Copy Ratio Sorter Two sided and Original Type from the Basic Features screen various setting keys from the Special Features scre...

Page 64: ...rd key the key of that function is highlighted If you want to cancel the assigned function press No Settings 4 Select the function that you want to assign to the standard key then press OK Only one fu...

Page 65: ...Features Screen is the screen that is displayed after the power is turned on or after performing a Reset Select Special Feature Mode Memory or Recall and the main settings screen for the selected fun...

Page 66: ...power off and then on again or press Reset Changing Settings for the Energy Saver Mode Pressing Energy Saver on the control panel puts the copier into the Energy Saver mode While in the Energy Saver...

Page 67: ...e energy saving level then press OK 3 Press Done Specifying Inch Entry Specifying this setting will ensure that the key for entering values in inches is displayed in the various numeric entry screens...

Page 68: ...ion window to be automatically displayed when changes are made to Special Feature settings Even if the window is not set to be displayed automatically you can still access it by pressing Setting Confi...

Page 69: ...ion automatically sorts copies if originals are fed through the feeder for copying This function is useful when making multiple copies because sorting is automatically specified even if you forget to...

Page 70: ...th the same paper size and begins feeding paper from that paper feeding location Turn Drawer Eligibility for APS ADS off if the drawer or paper deck option holds paper of the same size but of a differ...

Page 71: ...ys on the control panel or the touch panel display Error Tone When a malfunction occurs e g paper jam or operational error Job Done Tone When a job is complete e g after copying or stapling is complet...

Page 72: ...ree of control in the copy exposure NOTE The default setting is 9 Levels 1 Display the required screen as follows Press Additional Functions Custom Settings or Exposure Level Switch 2 Select 9 Levels...

Page 73: ...per jams To use such a drawer with plain paper cancel the drawer s designation as the feeding location for transparencies NOTE Only A4 and A4R drawers can be designated as the feeding locations for tr...

Page 74: ...on 2 Select the desired paper feeding location to designate as the feeding location for thin paper then press OK NOTE Paper feeding locations that are already designated for use with thin paper are hi...

Page 75: ...on is attached The colour palette sheets can be output only if the IP ED board option is attached NOTE For information on the types of colour palette sheets available with the editor option and instru...

Page 76: ...egistering Colours onto the Custom Sheet The Change Colour Sheet function enables you to register colours onto the custom sheet or make changes to the colours already registered You can copy or duplic...

Page 77: ...ur is erased and the colours of the duplicated sheet will be specified 4 Select the colour palette sheet to duplicate then press OK 5 Select the key of the colour to be changed or registered then pres...

Page 78: ...other keys or making changes to the colours of other keys repeat steps 5 and 6 IMPORTANT If a colour is selected through the Colour Palette Selection method without carrying out a colour palette dupli...

Page 79: ...Specifying Feeder Auto Start This function allows you to specify whether or not an original placed in the feeder s option single sheet document feeder is automatically pulled into the copier and copie...

Page 80: ...ues after changing them The copier s original standard copy settings are shown below Storing Standard Copy Settings You can store standard copy settings of your choice NOTE To change the standard copy...

Page 81: ...uired screen as follows Press Additional Functions Custom Settings or Standard Settings 2 Press Register 3 Press Yes To cancel changing the standard copy settings press No The screen below is displaye...

Page 82: ...isplay the required screen as follows Press Additional Functions Custom Settings or Standard Settings 2 Press Initial Settings 3 Press Yes To cancel initialising the standard copy settings press No Th...

Page 83: ...ault 1 Display the required screen as follows Press Additional Functions Custom Settings or Set System Settings Password If a system settings password is set enter the password after pressing Set Syst...

Page 84: ...ed This function enables you to tally the copy totals for each department With Department ID Management the following operations can be performed Setting whether or not to use Department ID Management...

Page 85: ...ion on copy counts see Displaying Copy Counts by Department on p 2 31 4 Press the column for department ID and enter a 4 digit number using Number keys You cannot store 0000 as a department ID Also yo...

Page 86: ...keys Then press OK You cannot store 0000 as the password NOTE When a password is not stored you can use this copier by entering only the department ID You can delete the number you entered by pressing...

Page 87: ...enter that password before being able to access department related functions 1 Display the required screen as follows Press Additional Functions Custom Settings or Dept ID Management If a system sett...

Page 88: ...he original default settings NOTE Department related settings that are protected by a system settings password are not initialised 1 Display the required screen as follows Press Additional Functions C...

Page 89: ...or a key input the touch panel display will return to the Basic Features screen This is called the Auto Clear function NOTE The default setting is 2 min 1 Display the required screen as follows Press...

Page 90: ...into the Energy Saver mode This is called the Auto Energy Saver function NOTE The default setting is 30 min 1 Display the required screen as follows Press Additional Functions Timer Settings Auto Ener...

Page 91: ...using the Character Composition function are lost Such settings stored in mode memory or the memory of the Recall key are also lost NOTE The default setting is 1 hrs 1 Display the required screen as f...

Page 92: ...e Adjustment Cleaning screen consists of a list of individual settings Use and to scroll to the desired setting When the procedure requires that you press and or is indicated in this manual Fine adjus...

Page 93: ...centage then press OK The adjustment can be made within the range shown below X horizontal direction 1 0 to 1 0 in 0 1 increments Y vertical direction 1 0 to 1 0 in 0 1 increments If you are making ad...

Page 94: ...s despite being copied with the standard or centre copy exposure value you will have to recalibrate the copy exposure settings of the copier NOTE The default setting is the centre value of a scale fro...

Page 95: ...ed IMPORTANT Make sure that you set the test print correctly An improperly placed test print can cause the colour gradation or exposure to be recalibrated incorrectly NOTE Make sure that A3 size paper...

Page 96: ...t Print 2 The message Printing Test Print 2 is displayed and Test Print 2 is output 6 Place the second test print on the platen glass Place the test print face down on the platen glass with the yellow...

Page 97: ...photo differentiation priority level so that copies are reproduced at a higher quality Give priority to Text when making copies of originals with fine and faint characters When making copies of origi...

Page 98: ...e performed when the feeder option is attached NOTE It takes about 20 seconds to clean the feeder option 1 Display the required screen as follows Press Additional Functions Adjustment Cleaning or Feed...

Page 99: ...pier to clean the primary corona assembly wire NOTE It takes about 30 seconds to clean the wire 1 Display the required screen as follows Press Additional Functions Adjustment Cleaning or Wire Cleaning...

Page 100: ...ct your service representative for more information Print Gradation Adjustment is usually made via the print controller option For details refer to the print controller manual This setting may not be...

Page 101: ...ailable only when a print controller option is installed NOTE This function cannot be used for copying from the platen glass or feeder option Do not use this mode when outputting images in RGB Using t...

Page 102: ...tion enables you to select the image type for prints output using the print controller option NOTE This function cannot be used for copying from the platen glass or feeder option The default setting i...

Page 103: ...our Needs Checking the Counter You can check the total number of Copy jobs made by displaying the copy count on the touch panel display 1 Press Counter Check on the control panel The various copy coun...

Page 104: ...Checking the Counter 2 48 2 Customising Settings to Your Needs...

Page 105: ...such as toner and fixing oil Loading Paper 3 2 Loading Paper into the Drawers 3 2 Adjusting a Drawer to Hold a Different Paper Size 3 6 Loading Paper in the Stack Bypass 3 9 Adding Toner 3 12 Refilli...

Page 106: ...ollow the procedure below to load paper into the drawers CAUTION When loading paper take care not to cut your hands on the edges of the paper IMPORTANT Load paper of the size indicated on the outside...

Page 107: ...designate that drawer as the feeding location for transparencies See p 2 16 Refer to Chapter 2 Useful Copy Functions in the Copying Guide for instructions on the correct way to load transparencies in...

Page 108: ...l package and store it in a dry place away from direct sunlight NOTE For high quality copies only use Canon approved paper 4 Turn the paper stack over and place it in the drawer Even out the edges of...

Page 109: ...ow on the sheet is against the far right corner of the drawer Do not load the following types of paper into the drawer Doing so may cause a paper jam Severely curled or wrinkled paper Thin straw paper...

Page 110: ...d decrease the amount of paper to the loading limit 6 Press Done Adjusting a Drawer to Hold a Different Paper Size If you want to load a new paper size into a drawer follow the procedure described bel...

Page 111: ...e loaded paper 3 Squeeze the lever on the left guide as shown below Without releasing the lever slide the left guide to align it with the mark for the desired paper size When adjusting the left guide...

Page 112: ...ze IMPORTANT Not adjusting the guides correctly may cause paper jams produce copies with dirt marks or make the inside of the copier dirty To prevent these problems check that the guides are adjusted...

Page 113: ...s Paper size 305 x 457 mm paper A3 A4 A4R irregular size paper 182 x 182 mm to 305 x 457 mm Paper weight 64 to 209 g m2 Curl down paper before use There are some types of paper that may meet the above...

Page 114: ...the stack bypass 2 Adjust the slide guides to match the size of the paper When feeding large size paper pull out the auxiliary tray IMPORTANT Adjusting the slide guides too tightly or too loosely may...

Page 115: ...oad the required number of sheets of paper in the stack bypass with the surface of the paper that was facing upward when the package was opened face up This is the surface that will be copied onto Mak...

Page 116: ...n If toner is ingested consult a physician immediately If toner gets onto your hands or clothes wash it off immediately with cold water Do not use warm water as this may fix the toner permanently and...

Page 117: ...ng Paper and Refilling Consumables 3 1 Open the right front door of the main unit 2 Push the toner box release lever down 3 Grip the handle on the toner box then pull the toner box out until it stops...

Page 118: ...t colours may adversely affect the copier or the quality of copies 5 Shake the toner bottle as illustrated below With the opening of the toner bottle facing downward drop the bottle about five times f...

Page 119: ...ottle opening with the toner supply port then turn the bottle in the direction of the arrow IMPORTANT The shape of the toner bottle opening and the toner supply port is different for each colour If th...

Page 120: ...is not correctly seated on the toner supply port Toner is emptied into the copier NOTE It takes a while to transfer all the toner into the toner box 8 Gently tap the bottom and sides of the toner bot...

Page 121: ...d toner bottles into open flames as this may ignite the toner remaining inside the bottle and result in burns or a fire CAUTION When removing the used toner bottle from the toner supply port be carefu...

Page 122: ...back into the copier Make sure that the toner box makes a clicking sound when you push it into the copier as this indicates that it is correctly seated 13 Close the right front door of the main unit C...

Page 123: ...edure for refilling fixing oil is displayed on the touch panel display CAUTION Make sure that the room where the copier is located is well ventilated before proceeding with the oil refill procedure NO...

Page 124: ...oil bottle and attach the nozzle IMPORTANT Make sure that the nozzle is firmly attached to the bottle 4 Refill the oil tank with one bottle of fixing oil CAUTION Be careful not to spill the fixing oi...

Page 125: ...e the remaining oil in the bottles to ignite and result in burns or a fire CAUTION Attach the cap onto the empty fixing oil bottle and dispose of it as noncombustible garbage 6 Close the front doors o...

Page 126: ...r to ignite and result in burns or a fire Your service representative will dispose of the used waste toner container Use the seal removed from the new waste toner container to cover up the opening of...

Page 127: ...Toner Container 3 23 Loading Paper and Refilling Consumables 3 2 Open the cover under the lower drawer 3 Open the lower left front door 4 Lift up the lever and pull out the waste toner container Lowe...

Page 128: ...emove the seal that covers the opening of the new waste toner container CAUTION Be careful not to tear the seal as you will need it to cover up the opening of the used waste toner container 6 Insert t...

Page 129: ...Paper and Refilling Consumables 3 8 Restore all the drawers to their original positions then close the cover under the lower drawer 9 Use the seal removed from the new waste toner container to cover u...

Page 130: ...they run out IMPORTANT Do not store consumables in empty spaces inside the copier such as under the fixing unit or inside drawers Doing so may damage the consumables or affect the copy quality Consuma...

Page 131: ...Some commercially available paper types are not suited to this copier Consult with your service representative when you need to purchase paper Toner When the Add xxx toner message appears on the touc...

Page 132: ...ing oil out of the reach of small children If fixing oil is ingested consult a physician immediately Avoid all contact with your eyes and skin as fixing oil is an eye and skin irritant If fixing oil g...

Page 133: ...r and Refilling Consumables 3 Options Universal Drawer A universal drawer can be adjusted to hold paper of various sizes See Adjusting a Drawer to Hold a Different Paper Size on p 3 6 Loading position...

Page 134: ...Consumables and Options 3 30 3 Loading Paper and Refilling Consumables...

Page 135: ...Jams in the Output Area 4 10 Removing Paper Jams in the Drawers 4 12 Removing Paper Jams in the Stack Bypass 4 14 Removing Paper Jams in the Paper Transport Area 4 16 Removing Paper Jams in the Transf...

Page 136: ...paper jam This display repeatedly appears on the touch panel display until the paper jam is completely cleared Example of screen indicating the location of the paper jam Example of screen indicating h...

Page 137: ...ll fix the toner and make it impossible to remove later When removing paper which has become jammed inside the copier remove the jammed paper gently to prevent the toner on the paper from scattering a...

Page 138: ...ys check all locations indicated on the touch panel display in the order given Display indicating locations of the paper jam and page number with instructions on how to remove jammed paper Right side...

Page 139: ...ng Paper Jams in the Left Feeder Cover on p 5 15 See Removing Paper Jams in the Right Feeder Cover on p 5 19 See Removing Paper Jams in the Single Sheet Document Feeder on p 5 22 See Removing Paper Ja...

Page 140: ...ositions Otherwise the right and left front doors will not close 4 Continue with the procedure by following the instructions displayed on the touch panel display Copying resumes once the copier is war...

Page 141: ...jam occurs use the number that is shown on the illustration as a reference for the area of the paper path that needs to be inspected The illustration below shows the paper path inside the main unit aD...

Page 142: ...el display Check the location of the paper jam and using the screen on the touch panel display as a reference follow the procedure described below to remove the jammed paper NOTE The screen that appea...

Page 143: ...ull it out Look carefully as jammed paper may be difficult to see 3 Close the right side door of the main unit If the paper deck option was attached reattach the paper deck to the main unit See Paper...

Page 144: ...and using the screen on the touch panel display as a reference follow the procedure described below to remove the jammed paper NOTE The screen that appears differs depending on the options attached 1...

Page 145: ...doors of the main unit If the stapler sorter option and the buffer pass unit option were attached reattach the stapler sorter and the buffer pass unit to the main unit See Stapler Sorter F2 on p 5 36...

Page 146: ...paper jams in the right side door first See Removing Paper Jams in the Right Side Door on p 4 8 If you pull the drawer out without removing the paper jammed between the drawer and the right side door...

Page 147: ...4 2 Pull out the drawer 3 Remove any jammed paper 4 Restore the drawer to its original position CAUTION When restoring the drawer to its original position be careful not to catch your fingers between...

Page 148: ...f a paper jam occurs in the stack bypass a screen similar to the one shown below appears on the touch panel display Check the location of the paper jam and using the screen on the touch panel display...

Page 149: ...nd then close the right front door of the main unit If the paper jam is only located at the stack bypass opening and closing the right front door after removing the jammed paper enables the copier to...

Page 150: ...ure described below to remove the jammed paper IMPORTANT Before removing jammed paper from the paper transport area always check for paper jams in the right side door and the output area first See Rem...

Page 151: ...the green lock release lever to the left and pull out the main assembly 3 Open the cover of the paper transport area and remove the jammed paper CAUTION Do not touch the transfer drum Lock release lev...

Page 152: ...t to get your fingers caught in the gap when pushing the main assembly back into the copier 5 Close the front doors of the main unit If the front doors do not close check to make sure that the green l...

Page 153: ...removing jammed paper from the transfer drum area always check for paper jams in the right side door and the output area first See Removing Paper Jams in the Right Side Door on p 4 8 and Removing Pape...

Page 154: ...l out the jammed paper while rotating the green resistance knob below the transfer drum in the direction of the arrow If rotating the resistance knob does not remove the jammed paper or if the jammed...

Page 155: ...he right until it stops CAUTION Be careful not to get your fingers caught in the gap when pushing the main assembly back into the copier 5 Close the front doors of the main unit If the front doors do...

Page 156: ...ul not to touch anywhere except the green fixing unit knob Failure to follow this precaution may result in burns IMPORTANT Before removing jammed paper from the fixing unit area always check for paper...

Page 157: ...direction of the arrow CAUTION Some parts surrounding the green tab are subject to high temperatures Be careful not to touch anything in this area except the green tab 4 Push the main assembly back in...

Page 158: ...ts original position CAUTION When closing the doors be careful not to get your fingers caught 6 Follow the instructions on the touch panel display NOTE For details see About the Paper Jam Troubleshoot...

Page 159: ...ions to resolve the paper jam problem There are torn pieces of paper left inside the copier Pulling jammed paper out from the copier by force may leave parts of the paper torn inside the copier leadin...

Page 160: ...ning the copier first turn off the power switch and unplug the power cord Failure to do so may result in a fire or electrical shock Do not use alcohol benzene paint thinner or other solvents for clean...

Page 161: ...glass or the rear side of the platen glass cover is dirty the original may not be scanned clearly or the size of the original may be detected incorrectly 1 Clean the platen glass and the rear side of...

Page 162: ...ed cleaning For instructions on cleaning the feeder s rollers see Cleaning the Feeder on p 2 42 1 Clean the feeding belt with a piece of well wrung cloth dampened with water then wipe it with a piece...

Page 163: ...necessary procedures as indicated by the messages The following describes some of the messages that require further explanation NOTE The messages are listed in alphabetical order Add black toner Cause...

Page 164: ...eck the number of copies specified and reduce the number if it exceeds the maximum stapling capacity For information on the maximum number of sheets that can be stapled together for the different pape...

Page 165: ...unit s option front cover is left open Remedy Close the buffer pass unit s option front cover Close the Stapler Sorter front cover Cause The stapler sorter s option front cover is left open Remedy Cl...

Page 166: ...Cause A paper jam occurred because originals unsuitable for the feeder option were loaded or an excessive number of originals were loaded Remedy Check the originals For information on the acceptable...

Page 167: ...ition function off and manually select the paper size See Chapter 1 Basic Copying in the Copying Guide Paper is jammed in the indicated location Remove the jammed paper Cause An original or paper is j...

Page 168: ...possible due to incorrect loading Cause Stapling could not be completed because the density of the original is too high Remedy Remove all paper from the sort bins Stopped due to incorrect loading Rem...

Page 169: ...he number again Cause The number entered is incorrect Remedy Enter the correct number or contact the supervisor of the copier This size cannot be stapled Cause The specified paper size cannot be stapl...

Page 170: ...an electrical shock CAUTION Always grasp the plug portion when unplugging the power cord Pulling on the power cord may expose or snap the core wire or otherwise damage the power cord If the cord is da...

Page 171: ...act your service representative after performing the following procedures Turn off the power switch Disconnect the power plug NOTE When you contact your service representative have the following infor...

Page 172: ...Touch Panel Display Messages 4 38 4 Troubleshooting...

Page 173: ...oving Paper Jams in the Right Feeder Cover 5 19 Removing Paper Jams in the Single Sheet Document Feeder 5 22 Removing Paper Jams on the Platen Glass 5 23 Routine Cleaning 5 25 Specifications 5 26 Pape...

Page 174: ...5 Handling Options 5 2 5 Handling Options Before Copying 5 72 After Copying 5 73...

Page 175: ...tion board with conductors such as metallic rulers placed on it Do not pull hard on the cord of the edit pen When using the edit pen avoid letting the cord come near to the tip of the edit pen Do not...

Page 176: ...ect the editor to the copier Placing an Original Place the original with the surface to be copied face up on the editor aligning the original s top right corner with the mark When you move the origina...

Page 177: ...urs of the various colour palette sheets NOTE Refer to Chapter 7 Appendix in the Copying Guide for information on the actual colours Black Hue A Very pale Light Primary colour Dark Primary Black Very...

Page 178: ...er Additional Functions Custom Settings For instructions see Specifying Colour Palette Sheet Settings Change Colour Sheet on p 2 19 Changing the colours on a colour palette sheet You can change the co...

Page 179: ...ed to the platen glass for copying The feeder can also be set to automatically flip two sided originals for making two one sided copies IMPORTANT The manual that comes packaged with the feeder is a ge...

Page 180: ...the feeder aOriginal separation lever This lever keeps the copied and uncopied originals separate in the original tray bOriginal set indicator Lights when originals are placed in the original tray cOr...

Page 181: ...e original tray and sends it to the platen glass for copying Single sheet document feeding Insert originals one sheet at a time into the single sheet document feeder The single sheet document feeder i...

Page 182: ...er or other originals which might not feed smoothly Transparencies and other highly transparent originals Originals that are themselves colour copies may not feed properly through the feeder particula...

Page 183: ...Follow the procedure below when making copies using the feeder s original tray 1 Adjust the slide guides to match the size of the originals If you are using A3 or A4R size originals flip open the aux...

Page 184: ...al on the platen glass before placing your originals into the original tray NOTE Place A4 size originals from 129 to 200 g m2 in weight vertically Flip open the auxiliary tray when placing A3 size or...

Page 185: ...from the Single Sheet Document Feeder Follow the procedure below when making copies using the feeder s single sheet document feeder 1 Open the single sheet document feeder 2 Adjust the slide guide on...

Page 186: ...sheet document feeder The original is automatically pulled into the feeder and copying begins IMPORTANT If the Feeder Auto Start setting see p 2 23 is turned off the original will not be automaticall...

Page 187: ...nd using the screen on the touch panel display as a reference follow the procedure described below to remove the jammed originals CAUTION When removing jammed originals take care not to cut your hands...

Page 188: ...Recirculating Document Feeder RDF E3 5 16 5 Handling Options 2 Open the left feeder cover 3 Remove any jammed originals 4 Open the inner cover Left feeder cover...

Page 189: ...ions 5 5 Remove any jammed originals 6 Close the inner cover CAUTION When closing the cover be careful not to get your fingers caught 7 Close the left feeder cover CAUTION When closing the cover be ca...

Page 190: ...ver then remove the jammed original 10 Lower the feeder 11 Follow the instructions on the touch panel display NOTE For details see About the Paper Jam Troubleshooting Screen on p 4 2 If the touch pane...

Page 191: ...and using the screen on the touch panel display as a reference follow the procedure described below to remove the jammed originals CAUTION When removing jammed originals take care not to cut your hand...

Page 192: ...g Document Feeder RDF E3 5 20 5 Handling Options 2 Open the right feeder cover 3 Remove any jammed originals 4 Close the right feeder cover CAUTION When closing the cover be careful not to get your fi...

Page 193: ...tion below then remove the jammed original 7 Lower the feeder 8 Follow the instructions on the touch panel display NOTE For details see About the Paper Jam Troubleshooting Screen on p 4 2 If the touch...

Page 194: ...k the location of the paper jam and using the screen on the touch panel display as a reference follow the procedure described below to remove the jammed original CAUTION When removing jammed original...

Page 195: ...the Paper Jam Troubleshooting Screen on p 4 2 Removing Paper Jams on the Platen Glass If a paper jam occurs on the platen glass a screen similar to the one shown below appears on the touch panel disp...

Page 196: ...andling Options 1 Remove all originals from the original tray CAUTION When the originals are removed the original tray automatically rises Be careful not to get your fingers caught 2 Lift up the feede...

Page 197: ...2 If the touch panel display continues to show paper jams in the feeder check the feeder again for originals that may still be remaining inside the mechanism of the feeder Routine Cleaning Clean the f...

Page 198: ...these situations occur you need to clean the feeder See Cleaning the Feeder on p 2 42 Specifications These specifications are subject to change without prior notice Name RDF E3 Original size A3 A4 A4...

Page 199: ...in the standard drawers Up to 2 500 sheets 80 g m2 of paper can be loaded into the paper deck IMPORTANT You may not be able to open the paper deck when the copier is in the Energy Saver mode In this...

Page 200: ...pull the paper deck away from the main unit bOpen button Press to load paper or to check for a paper jam cPaper deck A maximum of 2 500 sheets 80 g m2 can be stacked dFront cover Open this cover to lo...

Page 201: ...hands on the edges of the paper IMPORTANT The paper deck can only accommodate paper from 64 to 105 g m2 in weight Use the stack bypass to load paper that is heavier NOTE If the message is displayed du...

Page 202: ...ter automatically descends to the paper loading position 2 Open a package of paper and remove a stack of paper to load IMPORTANT Rewrap any remaining paper in its original package and store it in a dr...

Page 203: ...llowing types of paper into the paper deck Doing so may cause a paper jam Severely curled or wrinkled paper Thin straw paper Transparencies Paper that has been previously copied onto by this copier do...

Page 204: ...te more paper the lifter will descend once again You can only load A4 size paper into the paper deck Paper cannot be loaded horizontally The changing of the loading paper size must be carried out by a...

Page 205: ...scribed below to remove the jammed paper WARNING When removing jammed paper or inspecting the inside of the paper deck do not allow necklaces bracelets or other metallic objects to touch the inside of...

Page 206: ...ling Options 2 Remove any paper jammed in the feeding area 3 Press the open button to open the paper deck The lifter will go down automatically 4 Remove any jammed paper Look carefully as jammed paper...

Page 207: ...t to get your fingers caught 6 Follow the instructions on the touch panel display NOTE For details see About the Paper Jam Troubleshooting Screen on p 4 2 Specifications These specifications are subje...

Page 208: ...nctions of the Stapler Sorter on p 5 38 The Buffer Pass Unit 1 must be installed to install the stapler sorter IMPORTANT The manual that comes packaged with the stapler sorter is a general manual and...

Page 209: ...upt the stapling process dLoad Staples indicator This indicator lights when the stapler runs out of staples eBuffer pass unit release handle Grip this handle to pull the stapler sorter and the buffer...

Page 210: ...while copying is taking place and touching them may result in personal injury If the stapler sorter is installed be sure not to place your hand into the location where stapling is performed inside th...

Page 211: ...g m2 A3 25 sheets 80 to 104 7 gm2 15 sheets 157 to 209 g m2 Once the output exceeds the capacity of the bins copying will temporarily stop and will only resume after all the output copies are removed...

Page 212: ...ost bin The maximum number of copies that can be delivered to each of the bins is as follows A4 A4R 30 sheets 80 to 104 7 g m2 15 sheets 157 to 209 g m2 A3 25 sheets 80 to 104 7 g m2 10 sheets 157 to...

Page 213: ...hen you press Start The maximum number of copies that can be delivered to each of the bins is as follows A4 A4R 30 sheets 80 to 104 7 g m2 20 sheets 157 to 209 g m2 A3 25 sheets 80 to 104 7 g m2 15 sh...

Page 214: ...number of copies that can be manually stapled together is as follows A4 A4R 30 sheets 80 to 104 7 g m2 20 sheets 157 g m2 15 sheets 209 g m2 A3 25 sheets 80 to 104 7 g m2 15 sheets 157 to 209 g m2 In...

Page 215: ...posure and take up more space than if they were flat 1 Even out the edges of the sheets to be stapled together 2 Place the sheets on the first top sort bin Insert the sheets straight into the bin such...

Page 216: ...ing can be done varies depending on the paper size Corner stapling A3 A4 A4R Double stapling A3 A4 Single stapling Cannot be selected 4 Press Stapling Start Stop IMPORTANT You cannot staple the copies...

Page 217: ...using the stack bypass sorting may stop if the copies have markedly different copy exposures on each side of the paper Also the sorting of A4R size copies may stop depending on the copy exposure When...

Page 218: ...appears differs depending on the options attached When the number of copies is the cause Stapling may not be executed if the number of copies exceeds the maximum number of copies that can be stapled...

Page 219: ...l shock CAUTION When removing jammed paper take care not to cut your hands on the edges of the paper There are areas inside the buffer pass unit that are very hot Be careful not to touch anywhere exce...

Page 220: ...t then feed the jammed paper by rotating the green fixing unit knob in the direction of the arrow If the jammed paper is not visible when you lift the cover inside the buffer pass unit pull out the ma...

Page 221: ...per 5 Close the front cover of the buffer pass unit CAUTION When closing the cover be careful not to get your fingers caught IMPORTANT Make sure that the front cover of the buffer pass unit is closed...

Page 222: ...on p 4 2 Removing Paper Jams in the Stapler Sorter If a paper jam occurs in the stapler sorter a screen similar to the one shown below appears on the touch panel display Check the location of the pape...

Page 223: ...e care not to allow the toner on the jammed paper to come into contact with your hands or clothes If your hands or clothes become dirty wash them immediately with cold water Washing with warm water wi...

Page 224: ...paper by rotating the knob on the buffer pass unit in the direction of the arrow IMPORTANT Always hold up the cover inside the stapler sorter while rotating the knob on the buffer pass unit Rotating t...

Page 225: ...apler sorter that are very hot Be careful not to touch anywhere except for the parts coloured in green 5 Remove any paper that may be jammed in the paper output area on the non sort bin 6 Close the fr...

Page 226: ...erly 7 Close the front cover of the buffer pass unit CAUTION When closing the cover be careful not to get your fingers caught IMPORTANT Make sure that the front cover of the buffer pass unit is closed...

Page 227: ...Options 5 When Outputting to a Sort Bin 1 Open the front cover of the buffer pass unit 2 Open the front cover of the stapler sorter Buffer pass unit Main unit Buffer pass unit front cover Stapler sor...

Page 228: ...d up the cover inside the stapler sorter while rotating the knob on the buffer pass unit Rotating the knob with the cover inside the stapler sorter down may cause a malfunction 4 Remove any jammed pap...

Page 229: ...Options 5 5 Turn the knob on the stapler sorter in the direction of the arrow to feed the jammed paper 6 Open the upper cover then remove any jammed paper 7 Open the lower cover then remove any jamme...

Page 230: ...moved to make removing jammed paper easier See When Outputting to a Sort Bin on p 5 55 9 Close the front cover of the stapler sorter CAUTION When closing the cover be careful not to get your fingers c...

Page 231: ...the touch panel display NOTE For details see About the Paper Jam Troubleshooting Screen on p 4 2 Removing Paper Jams in the Sort Bins Paper that is jammed in the rear of the sort bins may be difficult...

Page 232: ...ith the paper jam is lowered to the position of the widely spaced bin If paper is jammed in a bin below the widely spaced bin press until the bin with the paper jam is raised to the position of the wi...

Page 233: ...ghts and the following message is displayed on the touch panel display Follow the procedure below to replace the staple case inside the staple cartridge IMPORTANT Only replace staples when the Load St...

Page 234: ...ns 1 Open the front cover of the stapler sorter 2 Grip the stapler unit by the green handle and pull it out of the stapler sorter until it stops 3 Press the green button to unlock the stapler section...

Page 235: ...reen button then remove the empty staple case If there are any staples remaining in the staple case the case cannot be removed 6 Place a new staple case into the staple cartridge by aligning the arrow...

Page 236: ...re placing the staple case into the staple cartridge 7 Pull the seal holding the staples together straight up to remove it IMPORTANT Make sure you pull the seal straight up because it may tear if you...

Page 237: ...n closing the cover be careful not to get your fingers caught IMPORTANT Make sure that the front cover of the stapler sorter is closed properly After replacing the staple cartridge no staples may appe...

Page 238: ...message is displayed on the touch panel display Follow the procedure described below to remove the jammed staples NOTE The screen that appears differs depending on the options attached 1 Open the fro...

Page 239: ...utton to unlock the stapler section 4 Unlock the stopper then lift up the staple cover Gently lift up the staple cover by its metal tab with your thumb while unlocking the stopper with your index fing...

Page 240: ...down to close the staple cover Make sure that the staple cover is locked into position by the stopper 7 Restore the stapler unit to its original position Push the staple unit in until it is locked The...

Page 241: ...removing jammed staples press Stapling Start Stop to have the remaining copies stapled However stapling will take place without staples for each staple removed Therefore you will need to manually rest...

Page 242: ...sheets 80 to 104 7 g m2 10 sheets 157 g m2 Staple sort function 1st to 20th bin A4 A4R 30 sheets 80 to 104 7 g m2 20 sheets 157 g m2 A3 25 sheets 80 to 104 7 g m2 15 sheets 157 g m2 NOTE You cannot u...

Page 243: ...ice Buffer Pass Unit These specifications are subject to change without prior notice Power source 230 V AC Power consumption 135 W Dimensions W x D x H 564 x 609 x 966 mm Weight Approx 56 kg Name Buff...

Page 244: ...e Control Card is inserted in the correct direction The Control Card is inserted as far as it can go An unusable Control Card is not inserted For example cards which are damaged cards already used to...

Page 245: ...pier remove the Control Card The touch panel display returns to the screen for inserting the Control Card IMPORTANT Once you have removed the Control Card you cannot operate the copier until the Contr...

Page 246: ...Control Card 5 74 5 Handling Options...

Page 247: ...CHAPTER 6 1 6 Appendix Copier Specifications 6 2 Index 6 4...

Page 248: ...rawer 64 to 105 g m2 Stack bypass 64 to 209 g m2 transparencies Paper size Drawer A3 A4 A4R Stack bypass 305 x 457 mm A3 A4 A4R Irregular size 182 x 182 mm to 305 x 457 mm Non image area Top 8 0 mm 1...

Page 249: ...1 0 250 1 0 500 1 0 707 A3 A4 Enlargement 1 1 414 A4 A3 1 2 000 A5 A3 1 4 000 Paper feeding system Two drawers 550 sheets each 80 g m2 Stack bypass 250 sheets 80 g m2 Copy exposure 9 17 gradations sw...

Page 250: ...ting the Standard Exposure 2 38 Selecting the Image Type Based on the Type of Image to Print Original Type Selection for Printer 2 46 When Differences in the Original Image and Copy Image Occur Zoom F...

Page 251: ...hanging the Colour Palette Sheet 5 6 Changing the Colours on a Colour Palette Sheet 5 6 Changing the Settings on the Copier Change Colour Sheet 2 19 Registering Colour onto the Custom Sheet 2 20 Confi...

Page 252: ...g the Password 1 27 Specifying the Department ID 2 28 Specifying the Password 2 28 Display Contrast Dial 1 12 Drawers Acceptable Paper Sizes 6 2 Adjusting Drawer 2 to Hold a Different Paper Size 3 6 D...

Page 253: ...er 5 9 5 13 Originals Fed Through the Feeder Are Dirty 4 28 Part Names 5 8 Removing Paper Jams in the Left Feeder Cover 5 15 Removing Paper Jams in the Right Feeder Cover 5 19 Removing Paper Jams in t...

Page 254: ...isplay ix 1 14 L Laser Safety xi xii Left Front Door 1 11 Legal Issues Limitations on the Use of Images xxii Limitations on the Use of This Copier xxii Loading Paper Loading Paper into the Drawers 3 2...

Page 255: ...12 Original Type Selection for Printer 2 46 Originals Acceptable Originals for the Feeder 5 10 Originals Fed Through the Feeder Are Dirty 4 28 P Pacemaker User Warning xxi Paper Loading Paper into th...

Page 256: ...n the Right Feeder Cover 5 19 Removing Paper Jams in the Right Side Door 4 8 Removing Paper Jams in the Single Sheet Document Feeder 5 22 Removing Paper Jams in the Stack Bypass 4 14 Removing Paper Ja...

Page 257: ...Door Location 1 10 Removing Paper Jams in the Right Side Door 4 8 S Safety Precautions Handling xvi Installation xiv Maintenance and Inspections xix Power Supply xv Screenshots x Security Key xxii 1...

Page 258: ...moving Paper Jams in the Sort Bins 5 59 Removing Paper Jams in the Stapler Sorter 5 50 Replacing the Staple Case 5 61 Sort Function 5 38 Specifications 5 70 Staple sort Function 5 40 Stapling Function...

Page 259: ...22 Entering Characters With the Keys 1 23 Frequently Used Keys 1 20 Key Representation ix Location 1 13 Messages 4 29 Part Names 1 14 Understanding How Keys are Displayed 1 21 Trademarks xiii Transfe...

Page 260: ......

Reviews: