background image

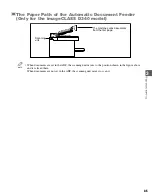
Loading Documents in the ADF
(Only for the imageCLASS D340 model)

3-4

1

Make sure there is no document on the
platen glass.

2

Fan the edges that will feed into the
machine first, then tap the edges of
multiple page documents on a flat surface
to even the stack.

3

Adjust the slide guides to the width of the
document.

4

Load the documents face up in the ADF.

• The document is now ready for scanning.

• For multiple page documents, the pages are

fed one by one from the top of the stack
(from the first page).

• Wait until all pages of your document have

been scanned before starting a new job.

• 50 sheets of letter-size (17 to 20-lb bond or

64 g/m

2

to 80 g/m

2

) documents can be set

in the ADF. If more than 50 sheets (letter
size) of documents are set in the ADF,
paper jams may occur.

• 30 sheets of legal-size (17 to 20-lb bond or

64 g/m

2

to 80 g/m

2

) documents can be set

in the ADF.

NOTE

DOCUMENT READY

3

2

1

Summary of Contents for imageCLASS D320

Page 1: ...D Woodhatch Reigate Surrey RH2 8BF United Kingdom CANON DEUTSCHLAND GmbH Europark Fichtenhain A10 47807 Krefeld Germany CANON ITALIA S p A Palazzo L Strada 6 20089 Milanofiori Rozzano MI Italy CANON L...

Page 2: ...guide is the imageCLASS D340 model Copyright Copyright 2003 by Canon Inc All rights reserved No part of this publication may be reproduced transmitted transcribed stored in a retrieval system or trans...

Page 3: ...e laser beam cannot escape from the machine during any phase of user operation CDRH Regulations The Center for Devices and Radiological Health CDRH of the U S Food and Drug Administration implemented...

Page 4: ...ption which can be determined by turning the equipment off and on the user is encouraged to try to correct the interference by one or more of the following measures Reorient or relocate the receiving...

Page 5: ...hapter 1 Introduction Customer Support 1 1 Important Safety Instructions 1 1 Main Components of the Machine 1 4 Operation Panel 1 6 Standby Display 1 7 Energy Saver Mode 1 8 Setting the Energy Saver M...

Page 6: ...el 8 4 LCD Messages 8 5 Paper Feeding Problems 8 7 Copying Problems 8 8 Print Quality Problems 8 9 Printing Problems 8 11 General Problems 8 11 If You Cannot Solve the Problem 8 12 Chapter 9 Setting t...

Page 7: ...mber in this guide which contains more information on the topic of the previous sentence Set Up Sheet Refer to the Set Up Sheet for details on the topic of the previous sentence Printer Guide Refer to...

Page 8: ...Troubleshooting for common problems On Your CD ROM See the Printer Guide for help with the printer driver CARPS Customer Care Center For e mail support the latest driver downloads and answers to frequ...

Page 9: ...use of the images scanned printed or otherwise reproduced you should consult in advance with your legal advisor for guidance Paper Money Traveler s Checks Money Orders Food Stamps Certificates of Depo...

Page 10: ...es If inflammable substances come into contact with electrical parts inside the machine it may result in a fire or electrical shock Do not block or cover the ventilation port or any openings on the ma...

Page 11: ...with appliances such as an air conditioner television or copier These devices generate an electrical noise and may interfere with your machine s ability Plug the machine into a standard 120 V AC 60 H...

Page 12: ...to avoid catching your hand Failing to do so may result in personal injury Do not press down hard on the platen glass cover when using the platen glass to scan a thick book This may damage the platen...

Page 13: ...med paper POWER CORD CONNECTOR USB INTERFACE CONNECTOR ADF AUTOMATIC DOCUMENT FEEDER Holds documents for copying and feeds them automatically into the scanning unit DOCUMENT OUTPUT TRAY Documents come...

Page 14: ...GLASS Place documents for copying PLATEN GLASS COVER Open it when you place documents on the platen glass for copying OUTPUT TRAY Outputs printed pages MULTI PURPOSE TRAY Load paper stack RIGHT COVER...

Page 15: ...layed in the LCD Exposure key Adjusts the copy exposure Image Quality key Adjusts the quality of copy image Numeric keys Enter copy quantity and other numerical values Stop Reset key Cancels copying a...

Page 16: ...play is as follows When the machine is plugged in the LCD displays PLEASE WAIT for a while then the standby display appears NOTE Copy Ratio Exposure Copy Quantity Paper Size Image Quality Standby Disp...

Page 17: ...copy or other functions are operating When paper jams occur When no paper is loaded in the cassette or multi purpose tray When PRESS SET KEY is displayed Setting the Energy Saver Mode Manually Restori...

Page 18: ...nters Paper which has already been copied using a digital full color copier Do not copy on the reverse side either Paper which has been printed on using a thermal transfer printer Do not copy on the r...

Page 19: ...inting area light shade Canon recommends that you print within this area Paper Envelope The scanning areas when you copy are a little larger than printing areas p 3 2 NOTE 13 32 10 mm 13 32 10 mm 13 3...

Page 20: ...he top of the paper feeds first in the cassette 4 Adjust the slide guides to fit the size of the paper stack Adjust the slide guides so that there is no space between the slide guides and the edge of...

Page 21: ...e envelopes with the print side up flaps should not be visible and load them so that the left side sender s address side feeds first in the cassette If the envelope to be loaded has a flap on the shor...

Page 22: ...logo on position the paper with the print side up logo side and load it so that the top of the paper feeds first in the multi purpose tray 4 Adjust the slide guides to fit the size of the paper Adjust...

Page 23: ...n the short edge this edge must enter the machine first Not loading it this way will result in paper jam 3 Adjust the slide guides to fit the size of the envelope Adjust the slide guides so that there...

Page 24: ...ted correctly for the paper size the quality of your copy images may be adversely affected When you insert an envelope and thick paper push the paper toward the inside of the machine lightly to feed p...

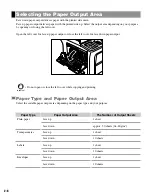
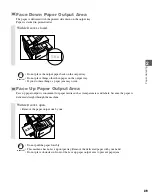
Page 25: ...paper output Do not open or close the left cover while copying and printing Paper Type and Paper Output Area Select the suitable paper output area depending on the paper type and your purpose IMPORTA...

Page 26: ...r Face Up Paper Output Area Face up paper output is convenient for paper media such as transparencies and labels because the paper is delivered straight through the machine Do not pull the paper forci...

Page 27: ...2 10...

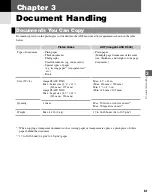
Page 28: ...W L Quantity Weight Platen Glass Plain paper Thick documents Photographs Small documents e g index cards Special types of paper e g tracing paper 1 transparencies 1 etc Book imageCLASS D340 Max Letter...

Page 29: ...ea of a Document The shaded area in the illustration below shows the scanned area of a document Make sure your document s text and graphics are within this area when copying Wrinkled or creased paper...

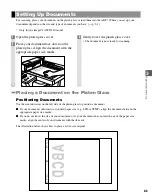
Page 30: ...document conforms to a standard paper size e g LTR or STMT align the document between the appropriate paper size marks If you do not know the size of your document or if your document does not match a...

Page 31: ...in the ADF The document is now ready for scanning For multiple page documents the pages are fed one by one from the top of the stack from the first page Wait until all pages of your document have bee...

Page 32: ...hen documents are set in the ADF the scanning unit moves to the position shown in the figure above and it is fixed there When documents are not set in the ADF the scanning unit moves to scan it NOTE 3...

Page 33: ...3 6...

Page 34: ...If the paper in the cassette or multi purpose tray runs out during copying the LCD displays SUPPLY REC PAPER Load paper in the cassette or multi purpose tray When paper is loaded the machine automatic...

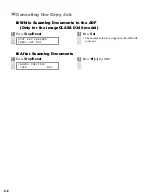
Page 35: ...ts in the ADF Only for the imageCLASS D340 model After Scanning Documents 1 Press Stop Reset 2 Press 4 for YES CANCEL COPYING YES NO 1 Press Stop Reset 2 Press Set The document that has stopped in the...

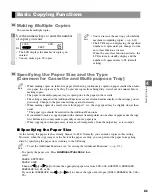
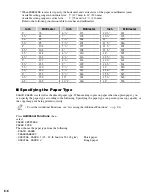
Page 36: ...e output tray as it is output Specifying the Paper Size At the factory the paper size has already been set to LTR Normally you can make copies in this setting However when the copy images or the back...

Page 37: ...correctly To set the Additional Functions see Accessing the Additional Functions p 9 1 Press Additional Functions then select PAPER SETTINGS PAPER TYPE Then choose the paper type from the following PL...

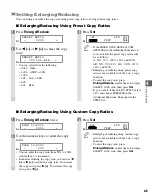
Page 38: ...opy function To reset the copy ratio press Enlarge Reduce several times to display DIRECT 100 ratio then press Set If you want to reduce LTR to STMT select 64 and choose FREESIZE in the Additional Fun...

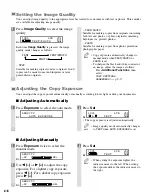
Page 39: ...inted photos PHOTO Suitable for making copies from photos printed on photographic paper Copy exposure automatically changes to manual mode when TEXT PHOTO or PHOTO is set To sharpen the black and whit...

Page 40: ...y for the imageCLASS D340 model 4 3 2 1 4 3 2 1 4 3 2 1 4 3 2 1 Set 3 sets of copies Copy 1 Copy 2 Copy 3 Special Features 1 Load documents face up in the ADF 2 Press Collate 2 on 1 Ex COL appears in...

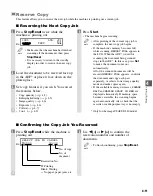
Page 41: ...anning 5 Place the next page of the document on the platen glass 6 Press Start Repeat step 5 and 6 to scan all documents 7 Press Set The machine begins printing out When scanning multiple page documen...

Page 42: ...nctions Be sure to load A4 size paper in the cassette or multi purpose tray When Loading Documents in the ADF Only for the imageCLASS D340 model 2 1 1 2 Originals Copy 2 on 1 NOTE 1 Press Collate 2 on...

Page 43: ...6 to scan all documents 7 Press Set to finish the 2 on 1 copy function If the available memory decreases SCANNING PLEASE WAIT and MAKING SPACE IN MEM are displayed alternatively If memory space become...

Page 44: ...ob begins If the machine s memory becomes full while scanning MEMORY FULL appears in the LCD When the ADF is used for scanning the document being scanned stops in the ADF In this case press Set to mak...

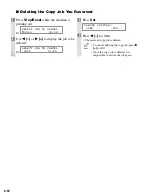
Page 45: ...to display the job to be deleted Ex 3 Press Set 4 Press 4 for YES The reserved copy job is deleted To cancel deleting the copy job press e for NO Once the copy job is deleted it is impossible to resto...

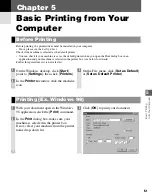
Page 46: ...not selected Printing Ex Windows 98 Before Printing Basic Printing from Your Computer 5 Basic Printing from Your Computer Chapter 5 1 On the Windows desktop click Start point to Settings then click Pr...

Page 47: ...8 application click the Print command 2 In the Print dialog box click Properties 3 In the Properties dialog box define your settings on the appropriate tabs or dialog boxes If you are dissatisfied wit...

Page 48: ...ce the job is deleted it is impossible to restore the job again The LCD can display characters in ASCII cord Using characters other than those in ASCII cord may have the LCD display garbled characters...

Page 49: ...EXIST is displayed 2 If there are report jobs and if you want to delete them press Set 3 If you decide to delete the job press 4 for YES To cancel deleting the job press e for NO Once the job is dele...

Page 50: ...id scratching the components Never use volatile liquids such as thinner benzene acetone or any other chemical cleaner to clean the interior of the machine these can damage the machine s components Cle...

Page 51: ...pearing on copies If you have trouble getting the glass clean wipe with a cloth moistened with water or a mild neutral detergent and then wipe the glass dry with another cloth Glue ink correction flui...

Page 52: ...at the side with the written instructions facing upward Do not forcefully move or push the protective shutter of the drum in any way Rock the cartridge 5 or 6 times to distribute the toner evenly Re i...

Page 53: ...ppear on copies Handling and Storing the Cartridge This section describes the precautions to ensure optimum copy quality Handling Precautions Do not throw cartridge into open flames as this may cause...

Page 54: ...0 C The recommended storage conditions are as follows Temperature 59 F to 80 6 F 15 C to 27 C Relative Humidity 20 to 80 Do not stand the cartridge on end or turn it upside down Storing Partially Used...

Page 55: ...cartridge from the machine 4 Rock the cartridge 5 or 6 times to distribute the toner evenly 5 Place the cartridge on a flat and stable surface Grip the sealing tape tab and snap it in the direction a...

Page 56: ...artridge into the machine until the right cover slightly rises up location The right cover moves simultaneously with the action of the cartridge Do not push the cartridge farther than location Doing s...

Page 57: ...n The Canon Cartridge Recycling Program has collected millions of cartridges that otherwise would have been discarded into landfills or similar facilities Instead this rapidly growing program returns...

Page 58: ...box Option A 2 Multiple Box Return We encourage you to use this option as a more efficient way to ship cartridges Complete Option A 1 Bundle multiple cartridge boxes together securely with tape Pleas...

Page 59: ...ion A UPS Pick up Give the shipment to your UPS driver when you receive your next regular delivery or Take the shipment to your local UPS receiving point Option B MBE Drop off Take the shipment to a p...

Page 60: ...dge boxes Place your eight individually packaged boxes of empty cartridges into the Canon collection box Seal the box Apply the Canon Canada Inc Canada Post label provided in this brochure Canon s lab...

Page 61: ...ges may be adversely affected Repacking and Transporting Your Machine 1 Unplug the power cord 2 If the machine is connected to a PC remove the PC cable 3 Open the right cover 4 Grip the end of the car...

Page 62: ...original packing material and box Place the machine on a level stable surface Do not leave the machine inside a car for a long period of time the temperature can become very high or low Avoid rough ro...

Page 63: ...7 14...

Page 64: ...e toner stains NOTE CAUTION Clearing Jams Troubleshooting Troubleshooting Chapter 8 1 Open the right cover If there is paper left in the cassette or on the output tray remove it first 2 Remove the car...

Page 65: ...the printed surface is on the inside of the roll then gently pull the rolled up paper out of the machine 5 If the leading edge of the paper is visible but has not entered the imaging area pull the pap...

Page 66: ...the paper release levers while printing This could result in damage to the fixing assembly 11 Return the cartridge back into the machine then close the right cover For details refer to Replacing the...

Page 67: ...e document and the paper NOTE 1 Open the ADF and gently remove the jammed paper from the ADF 2 Widen the slide guides until they stop remove the paper so as not to be caught by the slide guides Open t...

Page 68: ...ke sure that the document is not too long or too short p 3 1 Then reset the machine by opening the right cover and then closing it Fan the edge that will feed into the machine first then tap the edge...

Page 69: ...Additional Functions all the print jobs are deleted Clear the paper jam pp 8 1 to 8 4 and reload paper in the cassette or multi purpose tray Then reset the machine by opening the right cover and then...

Page 70: ...re loading it in the cassette This keeps the sheets of paper from sticking together The cassette may contain too many sheets Make sure the paper stack in the cassette does not exceed the capacity of t...

Page 71: ...t the requirements for the machine Envelopes must be COM10 MONARCH DL ISO C5 p 2 6 The machine will not make a copy The cartridge may not be installed properly Make sure the cartridge is installed pro...

Page 72: ...be adjusted correctly Adjust the copy exposure correctly using the Exposure key p 4 6 Adjust the copy exposure correctly in the PRINT EXPOSURE of the COMMON SETTINGS of the Additional Functions p 9 2...

Page 73: ...NGS of the Additional Functions may not be set correctly Select SPECIAL PAPER 2 in PAPER TYPE p 9 2 The copy images are missing when you make copies using the 2 on 1 function The documents may not be...

Page 74: ...ted to the power source and may not turn on If this happens disconnect the power cord and reconnect it correctly after a minute or more Set Up Sheet Nothing appears in the LCD The power cord may not b...

Page 75: ...o disassemble or repair the machine yourself Attempting to repair the machine yourself may void the limited warranty If you need to call your service representative make sure you have the following in...

Page 76: ...ns 2 Press 4 or e to select the menu you want to change Ex 3 Press Set 4 Use 4 or e to select the sub menu you want to change Ex 5 Press Set Ex Details for sub menus pp 9 2 to 9 4 After selecting the...

Page 77: ...type PLAIN PAPER TRANSPARENCY SPECIAL PAPER 1 SPECIAL PAPER 2 COMMON SETTINGS PRINT EXPOSURE The exposure can be adjusted to one of five levels center TONER SAVER MODE Sets the toner saver mode ON The...

Page 78: ...paper size group is changed the preset copy ratios 2 on 1 copy ratio and 2 on 1 paper size will change INCH Preset copy ratios 50 64 78 100 129 200 2 on 1 copy ratio 64 LTR size A Preset copy ratios 5...

Page 79: ...or when no data is received from the computer ON The error time out is on 005 to 300SEC 015SEC OFF The error time out is off PRINTER RESET Cancels the job currently being received and the job already...

Page 80: ...2 000 1 1 294 1 0 786 1 0 647 1 0 500 Zoom 0 500 to 2 000 in 1 increments Paper Feeding System Cassette Feeding 250 sheets of 17 to 20 lb bond 64 g m2 to 80 g m2 Multi purpose Tray 10 sheets of lette...

Page 81: ...A 2...

Page 82: ...NT message 8 5 CHECK PRINTER message 8 5 Cleaning machine exterior 7 1 periodic 7 1 scanning area 7 1 Collate copy 4 7 key 1 6 COMMON SETTINGS 9 2 Convention type vi COPY SETTINGS 9 3 Copy yield 7 4 C...

Page 83: ...essage 8 5 J Jams clearing 8 1 in ADF 8 4 inside the main unit 8 1 L LCD 1 7 Left cover 1 4 2 8 8 2 Loading an envelope in the multi purpose tray 2 6 documents in the ADF 3 4 envelopes in the cassette...

Page 84: ...2 1 size 2 1 type 2 1 weight 2 1 Print quality problems 8 9 Printing areas 2 2 Problems cannot solve 8 12 copying 8 8 documents 3 2 general 8 11 paper feeding 8 7 print quality 8 9 printing 8 11 Q Qu...

Page 85: ...R message 8 6 SYSTEM ERROR message 8 6 T TIMER SETTINGS 9 4 Toner in the cartridge 7 3 TONER SAVER MODE setting 9 2 Transparencies 2 1 3 1 Tray multi purpose 1 5 output 1 5 U USB interface connector 1...

Page 86: ...D Woodhatch Reigate Surrey RH2 8BF United Kingdom CANON DEUTSCHLAND GmbH Europark Fichtenhain A10 47807 Krefeld Germany CANON ITALIA S p A Palazzo L Strada 6 20089 Milanofiori Rozzano MI Italy CANON L...

Reviews: