0L40-088
Fixing Assembly
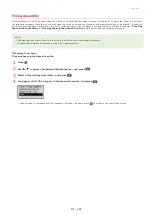
Dirt may adhere to the fixing units inside the machine and cause black streaks to appear on printouts. To clean the fixing unit, perform
the following procedure. Note that you cannot clean the fixing unit when the machine has documents waiting to be printed. To clean the
fixing unit, you need paper larger than plain A4 or Letter size paper. Set the paper in the paper drawer or manual feed slot (
Loading Paper in the Manual Feed Slot
) before performing the following procedure.
Cleaning requires toner. Make sure that there is sufficient toner remaining beforehand.
It takes approximately 90 seconds to clean the fixing assembly.
Loading Paper in the Manual Feed Slot
Press .
Use
/
to select <Adjustment/Maintenance>, and press
.
Select <Clean Fixing Assembly>, and press
.
Load paper (A4/LTR or larger) in the manual feed slot, and press
.
After cleaning is completed and the message <Finished.> appears, press
to return to the copy mode screen.
1
2
3
4
㻞㻣㻣㻌㻛㻌㻟㻟㻢
Summary of Contents for imageCLASS MF211
Page 1: ...㻝㻌㻛㻌㻟㻟㻢 ...
Page 29: ...LINKS Using the Operation Panel 㻞㻥㻌㻛㻌㻟㻟㻢 ...
Page 48: ...LINKS Loading Paper in the Paper Drawer Loading Paper in the Manual Feed Slot 㻠㻤㻌㻛㻌㻟㻟㻢 ...
Page 50: ...Exiting Quiet Mode Press to exit quiet mode 㻡㻜㻌㻛㻌㻟㻟㻢 ...
Page 77: ...LINKS Printing a Document 㻣㻣㻌㻛㻌㻟㻟㻢 ...
Page 84: ...Printing a Document Printing Borders Printing Dates and Page Numbers 㻤㻠㻌㻛㻌㻟㻟㻢 ...
Page 171: ...Configuring DNS 㻝㻣㻝㻌㻛㻌㻟㻟㻢 ...
Page 178: ...LINKS Setting Up Print Server 㻝㻣㻤㻌㻛㻌㻟㻟㻢 ...
Page 184: ...Setting a Wait Time for Connecting to a Network 㻝㻤㻠㻌㻛㻌㻟㻟㻢 ...
Page 190: ...LINKS Setting IPv4 Address Setting IPv6 Addresses Viewing Network Settings 㻝㻥㻜㻌㻛㻌㻟㻟㻢 ...
Page 211: ...㻞㻝㻝㻌㻛㻌㻟㻟㻢 ...
Page 296: ...For more information Printing a Document 㻞㻥㻢㻌㻛㻌㻟㻟㻢 ...
Page 300: ...For more information about this function see Printing Posters 㻟㻜㻜㻌㻛㻌㻟㻟㻢 ...
Page 318: ...Click Back Exit 6 㻟㻝㻤㻌㻛㻌㻟㻟㻢 ...
Page 330: ...Make sure that the correct port is selected for the printer 㻟㻟㻜㻌㻛㻌㻟㻟㻢 ...
Page 337: ...㻝㻌㻛㻌㻠㻣 ...
Page 367: ...㻟㻝㻌㻛㻌㻠㻣 ...
Page 371: ...The uninstaller starts Click Uninstall Click OK 4 5 㻟㻡㻌㻛㻌㻠㻣 ...

