Cleaning the Fixing Assembly
8W0J-0CJ
If the printout is smudged, the fixing assembly may be dirty. In this case, you can clean the fixing assembly using
paper.
The fixing assembly cannot be cleaned when data is waiting to be printed or when a toner cartridge or drum cartridge
has reached the end of its lifetime.
Required Preparations
●
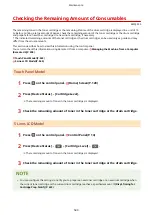
Check that there is enough amount of toner remaining in the toner cartridge and the drum cartridge.
Checking the Remaining Amount of Consumables(P. 540)
Touch Panel Model(P. 530)
5 Lines LCD Model(P. 530)
Touch Panel Model
1
On the control panel, press [Menu] in the [Home] screen. [Home] Screen(P. 120)
2
Press [Adjustment/Maintenance] [Maintenance] [Clean Fixing Assembly].
➠
The available paper sizes and types are displayed on the confirmation screen.
3
Check that available paper is loaded, and then press [Start].
➠
The paper is fed to the machine, and cleaning starts.
5 Lines LCD Model
1
Press
on the control panel. Control Panel(P. 14)
2
Press [Adjustment/Maintenance]
[Maintenance]
[Clean Fixing
Assembly]
.
➠
The available paper sizes and types are displayed on the confirmation screen.
3
Check that available paper is loaded, and then press
.
➠
The paper is fed to the machine, and cleaning starts.
Maintenance
530
Summary of Contents for imageCLASS MF264dw
Page 72: ... Shared Key Encryption for WPA WPA2 TKIP AES CCMP IEEE 802 1X Authentication Setting Up 63 ...
Page 139: ...Basic Operations 130 ...
Page 204: ... The volume is adjusted Basic Operations 195 ...
Page 333: ...Copying 324 ...
Page 368: ...8 Log out from Remote UI Security 359 ...
Page 501: ... Confirm Destination Scan PC Settings Menu Items 492 ...

