background image

4 Maintenance

19

6

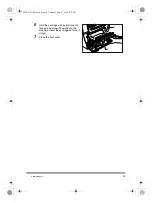
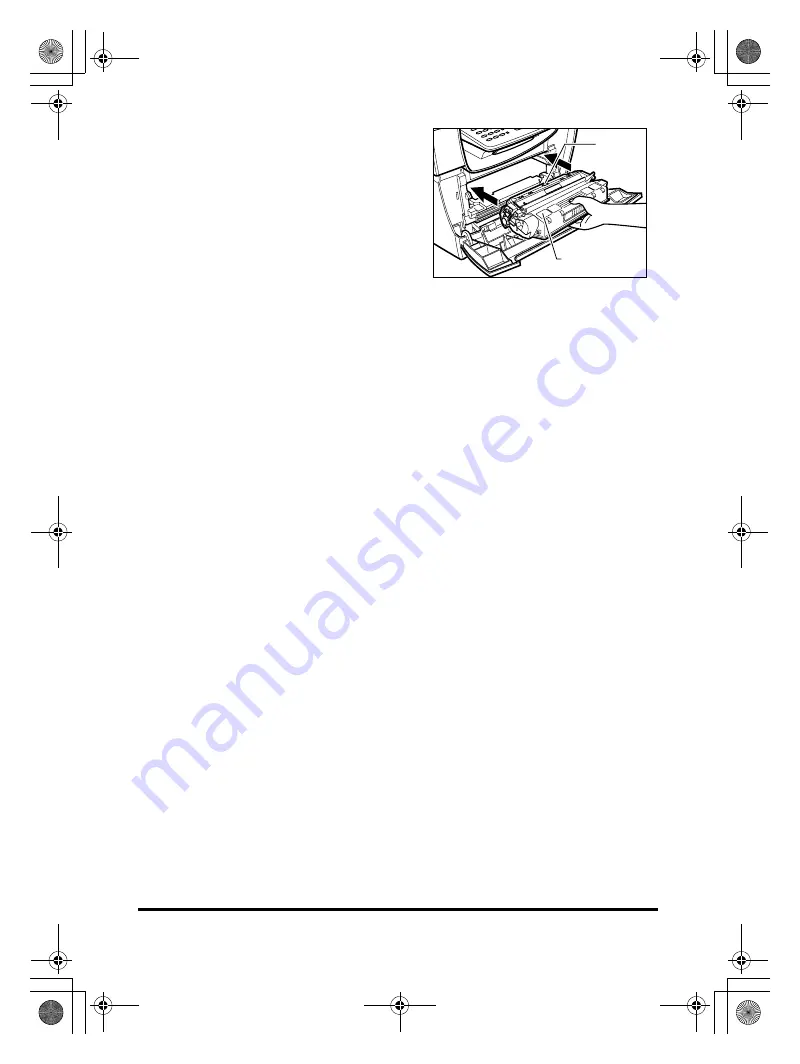
Hold the cartridge with instructions (C) 
face up and arrow (D) pointing to the 
machine. Insert the cartridge as far as it 
will go.

7

Close the front cover.

C

D

00CF-LD QRG.book  Page 19  Thursday, May 27, 2004  4:31 PM

Summary of Contents for imageCLASS MF5630

Page 1: ...Software Installation and Instructions Troubleshooting Software Guide CD ROM Model Name F145600 imageCLASS MF5630 F145602 imageCLASS MF5650 To view the manuals in PDF format Adobe Reader Adobe Acroba...

Page 2: ...erate the machine correctly and to avoid damage to the machine NOTE Notes provide advice for using your machine more effectively describe operating restrictions and explain how to avoid minor operatin...

Page 3: ...2 1 MF5650 11 2 2 2 MF5630 11 2 3 Enter Characters 13 3 Main Functions 3 1 Set Paper Size 14 3 2 Load the Document 14 3 2 1 Platen Glass 14 3 2 2 ADF 15 3 3 Copy 16 3 3 1 Resolution 16 3 3 2 Density...

Page 4: ...ed to describe the new generation of fax machines that use ITU T V 34 standard 33 6 Kbps modems Super G3 High Speed Fax machines allow transmission time of approx 3 seconds per page which results in r...

Page 5: ...age in any form or by any means electronic mechanical magnetic optical chemical manual or otherwise without the prior written permission of Canon Inc Notice The information in this document is subject...

Page 6: ...r heat source Do not place the machine in a closet or cabinet or on shelves unless adequate ventilation is available Operate the machine only from the type of power source indicated on the label on th...

Page 7: ...ns If the power cord or plug is damaged or frayed If liquid spills into the machine or if it is otherwise exposed to rain or liquids If you notice smoke unusual noises or odor coming from it If the ma...

Page 8: ...cal wall outlet that provides 200 to 240 volt AC 50 to 60 Hz power Near the PC you will connect it to Make sure you can reach the machine easily 1 3 Laser Safety Information Laser radiation could be h...

Page 9: ...ELHO A LASER DE CLASSE 1 PERFORMANCE OF PROCEDURES OTHER THAN THOSE SPECIFIED IN THE MANUALS FOR THIS PRODUCT MAY RESULT IN HAZARDOUS RADIATION EXPOSURE 1 4 Customer Support If you encounter a problem...

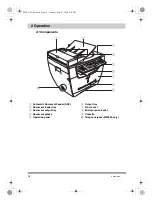
Page 10: ...ic Document Feeder ADF b Document feeder tray c Document output tray d Document guides e Operation panel f Output tray g Front cover h Multi purpose feeder i Cassette j Telephone jacks MF5650 only 00C...

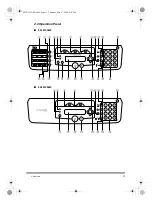
Page 11: ...MF5630 COPY FAX SCAN Menu 01 02 03 04 05 06 07 08 09 10 1 2 3 4 5 6 7 8 9 0 ABC DEF GHI JKL MNO PQRS TUV WXYZ 11 12 R Coded Dial Directory Hook Redial Pause OK T COPY SCAN Menu 1 2 3 4 5 6 7 8 9 0 OK...

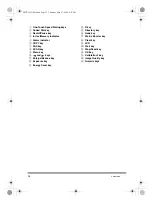
Page 12: ...COPY key g FAX key h SCAN key i Menu key j and keys k Enlarge Reduce key l Exposure key m Energy Saver key n R key o Directory key p Hook key q Status Monitor key r Clear key s LCD t Start key u Stop...

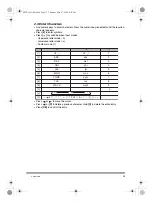
Page 13: ...input modes Uppercase letter mode A Lowercase letter mode a Number mode 1 Press or to move the cursor Press or C to delete a previous character Hold C to delete the entire entry Press OK to confirm t...

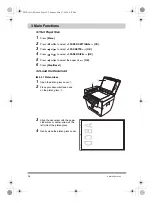
Page 14: ...OK 5 Press or to select the paper size OK 6 Press Stop Reset 3 2 Load the Document 3 2 1 Platen Glass 1 Open the platen glass cover a 2 Place your document face down on the platen glass b 3 Align the...

Page 15: ...for document requirements and proper positioning 1 Fan and tap the edges of the multi page document 2 Adjust the document guides to the width of the document 3 Load the document face up in the ADF 00...

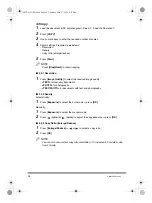
Page 16: ...quired image quality TEXT for text only documents PHOTO for photographs TEXT PHOTO for documents with text and photographs 3 3 2 Density Automatically 1 Press Exposure to select the auto mode press OK...

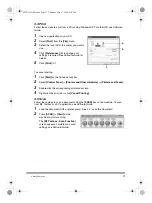
Page 17: ...t using the SCAN key on the machine To scan from MF Toolbox or a PC application see Software Guide 1 Load the document ADF or platen glass See 3 2 Load the Document 2 Press SCAN Start on the machine t...

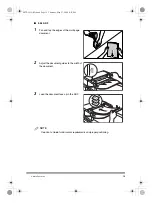
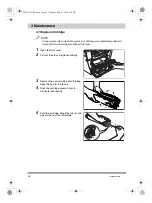
Page 18: ...will permanently set the toner 1 Open the front cover 2 Pull out the old cartridge horizontally 3 Remove the new cartridge from the bag Keep the bag for future use 4 Rock the cartridge several times...

Page 19: ...19 6 Hold the cartridge with instructions C face up and arrow D pointing to the machine Insert the cartridge as far as it will go 7 Close the front cover C D 00CF LD QRG book Page 19 Thursday May 27...

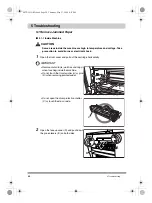
Page 20: ...the front cover and pull out the cartridge horizontally IMPORTANT Remove metal items watches and rings when touching inside the machine Do not touch the transfer roller A or pins B when removing jamm...

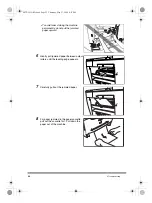
Page 21: ...per out of the machine 4 Pull out the paper from the machine 5 If the paper has not entered imaging area pull it forward and roll it inward IMPORTANT To avoid machine malfunction do not pull the jamme...

Page 22: ...aper upward 6 Gently pull jammed paper between output rollers until the leading edge appears 7 Carefully pull out the jammed paper 8 For paper jammed in the paper cassette pull out the cassette first...

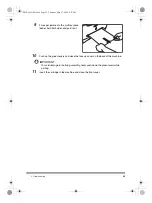
Page 23: ...ers while printing 11 Insert the cartridge in the machine and close the front cover 9 For paper jammed in the multi purpose feeder hold both sides and pull it out 10 Push up the green levers and close...

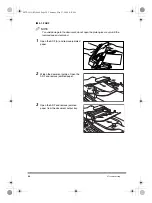
Page 24: ...platen glass cover until the jammed paper is removed 1 Open the ADF A and remove jammed paper 2 Widen the document guides Open the ADF and remove jammed paper 3 Open the ADF and remove jammed paper fr...

Reviews: