Windows XP
Setting up file sharing
Creating a shared folder
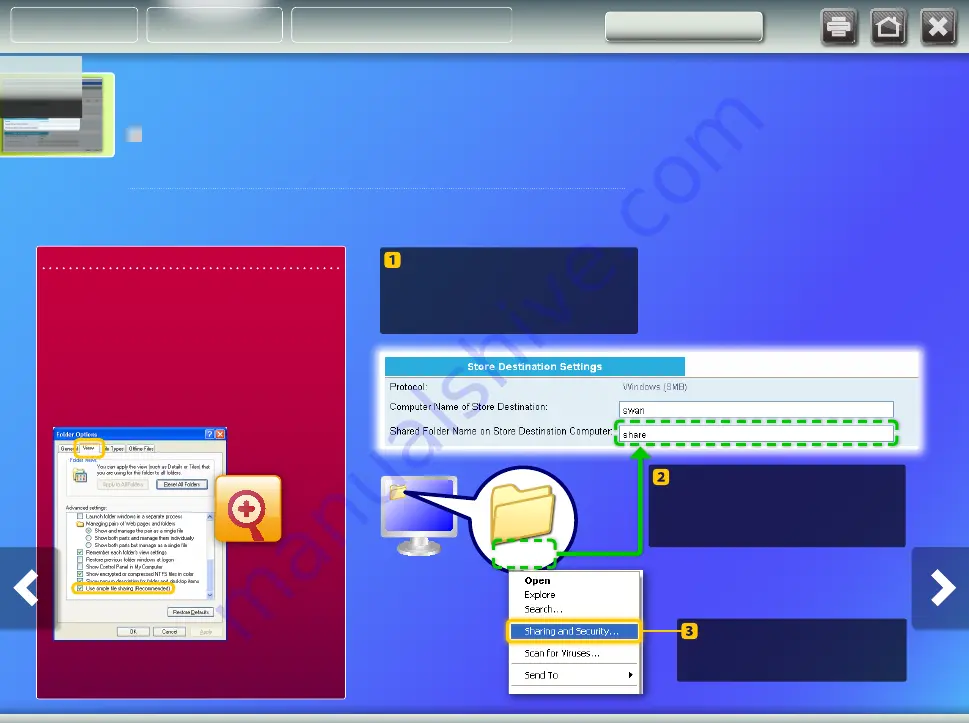
For Windows XP Professional users
You cannot use the Simple File Sharing feature if it is
disabled. Follow the procedure below to enable it.
1. On the Windows taskbar, click [Start], then [Control
Panel].
2. Click [Appearance], then [Folder Options]. (In Classic
View, double click [Folder Options].)
3. Select the [View] tab.
4. Under [Advanced settings], select the [Use simple file
sharing (Recommended)] check box.
5. Click [OK] to close the [Folder Options] dialog box.
share
Create a new folder on your
desktop and enter a name (for
example, “share”) for the folder.
Enter the name of the created
folder into the [Shared Folder
Name on Store Destination
Computer] field.
Right-click the folder, then
select [Sharing and
Security].
This section explains how to set up file sharing using the Simple File Sharing feature.
The example procedure described below creates a shared folder on your desktop.
Storing documents
About Buttons
Outline
Setting Up


