


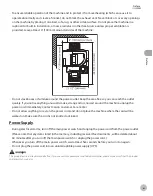
Before Using the Machine
Please read this guide before operating this product.
After you fi nish reading this guide, store it in a safe place for future reference.
Basic Operation Guide
Originals and Print Media
Registering Destinations in the Address Book
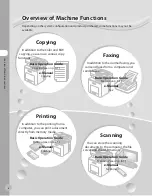
Copying
Fax
Printing
Scanning
Network
Setting from a PC
Maintenance
Troubleshooting
Appendix
Machine Settings
Summary of Contents for imageCLASS MF8450c
Page 53: ...Before Using the Machine 1 28 Timer Settings ...
Page 129: ...3 52 Storing Editing One Touch Storing Editing Address Book ...
Page 132: ...Copying 4 3 Overview of Copy Functions p 4 22 p 4 30 p 4 36 ...
Page 201: ...Copying 4 72 Confirming and Canceling Copy Jobs Confirming Copy Logs ...
Page 204: ...Fax 5 3 Overview of Fax Functions p 5 30 p 5 47 p 5 54 p 5 49 p 5 112 p 5 104 ...
Page 346: ...E mail 6 3 Overview of E Mail Functions ...
Page 354: ...Printing 7 3 Overview of Print Functions p 7 9 p 7 10 p 7 7 ...
Page 381: ...Printing 7 30 Checking and Canceling Print Jobs Checking Print Logs ...
Page 384: ...Scanning 8 3 Overview of Scanner Functions ...
Page 391: ...Scanning 8 10 Basic Scanning Operations ...


