background image

SERVICE

MANUAL

Color imageCLASS
MF9170

c

MF9150c 
MF8450c

COPYRIGHT

©

2008 CANON INC.                          CANON  Color imageCLASS MF9170/9150c/8450c REV. 0 PRINTED IN U.S.A.

OCTOBER 2008
REV. 0

Summary of Contents for imageCLASS MF8450c

Page 1: ...SERVICE MANUAL Color imageCLASS MF9170c MF9150c MF8450c COPYRIGHT 2008 CANON INC CANON Color imageCLASS MF9170 9150c 8450c REV 0 PRINTED IN U S A OCTOBER 2008 REV 0 ...

Page 2: ... need arises In the event of major changes in the contents of this manual over a long or short period Canon will issue a new edition of this manual The following paragraph does not apply to any countries where such provisions are inconsistent with local law Trademarks The product names and company names used in this manual are the registered trademarks of the individual companies Copyright This ma...

Page 3: ...equiring care to avoid combustion fire Indicates an item prohibiting disassembly to avoid electric shocks or problems Indicates an item requiring disconnection of the power plug from the electric outlet Indicates an item intended to provide notes assisting the understanding of the topic in question Indicates an item of reference assisting the understanding of the topic in question Provides a descr...

Page 4: ... used to indicate Low The voltage value however differs from circuit to circuit In addition the asterisk as in DRMD indicates that the DRMD signal goes on when 0 In practically all cases the internal mechanisms of a microprocessor cannot be checked in the field Therefore the operations of the microprocessors used in the machines are not discussed they are explained in terms of from sensors to the ...

Page 5: ...ettings 1 11 1 2 3 7 Printer Settings 1 13 1 2 3 8 Timer Settings 1 15 1 2 3 9 Adjustment Cleaning 1 16 1 2 3 10 Report Settings 1 16 1 2 3 11 System Management Set 1 17 1 2 4 Maintenance by the User 1 25 1 2 4 1 Cleaning 1 25 1 2 5 Safety 1 28 1 2 5 1 Points to note at disassembly assembly 1 28 1 2 5 2 CDRH Regulations 1 28 1 2 5 3 Safety of the Laser Light 1 28 1 2 5 4 Handling the Laser Unit 1 ...

Page 6: ...rding to Copy Functions 3 9 3 4 2 Flow of Image Data for the SEND Function 3 10 3 4 3 Flow of Image Data for the Fax Transmission 3 10 3 4 4 Flow of Image Data for the Fax Reception Function 3 11 3 4 5 Flow of Image Data for the PDL Function 3 11 3 5 Parts Replacement Procedure 3 12 3 5 1 Main Controller PCB 3 12 3 5 1 1 Before Removing the Main Controller PCB 3 12 3 5 1 2 Removing the Main Contro...

Page 7: ...ration Mode 5 3 5 2 2 Document Size Detection 5 5 5 3 Detection Jams 5 6 5 3 1 Overview 5 6 5 4 ADF DADF 5 7 5 4 1 ADF DADF 5 7 5 4 1 1 Removing the ADF unit 5 7 5 4 1 2 Procedure after Replacing the ADF Unit 5 8 5 4 2 Pickup Feed Unit 5 8 5 4 2 1 Removing the ADF Pickup Feed Unit 5 8 5 4 3 Pick up Roller 5 10 5 4 3 1 Removing the ADF Pickup Roller 5 10 5 4 4 Separation Roller 5 11 5 4 4 1 Removin...

Page 8: ...al Change Corrective Control 7 8 7 2 3 D half Control 7 9 7 2 4 Color Displacement Corrective Control 7 11 7 2 5 Auto Gradation Correction Control 7 14 7 3 Toner Cartridge 7 15 7 3 1 Overview 7 15 7 3 2 Toner Level Detection 7 16 7 3 3 Memory Tag Control 7 16 7 3 4 Toner Cartridge Detection 7 16 7 3 5 New Toner Cartridge Detection 7 17 7 3 6 Developing Cylinder Engagement disengagement Control 7 1...

Page 9: ...ation 8 1 8 1 1 Overview 8 1 8 1 2 Interval Speed Increase Control 8 3 8 2 Other Control 8 4 8 2 1 Cassette Pickup Mechanism 8 4 8 2 2 Manual Feed Pickup Mechanism 8 5 8 2 3 Skew Correction 8 6 8 2 4 Throughput down Control 8 7 8 2 5 Throughput down Control 8 8 8 2 6 Feeding Speed Control 8 9 8 2 7 Feeding Speed Control 8 9 8 2 8 Warp Control 8 9 8 2 9 Delivery 8 11 8 3 Detection Jams 8 13 8 3 1 J...

Page 10: ...Manual Feed Pickup Solenoid 8 25 8 5 7 2 Removing the Manual Feed Pickup Solenoid 8 25 8 5 8 Manual Separation Roller 8 27 8 5 8 1 Before Removing the Manual Feed Separation Pad 8 27 8 5 8 2 Removing the Manual Feed Separation Pad 8 27 8 5 9 Duplexing Feed Motor 8 28 8 5 9 1 Before Removing the Duplex Feed Motor 8 28 8 5 9 2 Removing the Duplex Feed Motor 8 28 8 5 10 Reverse Unit 8 28 8 5 10 1 Bef...

Page 11: ...1 5 ETB motor failure detection 10 3 10 1 6 Fixing motor failure detection 10 3 10 1 7 Main Unit Fan Failure Detection 10 3 10 1 8 Duplex Fan Failure Detection 10 3 10 2 Control Panel 10 4 10 2 1 Overview 10 4 10 3 Counter 10 5 10 3 1 Overview 10 5 10 3 2 Timing of Increasing the Count 10 5 10 4 Power Supply 10 6 10 4 1 Power Supply 10 6 10 4 1 1 Low voltage Power Unit 10 6 10 4 2 Protection Funct...

Page 12: ... the Control Panel 10 21 10 5 12 NCU Board 10 22 10 5 12 1 Before Removing the NCU PCB 10 22 10 5 12 2 Removing the NCU PCB 10 22 10 5 13 DC Controller PCB 10 22 10 5 13 1 Before Removing the DC Controller PCB 10 22 10 5 13 2 Removing the DC Controller PCB 10 22 10 5 13 3 Procedure after Replacing the DC controller PCB 10 23 10 5 14 Memory Controller PCB 10 23 10 5 14 1 Before Removing the Memory ...

Page 13: ... 12 1 12 3 1 Procedure after Replacing the DC controller PCB 12 1 12 3 2 Procedure after Replacing the Main Controller PCB 12 1 12 3 3 Procedure after Clearing RAM Data 12 1 12 3 4 Procedure after Replacing the Control Panel 12 2 12 4 ADF 12 2 12 4 1 Outline 12 2 12 4 1 1 Procedure after Replacing the ADF Unit 12 2 Chapter 13 Correcting Faulty Images 13 1 Initial Checkup 13 1 13 1 1 Initial Check ...

Page 14: ...anagement Mode 15 1 Overview 15 1 15 1 1 Preface 15 1 15 1 2 Entering the Special Management Mode 15 1 15 1 3 Menu List 15 2 15 2 Troubleshooting 15 3 15 2 1 Pre Check 15 3 15 2 2 User Request 15 3 15 2 3 Paper Error 15 3 15 2 4 Image error 15 3 Chapter 16 Service Mode 16 1 Outline 16 1 16 1 1 Service Mode Configuration 16 1 16 1 2 Entering Selecting Service Mode 16 3 16 1 3 Exiting Service Mode 1...

Page 15: ... 35 16 5 1 1 SYSTEM List 16 35 16 5 2 SCAN 16 35 16 5 2 1 SCAN List 16 35 16 5 3 PRINT 16 36 16 5 3 1 PRINT List 16 36 16 5 4 FAX 16 37 16 5 4 1 FAX List 16 37 16 5 5 PANEL 16 38 16 5 5 1 PANEL List 16 38 Chapter 17 Upgrading 17 1 Outline 17 1 17 1 1 Overview of Upgrade 17 1 17 2 Making Preparations 17 2 17 2 1 Required System Environment 17 2 17 2 2 Before Upgrade 17 2 17 3 Downloading System Sof...

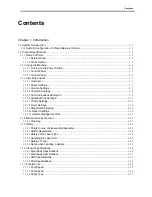
Page 16: ...Chapter 1 Introduction ...

Page 17: ... 1 2 3 7 Printer Settings 1 13 1 2 3 8 Timer Settings 1 15 1 2 3 9 Adjustment Cleaning 1 16 1 2 3 10 Report Settings 1 16 1 2 3 11 System Management Set 1 17 1 2 4 Maintenance by the User 1 25 1 2 4 1 Cleaning 1 25 1 2 5 Safety 1 28 1 2 5 1 Points to note at disassembly assembly 1 28 1 2 5 2 CDRH Regulations 1 28 1 2 5 3 Safety of the Laser Light 1 28 1 2 5 4 Handling the Laser Unit 1 28 1 2 5 5 S...

Page 18: ...he following are the host machines that correspond to Cassette Feeding Unit AB1 AC1 T 1 1 North America US Canada Latin America Asia Singapore Hong Kong China Korea 1 Cassette Feeding Unit AB1 AC1 Japan North America Europe Australia Asia Cassette Feeding Unit AB1 MF9170c MF8450C MF8450C Cassette Feeding Unit AC1 MF8450 MF9170c MF9150c MF8450c MF9170 MF9130 MF8450 1 ...

Page 19: ...ADF Tray 3 Control Panel 4 Cassette 1 5 Manual feed tray 6 Front Cover 7 Delivery tray 8 Reader Unit 9 Scanning Area 10 Platen Glass 11 Main Power Switch 12 USB Port 13 Ethernet Port 14 Handset Jack 15 External Device Jack 16 Telephone Line Jack 17 Toner Cartridges 18 ETB Unit None for I SENSYS MF9130 1 Power Socket 2 Jam removal cover 1 2 3 4 5 6 7 8 9 10 12 13 11 14 15 16 18 17 1 2 ...

Page 20: ...DF delivery roller 4 Reader unit 5 Platen glass 6 CCD unit 1 Reverse unit 2 Delivery unit 3 Delivery roller 4 Fixing unit 5 ETB unit 6 Photosensitive drum 7 Manual pickup roller 8 Pickup feed unit 9 Cassette pickup roller 10 Cassette 1 11 Toner Cartridges 12 Laser scanner unit 13 Controller box 14 Low voltage power supply PCB 6 2 3 4 5 1 1 2 3 4 13 14 5 6 7 8 9 11 12 10 ...

Page 21: ...switch and control panel power switch F 1 6 Main power switch Used to turns OFF ON the machine Control panel power switch Used to enter the power save mode low power mode sleep mode 1 Main power switch 2 Control panel power switch 3 Main power lamp MEMO Since the machine is not equipped with HDD the main power can be turned OFF during a period when the progress bar is displayed 1 2 3 ...

Page 22: ...h sub power supply 7 USB slot 8 Volume control dial 9 Clear key 10 Log in out key 11 Stop key 12 Start key 13 Main Power indicator 14 Error indicator 15 Processing Data indicator 16 Reset key 17 OK key 18 Scroll wheel 19 keys 20 Back key 21 Any key 22 Status monitor Cancel key 23 CF card slot 24 SD MS card slot 1 2 3 4 6 7 8 23 24 5 9 11 13 10 14 12 15 16 19 20 21 22 17 18 ...

Page 23: ...Power switch sub power supply 7 USB slot 8 Volume control dial 9 Clear key 10 Log in out key 11 Stop key 12 Start key 13 Main Power indicator 14 Error indicator 15 Processing Data indicator 16 Reset key 17 OK key 18 Scroll wheel 19 keys 20 Back key 21 Any key 22 Status monitor Cancel key 1 2 3 4 6 7 8 5 9 11 13 10 14 12 15 16 19 20 21 22 17 18 ...

Page 24: ...available Paper Settings Item Settings Stack Bypass Paper Std OFF ON Paper Size Inch Size LTR LGL STMT EXEC FLSC OFI B OFI M OFI G LTR G LGL Custom Size COM10 Monarch DL ISO C5 ISO B5 A B Size A4 A5 B5 A4 For all excluding USA Canada LTR Only for USA Canada Paper Type Plain Plain H Recycled Paper Color Bond Heavy 1 Heavy 2 Transparencies Labels Rough Drawer 1 Paper Size Inch Size LTR LGL EXEC FLSC...

Page 25: ...to 5 Brighter Reverse Color Display OFF ON Auto Clear Settings Selected Function Initial Function Printer Density Selection 4 to 4 0 Inch Entry OFF ON USA ON Auto Drawer Selection Copy Stack Bypass OFF ON Drawer 1 OFF ON Drawer 2 1 OFF ON Printer Drawer 1 OFF ON Drawer 2 1 OFF ON Receive 4 Fax for fax only machine Stack Bypass OFF ON Drawer 1 OFF ON Drawer 2 1 OFF ON Other Stack Bypass OFF ON Draw...

Page 26: ...val 4 Lighter to 4 Darker 0 Background OFF Background Removal Background Fine Adjust Yellow 0 to 8 6 Red 0 to 8 6 Green 0 to 8 6 Blue 0 to 8 6 Original Type Text Photo Text Photo Priority level 4 Text Priority to 4 Photo Priority 0 2 sided Original Settings Off Book Type Original Calendar Type Original TX Terminal ID 4 OFF ON Printing Position Inside Outside Tel Number Mark FAX TEL Color Send Gamm...

Page 27: ... OFF ON Set Pause Time 1 to 15 seconds 2 Auto redial OFF ON Redial Times 100V 1 to 15 2 120V 230V 1 to 10 2 Redial Time min 2 to 99 minutes 5 China 4 TW 2 Others TX Error Redial OFF ON Check Tone Before Sending 6 OFF ON Depending on the destination RX Settings ECM RX OFF ON Reception mode Selection Auto RX Fax Tel Auto Switch Ring Start Time 4 30 seconds 6 Japan U S A Canada 8 Others Fax Tel Ring ...

Page 28: ...Max 16 characters Destination Registration Max 120 characters I Fax Register Name Max 16 characters Destination Registration Max 120 characters File Register Name Max 24 characters Destination Registration FTP Windows SMB Windows SMB Browse Host Name Max 120 characters Folder Name Max 120 characters User Name Max 24 characters Password FTP Max 24 characters SMB Max 14 characters Group Register Nam...

Page 29: ...uch Name Max 12 characters I Fax Address Max 120 characters File Register Name Max 16 characters Register One Touch Name Max 12 characters Protocol FTP Windows SMB Windows SMB Browse Host Name Max 120 characters Folder Name Max 120 characters User Name Max 24 characters Password FTP Max 24 characters SMB Max 14 characters Group Register Name Max 16 characters Register One Touch Name Max 12 charact...

Page 30: ...uality Gradation level High Gradation 1 High Gradation 2 Toner Density Cyan C 8 Lighter to 8 Darker 0 Magenta M 8 Lighter to 8 Darker 0 Yellow Y 8 Lighter to 8 Darker 0 Black Bk 8 Lighter to 8 Darker 0 Save Toner OFF ON Line Control Resolution Priority Gradation Priority Layout Margin Direction Long Edge Short Edge Unit of Measure Millimeter Inch Millimeter For all excluding USA Canada Inch Only f...

Page 31: ... 0 01 inch Height 127 0 to 355 6 mm Width 0 1 mm 5 00 to 14 00 inch Width 0 01 inch Append CR to LF Yes No A4 Print Area Enlargement OFF ON Halftones OFF ON Text Resolution Gradation Graphics Resolution Gradation Image Resolution Gradation RGB Source Profile Text sRGB Gamma 1 5 Gamma 1 8 Gamma 2 4 Graphics sRGB Gamma 1 5 Gamma 1 8 Gamma 2 4 Image sRGB Gamma 1 5 Gamma 1 8 Gamma 2 4 Output Profile T...

Page 32: ... 3 GMT 10 00 4 GMT 9 00 5 GMT 8 00 6 GMT 7 00 7 GMT 6 00 8 GMT 5 00 Default for North America EST 9 GMT 4 00 10 GMT 3 30 11 GMT 3 00 12 GMT 2 00 13 GMT 1 00 14 GMT Default for Europe general 15 GMT 1 00 16 GMT 2 00 17 GMT 3 00 18 GMT 3 30 19 GMT 4 00 20 GMT 4 30 21 GMT 5 00 22 GMT 5 30 23 GMT 6 00 24 GMT 7 00 25 GMT 8 00 26 GMT 9 00 Default for Japan 27 GMT 9 30 28 GMT 10 00 29 GMT 11 00 30 GMT 12...

Page 33: ...ty 0 Platen Glass 3 Color Priority to 3 B W Priority 0 Color Black Char Process Feeder 3 Color Priority to 3 B W Priority 0 Platen Glass 3 Color Priority to 3 B W Priority 0 Image Special Processing OFF Level 1 Level 2 Paper Length Confirmation OFF ON Special Mode P OFF ON Fixing Unit Cleaning Start Cleaning Feeder Cleaning Start Report Settings Settings Item Settings TX Report OFF ON Only When Er...

Page 34: ...cters Password Max 7 characters Limit On Off Page Limit Total Prints ON OFF Page Limit 0 999999 Total Color Print ON OFF Page Limit 0 999999 Total Black ON OFF Page Limit 0 999999 Color Copy ON OFF Page Limit 0 999999 Color Scan ON OFF Page Limit 0 999999 Color Print ON OFF Page Limit 0 999999 Black Copy ON OFF Page Limit 0 999999 Black Scan ON OFF Page Limit 0 999999 Black Print ON OFF Page Limit...

Page 35: ...999 Total Black ON OFF Page Limit 0 999999 Color Copy ON OFF Page Limit 0 999999 Color Scan ON OFF Page Limit 0 999999 Color Print ON OFF Page Limit 0 999999 Black Copy ON OFF Page Limit 0 999999 Black Scan ON OFF Page Limit 0 999999 Black Print ON OFF Page Limit 0 999999 Page Totals Total Prints Total Color Print Total Black Prints Color Copy Color Scan Color Print Black Copy Black Scan Black Pri...

Page 36: ...s IP Address 0 0 0 0 PING Command IP Address IP Address Range Settings OFF ON Register Max 10 IPv4 Addresses Single Address IP Address Multiple Destinations First Address Last Address Edit Confirm Max 10 IPv4 Addresses Reject Permit Reject Permit Edit IP Address Switch Single Address Multiple Destinations Erase Is it OK to erase No Yes DNS Settings DNS Server Address Primary DNS Server IP Address ...

Page 37: ... Host Name Max 47 characters IP Address Range Settings OFF ON Register Max 10 IPv6 Addresses Single Address IP Address Multiple Destinations First Address Last Address Prefix Address IPv6 Prefix Edit Confirm Max 10 IPv6 Addresses Reject Permit Reject Permit Edit IP Address Switch Single Address Multiple Destinations Erase Is it OK to erase No Yes DNS Settings DNS Server Settings Primary DNS Server...

Page 38: ...ort Number 1 to 65535 80 Use Proxy within the Same Domain OFF ON Use Proxy Authentication OFF ON User Name Max 24 characters Password Max 24 characters Receive MAC Address Set MAC Address Permit RX Valid OFF ON Register MAC Address Max 12 characters Max 10 addresses Edit Confirm List of permitted address Edit MAC Address Max 12 characters Erase Is it OK to erase No Yes SMB Settings 4 Use SMB Clien...

Page 39: ...ation Encryption POP Auth Before Send OFF ON SMTP Authentication OFF ON User Name Max 64 characters Can be set when SMTP authentication is ON Password Max 32 characters Can be set when SMTP authentication is ON System Management Set Communication Settings 4 Item Settings E mail I Fax Settings Send Data Size Limit 0 to 99MB in 1MB unit 3MB Divide TX Data Oversize OFF ON Default Subject Max 40 chara...

Page 40: ...s does not contain Max 120 characters Forwarding destination File Format When Fax is selected in Forwarding Conditions Settings TIFF PDF When I Fax is selected in Forwarding Conditions Settings TIFF Black PDF Color TIFF Black JEG Color PDF PDF Black JPEG Color Divide Pages OFF ON Forward w o Condition Fax I Fax Forwarding Destination Select from the list of registered addresses File Format When Fa...

Page 41: ... Display OFF ON System Management Set Memory Media Store Log Item Settings Memory Media Store Log Do Not Retain Retain System Management Set Use USB Device Item Settings Use USB Device OFF ON System Management Set Dept ID User Name Display Item Settings Dept ID User Name Display OFF ON System Management Set Page Description Lan PnP Item Settings Page Description Lan PnP LIPS LX PCL5c PCL6 FAX LIPS...

Page 42: ...4 Use or Scroll Wheel to select Fixing Unit Cleaning then press OK F 1 11 5 Confirm that Start Cleaning is displayed then press OK Printing starts Do not use alcohol benzene paint thinner or other solvents for cleaning Doing so may result in damage to the plastic parts Do not use tissue paper paper towels or similar materials for cleaning they can stick to the components or generate static charges...

Page 43: ...ft dry cloth F 1 14 3 Close the feeder F 1 15 Cleaning the Feeder Automatically If your originals have black streaks or appear dirty after scanning them through the feeder clean the rollers of the feeder MEMO Discard the cleaning sheet after use The cleaning process cannot be canceled Please wait until it is completed When cleaning the machine first turn OFF the main power switch and disconnect th...

Page 44: ...heel to select Feeder Cleaning then press OK F 1 18 5 Place 10 sheets of blank paper into the feeder F 1 19 6 Confirm that Start is displayed then press OK F 1 20 The display returns to the Adjustment Cleaning screen 7 Press Main Menu to return to the Main Menu screen MEMO Discard the cleaning sheet after use The cleaning process cannot be canceled Please wait until it is completed ...

Page 45: ...orce regulations concerning laser products on August 2 1976 These regulations apply to laser products manufactured on and after August 1 1976 and the sale of laser products not certified under the regulations is banned within the Untied States The label shown here indicates compliance with the CDRH regulations and its attachment is required on all laser products that are sold in the United States ...

Page 46: ... 3 Do not bring toner into contact with plastic material It tends to react easily Storage of copy print output Do not use transparent polyvinyl case If printed side contact with the surface of case toner melts and the paper may be adhered with a case 1 2 5 6 Notes when handling a battery 0018 9080 imageCLASS MF9170c imageCLASS MF9150c imageCLASS MF8450c The following warnings are given to comply w...

Page 47: ...65 from when the machine is turned on to when the standby screen is displayed Print area At printing Paper other than envelope Inside of the circumference of 5 mm Envelope Inside of the circumference of 10 mm At copying Inside of the lead edge of 5 mm both sides of 3 mm and trailing edge of 5 mm At the time of printing a received message Inside of the lead edge of 5 mm both sides of 3 mm and trail...

Page 48: ... rating Rated input voltage 100 to 127V 100V model 220 to 240V 200V model Rated input frequency 50 60Hz Power consumption maximum Less than 929W Main unit only Less than 949W When Cassette Unit AB1 AC1 optional is installed Power consumption At standby Less than 28W At sleep mode Less than 1W 100V model Less than 1 2W 200V model Ozone At initial use Less than 0 01ppm After service life Less than 0...

Page 49: ...m The right side is not detected Non image width leading edge Less than 5 0 2 0 mm When ADF is used incl stream reading Less than 5 0 2 0 mm Non image width left right Left edge Less than 3 0 2 0 mm When ADF is used incl stream reading Less than 3 0 2 0 mm Gradation 256 gradation Reading resolution 600 x 600 dpi Reading speed Fixed reading Not specified Stream reading Single sided 20 8ipm LTR 600d...

Page 50: ...g hr Color 3 0mg hr Dimensions Dimension 546 mm x 527 mm x 627 mm Main unit only 546 mm x 527 mm x 930 mm When Cassette Feeding Unit AB1 AC1 optional is installed Installation space Jam removal cover and ADF opened Cassette pulled out 546 mm x 1140 mm x 792 mm 546 mm x 1140 mm x 1095 mm When Cassette Feeding Unit AB1 AC1 optional is installed Weight Approx 44kg incl toner cartridge Option See Syst...

Page 51: ...x 200dpi 8 pixels mm x 7 7 lines mm 200 x 400dpi 8 pixels mm x 15 4 lines mm 400 x 400dpi 16 pixels mm x 15 4 lines mm Reduction for reception Automatic reduction of an image received 75 to 100 incremented by 1 FAX TEL switching Provided Remote reception Provided Memory reception Send Receive memory More than 1000 pages Total number of sent received pages Based on the JBIG standard mode with ITU T...

Page 52: ...y 1 Stream reading Single sided Double sided Single sided Double sided Cassette Optional cassette Manual feed tray Cassette Optional cassette Manual feed tray Cassette Optional cassette Manual feed tray Cassette Optional cassette Manual feed tray Plain paper A4R 21 0 21 0 10 10 19 7 19 7 7 7 LGL 17 9 17 9 5 5 17 9 17 9 5 5 LTRR 22 0 22 0 11 11 20 8 20 8 7 7 Thick paper A4R 17 17 8 4 8 4 16 8 16 8 ...

Page 53: ... 1 Fixed reading 1 vs 1 copy 1 Stream reading Single sided Double sided Single sided Double sided Cassette Optional cassette Manual feed tray Cassette Optional cassette Manual feed tray Cassette Optional cassette Manual feed tray Cassette Optional cassette Manual feed tray Plain paper Thick paper A4R 17 0 17 0 8 4 8 4 17 0 17 0 7 7 LGL 14 3 14 3 4 4 14 3 14 3 4 4 LTRR 17 0 17 0 8 4 8 4 17 0 17 0 7...

Page 54: ...lain H From 20 to 28 lb 75 to 105 g m2 A A Color From 19 to 24 lb 70 to 90 g m2 A A Recycled From 19 to 24 lb 70 to 90 g m2 A A Heavy 1 From 28 to 32 lb 106 to 120 g m2 A A Heavy 2 From 32 to 47 lb 121 to 176 g m2 A Bond 20 lb 75 g m2 A A Transparency A Labels A Envelopes A Rough A A Cassette Optional cassette Manual feed tray Size W x L Legal Letter Officio M Officio B Offficio Executive Foolscap...

Page 55: ...Chapter 2 Basic Operation ...

Page 56: ...Contents Contents 2 1 Construction 2 1 2 1 1 Functional Configuration 2 1 2 1 2 Connecting the Main PCBs 2 2 2 2 Basic Sequence 2 3 2 2 1 Basic Sequence of Operation 2 3 2 2 2 Power On Sequence 2 4 ...

Page 57: ...ASS MF9170c imageCLASS MF9150c imageCLASS MF8450c This machine s functions are divided into 8 blocks F 2 1 External auxiliary control system Main controller Original feed system Original exposure system Laser exposure system Image formation system Pickup feed system Fixing system ...

Page 58: ...odular PCB PCB21 Modular PCB PCB24 NCU PCB PCB26 Pseudo CI PCB PCB27 Off hook PCB PCB28 Environment sensor PCB29 Color displacement density sensor right PCB30 Color displacement density sensor left J201 J1022 J202 J1024 J401 J1023 PCB2 J6001A J1002 J2002 J1019 J2001 J1009 PCB5 J8120 J6028 J8129 J3013 J8125 J3012 J3016 J1006 J1004 J3004 J8113 J6101 PCB14 J6151 J8501 PCB11 J3 J8151 PCB20 PCB26 J8502...

Page 59: ...e main controller or power switch is turned OFF To keep the machine ready to print The machine goes into sleep mode when a sleep command is sent from the main controller It executes the color displacement correction and the image stability control when each command is sent INTR Initial rotation From the print command is input by the main controller until paper is picked up To stabilize the photose...

Page 60: ... CPU Initialize ASIC Start up fans Video interface communication start Internal communication start Toner cartridge detection Check residual jam Fixing unit pressurized Developing cylinder disengagement check Developing cylinder disengaged Engaged Disengaged Check environment Initial drive for motors Check residual paper Initial drive for scanner Transfer roller position detection Shift home posit...

Page 61: ...Chapter 3 Main Controller ...

Page 62: ...7 3 3 5 Printer unit Output Image Processing 3 8 3 4 Image Data Flow 3 9 3 4 1 Flow of Image Data According to Copy Functions 3 9 3 4 2 Flow of Image Data for the SEND Function 3 10 3 4 3 Flow of Image Data for the Fax Transmission 3 10 3 4 4 Flow of Image Data for the Fax Reception Function 3 11 3 4 5 Flow of Image Data for the PDL Function 3 11 3 5 Parts Replacement Procedure 3 12 3 5 1 Main Con...

Page 63: ...ain controller mainly consists of the following parts T 3 1 F 3 1 A Reader unit B DC controller PCB C Printer unit No PCB Name Function 1 Main controller PCB System control memory control image processing control interface control 2 Extended RAM DIMM Memory for image storage Memory for work image processing and data analysis etc 1 2 A B C ...

Page 64: ...versal port IC30 Ethernet controller IC31 IC33 IC37 IC42 DDR SDRAM main memory IC32 Main CPU main image process IC34 BOOT ROM IC35 Main program ROM IC38 FAX modem J8112 J8125 J8129 J8121 J8120 J8131 J8113 J8133 J8114 IC6 J8103 J8118 J8140 J8117 J8119 J8110 SW4 J8104 SW2 J8111 IC32 IC30 IC35 IC34 IC38 J8130 J8102 J8101 J8128 J8127 BAT1 J8123 J8126 J8134 J8124 J8106 IC31 IC33 IC37 IC42 J8109 IC7 IC2...

Page 65: ...I interface CC VI J8118 Serial interface Coin vendor 100V 230V Serial I F PCB 120V J8119 Card reader interface Card reader E1 J8120 Motor for ADF solenoid sensor signal ADF relay PCB J8121 Reader motor control signal Reader motor M12 J8123 Not implemented J8124 Secondary battery for memory backup Secondary battery J8125 Power source Low voltage power PCB J8126 Pseudo CI signal Pseudo CI PCB J8127 ...

Page 66: ...M in the main controller PCB At the time of startup the CPU reads the system software from the main program ROM into the main memory DDR SDRAM according to the boot program in the BOOT ROM While the CPU is reading the system software and initializing memory etc the following screen is displayed in the control panel where the progress status is displayed in the progress bar F 3 3 Progress bar ...

Page 67: ...le 3 Control Program 2 1 Perform initialization of each software module and communication with a printer 2 When the printer is detected normally the startup sequence is completed If it is not detected normally an error code E197 is displayed after a connection timeout occurs F 3 4 When the startup sequence is completed it becomes possible to receive a job The operation screen is displayed in the c...

Page 68: ...Image processing is mainly executed by the main controller PCB The configuration of related modules is shown below F 3 6 A A A SEND FAX PullScan E Mail PDL Print PC Original Copy Print output Scan Image data Other iR machine DC controller PCB Main controller PCB Processes the image data read by the reader unit Reader unit input image processing block Processes image data for output to the printer ...

Page 69: ...iting Block 0020 0953 imageCLASS MF9170c imageCLASS MF9150c imageCLASS MF8450c In this processing compression extension editing are performed F 3 8 To compression expansion editing block Edge emphasis Enlargement reduction Main controller PCB Reader unit Main controller PCB to printer unit output image processing block Reader image processing block PDL image processing block Enlargement reduction ...

Page 70: ...performs image processing to perform printing to the image data received from the reader unit F 3 9 Main controller PCB To DC controller PCB Compression expansion editing block Binary density conversion Enlargement reduction Smoothing Binary processing error diffusion intensify to density conversion density adjustment F adjustment gamma correction ...

Page 71: ... Copy Functions 0020 0955 imageCLASS MF9170c imageCLASS MF9150c imageCLASS MF8450c F 3 10 Main controller PCB row data Image processing block for printer unit Image processing block for reader unit Reader unit Data compression Data rotation Data expansion DC controller PCB ...

Page 72: ...7 imageCLASS MF9170c imageCLASS MF9150c imageCLASS MF8450c F 3 12 Main controller PCB USB1 1 Image processing block for reader unit Reader unit Data rotation Data expansion Resolution conversion To network compression data Ethernet port Main controller PCB Image processing block for reader unit Image processing block for FAX Modem board Data rotation Data compression Data expansion Reader unit ...

Page 73: ...n 0020 0959 imageCLASS MF9170c imageCLASS MF9150c imageCLASS MF8450c F 3 14 Main controller PCB Image processing block for printer unit Image processing block for fax Modem board Data compression Data rotation Data expansion DC controller PCB Main controller PCB PDL Rendering processing block Compression expansion editing block Processing block for printer unit DC controller PCB Ethernet ...

Page 74: ...B 0021 0348 imageCLASS MF9170c imageCLASS MF9150c imageCLASS MF8450c After replacing the main controller PCB with new one perform the follow ing procedure 1 Backup the user data Import the user data using the remote UI 2 Enter the flicker adjustment value of the control panel 1 Using the service mode check the flicker value of the control panel TESTMODE PANEL FLICKER CHECK START FLICKER AD JUST 2 ...

Page 75: ...Chapter 4 Original Exposure System ...

Page 76: ...cting the Size of Originals 4 6 4 3 3 1 Overview 4 6 4 3 4 Dirt Sensor Control 4 7 4 3 4 1 Overview 4 7 4 3 4 2 Stream Reading Position Shift 4 7 4 4 Parts Replacement Procedure 4 8 4 4 1 ADF Unit Reader Unit 4 8 4 4 1 1 Before Removing the ADF Unit Reader Unit 4 8 4 4 1 2 Removing the ADF Unit Reader Unit 4 8 4 4 1 3 Procedure after Replacing the ADF Unit 4 10 4 4 1 4 Procedure after Replacing th...

Page 77: ...ode with CCD unit fixed Reading resolution 600 dpi x 600 dpi Gradation 256 gradation Productivity ADF Single sided 20 8 ipm LTR 19 7 ipm A4 Double sided Approx 7 ipm A4 LTR Detection of the carriage position Reader HP sensor SR717 Magnification change Zoom 50 to 200 Sub scanning direction only Image processing by the main controller PCB Lens Fixed focus lens CCD Number of lines 1 line each for RGB...

Page 78: ...d from the 2 document lamps LAMP1 2 is reflected to the original and reaches to the CCD via the 4 mirrors and the lenses F 4 2 1 CCD PCB PCB11 2 Inverter PCB PCB12 3 Document lamps LAMP1 2 4 CCD unit 5 Mirrors 6 Lenses 7 Light path 8 CCD 1 2 3 5 6 4 5 7 3 5 5 5 8 6 ...

Page 79: ...s the A4R long scan operation motor drive only to smooth the drive belt and grease F 4 4 Motor forward Motor reverse Reader HP sensor ON Document lamp ON Reader motor M12 Document lamp LAMP1 2 Reader HP sensor SR717 HP shift End position of pre scan Pre scan operation 1 HP shift HP HP WAIT Home position End position of pre scan 1 Document lamp ON 2 HP shift 3 Pre scan operation 4 HP shift ...

Page 80: ... of the light intensity between the center and the surrounding of the document lamp Deterioration of the document lamp Shading correction is performed to correct unevenness of the CCD output level F 4 6 Book Position the position at which the motor is accelerated to prepare for reading Reader motor M12 Document lamp LAMP1 2 Reader HP sensor SR717 STBY SREADY HP shift HP shift Start key ON Motor fo...

Page 81: ...into the USB slot Inserting a memory card into the card slot Opening closing the front cover or reverse assembly cover Opening closing the cassette Setting paper in the empty cassette Setting paper in the empty manual feed tray Setting paper in the empty document tray Overdrive control When starting activation of the document lamp the machine applies a voltage higher than the one applied at readin...

Page 82: ...has a function to perform digital magnification change at 50 to 200 and the magnification can be set in increments decrements of 1 4 3 3 Detecting the Size of Originals 4 3 3 1 Overview 0019 8968 imageCLASS MF9170c imageCLASS MF9150c imageCLASS MF8450c The machine does not perform document size detection The machine is not equipped with the document size sensor The machine performs reading in the ...

Page 83: ... incorrect correction to be performed In such a case disabling of the correction can be set in the user mode Adjustment Cleaning Automatic correction of feeder dust ON Perform automatic correction initial setting OFF Do not perform automatic correction 4 3 4 2 Stream Reading Position Shift 0019 9722 imageCLASS MF9170c imageCLASS MF9150c imageCLASS MF8450c When dust is detected at the final documen...

Page 84: ...CLASS MF9150c imageCLASS MF8450c 1 Open the ADF upper cover 1 F 4 10 2 While pushing the claw 1 remove the ADF upper front cover 2 F 4 11 3 Open the ADF tray 1 to the position indicated in the figure below Using a flat blade screwdriver press the hook 2 in the direction of the arrow A and release the claw 3 to remove the ADF tray in the direction of the arrow B F 4 12 4 Open the ADF tray 1 to the ...

Page 85: ...binding 2 3 2 1 1 2 4 3 1 Points to note at work Be sure not to close the ADF unit reader unit hastily If closing the ADF unit reader unit hastily the impact can cause damage Also be careful not to get your hands caught between the ADF unit reader unit and the host machine Points to Note When Removing the Hinge Stopper When removing both the left and right hinge stoppers the ADF the reader unit cl...

Page 86: ...ter Replacing the Reader Unit 0021 0346 imageCLASS MF9170c imageCLASS MF9150c imageCLASS MF8450c After replacing the reader unit execute automatic detection of the CCD read ing position at ADF stream reading in the following service mode COPIER FUNCTION INSTALL STRD POS Operation Adjust the reading position by moving the scanner in increments of 0 1 mm Time When the lamp is turned on Adjustment ti...

Page 87: ...tream reading in the following service mode COPIER FUNCTION INSTALL STRD POS Operation Adjust the reading position by moving the scanner in increments of 0 1 mm Time When the lamp is turned on Adjustment time 10 seconds When the lamp is not turned on Lamp adjustment time 10 to 30 seconds Adjustment time 10 seconds MEMO The CCD unit in the reader unit cannot be replaced in the field If the CCD unit...

Page 88: ...Chapter 5 Original Feeding System ...

Page 89: ... Feed Unit 5 8 5 4 2 1 Removing the ADF Pickup Feed Unit 5 8 5 4 3 Pick up Roller 5 10 5 4 3 1 Removing the ADF Pickup Roller 5 10 5 4 4 Separation Roller 5 11 5 4 4 1 Removing the ADF Separation Roller 5 11 5 4 5 Pick up Motor 5 12 5 4 5 1 Before Removing the ADF Pickup Motor 5 12 5 4 5 2 Removing the ADF Pickup Motor 5 12 5 4 6 Pick up Solenoid 5 13 5 4 6 1 Before Removing the ADF Pickup Solenoi...

Page 90: ...aration pad 4 The document is transported to the reading glass surface by the ADF feed roller The ADF paper trailing edge sensor SR719 detects the leading edge of the document 5 While being transported by the ADF feed roller the document is read by the CCD unit 6 The document is delivered on the ADF delivery tray by the ADF delivery roller A 2 sided original with its first side read is delivered t...

Page 91: ...he ADF rollers are driven by the ADF pickup motor F 5 3 ADF paper trailing edge signal ADF paper signal ADF pickup motor control signal ADF delivery solenoid signal Main controller PCB ADF relay PCB M13 SR718 SL5016 SR719 ...

Page 92: ... the document reaches the ADF feed roller the feed speed becomes approximately 1 2 times which is the same as the reading speed If no stop request is sent from the main controller when the lead edge of the document reaches in front of the reading position reading operation starts F 5 5 4 When reading is completed the document is delivered to the ADF delivery tray by the ADF delivery roller When a ...

Page 93: ...ading a double sided document is the same as that of reading a single sided document until the step where the lead edge of the document reaches the ADF paper trailing edge sensor The following shows the operational sequence afterwards 1 When the ADF paper trailing edge sensor detects the lead edge of the document the ADF pickup motor stops and then the ADF pickup roller moves up When the ADF picku...

Page 94: ...lers are engaged 5 When a specified period of time time until the trailing edge of the document passes through the ADF delivery roller elapses after the trailing edge of the doc ument passes through the ADF paper trailing edge sensor the ADF pickup motor stops In the case of double sided document reading the ADF pickup roller has already moved up to a specified position F 5 12 5 2 2 Document Size ...

Page 95: ...dge sensor in 1 sided multiple jobs Yes The leading edge of paper does not reach the ADF paper trailing edge sensor within 1 2 sec after reverse operation starts in 2 sided job Yes 0002H Residual jam The trailing edge of paper does not passes through the ADF paper trailing edge sensor within 3 4 sec after the leading edge of paper reaches the ADF paper trailing edge sensor in 1 sided job Yes The t...

Page 96: ...ont cover 2 F 5 14 3 Open the ADF tray 1 to the position indicated in the figure below Using a flat blade screwdriver press the hook 2 in the direction of the arrow A and release the claw 3 to remove the ADF tray in the direction of the arrow B F 5 15 4 Open the ADF tray 1 to the position indicated in the figure below to re move it upward F 5 16 5 Remove the ADF upper rear cover 1 1 screw 2 1 boss...

Page 97: ...e ADF unit execute automatic detection of the CCD read ing position at ADF stream reading in the following service mode COPIER FUNCTION INSTALL STRD POS Operation Adjust the reading position by moving the scanner in increments of 0 1 mm Time When the lamp is turned on Adjustment time 10 seconds When the lamp is not turned on Lamp adjustment time 10 to 30 seconds Adjustment time 10 seconds 5 4 2 Pi...

Page 98: ...ated in the figure below Using a flat blade screwdriver press the hook 2 in the direction of the arrow A and release the claw 3 to remove the ADF tray in the direction of the arrow B F 5 24 4 Open the ADF tray 1 to the position indicated in the figure below to re move it upward F 5 25 5 Remove the ADF upper rear cover 1 1 screw 2 1 boss 3 1 2 2 1 1 2 A B 2 3 3 1 ...

Page 99: ...connector 3 1 wire saddle 4 F 5 28 8 Remove the ADF pickup feed unit 1 4 screws 2 F 5 29 5 4 3 Pick up Roller 5 4 3 1 Removing the ADF Pickup Roller 0018 9174 imageCLASS MF9170c imageCLASS MF9150c imageCLASS MF8450c 1 Open the ADF upper cover 1 F 5 30 2 Remove the ADF pickup roller unit 1 3 2 1 1 2 4 3 1 1 2 2 2 2 1 ...

Page 100: ...paration Roller 0019 5919 imageCLASS MF9170c imageCLASS MF9150c imageCLASS MF8450c 1 Open the ADF upper cover 1 F 5 33 2 While pressing the shaft retainer 1 release the 2 shafts 2 and remove the ADF upper cover 3 F 5 34 3 Release the claw 1 to remove the gear 2 F 5 35 4 Remove the 4 grip rings 1 the bushing 2 and the bushing 3 1 2 1 1 3 1 1 2 2 1 2 ...

Page 101: ...ler shaft 3 F 5 39 8 Remove the ADF separation roller 1 F 5 40 5 4 5 Pick up Motor 5 4 5 1 Before Removing the ADF Pickup Motor 0018 9069 imageCLASS MF9170c imageCLASS MF9150c imageCLASS MF8450c 1 Remove the ADF pickup feed unit page 5 8 Reference Removing the ADF Pickup Feed Unit 5 4 5 2 Removing the ADF Pickup Motor 0018 9071 imageCLASS MF9170c imageCLASS MF9150c imageCLASS MF8450c 1 Disconnect ...

Page 102: ...3 F 5 45 5 4 6 Pick up Solenoid 5 4 6 1 Before Removing the ADF Pickup Solenoid 0018 9066 imageCLASS MF9170c imageCLASS MF9150c imageCLASS MF8450c 1 Remove the ADF pickup feed unit page 5 8 Reference Removing the ADF Pickup Feed Unit 5 4 6 2 Removing the ADF Pickup Solenoid 0018 9067 imageCLASS MF9170c imageCLASS MF9150c imageCLASS MF8450c 1 Remove the grip ring 1 and disconnect the connector 2 F ...

Page 103: ...9134 imageCLASS MF9170c imageCLASS MF9150c imageCLASS MF8450c 1 Open the ADF upper cover 1 F 5 49 2 Open the inner guide 1 F 5 50 3 Remove the 2 screws 1 4 Push the 2 claws 2 in the direction of the arrow A to remove the ADF separation claw cover 3 F 5 51 5 Close the inner guide 1 F 5 52 6 Remove the spring 1 1 2 2 1 2 3 1 Be careful not to lose the removed spring 1 1 2 3 1 1 ...

Page 104: ...5 5 15 F 5 53 7 Open the inner guide 1 F 5 54 8 Remove the ADF separation pad unit 1 F 5 55 9 Remove the separation pad fixing pin 1 and the sheet 2 and then re move the ADF separation pad 3 F 5 56 1 1 1 1 2 3 ...

Page 105: ...Chapter 6 Laser Exposure ...

Page 106: ...6 4 6 2 3 Laser Light Intensity Control 6 4 6 2 4 Image Masking Control 6 4 6 2 5 Failure Detection 6 4 6 3 Controlling the Laser Scanner Motor 6 5 6 3 1 Overview 6 5 6 3 2 Failure Detection 6 5 6 4 Parts Replacement Procedure 6 6 6 4 1 Laser Scanner Unit 6 6 6 4 1 1 Before Removing the Laser Scanner Unit 6 6 6 4 1 2 Removing the Laser Scanner Unit 6 6 ...

Page 107: ...nit There are two two colors of laser diodes for one laser driver PCB The laser beams of two colors emitted from the laser diode are reflected by one polygon mirror In this machine the process speed varies according to the print mode The rotational speed of the scanner motor and the laser light intensity are switched according to the process speed F 6 1 SCNM1ACC SCNM1DEC SCNM2ACC SCNM2DEC LDCTRL V...

Page 108: ...eo signals and the laser beam is radiated 6 The laser beams are reflected by the polygon mirror rotating at the constant speed and reach the photosensitive drum via the focusing lens and the reflection mirror The focusing lens corrects the route of the laser beam to maintain the constant scanning speed on the photosensitive drum 7 When the photosensitive drum rotates at constant speed and the lase...

Page 109: ...als to each laser driver IC IC1 IC2 video signals VDO VDO for the image formation laser control signals CTRL 0 to 2 for switching the operational mode of the laser driver circuit laser light intensity switch signal LDPWRH for switching the laser light intensity The laser driver IC controls the laser according to the combination of the laser control signals 5V DC controller PCB Laser driver PCB Cya...

Page 110: ...art the image masking control depends on the paper size information that DC controller receives from the main controller There is no cassette paper size detection function in this equipment F 6 3 The colored area indicates the area where an image can be scanned by the laser beam The times T1 T2 T3 T4 and T5 depend on the paper size The T1 time depends on the color If the main controller does not s...

Page 111: ...f the scanner motor by sending the scanner motor acceleration signal SCNMACC or the scanner motor deceleration signal SCNMDEC to the scanner motor driver based on the detected rotational speed 6 3 2 Failure Detection 0019 5011 imageCLASS MF9170c imageCLASS MF9150c imageCLASS MF8450c In the DC controller the fault in the scanner motor is detected The CPU IC1001 monitors the frequency comparator in ...

Page 112: ... Controller Box page 10 15 Reference Removing the Con troller Box 7 Remove the Off Hook PCB only of the machine with FAX page 10 25 Reference Removing the Off Hook PCB 8 Remove the DC Controller PCB page 10 22 Reference Removing the DC Controller PCB 9 Remove the Laser Scanner Cover page 10 16 Reference Removing the Laser Scanner Cover 6 4 1 2 Removing the Laser Scanner Unit 0018 9193 imageCLASS M...

Page 113: ...Chapter 7 Image Formation ...

Page 114: ...20 7 4 3 ETB Cleaning 7 21 7 4 4 Transfer Roller Engagement disengagement Control 7 22 7 5 Parts Replacement Procedure 7 26 7 5 1 Drum Motor 7 26 7 5 1 1 Before Removing the Drum Motor 7 26 7 5 1 2 Removing the Drum Motor 7 26 7 5 2 Main Drive Unit 7 26 7 5 2 1 Before Removing the Main Drive Unit 7 26 7 5 2 2 Removing the Main Drive Unit 7 26 7 5 2 3 Point to Note When Installing the Main Drive Un...

Page 115: ...Contents 7 5 7 1 Before Removing the Color Displacement Density Sensor 7 34 7 5 7 2 Removing the Color Displacement Density Sensor 7 34 ...

Page 116: ...ain controller At the same time it controls the high voltage power PCB makes toner adhere to the electrostatic latent image and then transfers it on paper A memory tag which saves cartridge data is built in the toner cartridge for each color The DC controller detects the use condition of the toner cartridge by reading writing the memory tag F 7 1 Video data Cartridge data ATT TR DEV PRI PREEXP Mai...

Page 117: ...k To transfer toner on the photosensitive drum to paper Step 5 Attraction Step 6 Transfer Step 7 Drum separation Step 8 ETB separation 4 Fixing block To fix toner on paper Step 9 Fixing 5 Cleaning block To remove the residual toner on the photosensitive drum Step 10 Drum cleaning F 7 2 C Photosensitive drum Cleaning 10 Drum cleaning Electrostatic latent image formation 2 Primary charging 3 Laser b...

Page 118: ...Step 2 Primary charging As a preparation for the latent image formation the surface of the photosensitive drum is changed with a uniform negative potential The machine charges the photosensitive drum with negative charge directly from the primary charging roller which is interlocked with the drum The primary charging roller is made of a conductive rubber and a negative DC bias is applied to the ro...

Page 119: ...hotosensitive drum the toner is separated from the developing cylinder at the area where the photosensitive drum is engaged with the developing cylinder and is adhered to the light area of the photosensitive drum This makes the electrostatic latent image on the photosensitive drum visible Since the potential in the dark area on the photosensitive drum is lower than the potential on the developing ...

Page 120: ...he order of M C Y and Bk F 7 8 Step 7 Drum separation The paper is separated from the photosensitive drum by its own elastic force curvature separation There is also a static charge eliminator at the downstream of the transfer roller It decreases the static charge on the ETB to stabilize paper feed operation F 7 9 Step 8 ETB separation The paper is separated from the ETB by the elasticity of paper...

Page 121: ...amic heater with lower heat which warms up quickly The feature of this heater is that the wait time is short and thus energy saving is realized F 7 11 7 1 7 Cleaning Block 0019 5018 imageCLASS MF9170c imageCLASS MF9150c imageCLASS MF8450c In this block the residual toner on the photosensitive drum is removed When transfer is performed a part of the toner image on the photosensitive drum is not som...

Page 122: ...orrection or copy image correction Timing of execution of each control T 7 1 Executed when 120 sheets are printed after the initial implementation Executed when 500 sheets are printed after the 2nd implementation Executed when 1000 sheets are printed after the 3rd implementation Executed when 1000 sheets are printed thereafter No Execution timing Operation time Environmental change corrective cont...

Page 123: ...en a specified period of time elapses after the execution of this control When a specified number of prints are completed after the execution of the previous job or after the replacement of the toner cartridge When a specified level of environmental change temperature humidity has been made after the execution of this control When the DC controller received the execution command from the main cont...

Page 124: ...ter LED and light receiver PD 3 The light emitted from the light emitter is reflected at the pattern image for image gradation correction and received at the light receiver of the color displacement density sensor The intensity of the reflected light varies depending on the toner density 4 The color displacement density sensor converts the received light into a voltage and sends it to the DC contr...

Page 125: ...is is to measure the density of halftone patch accurately The timing is determined with using the pattern printed at step 2 ETB 2nd round 4 Pattern for density condition Halftone patch of Bk Y C M is printed on the left side only Measures the density condition of each color The timing is determined with using the pattern printed at step 2 5 Pattern for turn on density detection Halftone patch of B...

Page 126: ...is executed at the following timing At power on after the replacement of the toner cartridge When the front cover is closed after the replacement of the toner cartridge When a specified number of prints are completed When the execution command is received from the main controller Explanation of operation 1 The DC controller forms a pair of pattern images for color displacement correction one is on...

Page 127: ...art position main scanning magnification and sub scanning start position F 7 16 Color displacement signal ETB Color displacement density sensor left Color displacement density LED drive signal Color displacement density sensor right Color displacement density signal Pattern image for color displacement correction DC controller PCB Main controller PCB Light emitter LED Light receiver PD ...

Page 128: ...nt Printed in black Bk only on the left side and in order of yellow Y cyan C and magenta M on the right side This is for the comparison of each color registration based on the black position F 7 17 Error Codes E020 Warning color displacement density sensor abnormality When light could not be received by the light receiver the machine sets an initial value for the color displacement corrective valu...

Page 129: ...radation correction F 7 18 Item Description Number of test pattern sheet Type of test pattern Full Correction PASCAL This correction outputs a test pattern and the reader scans its gradation density to adjust the gradation 2 1st sheet T MIC 2nd sheet high low screen rulings Quick Correction This correction adjusts the gradation by means of D half control instead of outputting a test pattern Copy I...

Page 130: ...ng four controls Memory tag control Toner cartridge detection New toner cartridge detection Developing cylinder engagement disengagement control M SL DC controller PCB Fixing motor control signal Drum motor drive signal Memory controller PCB Developing disengagement cam Cartridge data Developing disengagement signal Toner level signal Developing disengagement sensor New cartridge sensor Drum motor...

Page 131: ... panel F 7 20 7 3 3 Memory Tag Control 0019 5024 imageCLASS MF9170c imageCLASS MF9150c imageCLASS MF8450c The DC controller detects the use condition of the toner cartridge by reading writing data saved in the memory tag When the machine is placed in the following condition the DC controller determines that it is a communication error of the memory tag and notifies the main controller of Warning c...

Page 132: ...ower is turned ON without removing the protection material the new cartridge sensor flag is pressed by the protection material so a new cartridge sensor SR716 detects the presence of the protection material In this condition the machine determines that the protection material is not removed from the toner car tridge stops the operation and then displays a message prompting an operator to remove th...

Page 133: ... based on the direction of the developing disengagement cam F 7 23 MEMO The machine uses a contact development method in which the developing cylinder is engaged with the photosensitive drum At color printing developing cylinders of all colors are engaged with the photosensitive drum but at monochrome printing only the black color developing cylinder is engaged with it By disengaging developing cy...

Page 134: ...r roller of each color After the toner is transferred the paper is separated from the ETB by the ETB feed roller Especially at the time of color printing high accuracy is requested for paper feeding by the ETB because one image is formed with four color toners overlapped The ETB is also used for image stabilization control When image gradation corrective control or color displacement corrective co...

Page 135: ...ller based on the measured voltage of each roller The DC controller sends a constant current to the transfer roller Bk and attraction roller when starting print operation and measures the voltage at that point Based on the measured voltage it extracts the optimum transfer and attraction biases In the subsequent print operation the optimum transfer and attraction biases are applied to stabilize the...

Page 136: ...rged toner and positive charged toner remain on the ETB When ETB cleaning starts the DC controller sets the potential of the photosensitive drums for magenta M and yellow Y to 0 using the bias of the primary charging roller The photosensitive drums for cyan C and black Bk are changed negative For the transfer roller for each color a positive or negative DC bias is applied as shown in the figure be...

Page 137: ...the black color cylinder is engaged Only the black color cylinder is engaged Others All color cylinders are engaged Power off standby All color cylinders are disengaged All color cylinders are disengaged MEMO The photosensitive drum consumption is affected by the drum rotation time At monochrome printing of plain paper or transparency the photosensitive drums of Y M and C are disengaged from the E...

Page 138: ... transfer roller holder follows the operation of the transfer roller disengagement slider When the transfer roller disengagement slider moves up and down the pin moves along the slope and the transfer roller is engaged with or disengaged from the transfer roller F 7 28 SL5011 M5 Bk toner cartridge DC controller PCB ETB motor drive signal ETB disengagement solenoid drive signal Y toner cartridge C ...

Page 139: ...isengagement slider is placed at the downward position the yellow Y transfer roller holder moves to the highest position along the slope 1 so the transfer roller is disengaged from the ETB The same applies to cyan C and magenta M The black Bk transfer holder stays at the lowest position because the transfer roller disengagement slider has no slope As a result the transfer roller is engaged with th...

Page 140: ...ects the engagement disengagement condition of the transfer rollers based on the measurement result If the change of engagement disengagement could not be confirmed when the engagement disengagement condition of the transfer rollers was detected again after the transfer roller disengagement slider was moved the DC controller measures the voltage of the transfer rollers again retry control Error Co...

Page 141: ...he Main Drive Unit 0020 5295 imageCLASS MF9170c imageCLASS MF9150c imageCLASS MF8450c 1 Remove the ETB unit page 7 31 Reference Removing the ETB Unit 2 Remove the toner cartridge 3 Remove the rear cover unit page 10 11 Reference Removing the Rear Cover Unit 4 Remove the right cover page 10 11 Reference Removing the Right Cover 5 Remove the drum motor page 7 26 Reference Removing the Drum Motor 7 5...

Page 142: ...on of the arrow B F 7 37 5 Slide the cable guide 1 to remove 1 claw 2 F 7 38 6 Slide the cable guide 1 to remove 1 claw 2 F 7 39 7 Free the cable from the cable guide 1 F 7 40 8 Remove the cable guide 1 1 claw 2 F 7 41 9 Remove the link 1 from the shaft 2 F 7 42 10 Fit the link 1 with the cutoff of the shaft 2 to remove the link F 7 43 11 Free the cable from the cable guide 1 2 2 1 1 2 1 3 2 B A ...

Page 143: ...e gear 5 s elongate hole 2 with the triangle 1 2 Interlock the teeth of the gears 5 and 6 so that the holes 3 of the gears will lie right next to each other 3 Interlock the teeth of the gears 6 and 7 so that the holes 4 of the gears will lie right next to each other F 7 49 4 Interlock the teeth of the gears 3 and 4 so that the holes 1 of the gears will lie right next to each other 5 Interlock the ...

Page 144: ...he drawer connector 1 and move the shutter arm 2 to upper F 7 54 5 Align the 3 positioning parts 1 and install the main drive unit 2 with parallel to the side of the host machine 4 screws 3 F 7 55 6 Confirm that the gear positions are properly aligned by checking from the 2 windows 1 F 7 56 Alignment is adjusted properly if the elongate holes of the gears 1 and 2 and the plate 3 are aligned in a s...

Page 145: ...age Solenoid 0019 6129 imageCLASS MF9170c imageCLASS MF9150c imageCLASS MF8450c 1 Remove the claw 2 to move the cable guide 1 toward the left F 7 59 2 Remove the plate 1 3 screws 2 F 7 60 3 Disconnect the 2 connectors 1 and free the harness 4 from the harness guide 2 and the wire saddle 3 F 7 61 4 Remove the developing disengage drive unit 1 3 screws 2 F 7 62 5 Remove the plate 1 3 screws 2 F 7 63...

Page 146: ...f the host machine need to be aligned interlocked Tighten the 2 screws 1 to the developing disengage drive unit 3 and tighten the screw 2 halfway to confirm the alignment of the gear 4 and the gear 5 F 7 67 Confirming the alignment of the gear 4 There is a small toothed gear 3 in the developing disengage drive unit 1 Make sure that the small toothed gear is aligned with the elongate hole 2 home po...

Page 147: ... to Note At Handling Be careful not to touch the surface of the ETB belt or damage it Dirts or small cuts on the belt may cause image faults 1 1 1 2 When closing the front cover with the ETB unit removed and then and opening it the drawer connector 1 faces upward The drawer connector facing upward may cause the following symptoms and therefore be sure to put down the 2 drawer connectors 1 if neces...

Page 148: ...SS MF9150c imageCLASS MF8450c 1 Remove the ETB unit page 7 31 Reference Removing the ETB Unit 7 5 6 2 Removing the ETB Disengage Solenoid 0019 5803 imageCLASS MF9170c imageCLASS MF9150c imageCLASS MF8450c 1 Remove the duplex delivery assembly 1 2 screws 2 F 7 77 2 Remove the ETB right cover 1 3 screws 2 5 claws 3 F 7 78 F 7 79 F 7 80 3 Remove the ETB disengage solenoid 1 1 connector 2 1 screw 3 F ...

Page 149: ...eCLASS MF8450c 1 Remove the ETB unit page 7 31 Reference Removing the ETB Unit 7 5 7 2 Removing the Color Displacement Density Sensor 0019 5790 imageCLASS MF9170c imageCLASS MF9150c imageCLASS MF8450c 1 Remove the duplex delivery assembly 1 2 screws 2 F 7 82 2 Remove the cover 1 and the stay 2 1 screw 3 F 7 83 3 Remove the color displacement density sensor 1 1 claw 2 F 7 84 ...

Page 150: ...Chapter 8 Pickup and Feed System ...

Page 151: ... 2 Delivery Stationary JAM 8 14 8 3 4 Other Jams 8 14 8 3 4 1 Wrapping JAM 8 14 8 3 4 2 Residual JAM 8 14 8 3 4 3 Door Open JAM 8 14 8 3 4 4 Automatic Delivery Function 8 14 8 4 Duplex Feeding 8 15 8 4 1 Overview 8 15 8 4 2 Duplexing Feed Control 8 16 8 4 3 Duplexing Pickup Operation 8 19 8 5 Parts Replacement Procedure 8 20 8 5 1 Pickup Feed Unit 8 20 8 5 1 1 Before Removing the Pickup Feed Unit ...

Page 152: ...anual Feed Separation Pad 8 27 8 5 8 2 Removing the Manual Feed Separation Pad 8 27 8 5 9 Duplexing Feed Motor 8 28 8 5 9 1 Before Removing the Duplex Feed Motor 8 28 8 5 9 2 Removing the Duplex Feed Motor 8 28 8 5 10 Reverse Unit 8 28 8 5 10 1 Before Removing the Reversal Unit 8 28 8 5 10 2 Removing the Reversal Unit 8 28 8 5 11 Reverse Motor 8 30 8 5 11 1 Before Removing the Reversal Motor 8 30 ...

Page 153: ...lenoid SL5013 Manual pickup solenoid SL5017 Duplexing solenoid M5 SL5013 M6 M1 DC controller PCB Fixing pressure roller Fixing sleeve Fixing delivery roller Bk toner cartridge Y toner cartridge M toner cartridge C toner cartridge Registration roller Registration shutter Cassette pickup roller Manual feed pickup roller ETB unit M7 M8 M9 Reverse roller SL5012 Cassette pickup solenoid drive signal M4...

Page 154: ...performed to feed paper for printing of the second page during duplexing printing the machine controls the duplexing solenoid SL5017 and uses the registration sensor SR710 F 8 2 SR706 Reverse sensor SR707 Manual feed paper sensor SR708 Pre registration sensor SR709 Cassette paper sensor SR710 Registration sensor SR713 Delivery paper full level sensor SR714 Paper displacement sensor SR715 Delivery ...

Page 155: ... duplex feed assembly T 8 1 F 8 3 SR708 pre registration sensor Timing Single sided printing Duplex printing Timing of increasing the speed After the trailing edge of the paper passes through the fixing delivery roller After the trailing edge of the paper passes through the fixing delivery roller Timing of decreasing the speed After the trailing edge of the paper passes through the holding roller ...

Page 156: ...n 1 The main controller sends a print command to the DC controller 2 The DC controller drives the pickup motor M4 3 The DC controller turns ON the cassette pickup solenoid SL5012 When the drive is sent from the pickup motor the cassette pickup roller rotates In this condition double fed paper is removed by using the mechanism of oblique surface separation and the separation pad and the paper is fe...

Page 157: ...eration 1 The main controller sends a print command to the DC controller 2 The DC controller drives the pickup motor M4 3 The DC controller turns ON the manual feed pickup solenoid SL5013 When the drive is sent from the pickup motor the manual feed pickup roller rotates In this condition double fed paper is removed by the separation pad and the paper is fed one by one 4 The paper is transported to...

Page 158: ...aper path is obstructed by the registration shutter Since the registration shutter is pressed by springs the registration shutter does not move only with the power of the sheet trying to move ahead When the paper is warped the stiffness of the paper is applied in addition to the power of trying to move ahead which increases the power of lifting up the registration shutter 3 When the power exceedin...

Page 159: ...maller than the specified paper width or whether the paper is displaced to the left side of the feed path Whether the paper width is smaller than the specified paper width or whether the paper is displaced to the right side of the feed path can be detected by the fixing sub thermistor TH2 because an abnormal temperature increase occurs at the left edge of the fixing sleeve F 8 7 Different throughp...

Page 160: ...l temperature increase occurs at the edge of the fixing sleeve To prevent an abnormal temperature increase the machine increases an interval between sheets when the paper is fed displaced to one side and promotes a tem perature decrease between sheets The machine uses the paper displacement sensor SR714 located at the right side of the registration shutter in order to detect the paper displacement...

Page 161: ...B When the paper transport speed of the pressure roller is slower than that of the ETB the paper warp increases and an image defect or paper crease occurs Con versely the speed is faster than that of the ETB the paper is pulled by the pressure roller and a color displacement occurs in the sub scanning direction The machine controls the rotational speed of the fixing motor M1 which drives the press...

Page 162: ...re appropriate distance between the transfer unit and the fixing assembly in the product this control is not necessary to make paper warped However since the machine performs vertical feeding and it is necessary to minimize its height no distance can be secured between the transfer unit and the fixing assembly Therefore it is necessary to perform warp control Fixing pressure roller Fixing sleeve P...

Page 163: ...the fixing unit 2 When a certain period of time elapses after the fixing delivery sensor SR6005 detects the lead edge of the paper the duplexing feed motor M10 and the reverse motor M11 rotate forward The paper moves to the reverse assembly while pressing up the self weight flapper F 8 10 3 When a certain period of time elapses after the reverse sensor SR706 detects the lead edge of the paper the ...

Page 164: ...assembly is closed Whether or not the paper has been delivered to the delivery tray is detected by the delivery sensor SR715 When the paper in the delivery tray reaches the full level the delivery paper full level flag comes into contact with the paper and the full level is detected by the delivery paper full level sensor SR713 F 8 12 M11 SR715 SR713 Delivery roller Delivery full level flag ...

Page 165: ...otor M10 started feeding the paper placed in standby at the duplexing re pickup position 8 3 2 4 Duplexing Reverse Unit Delay JAM 0019 5038 imageCLASS MF9170c imageCLASS MF9150c imageCLASS MF8450c The machine determines that the duplexing reverse unit delay jam has occurred when the reverse sensor SR706 does not detect the absence of paper in the period from the start of duplexing reverse to the d...

Page 166: ...ccur The machine determines that the wrapping jam has occurred when the fixing delivery sensor SR6005 detects the absence of paper before the time equivalent to the paper length detected by the registration sensor SR710 minus 50 mm approximately 1 9 seconds elapses after the sensor detects the lead edge of the paper 8 3 4 2 Residual JAM 0019 5042 imageCLASS MF9170c imageCLASS MF9150c imageCLASS MF...

Page 167: ...he position to start writing an image in the main scanning direction for the second side F 8 13 The reverse driver PCB controls the operational sequence of the reverse assembly and duplexing feed assembly using an 8 bit CPU IC801 The reverse driver PCB performs serial communication with the DC controller It drives each load according to the signal sent from the DC controller F 8 14 Duplexing feed ...

Page 168: ...ds a signal to the DC controller The reverse driver PCB detects whether the paper has been transported to the pickup position or not by monitoring the signal F 8 15 M10 Duplexing feed motor SR708 Pre registration sensor M11 Reverse motor SR710 Registration sensor SL5017 Duplexing solenoid SR713 Delivery paper full level sensor SR706 Reverse sensor SR715 Delivery sensor Reverse driver PCB DC contro...

Page 169: ...mbly while pressing up the self weight flapper F 8 16 3 When a specified period of time elapses after the reverse sensor SR706 detects the lead edge of the paper the reverse motor M11 stops This specified period of time varies depending on the paper length The paper which passed through the reverse roller before the reverse motor stops is temporarily stored at the back of the machine 4 The reverse...

Page 170: ... sensor SR708 detects the lead edge of the paper the duplexing feed motor stops This specified period of time varies depending on the paper length The paper stops at the re pickup position 8 The main controller sends the print command for the second side to the DC controller 9 The DC controller drives the pickup motor M4 at the timing when duplexing re pickup can be performed The paper skew is cor...

Page 171: ...o sheets at once Alternating complex mode Duplexing print operation in the condition where three sheets remain in the machine T 8 10 Each duplexing print operation can be specified by the main controller However duplexing print operation cannot be specified for the cases other than the printable paper size A4 LTR and legal and the specified print mode Plain paper Thick paper 1 Gloss paper 1 for du...

Page 172: ...age 10 13 Reference Removing the Left Cov er 4 Remove the right cover page 10 11 Reference Removing the Right Cover 5 Remove the Front Cover Unit page 10 9 Reference Removing the Front Cover Unit 8 5 1 2 Removing the Pickup Feed Unit 0019 5824 imageCLASS MF9170c imageCLASS MF9150c imageCLASS MF8450c 1 Remove the cover 1 1 screw 2 F 8 20 2 Remove the 2 plates 1 2 screws 2 F 8 21 3 Remove the PCB co...

Page 173: ... 5 2 1 Before Removing the Cassette Pickup Roller 0020 1875 imageCLASS MF9170c imageCLASS MF9150c imageCLASS MF8450c 1 Remove the ETB unit page 7 31 Reference Removing the ETB Unit 8 5 2 2 Removing the Cassette Pickup Roller 0018 9207 imageCLASS MF9170c imageCLASS MF9150c imageCLASS MF8450c 1 Open the cover 1 F 8 27 2 Remove the cassette pickup roller 1 2 claws 2 1 3 2 1 2 3 1 2 2 2 2 ...

Page 174: ...ference Removing the Right Cover 8 5 3 2 Removing the Pickup Motor 0019 5829 imageCLASS MF9170c imageCLASS MF9150c imageCLASS MF8450c 1 Open the front cover 1 F 8 29 2 Remove the link 1 from the shaft 2 F 8 30 3 Fit the link 1 with the cutoff of the shaft 2 to remove the link F 8 31 4 Free the cable from the cable guide 1 F 8 32 5 Disconnect the 3 connectors 1 F 8 33 6 Remove the cable guide 1 1 s...

Page 175: ...Reference Removing the Left Cov er 6 Remove the right cover page 10 11 Reference Removing the Right Cover 7 Remove the Control Panel Unit page 10 21 Reference Removing the Control Panel Unit 8 Remove the Front Upper Cover 1 page 10 10 Reference Removing Front Upper Cover 1 9 Remove the Front Cover Unit page 10 9 Reference Removing the Front Cover Unit 10 Remove the Pickup Feed Unit page 8 20 Refer...

Page 176: ...s 3 F 8 44 8 Remove the rod 1 1 claw 2 F 8 45 9 Fit the rod 1 with the cutoff of the shaft 2 to remove the rod F 8 46 10 Remove the holder 1 2 screws 2 F 8 47 11 Remove the plate 1 1 screw 2 F 8 48 12 Remove the 4 screws 1 F 8 49 13 Put the right side of the host machine downward to slide the bottom plate 1 for about 30mm from the pickup drive unit 2 ...

Page 177: ...up Solenoid 0018 9308 imageCLASS MF9170c imageCLASS MF9150c imageCLASS MF8450c 1 Remove the ETB unit page 7 31 Reference Removing the ETB Unit 2 Remove the fixing assembly page 9 6 Reference Removing the Fixing Assembly 3 Remove the rear cover unit page 10 11 Reference Removing the Rear Cover Unit 4 Remove the ADF Unit Reader Unit page 4 8 Reference Removing the ADF Unit Reader Unit 5 Remove the l...

Page 178: ...right hinge 1 1 screw 2 F 8 57 4 Fit the link 1 with the cutoff of the shaft 2 to remove the link F 8 58 5 Free the cable from the cable guide 1 F 8 59 6 Disconnect the 3 connectors 1 F 8 60 7 Remove the cable guide 1 1 screw 2 2 claws 3 F 8 61 8 Remove the rod 1 1 claw 2 F 8 62 1 2 ...

Page 179: ...pickup drive unit 1 2 screws 2 F 8 68 15 Remove the plate 1 4 screws 2 F 8 69 16 Remove the manual feed pickup solenoid 1 1 screw 2 F 8 70 8 5 8 Manual Separation Roller 8 5 8 1 Before Removing the Manual Feed Separation Pad 0018 9210 imageCLASS MF9170c imageCLASS MF9150c imageCLASS MF8450c 1 Remove the ETB unit page 7 31 Reference Removing the ETB Unit 8 5 8 2 Removing the Manual Feed Separation ...

Page 180: ...age 10 11 Reference Removing the Rear Cover Unit 4 Remove the ADF Unit Reader Unit page 4 8 Reference Removing the ADF Unit Reader Unit 5 Remove the left cover page 10 13 Reference Removing the Left Cov er 6 Remove the right cover page 10 11 Reference Removing the Right Cover 7 Remove the Upper Frame Unit page 10 18 Reference Removing the Upper Frame Unit 8 5 10 2 Removing the Reversal Unit 0019 5...

Page 181: ...Note at Installation Before installing the reverse unit 1 to the host machine be sure to align the gear unit 2 with the coupling 3 of the reverse unit The gear unit 2 is easily detached from the coupling 3 So be sure to keep pushing the gear unit 2 when installing the reverse unit 1 to the host machine 3 3 4 4 3 3 4 4 1 2 ...

Page 182: ...8450c 1 Remove the belt 2 from the motor gear 1 F 8 76 2 Remove the reversal motor 1 2 screws 2 F 8 77 8 5 12 Reverse Solenoid 8 5 12 1 Before Removing the Reversal Solenoid 0019 5832 imageCLASS MF9170c imageCLASS MF9150c imageCLASS MF8450c 1 Remove the ETB unit page 7 31 Reference Removing the ETB Unit 2 Remove the fixing assembly page 9 6 Reference Removing the Fixing Assembly 3 Remove the rear ...

Page 183: ...connector 1 and free the harness 2 from the guide 3 3 Remove the reversal solenoid unit 4 1 screw 5 1 solenoid pin 6 1 solenoid arm 7 F 8 79 4 Remove the reversal solenoid 2 from the fixing plate 1 1 screw 3 F 8 80 1 2 2 1 2 3 5 6 7 4 1 2 3 ...

Page 184: ...Chapter 9 Fixing System ...

Page 185: ... 9 4 9 3 Protection Function 9 5 9 3 1 Overview 9 5 9 3 2 Failure Detection 9 5 9 4 Parts Replacement Procedure 9 6 9 4 1 Fixing Unit 9 6 9 4 1 1 Removing the Fixing Assembly 9 6 9 4 2 Fixing Sleeve Unit 9 6 9 4 2 1 Before Removing the Fixing Sleeve Unit 9 6 9 4 2 2 Removing the Fixing Sleeve Unit 9 6 9 4 3 Fixing Drive Unit 9 9 9 4 3 1 Before Removing the Fixing Drive Unit 9 9 9 4 3 2 Removing th...

Page 186: ...ontact type thermistor for detecting the fixing sleeve temperature that is located at the center inside the fixing sleeve Fixing sub thermistor TH2 contact type thermistor for detecting the fixing heater temperature that is located at the left edge of the fixing heater Fixing thermal switch TP1A Non contact type thermal switch for preventing the fixing heater from overheating that is located at th...

Page 187: ...e fixing sleeve by heating the fixing heater before the fixing motor drives and to lubricate the sleeve in order to prevent the fixing sleeve from being damaged Fixing sub thermistor TH2 is used to detect the temperature Start up temperature control CPU heats the fixing heater to the start up temperature in order to warm the fixing assembly up to the required temperature for fixing The start up te...

Page 188: ...control step by step according to the detected temperature by the fixing sub thermistor When the detected temperature is 250 deg C or higher the controller extends the pickup interval by keeping the paper feed speed to lower the throughput The sheet interval gets longer the fixing sleeve temperature becomes lower Firstly 1st additional interval is added to the default pickup interval followed by p...

Page 189: ...nd the entry of sleep mode Slightly pressurized condition The fixing film is pushed slightly by the pressure roller This condition is called at printing envelope F 9 3 The pressuring releasing status of the fixing sleeve is identified by ON OFF status of the fixing pressure release sensor SR705 and the rotation period of the fixing motor M1 MEMO If pulling out jam paper with fixing sleeve pressure...

Page 190: ...ng assembly does not enter ready within 40 seconds from energization to the fixing heater at print operation start Abnormal low temperature of fixing main thermistor If any of the followings is detected CPU determines the abnormal low temperature of the fixing main thermistor If the detected temperature of the fixing main thermistor is kept below 40 C for 4 seconds continuously from energization o...

Page 191: ...S MF9170c imageCLASS MF9150c imageCLASS MF8450c 1 Remove the fixing assembly page 9 6 Reference Removing the Fixing Assembly 9 4 2 2 Removing the Fixing Sleeve Unit 0019 5850 imageCLASS MF9170c imageCLASS MF9150c imageCLASS MF8450c 1 Turn the gear 1 in the direction of the arrow to the position 2 F 9 6 Points to Note At Operation When removing the fixing assembly perform the operation after the fi...

Page 192: ... and remove the cover 3 F 9 9 4 Remove the cover 1 2 screws 2 1 claw 3 F 9 10 5 Remove the guide 1 2 claws 2 F 9 11 F 9 12 6 Remove the cover 1 1 claw 2 F 9 13 7 Remove the screw 1 F 9 14 When removing the guide be sure to set a protection sheet 1 around the fixing sleeve to prevent damage scar ...

Page 193: ...8 12 Slide the side plate 1 to remove the unit 2 F 9 19 13 Remove the plate 1 1 screw 2 F 9 20 14 Remove the 2 parts of 1 from the side plate to remove the unit 2 2 claws 3 F 9 21 15 Remove the spring holder 1 to remove the spring 2 F 9 22 16 Remove the plate 1 F 9 23 17 Remove the spring holder 1 to remove the spring 2 F 9 24 18 Remove the plate 1 ...

Page 194: ...ver unit page 10 11 Reference Removing the Rear Cover Unit 4 Remove the ADF Unit Reader Unit page 4 8 Reference Removing the ADF Unit Reader Unit 5 Remove the left cover page 10 13 Reference Removing the Left Cov er 6 Remove the right cover page 10 11 Reference Removing the Right Cover 7 Remove the Upper Frame Unit page 10 18 Reference Removing the Upper Frame Unit 8 Remove the Reversal Unit page ...

Page 195: ...ness bands 2 and the harness 3 from the harness guide cover 4 F 9 33 5 Remove the 4 screws 1 and the screw binding 2 to remove the harness guide cover 3 F 9 34 6 Disconnect the connector 1 and free the harness 2 from the harness guide 3 7 Remove the screw 4 to remove the switch unit 5 1 2 3 2 1 4 1 3 2 1 1 3 2 ...

Page 196: ...ive unit 5 in the di rection of the arrow and release the 2 projections 6 to remove the duplex feed drive unit 5 F 9 37 12 Disconnect the 2 connectors 1 and free the harness 2 from the harness guide 3 and the wire saddle 4 F 9 38 13 Remove the 3 screws 1 move the fixing drive unit 2 in the direction of the arrow and release the projection 3 to remove the fixing drive unit 2 Point to Note at Work T...

Page 197: ... Removing the Right Cover 7 Remove the Upper Frame Unit page 10 18 Reference Removing the Upper Frame Unit 8 Remove the Reversal Unit page 8 28 Reference Removing the Revers al Unit 9 Remove the Fixing Drive Unit page 9 9 Reference Removing the Fix ing Drive Unit 9 4 4 2 Removing the Fixing Motor 0018 9695 imageCLASS MF9170c imageCLASS MF9150c imageCLASS MF8450c 1 Disconnect the 3 connectors 1 F 9...

Page 198: ... the harness guide 1 in the direction of the arrow A to remove the hook 2 in the direction of the arrow B 7 Remove the harness guide 1 F 9 44 8 Remove the plate 1 2 screws 2 F 9 45 9 Remove the fixing drive unit support plate 1 1 screw black 2 4 3 1 2 1 B A 2 1 1 2 ...

Page 199: ...Chapter 9 9 14 F 9 46 10 Remove the 3 gears 1 F 9 47 11 Remove the fixing motor 1 1 screw black 2 1 screw 3 F 9 48 1 2 1 1 2 3 ...

Page 200: ...Chapter 10 External and Controls ...

Page 201: ...the Front Cover Unit 10 9 10 5 1 2 Removing the Front Cover Unit 10 9 10 5 2 Front Upper Cover 1 10 10 10 5 2 1 Before Removing Front upper Cover 1 10 10 10 5 2 2 Removing Front Upper Cover 1 10 10 10 5 3 Rear Cover 10 11 10 5 3 1 Removing the Rear Cover Unit 10 11 10 5 4 Right Cover 10 11 10 5 4 1 Before Removing the Right Cover 10 11 10 5 4 2 Removing the Right Cover 10 11 10 5 5 Left Cover 10 1...

Page 202: ...he Memory Controller PCB 10 23 10 5 14 2 Removing the Memory Controller PCB 10 23 10 5 15 Duplexing Driver PCB 10 23 10 5 15 1 Before Removing the Duplex Driver PCB 10 23 10 5 15 2 Removing the Duplex Driver PCB 10 23 10 5 16 Low voltage Power Supply PCB 10 23 10 5 16 1 Before Removing the Low Voltage Power Supply PCB 10 23 10 5 16 2 Removing the Low Voltage Power Supply PCB 10 24 10 5 17 High vol...

Page 203: ...ion sensor M M Duplexing feed motor Color displacement density sensors Developing disengagement solenoids manual pickup solenoid Cassette pickup solenoid ETB disengagement solenoid Low voltage power PCB Fixing delivery sensor ADF paper trailing edge sensor M ETB motor Reverse motor M M Fixing motor Pickup motor Environment sensor Fixing pressure release sensor Front cover sensor Drum HP sensors To...

Page 204: ...The reset IC monitors 3 3 V voltage and resets the CPU and ASIC when the power is turned ON EEPROM IC1007 The EEPROM stores various backup data 10 1 3 Fan Motor Control 0020 2654 imageCLASS MF9170c imageCLASS MF9150c imageCLASS MF8450c The machine uses nine motors in total for paper feeding and image formation T 10 1 Name Purpose Type Fault detection Motor Fixing motor M1 To drive the pressure rol...

Page 205: ...comes out of the specified interval for more than 2 seconds continuously 10 1 6 Fixing motor failure detection 0020 2657 imageCLASS MF9170c imageCLASS MF9150c imageCLASS MF8450c The DC controller determines that a failure occurred in the fixing motor M1 in any of the following cases The machine stops operation and displays E014 Fixing motor failure on the control panel Fixing motor start up failur...

Page 206: ...trol panel LED Entry with hard keys wheel and volume Interface control for the USB memory CF card and SD MS card F 10 2 CPU on the main controller PCB transmits the data display information to the control panel main PCB according to the programs The data is transmitted to color LCD via control panel main PCB Color LCD Control panel Control panel jog PCB Control panel main PCB J201B J102A J103A J81...

Page 207: ...ble sided 1 Single Sided Print 2nd Side of a Double Sided Print In the case of a single sided print or the 2nd side of a double sided print the machine increase the count when the trailing edge of paper is discharged outside the machine as indicated by the output of the delivery sensor SR715 2 1st Side of a Double Sided Print The machine increases the count when the pre registration sensor SR708 g...

Page 208: ...river PCB high voltage power PCB memory controller PCB sensor photo interrupter environment sensor fixing unit control panel reverse unit and ADF CPU IC1001 Noise filter Fuse Power switch Fuse Noise filter Low voltage power circuit Remote switch control circuit Zero crossing circuit 24V ON OFF circuit 24V generation circuit 5V generation circuit 3 3V generation circuit Machine power supply voltage...

Page 209: ...and motors are supplied with the 24VB They stop when the front cover or the reverse assembly cover is opened This is to protect the users and the service technicians from an electric shock or injury to their hands The 24VB also functions as the front cover detection signal The CPU determines the front cover or the reverse assembly cover open when the 24VB supply stops 10 4 3 Energy Saving Function...

Page 210: ...sed 3 No job 4 Off hook is detected 5 On hook is detected 6 A job occurs 7 The screen switches Entry by keys in the control panel 8 An alert occurs 9 The machine recovers from an alert Power OFF Power ON Standby Reader unit Control panel Printer engine Main controller Power ON status 1W sleep status Power OFF status 1 4 8 1 2 1 1 7 7 3 6 3 6 3 4 5 9 5 9 Sleep 1 Sleep 2 1W sleep Sleep 2 conditions ...

Page 211: ...ov er 4 Remove the right cover page 10 11 Reference Removing the Right Cover 10 5 1 2 Removing the Front Cover Unit 0018 9093 imageCLASS MF9170c imageCLASS MF9150c imageCLASS MF8450c 1 Turn the 2 drawer connectors 1 up F 10 5 2 Remove the cable cover 1 1 screw 2 1 claw 3 F 10 6 3 Remove the relay connector 1 and the harness 2 from the harness guide 3 F 10 7 4 While lifting the front cover unit 1 r...

Page 212: ...anel unit page 10 21 Reference Removing the Control Panel Unit 10 5 2 2 Removing Front Upper Cover 1 0019 6873 imageCLASS MF9170c imageCLASS MF9150c imageCLASS MF8450c 1 Pull the delivery tray 1 out 2 Move the delivery tray 1 in the direction of the arrow and release the 2 projections 2 from the 2 claws 3 of the delivery tray cover to remove the delivery tray F 10 11 3 Remove the 2 claws 2 and the...

Page 213: ...fore Removing the Right Cover 0018 9095 imageCLASS MF9170c imageCLASS MF9150c imageCLASS MF8450c 1 Remove the ETB unit page 7 31 Reference Removing the ETB Unit 2 Remove the rear cover unit page 10 11 Reference Removing the Rear Cover Unit 10 5 4 2 Removing the Right Cover 0018 9096 imageCLASS MF9170c imageCLASS MF9150c imageCLASS MF8450c 1 Remove the panel stand left cover 1 and the panel stand r...

Page 214: ... 1 and remove the protrusion 2 in the direction of the arrow A F 10 21 7 Move the right cover 1 in the direction of the arrow and release the 2 claws 2 to remove Points to note at work Be sure not to close the ADF unit reader unit hastily If closing the ADF unit reader unit hastily the impact can cause damage Also be careful not to get your hands caught between the ADF unit reader unit and the hos...

Page 215: ...nit reader unit 1 F 10 24 3 Remove the 3 screws 1 F 10 25 4 Remove the 2 hooks 2 of the left cover 1 in the direction of the arrow A 5 Remove the 6 claws 3 and the 2 hooks 4 and move the left cover 1 in the direction of the arrow B F 10 26 6 Move the left cover 1 in the direction of the arrow and release the pro jection 2 the projection 3 and the claw 4 to remove 1 2 1 1 Points to note at work Be ...

Page 216: ...ery Tray Cover 0019 5965 imageCLASS MF9170c imageCLASS MF9150c imageCLASS MF8450c 1 Pull the delivery tray 1 out 2 Move the delivery tray 1 in the direction of the arrow and release the 2 projections 2 from the 2 claws 3 of the delivery tray cover to remove F 10 28 3 Remove the 2 claws 2 and the 2 bosses 3 at both sides of front upper cover 2 to remove them in the direction of the arrow A 4 Move f...

Page 217: ...8450c 1 Remove the Electrical Components Cover 1 12 screws 2 1 terminal 3 F 10 33 10 5 8 Controller Box 10 5 8 1 Before Removing the Controller Box 0019 5930 imageCLASS MF9170c imageCLASS MF9150c imageCLASS MF8450c 1 Remove the ETB unit page 7 31 Reference Removing the ETB Unit 2 Remove the rear cover unit page 10 11 Reference Removing the Rear Cover Unit 3 Remove the left cover page 10 13 Referen...

Page 218: ...e Right Cover 5 Remove the Electrical Components Cover page 10 15 Reference Re moving the Electrical Components Cover 6 Remove the Controller Box page 10 15 Reference Removing the Con troller Box 7 Remove the Off Hook PCB only of the machine with FAX page 10 25 Reference Removing the Off Hook PCB 8 Remove the DC Controller PCB page 10 22 Reference Removing the DC Controller PCB 10 5 9 2 Removing t...

Page 219: ...d free the 5 harnesses 3 from the 2 harness guide mouths 2 F 10 38 4 Remove the harness guide 1 1 screw 2 F 10 39 5 Remove the left frame reinforcement plate 1 6 screws 2 F 10 40 6 Remove the 8 screws 2 from the laser scanner cover 1 1 2 2 1 2 3 3 1 2 2 2 1 ...

Page 220: ...emoving the Rear Cover Unit 4 Remove the ADF Unit Reader Unit page 4 8 Reference Removing the ADF Unit Reader Unit 5 Remove the left cover page 10 13 Reference Removing the Left Cov er 6 Remove the right cover page 10 11 Reference Removing the Right Cover 10 5 10 2 Removing the Upper Frame Unit 0019 5937 imageCLASS MF9170c imageCLASS MF9150c imageCLASS MF8450c 1 Remove the harness guide 1 4 screws...

Page 221: ...Chapter 10 10 19 F 10 43 2 Remove the screw 2 on the backside of the flat cable 1 F 10 44 3 Remove the harness guide 1 F 10 45 4 Remove the harness guide 1 1 screw 2 1 1 2 1 2 1 ...

Page 222: ...ght side of the upper frame unit F 10 48 7 Move the 2 reader fixing arms 1 to the rear side F 10 49 8 Open the fixing delivery cover 1 to remove the left upper front inner cov er 2 and the right upper front inner cover 3 F 10 50 9 Close the fixing delivery cover 1 F 10 51 10 Remove the upper frame unit 1 1 1 2 1 1 1 1 1 1 1 1 2 3 1 ...

Page 223: ... the Control Panel 0021 0350 imageCLASS MF9170c imageCLASS MF9150c imageCLASS MF8450c After replacing the control panel adjust the flicker value of the control panel using the service mode 1 Using the service mode make the machine display the flicker value ad justment screen for the control panel TESTMODE PANEL FLICKER CHECK START F 10 55 2 Press the OK key The flicker value entry screen is displa...

Page 224: ...geCLASS MF9150c imageCLASS MF8450c 1 Remove the NCU PCB 1 flat cable 2 3 connectors 3 2 screws 4 F 10 58 10 5 13 DC Controller PCB 10 5 13 1 Before Removing the DC Controller PCB 0019 8017 imageCLASS MF9170c imageCLASS MF9150c imageCLASS MF8450c 1 Remove the ETB unit page 7 31 Reference Removing the ETB Unit 2 Remove the rear cover unit page 10 11 Reference Removing the Rear Cover Unit 3 Remove th...

Page 225: ...roller Box 7 Remove the Off Hook PCB only of the machine with FAX page 10 25 Reference Removing the Off Hook PCB 8 Remove the DC Controller PCB page 10 22 Reference Removing the DC Controller PCB 9 Remove the Laser Scanner Cover page 10 16 Reference Removing the Laser Scanner Cover 10 5 14 2 Removing the Memory Controller PCB 0019 5777 imageCLASS MF9170c imageCLASS MF9150c imageCLASS MF8450c 1 Rem...

Page 226: ...over 7 Remove the Upper Frame Unit page 10 18 Reference Removing the Upper Frame Unit 8 Remove the Reversal Unit page 8 28 Reference Removing the Revers al Unit 10 5 16 2 Removing the Low Voltage Power Supply PCB 0019 5739 imageCLASS MF9170c imageCLASS MF9150c imageCLASS MF8450c 1 Remove the switch button unit 1 2 screws 2 F 10 63 2 Disconnect the connector 1 and remove the 4 screws TP 2 and the s...

Page 227: ...he High Voltage Power Supply PCB 0019 5741 imageCLASS MF9170c imageCLASS MF9150c imageCLASS MF8450c 1 Disconnect the 2 flat cables 1 F 10 68 2 Remove the high voltage power supply PCB 1 2 screws binding 2 2 screws double SEMS 3 7 claws 4 F 10 69 10 5 18 Off Hook PCB 10 5 18 1 Before Removing the Off Hook PCB 0020 4668 imageCLASS MF9170c imageCLASS MF9150c imageCLASS MF8450c 1 Remove the ETB unit p...

Page 228: ...ng the Off Hook PCB 6 Removing the High Voltage Power Supply PCB page 10 25 Reference Removing the High Voltage Power Supply PCB 10 5 19 2 Removing the Cooling Fan 0019 0010 imageCLASS MF9170c imageCLASS MF9150c imageCLASS MF8450c 1 Disconnect the connector 1 F 10 71 2 Remove the cooling fan unit 1 1 screw 2 F 10 72 3 Remove the grounding spring 1 F 10 73 4 Remove the heat exhaust fan 1 6 claws 2 ...

Page 229: ...Chapter 10 10 27 F 10 75 F 10 76 2 Remove the duplex fan unit 1 1 connector 2 2 screws 3 F 10 77 F 10 78 3 Remove the fan cover 1 to remove the duplex fan 3 claws 2 F 10 79 ...

Page 230: ...Chapter 11 Maintenance and Inspection ...

Page 231: ...nts 11 1 Periodically Replaced Parts 11 1 11 1 1 Periodically Replaced Parts 11 1 11 2 Consumables 11 1 11 2 1 Expected Service Life of Consumable Parts 11 1 11 3 Periodical Service 11 1 11 3 1 Periodic Service 11 1 ...

Page 232: ...d to be faulty by referring to the following table F 11 1 T 11 1 11 3 Periodical Service 11 3 1 Periodic Service 0019 4955 imageCLASS MF9170c imageCLASS MF9150c imageCLASS MF8450c This machine does not have parts that require periodic servicing No Parts name Parts No Q ty Replacement Timing 1 ADF separation roller FL2 6637 1 50 000 sheets 2 ADF separation pad FC7 6297 1 50 000 sheets 3 Duplex fan ...

Page 233: ...Chapter 12 Measurement and Adjustments ...

Page 234: ...ecking the Nip Width fixing pressure roller 12 1 12 3 Electrical Components 12 1 12 3 1 Procedure after Replacing the DC controller PCB 12 1 12 3 2 Procedure after Replacing the Main Controller PCB 12 1 12 3 3 Procedure after Clearing RAM Data 12 1 12 3 4 Procedure after Replacing the Control Panel 12 2 12 4 ADF 12 2 12 4 1 Outline 12 2 12 4 1 1 Procedure after Replacing the ADF Unit 12 2 ...

Page 235: ...fixing unit if the nip width is out of specification since the nip width of the fixing unit is not adjustable in this machine 12 3 Electrical Components 12 3 1 Procedure after Replacing the DC controller PCB 0019 8983 imageCLASS MF9170c imageCLASS MF9150c imageCLASS MF8450c After replacing the DC controller PCB restore the backup data from the main controller PCB 1 Using the service mode restore t...

Page 236: ... entry screen is displayed F 12 4 3 Press the OK key The flicker adjustment pattern a pattern with horizontal stripes is dis played in the LCD Pressing the right left arrow keys search for the area with the minimum flicker F 12 5 4 Press the OK key 5 Press the Back key The service mode operation is terminated 12 4 ADF 12 4 1 Outline 12 4 1 1 Procedure after Replacing the ADF Unit 0020 4994 imageCL...

Page 237: ...Chapter 13 Correcting Faulty Images ...

Page 238: ...omponents 13 6 13 3 1 Clutch Solenoid 13 6 13 3 1 1 Solenoids 13 6 13 3 2 Motor Fan 13 7 13 3 2 1 Motors 13 7 13 3 2 2 Fans 13 8 13 3 3 Sensor 13 9 13 3 3 1 Sensors 13 9 13 3 4 Switch 13 11 13 3 4 1 Switches Speaker and Thermistors 13 11 13 3 5 PCBs 13 13 13 3 5 1 PCBs 13 13 13 3 6 Location of Convectors 13 15 13 3 6 1 Location of Connectors 13 15 ...

Page 239: ...paper in the pick up source is within specifications Paper is correctly set on the selected pick up source The size guides are aligned with paper Cartridge sets Make sure the toner cartridges in each color are set in the machine properly Fixing unit sets Make sure the fixing unit is set in the machine properly External cover sets Make sure the front cover is closed securely Condensation During win...

Page 240: ...th test prints if the printer engine works normally When pressing the test print switch at the DC controller PCB with the machine in standby mode a test pattern horizontal lines is printed This test print can be executed without the main controller PCB F 13 1 Implementation procedure 1 Remove the reader hinge cover 1 4 claws 2 F 13 2 2 2 1 ...

Page 241: ...Chapter 13 13 3 2 Remove the rear cover unit 1 2 screws 2 9 claws 3 F 13 3 3 Remove the 3 screws 1 F 13 4 3 2 3 3 3 1 1 2 1 ...

Page 242: ...Chapter 13 13 4 4 Move the left cover 2 to the position where the 2 screws 1 of the power unit cover can be removed F 13 5 5 Remove the power unit cover 1 12 screws 2 1 terminal 3 F 13 6 2 1 1 3 1 2 2 ...

Page 243: ...1 hook 4 F 13 7 7 Press the test print switch 1 F 13 8 Points to Note When Removing the Off Hook Unit Be careful not to pull strongly the cable connected with the off hook unit and break it It is enough to move the off hook unit downward so that the test print switch at the rear side can be seen 1 2 2 3 2 4 1 ...

Page 244: ...9150c imageCLASS MF8450c F 13 9 T 13 1 Notation Name SL5011 ETB disengagement solenoid SL5012 cassette pickup solenoid SL5013 manual pickup solenoid SL5014 YMC developing disengagement solenoid SL5015 Bk developing disengagement solenoid SL5016 ADF delivery solenoid SL5017 reverse solenoid SL5016 SL5017 SL5011 SL5015 SL5014 SL5012 SL5013 ...

Page 245: ... MF8450c F 13 10 T 13 2 Notation Name M1 fixing motor M2 scanner motor 1 M3 scanner motor 2 M4 pickup motor M5 ETB motor M6 M drum motor M7 C drum motor M8 Y drum motor M9 Bk drum motor M10 duplexing feed motor M11 reverse motor M12 reader motor M13 ADF pickup motor M1 M10 M5 M4 M8 M7 M6 M11 M13 M9 M12 M2 M3 ...

Page 246: ...Chapter 13 13 8 13 3 2 2 Fans 0019 5064 imageCLASS MF9170c imageCLASS MF9150c imageCLASS MF8450c F 13 11 T 13 3 Notation Name FM1 main unit fan FM2 duplex fan FM2 FM1 ...

Page 247: ...SR701 M drum HP sensor SR702 C drum HP sensor SR703 Y drum HP sensor SR704 Bk drum HP sensor SR711 YMC developing disengagement sensor SR712 Bk developing disengagement sensor SR716 new cartridge sensor SR717 reader HP sensor SR718 ADF paper sensor SR719 ADF paper trailing edge sensor SR718 SR719 SR717 SR716 SR712 SR711 SR704 SR703 SR702 SR701 ...

Page 248: ...or SR708 pre registration sensor SR709 cassette paper sensor SR710 registration sensor SR713 delivery paper full level sensor SR714 paper displacement sensor SR715 delivery sensor SR720 front cover sensor SR6001 paper loop sensor SR6005 fixing delivery sensor SR720 SR707 SR708 SR710 SR709 SR714 SR713 SR715 SR706 SR705 SR6001 SR6005 ...

Page 249: ...Speaker and Thermistors 0019 9004 imageCLASS MF9170c imageCLASS MF9150c imageCLASS MF8450c F 13 14 T 13 6 Notation Name SW1 front cover detection switch SW2 cassette detection switch SW3 delivery cover detection switch SW4 power switch SW1 SW3 SW4 SW2 ...

Page 250: ...3 12 F 13 15 T 13 7 Notation Name H1 fixing heater LAMP1 document lamp LAMP2 document lamp SP1 speaker TH1 fixing main thermistor TH2 fixing sub thermistor TP1A fixing thermal switch TP1 H1 SP1 TH1 TH2 LAMP2 LAMP1 ...

Page 251: ...Chapter 13 13 13 13 3 5 PCBs 13 3 5 1 PCBs 0019 5065 imageCLASS MF9170c imageCLASS MF9150c imageCLASS MF8450c ...

Page 252: ...PCB6 high voltage power PCB PCB7 laser driver PCB PCB9 reverse driver PCB PCB11 CCD PCB PCB12 inverter PCB PCB14 ADF relay PCB PCB15 control panel main PCB PCB16 control panel jog PCB PCB29 color displacement density sensor right PCB30 color displacement density sensor left PCB11 PCB7 PCB12 PCB14 PCB30 PCB5 PCB9 PCB15 PCB16 PCB29 PCB4 PCB3 PCB6 ...

Page 253: ...r PCB PCB13 CCD relay PCB PCB17 control panel relay PCB PCB18 main controller PCB PCB19 modular PCB PCB20 modular PCB PCB21 modular PCB PCB24 NCU PCB PCB26 pseudo CI PCB for Japan PCB27 off hook PCB for outside Japan PCB28 environment sensor PCB8 PCB1 PCB2 PCB18 PCB19 20 21 PCB24 PCB28 PCB26 27 PCB17 PCB13 ...

Page 254: ...nnectors 0020 1529 imageCLASS MF9170c imageCLASS MF9150c imageCLASS MF8450c F 13 18 32 23 62 61 21 60 45 31 51 50 48 47 49 63 71 67 66 65 64 22 4 18 7 9 5 12 13 15 6 29 1 69 70 20 8 10 19 11 17 16 14 35 34 36 3 2 43 42 41 40 39 38 28 68 30 33 26 24 55 59 54 58 53 57 52 56 ...

Page 255: ...3 38 PCB29 color displacement density sensor right 38 PCB3 J7002 pickup relay PCB J504 J503 38 PCB30 color displacement density sensor left 39 PCB3 J7003 pickup relay PCB 45 J707 SR707 manual feed paper sensor 40 PCB3 J7004 pickup relay PCB 46 J601 SW1 front cover detection switch 41 PCB3 J7005 pickup relay PCB 47 J708 SR708 pre registration sensor 42 PCB3 J7006 pickup relay PCB 48 J709 SR709 cass...

Page 256: ...Chapter 13 13 18 F 13 19 21 22 28 29 30 31 24 14 15 16 23 26 25 32 27 20 19 18 17 2 13 6 10 33 1 8 4 3 12 11 5 7 9 ...

Page 257: ...B 6 PCB2 J210 driver PCB 6 SW2 cassette detection switch 7 PCB2 J213 driver PCB 22 J5008 M1 fixing motor 7 PCB2 J213 driver PCB 23 J705 SR705 fixing pressure release sensor 8 PCB2 J402 driver PCB 24 J5007 M4 pickup motor 8 PCB2 J402 driver PCB 25 J5012 SL5012 cassette pickup solenoid 8 PCB2 J402 driver PCB 26 J5013 SL5013 manual pickup solenoid 9 PCB2 J403 driver PCB 27 J403 SL5014 YMC developing ...

Page 258: ...r 13 13 20 F 13 20 28 26 69 27 70 12 15 14 16 11 24 19 18 22 1 3 2 56 46 39 38 40 33 42 54 47 55 50 84 51 52 45 34 37 41 53 48 49 79 73 80 81 64 71 76 82 10 62 13 23 32 31 30 21 17 20 5 74 6 8 7 4 9 75 29 25 ...

Page 259: ...J203 SP1 speaker 32 PCB17 J205 control panel relay PCB 34 J8103 PCB18 main controller PCB 37 PCB18 J8103 main controller PCB 32 J205 PCB17 control panel relay PCB 38 PCB18 J8104 main controller PCB 59 J6013 USB 39 PCB18 J8110 main controller PCB 60 J6014 SD CARD 40 PCB18 J8111 main controller PCB 61 J6015 LAN 41 PCB18 J8113 main controller PCB 62 J6101 PCB13 CCD relay PCB 42 PCB18 J8114 main contr...

Page 260: ...Chapter 14 Error Code ...

Page 261: ... 14 2 14 3 Jam Code 14 8 14 3 1 Jam Code main body 14 8 14 3 2 Jam Code ADF 14 8 14 4 Alarm Code 14 9 14 4 1 Alarm Code ADF 14 9 14 5 Fax Error Codes 14 9 14 5 1 Outline 14 9 14 5 1 1 Error Code Outline 14 9 14 5 2 User Error Code 14 9 14 5 2 1 User Error Code 14 9 14 5 3 Service Error Code 14 9 14 5 3 1 Service Error Code 14 9 ...

Page 262: ...r runs but then stops running E015 0000 Failure in developing disengagement E020 0000 Error in density sensor E024 0000 Y toner level sensor failure 0001 M toner level sensor failure 0002 C toner level sensor failure 0003 Bk toner level sensor failure E066 0000 Error in environment sensor E078 0000 Error in primary transfer estrangement unit E100 0000 Y scanner assembly fault 0001 M scanner assemb...

Page 263: ...ted temperature of the sub thermistor is 245 deg C approx 2 12V equivalent or more is detected for 0 5 continuous sec or more Cause Error in sub thermistor error in DC controller PCB E003 Error in abnormally low temperature of fixing assembly 0000 Description The status where the detected temperature of the main thermistor is 100 deg C approx 2 60V equivalent or less is detected for 0 5 continuous...

Page 264: ...he cycle of the drum motor speed detection signal does not become its specified value Cause Error in drum motor error in DC controller PCB 0007 Description After the cyan drum motor speed detection signal became the specified value of the cycle it exceeds the specified cycle for 2 continuous sec or more Cause Error in drum motor error in DC controller PCB 0008 Description When 2 5 sec passed after...

Page 265: ...ty Cause Dirt on density sensor error in density sensor error in DC controller PCB error in toner cartridge Replacement of ETB unit Error in high voltage joint Check high voltage joint for each color and each joint to high voltage PCB Replacement of DC controller Replacement of toner cartridge Code Description Action ...

Page 266: ...erminal assembly fault check on every contact between the terminals of each color and the high voltage PCB assembly E100 Error in scanner motor laser unit BD 0000 Description Yellow scanner assembly malfunction Cause Laser scanner unit fault DC controller PCB assembly fault Replace laser scanner unit Replace DC controller PCB 0001 Description Magenta scanner assembly malfunction Cause Laser scanne...

Page 267: ...error Replace DC controller PCB Replace video controller PCB E198 DC controller memory malfunction 0000 Description DC controller memory malfunction Cause DC controller PCB assembly fault Replace DC controller PCB assembly Code Description Action ...

Page 268: ...om the coin vendor has been detected since communication started after confirmation of normal connection to the coin vendor after power on A serial communication error has occurred The serial communication error cannot be recovered Check the connection between the image processor PCB and serial PCB Check the connectors of the serial PCB and coin vendor for normal connection Replace the serial PCB ...

Page 269: ...eception of an emergency stop command 1118 Door open jam SR720 The door was opened when there was printing paper in the transport path 0221 Reverse section JAM SR706 SR715 This jam is applied when the double fed paper drops on the back of the host machine The machine determines the reverse section jam if the paper length that is detected by the reverse sensor SR706 is 50mm or more longer than the ...

Page 270: ...eport or Activity Report while the machine remains in factory default state To check a service error code shift bit 0 of service soft switch 1 SSSW SW01 to 1 Display only the error codes which are newly incorporated in this machine as well as which require remedies unique to the product For the causes and countermeasures of other error codes refer to the separate G3 G4 Facsimile Error Code List Re...

Page 271: ...re than specified after transmission of PPS MPS 0762 Tx at time of ECM transmission DCN is received after transmission of PPS EOM 0763 Tx at time of ECM transmission the procedural signal has been transmitted more than specified after transmission of PPS MPS or T5 time out 60 sec has occurred 0764 Tx at time of ECM transmission the procedural signal has been transmitted more than specified after t...

Page 272: ...Chapter 15 Special Management Mode ...

Page 273: ...Overview 15 1 15 1 1 Preface 15 1 15 1 2 Entering the Special Management Mode 15 1 15 1 3 Menu List 15 2 15 2 Troubleshooting 15 3 15 2 1 Pre Check 15 3 15 2 2 User Request 15 3 15 2 3 Paper Error 15 3 15 2 4 Image error 15 3 ...

Page 274: ...nu Key Additional Func key Right Any key Additional function screen is displayed 3 Press 3 6 9 Mode transfers to the special management mode and maintenance code entry screen is displayed 4 Enter the maintenance code 5 digit and press OK Setting screen is displayed 5 Switch from OFF to ON and press OK Pressing OK activates the setting F 15 1 If you restore the settings switch from ON to OFF in the...

Page 275: ... ON Pre rotation is extended by 10 sec and also paper interval is extended by one and half round when printing 14682 Foggy image prevention mode All modes OFF ON Pre exposure is turned OFF Transfer bias is not applied as a countermeasure against the trailing edge toner splash 25200 Transparency permeability correction mode Transparency OFF ON Specify the control temperature at 180 deg C and make a...

Page 276: ...lor monochrome mixed mode Measure Execute Monochrome mode engage mode Special management mode Main menu Additional function 3 6 9 53649 Service mode COPIER FUNCTION SPLMAN SPL53649 Note When setting Monochrome mode engage mode it affects the life of color toner cartridges even though printing in monochrome 1 Corner bend dirt and paper stack in monochrome Supplement In Pickup page if setting Paper ...

Page 277: ...Additional function 3 6 9 34691 Service mode COPIER FUNCTION SPLMAN SPL34691 Note When Color displacement correction mode is set printing speed may be slowing 3 Speckles on image and non image area Supplement When printing continuously red color image may have blur or lines depending on the paper type Measure Execute Calcareous paper mode Special management mode Main menu Additional function 3 6 9...

Page 278: ...ment 7 Mottled image on entire image area not smooth Supplement When printing the blue color image mottled or scale like image failure appears Measure Execute Re transfer prevention mode Special management mode Main menu Additional function 3 6 9 47667 Service mode COPIER FUNCTION SPLMAN SPL47667 Note When Re transfer prevention mode is set symptom may get worse depending on the printer status 8 M...

Page 279: ...ding edge margin execute leading edge margin switch enlarge Special management mode Main menu Additional function 3 6 9 65676 Service mode COPIER FUNCTION SPLMAN SPL65676 When reducing the leading edge margin execute leading edge margin switch reduce Special management mode Main menu Additional function 3 6 9 65677 Service mode COPIER FUNCTION SPLMAN SPL65677 When enlarging the left right margin e...

Page 280: ...Chapter 16 Service Mode ...

Page 281: ... OPTION 16 16 16 2 5 1 OPTION List 16 16 16 2 6 COUNTER 16 26 16 2 6 1 COUNTER List 16 26 16 3 FEEDER 16 28 16 3 1 ADJUST 16 28 16 3 1 1 ADJUST List 16 28 16 3 2 FUNCTION 16 28 16 3 2 1 FUNCTION List 16 28 16 4 FAX 16 28 16 4 1 SSSW 16 28 16 4 1 1 SSSW List 16 28 16 4 2 MENU 16 30 16 4 2 1 MENU List 16 30 16 4 3 NUM 16 30 16 4 3 1 NUM List 16 30 16 4 4 NCU 16 31 16 4 4 1 NCU List 16 31 16 5 TESTMO...

Page 282: ...F8450c The service mode screen transition is shown below F 16 1 1 Main menu key 2 2 key 3 8 key 4 Main menu key Back key Back key Back key OK key or Back key User screen Initial screen Main item screen Intermediate item screen Sub item screen Main item screen Intermediate item screen Sub item screen Settings screen Back key ...

Page 283: ... O display mode Adjustment mode Operation Checking mode Machine settings mode Counter mode SSSW MENU NUM NCU Bit switch registration mode Service mode for FAX Displayed only when FAX is installed TESTMODE Service mode used to perform test print or operation check Menu switch registration mode Numeric value parameter settings mode NCU parameter settings mode Service mode SYSTEM SCAN PRINT FAX PANEL...

Page 284: ...SS MF9150c imageCLASS MF8450c Since there is no service label in the machine printing in the service mode setting value is not available either Hence adjustment in the market is being performed Please note that when the value service mode is modified be sure to record the modified value When making a copier machine execute an operation using the service mode be sure to remove the cable from the ex...

Page 285: ... value 1 Setting range 2 ON OFF selection screen To select the setting key or scroll wheel To change the setting OK key Not change the setting Back key Numeric value entry screen 1 To enter the setting value Numeric keys To increase the setting value by 1 key or scroll wheel clockwise To decrease the setting value by 1 key or scroll wheel counterclockwise To enter the negative setting value Right ...

Page 286: ...or 1 can be selected To change the setting OK key Not change the setting Back key Small screen 2 To select the item key or scroll wheel To display the each setting screen OK key To display the previous screen Back key Setting value 1 Item selection screen To select the setting key or scroll wheel To change the setting OK key Not change the setting Back key Numeric value entry screen 2 To enter the...

Page 287: ...isplay of the version checksum date of BootROM boot program area OPROM Not used ECONT Display of the ROM version of the recording engine COPIER DISPLAY CCD Sub item Description TARGET B BLUE color shading target value TARGET G GREEN color shading target value TARGET R RED color shading target value GAIN OB CCD odd bit BLUE color gain level adjustment value GAIN OG CCD odd bit GREEN color gain leve...

Page 288: ...ine It differs depending on whether the machine is a reader or an ADF Value after RAM clearing 0 ADJ X MG Fine adjustment of the copyboard reading sub scanning magnification When used The image printed in the copy output sheet is larger or smaller than the document image Adjustment method Compare the document and copy output sheet and make an adjustment When the image printed in the output sheet i...

Page 289: ... control is performed at the time of automatic gradation correction full correction Setting range 32 to 32 OFST P K Adjustment of the test print reading density Perform an offset adjustment for the test print reading signal when PASCAL control is performed at the time of automatic gradation correction full correction Setting range 32 to 32 COPIER ADJUST MISC Sub item Description SEG ADJ Adjustment...

Page 290: ...ting value Value after RAM clearing 0 DEV BS M Developing bias setting value M When used Low high image density or fogging occurs but the problem cannot be eliminated by changing the density setting and performing special printing process Adjustment method Increase the setting value to increase the image density Decrease the setting value to decrease the image density When fogging occurs it may be...

Page 291: ...nt method The problem may be eliminated by changing the setting value Increase the setting value Effective for toner scatter dotted image Decrease the setting value Effective for white dots white flower patches image with high granularity in halftone mode Setting range 30 to 40 Unit 50V It is preferable to enter values in the condition of M C Y K Factory setting value Value after RAM clearing 0 BC...

Page 292: ...When a residual image remains in an image the problem may be eliminated by decreasing the setting value Setting range 4 to 4 Unit Approx 5 degree C Factory setting value Value after RAM clearing 0 BKFS TMP Fixing temperature backside setting value When used The problem cannot be eliminated by performing special printing process and the image is not firmly fixed to the sheet or a residual image rem...

Page 293: ...mm Time Å When the lamp lights up Adjustment time 10 sec When the lamp does not light up Lamp adjustment time of 10 to 30 sec Adjustment time of 10 sec Displays 0 Operating 1 OK 2 NG COPIER FUNCTION PANEL Sub item Description LCD CHK Not used LED CHK Not used LED OFF Not used KEY CHK Not used COPIER FUNCTION CLEAR Sub item Description R CON Not used TEL USER Clearing of user data and data register...

Page 294: ...DEPT USR Setting the ID management by department and user management to OFF SYS INFO Clearing of the system administration password ALL Clearing of the following items USER DATA SERVICE DATA JOB ID Histories Clearing date MEMO USER DATA SERVICE DATA are initialized for the default destination setting EAM DAT Not used ELA DAT Not used COPIER FUNCTION MISC R Sub item Description SCANLAMP Turning on ...

Page 295: ...her or not to start up the installation navigation When setting this switch to 1 after the installation navigation is completed the installation navigation does not start up at the time of next activation Setting value 0 Start up the navigation 1 Do not start up the navigation Factory setting value Value after RAM clearing 0 DSP PPRSE Setting of whether or not to display the paper setting screen w...

Page 296: ...te full correction by selecting Initial setting registration Adjustment Cleaning Automatic gradation correction Full correction CLR DCN Clear of the backup information of DC controller NVRAM retained in the controller s NVRAM to the DC controller NVRAM SEL TALC Setting of TALC paper ETB cleaning is performed 10 times at initial rotation INV ATVC Setting to enable ATVC Ignore ATVC and use a default...

Page 297: ... Setting value 0 OFF 1 ON Factory setting value Value after RAM clearing 0 SPL14660 Not used SPL65676 Switching of the margin at the lead edge in the direction of increasing the margin Increase the margin at the lead edge of the paper The standard margin is set if the setting conflicts with that of the decreased margin at the lead edge Setting value 0 OFF 1 ON Factory setting value Value after RAM...

Page 298: ...y email Setting value 0 For PDL_Text mode CardDirect_Gray Correction ODM Background On 1 For PDL_Photo mode CardDirect_Normal ODM Background Off 2 For Scan_Photo mode CardDirect_Normal ODM Background On Factory setting value Value after RAM clearing 0 The Text mode is set as default because it is considered that many of the email messages contain documents mixed with text ODM for CardDirect is use...

Page 299: ...ed 118 Total monocolor 1 119 Total monocolor 2 120 Total full color large yes 121 Total full color small 122 Total full color monocolor large yes 123 Total full color monocolor small yes 124 Total full color monocolor 2 yes 125 Total full color monocolor 1 yes 126 Total A1 yes 127 Total A2 128 Total A large yes 129 Total A small yes 130 Total A full color 1 yes 131 Total A full color 2 yes 132 Tot...

Page 300: ...4 Copies small yes 205 Copies A total 1 yes 206 Copies A total 2 207 Copies A large yes 208 Copies A small yes 209 Local copies total 1 yes 210 Local copies total 2 211 Local copies large yes 212 Local copies small 213 Remote copies total 1 214 Remote copies total 2 215 Remote copies large 216 Remote copies small yes 217 Copies full color 1 yes 218 Copies full color 2 219 Copies monocolor 1 220 Co...

Page 301: ...al copies monocolor small 283 Local copies black and white large yes 284 Local copies black and white small 285 Local copies full color mono color large yes 286 Local copies full color mono color large yes 287 Local copies full color mono color 2 yes 288 Local copies full color mono color 1 289 Local copies full color large two sided yes 290 Local copies full color small two sided 291 Local copies...

Page 302: ...s black and white large two sided yes 330 Prints black and white small two sided yes 331 PDL prints total 1 yes 332 PDL prints total 2 333 PDL prints large yes 334 PDL prints small yes 335 PDL prints full color 1 yes 336 PDL prints full color 2 yes 339 PDL prints black and white 1 yes 340 PDL prints black and white 2 341 PDL prints full color large yes 342 PDL prints full color small 345 PDL print...

Page 303: ...x prints full color small 613 Box prints monocolor large 614 Box prints monocolor small 615 Box prints black and white large 616 Box prints black and white small 617 Box prints full color monocolor large 618 Box prints full color monocolor small 619 Box prints full color monocolor 2 620 Box prints full color monocolor 1 621 Box prints full color large two sided 622 Box prints full color small two ...

Page 304: ...ridge monocolor large two sided 684 PictBridge monocolor small two sided 685 PictBridge black and white large two sided 686 PictBridge black and white small two sided yes 701 Received prints total 1 yes 702 Received prints total 2 703 Received prints large yes 704 Received prints small yes 705 Received prints full color 1 yes 706 Received prints full color 2 707 Received prints gray scale 1 708 Re...

Page 305: ...tal 2 color 904 Copy scan total 2 black and white 905 Copy scan total 3 color 906 Copy scan total 3 black and white 907 Copy scan total 4 color 908 Copy scan total 4 black and white 909 Local copy scans color 910 Local copy scans black and white 911 Remote copy scans color 912 Remote copy scans black and white 913 Sent scan total 1 color 914 Sent scan total 1 black and white yes 915 Sent scan tota...

Page 306: ...w card reader Enter a card number Setting range 0 to 99999 Factory setting value Value after RAM clearing 0 When a card number is entered the following settings are made Initialize the information registered for department management Register the following number of cards based on the card number entered MF9130 MF9150c MF9170 MF9170C MF9330C MF9340C MF9340C MF9370C iR C1021 iR C1021i iR c1022 iR C...

Page 307: ...1 OFF Factory setting value Value after RAM clearing 0 TR ERDS Display of the 24 digit license key ST PCL Display of the installation status of PCL when disabling license transfer Setting value 0 ON 1 OFF Factory setting value Value after RAM clearing 0 TR PCL Display of the 24 digit license key ST EAM Display of the installation status of EAM function when disabling license transfer Setting value...

Page 308: ...ter Count up the value by 1 for large and small sizes The counter value can be cleared COPIER COUNTER PICK UP Display setting adjustment range 00000000 to 99999999 When 99999999 is exceeded the value returns to 00000000 Sub item Description C1 Cassette pickup total counter Display the number of sheets picked up from Cassette C2 Option cassette pickup total counter Display the number of sheets pick...

Page 309: ...oes through the ADF separation roller Display range 0 to 999999 Limit 50000 Factory setting value Value after RAM clearing 0 FEEDER ADJUST Sub item Description DOCST Adjustment of the position to stop the document when it is picked up from ADF picked up from the document tray Setting range 100 to 100 For reference When the value is increased the margin at the lead edge is decreased LA SPEED Adjust...

Page 310: ...age timeout time 13 2 Convert mm inch when sending received image 14 2 Whether executing inch to mm conversion in both main and sub scanning directions or in sub scanning direction only 4 Perform inch type resolution declaration 15 2 Accept receiving ND line Host machine line 6 Detect continuous signal at F T switching 18 0 Detect carrier disconnection between DCS and TCF 1 Waiting time for carrie...

Page 311: ...3000 Default 55s 15 Threshold for hooking and on hook 0 to 999 16 Time to temporarily response at FAX TEL switching 0 to 9 17 Pseudo RBT cadence ON time 0 to 999 18 Pseudo RBT cadence OFF time short 0 to 999 19 Pseudo RBT cadence OFF time long 0 to 999 20 Pseudo ring tone cadence ON time 0 to 999 21 Pseudo CI cadence OFF time short 0 to 999 22 Pseudo CI cadence OFF time long 0 to 999 23 CNG detect...

Page 312: ... N 1 2 DP 10 N 01 Pulse dial speed 10 pps 5 to 300 x 0 1 pps 03 Pulse dial make ratio 10 to 90 04 Minimum pause time 10 to 9999 ms Bit No Function 1 0 0 Frequency sensing method Modem Tonal counter 1 2 Signal frequency Changes No change 3 4 Screening intermittent signal From ON From both 5 6 Signal method Continuous Intermittent 7 Signal sensing Yes No Parameter No Function Setting Range 01 T0 tim...

Page 313: ...ange 01 02 T1 timer 0 to 9999 x 10 ms 03 T2 timer 0 to 9999 x 10 ms 04 T3 timer 0 to 9999 x 10 ms 05 T4 timer 0 to 9999 x 10 ms 06 Signal sensing table 0 to 16 07 Signal sensing level 0 to 7 08 Number of signal frequencies 0 to 9999 pce Bit No Function 1 0 0 1 2 Signal frequency Changes No change 3 RBT signal detection Yes No 4 Screening intermittent signal From On From Both 5 RBT signal checking ...

Page 314: ...9 Hz 09 Upper limit of CI frequency 0 to 9999 Hz Parameter No Setting description Setting range 01 At F T switching CNG MIN ON time 0 to 9999 x 10 ms 02 CNG MAX ON time 0 to 9999 x 10 ms 06 Hit ratio 0 to 9999 07 When answer phone is directly connected CNG MIN ON time 0 to 9999 x 10 ms 08 CNG MAX ON time 0 to 9999 x 10 ms 09 instantaneous interruption tolerable time 0 to 9999 x 10 ms 11 Number of ...

Page 315: ...ing is disabled 46 Time to identify DialTone signal 47 Time of not being disconnected in the case that DialTone signal is disconnected 65 Number of maximum lines of A4 paper at the time of sending cut paper 66 Number of maximum lines of B4 paper at the time of sending cut paper Parameter No Function Setting Range 01 Flash connection time 0 to 9999 x 10 ms 02 Grounding time 0 to 9999 x 10 ms Bit No...

Page 316: ...E SYSTEM ACC Check ID control card reader Sub item Description NCR CRD Display presence absence of NCR device or the card CRD KIND Card type the first 3 digit characters CRD STYL Card format the second 3 digit characters READ STS Read status the third 3 2 digit characters NCR STS Device status the fourth character NCR VER Version of NCR device 4 digit numeric figures TESTMODE SYSTEM SPEAKER Check ...

Page 317: ...m Description HP SENS Home position sensor 1 HP 0 anything other than HP TP SENS Sensor for paper in tray 1 presence of paper 0 no paper REG SENS Pre registration sensor 1 presence of paper 0 no paper ESS SENS Front door sensor 1 ON 0 OFF TESTMODE SCAN ADFTEST ADF Feeding Test Execute feeding operation according to the scanning feeding speed specified in SPEED 2 SIDE COUNT Sub item Description SPE...

Page 318: ... MATERIAL Display paper type FACE UP DOWN Not used FEED Selection for the pickup position START Start PG pattern print Execute output that has been selected above by pressing it TESTMODE FAX MODEM Sub item Description RELAY 1 CML Test ON OFF state of NCU s each relay and port SW P S H D R RELAY 2 CI2 Test ON OFF state of NCU s each relay and port SW C1 NOR DCSEL DCLIN IPSEL1 FREQ 462Hz Close DC ci...

Page 319: ... DETECT3 CMG CNG detection test 2 Check CNG signal and FED Make CML relay at OFF state to detect CNG FED CML TESTMODE PANEL Key wheel LCD LED and flicker check Sub item Description KEY CHECK START Key check Check the operation of the key on the control panel The following table shows information displayed when pressing each key When pressing the OK key after operation check OK or NG is displayed i...

Page 320: ...rclockwise operation only MEMO 1 click increases decreases the value by 1 The wheel rotates 360 degrees with 24 clicks LED CHECK START LED check Check the LED operation Every time pressing the OK key after LEDs are completely turned off the Start Key Lamp Execution Memory Lamp Error Lamp light up sequentially When pressing the Return key in midstream LED check stops and NG is displayed MEMO The ma...

Page 321: ...Press the OK key 2 Increase decrease the setting value to minimize flicker in the flicker screen displayed key The value decreases key The value increases 3 When pressing the OK key the setting value is displayed 4 Press the Return key and complete adjustment Factory setting value Varies depending on the machine Value after clearing of RAM data 10 MAX Set the maximum setting value Adjustment metho...

Page 322: ...Chapter 17 Upgrading ...

Page 323: ... 1 Overview of Upgrade 17 1 17 2 Making Preparations 17 2 17 2 1 Required System Environment 17 2 17 2 2 Before Upgrade 17 2 17 3 Downloading System Software 17 3 17 3 1 Downloading the System Software 17 3 17 3 1 1 Downloading Procedure 17 3 ...

Page 324: ... using the user support tool hereinafter called UST F 17 1 Firmware Structure T 17 1 Depending on the UST version Firmware can be less than above mentioned Firmware Function Storage BOOTROM Main controller activation Main controller PCB BOOTABLE Whole control Main controller PCB LANGUAGE Language file Main controller PCB DCON Control printer area DC controller PCB Firmware USB cable Main body PC ...

Page 325: ...re PC that has USB port UST file for the Machine Obtained from System CD and Service site s download Vary depends on the sales company USB cable USB1 1 2 0 17 2 2 Before Upgrade 0019 5086 imageCLASS MF9170c imageCLASS MF9150c imageCLASS MF8450c 1 Start PC 2 Connect the machine and a PC with a USB cable 3 Turn ON the machine and enter the download mode in service mode COPIER FUNCTION SYSTEM DOWNLOA...

Page 326: ...g the System Software 17 3 1 1 Downloading Procedure 0019 5087 imageCLASS MF9170c imageCLASS MF9150c imageCLASS MF8450c 1 Open the UST wlaaXXXX ust all exe XXXX firmware version 2 Note the firmware version that the current one will be updated to and click Next F 17 3 ...

Page 327: ...Chapter 17 17 4 3 Click Next F 17 4 4 Select a USB connected device and click Next F 17 5 ...

Page 328: ...Chapter 17 17 5 5 Click Start F 17 6 6 Click Yes F 17 7 Download will be started F 17 8 ...

Page 329: ...pter 17 17 6 7 When download is complete click OK F 17 9 The machine restarts automatically 8 Check that the firmware version is the same as the one checked in step 2 in service mode COPIER DISPLAY VERSION ...

Page 330: ...Chapter 18 Service Tools ...

Page 331: ...Contents Contents 18 1 Service Tools 18 1 18 1 1 Special Tools 18 1 18 1 2 Standard Tools 18 2 18 1 3 Solvent Oil List 18 2 ...

Page 332: ... multimeter FY9 2002 A Use for electrical checks for adjustment of laser power in combination with the laser power checker Cover switch TKN 0093 A Tester extension pin FY9 3038 A Used as a probe extension when making electrical checks Tester extension pin L shaped FY9 3039 A Used as a probe extension when making electrical checks CA1 test Sheet FY9 9030 A Used for adjusting checking images D 10 te...

Page 333: ...ting pliers Needle nose pliers CK 0151 CK 0161 CK 0170 CK 0201 CK 0202 5 piece set M4 Length 107 mm 16 17 18 19 20 Pliers Retaining ring pliers Crimper Tweezers Ruler CK 0203 CK 0205 CK 0218 CK 0302 CK 0303 Applied to the axis ring Employed to measure 150 mm 21 22 23 24 25 Mallet plastic head Brush Penlight Plastic bottle Lint free paper CK 0314 CK 0315 CK 0327 CK 0328 CK 0336 100 cc 500 SH PKG 26...

Page 334: ...Appendix ...

Page 335: ...Contents Contents 1 General Timing Chart 1 Sequence of Operations reader unit 1 Sequence of Operations printer unit 1 2 General Circuit Diagram 3 Signal Names 3 General Circuit Diagram 8 ...

Page 336: ...utput level does not become constant due to the following reasons Sequence of Operations printer unit imageCLASS MF9170c imageCLASS MF9150c imageCLASS MF8450c Condition Full color Cassette A4 Single sided 2 prints continuous Reader motor M12 Document lamp LAMP1 2 Reader HP sensor SR717 STBY SREADY HP shift HP shift Start key ON Motor forward Motor reverse Reader HP sensor ON Document lamp ON HP Bo...

Page 337: ...r M10 Scanner motor M2 M3 Cassette pickup solenoid SL5012 Registration sensor SR710 Fixing delivery sensor SR6005 Reverse sensor SR706 Delivery sensor SR715 TOP OF PAGE signal TOP Pre exposure LED Primary charging bias Developing bias Transfer bias Magenta Transfer bias Cyan Transfer bias Yellow Transfer bias Black Attaching bias ATVC ATVC ATVC Print command Operation Between sheets bias Normal ro...

Page 338: ...SYNCHRONOUS signal VDO_Y0_N VIDEO signal Yellow video 1 BD_M BD signal Magenta VDO_Y1_P VIDEO signal Yellow video 2 BD_C BD signal Cyan VDO_Y1_N VIDEO signal Yellow video 2 BD_Y BD signal Yellow VDO_C0_P VIDEO signal Cyan video 1 BD_K BD signal Black VDO_C0_N VIDEO signal Cyan video 1 CCRT STATUS CHANGE NOTICE signal VDO_C1_P VIDEO signal Cyan video 2 SDA SERIAL DATA signal VDO_C1_N VIDEO signal C...

Page 339: ...signal Cyan PRI1PWM CHARGE BIAS DRIVE signal Magenta DEV4PWM DEVELOPING BIAS DRIVE signal Black DEV3PWM DEVELOPING BIAS DRIVE signal Yellow DEV2PWM DEVELOPING BIAS DRIVE signal Cyan DEV1PWM DEVELOPING BIAS DRIVE signal Magenta PREEXP4 PRIMARY EXPOSURE LED DRIVE signal Black PREEXP3 PRIMARY EXPOSURE LED DRIVE signal Yellow PREEXP2 PRIMARY EXPOSURE LED DRIVE signal Cyan PREEXP1 PRIMARY EXPOSURE LED ...

Page 340: ...TROL signal VDO11 VIDEO signal Magenta video 1 VDO11 VIDEO signal Magenta video 1 VDO22 VIDEO signal Cyan video 2 VDO22 VIDEO signal Cyan video 2 LD2CTRL2 LASER CONTROL signal LD2CTRL1 LASER CONTROL signal LD2CTRL0 LASER CONTROL signal VDO21 VIDEO signal Cyan video 1 VDO21 VIDEO signal Cyan video 1 LDPWRH LASER LIGHT INTENSITY SWITCH signal LD2PDOUT LASER CURRENT OUTPUT signal TOPS TOP OF PAGE sig...

Page 341: ...R POSITIVE BIAS DRIVE signal Yellow TR2PWM TRANSFER POSITIVE BIAS DRIVE signal Cyan TR1NPWM TRANSFER NEGATIVE BIAS DRIVE signal Magen ta TR1PWM TRANSFER POSITIVE BIAS DRIVE signal Magenta ATTPWM ATTRACTION POSITIVE BIAS DRIVE signal ATTNDCD ATTRACTION NEGATIVE BIAS DRIVE signal TR4I TRANSFER CURRENT signal Black TR1I TRANSFER CURRENT signal Magenta ATTI ATTRACTION CURRENT signal TON4SNS TONER LEVE...

Page 342: ...OR SPEED signal Magenta D4HPS DRUM HOME POSITION signal DM1ACC DRUM MOTOR ACCELERATION signal Magenta D3HPS DRUM HOME POSITION signal DM3DEC DRUM MOTOR DECELERATION signal Yellow D2HPS DRUM HOME POSITION signal DM4REV DRUM MOTOR REVERSE COMMAND signal Black D1HPS DRUM HOME POSITION signal DM1DEC DRUM MOTOR DECELERATION signal Black FEDMI2 FEED MOTOR CONTROL signal DM4FG DRUM MOTOR SPEED signal Bla...

Page 343: ...UP SOLENOID DRIVE signal FSRMFG FIXING MOTOR SPEED signal ETBMFG ETB MOTOR SPEED signal FSRMACC FIXING MOTOR ACCELERATION signal ETBMACC ETB MOTOR ACCELERATION signal FSRMDEC FIXING MOTOR DECELERATION signal ETBMDEC ETB MOTOR DECELERATION signal PFULS DELIVERY TRAY PAPER FULL signal TRSEPSL ETB ESTRANGEMENT SOLENOID DRIVE signal FSRSEPS FIXING PRESSURE RELEASE signal DUPOPCK CLOCK signal DEVBKLS D...

Page 344: ...OLD9 SOLD7 SOLD10 SOLD8 1 2 3 4 J3020D 1 2 3 4 J3020L J3020DH 1 2 3 4 J3020 8 1 2 3 4 5 6 7 9 10 J8125 10 9 8 2 3 4 5 6 1 7 J5027L J5027DH 7 1 6 5 4 3 2 8 9 10 J5027D 2 3 4 1 J5026F 2 3 4 1 J5026M 8 1 2 3 4 5 6 7 9 10 J5025M 8 1 2 3 4 5 6 7 9 10 J5025F 1 2 3 4 5 J7003 5 4 3 2 1 J7004 3 2 1 J7005 J1014 10 9 8 2 3 4 5 6 1 7 J3004 PIN3002 3 4 5 6 1 2 J1006 8 1 2 3 4 5 6 7 J3012 2 1 J3016 1 2 3 4 J301...

Page 345: ...M2ACC SCNM1DEC SCNM2DEC GND GND 1st 2st 3st 4st Laser scanner unit 1 2 3 4 5 6 7 8 J1021 5 4 3 2 1 J5029 1 2 3 4 5 J1013 J5030H J5029H J5028H 3 2 1 J5030 4 3 2 1 J5028 1 2 3 J1025 1 2 3 4 J1011 J401 J1023 J1022 J201 1 2 J202 J1009 J2002 J1019 1 2 3 J1008 J301 1 2 J302 2 1 J303 1 2 J304 2 1 J305 J1020 1 2 3 4 J1018 1 2 3 4 J5001A J1010 J101 J102 J1012 2 1 J1024 23 J312 J313 1 2 3 4 J5001B 1 2 3 4 1...

Page 346: ...10L J5010LM 1 2 J405 2 1 J403 1 2 J210 3 2 1 J705 J823DH 1 2 3 J823D 10 9 8 2 3 4 5 6 1 7 J209 3 2 1 J406 9 8 2 3 4 5 6 1 7 J410 J4010D 7 1 6 5 4 3 2 8 9 10 11 12 J404 1 2 3 J702 13 12 11 10 9 8 2 3 4 5 6 1 7 J208 1 2 3 4 5 6 J5003 12 11 10 9 8 2 3 4 5 6 1 7 J207 J5010DF 1 2 3 4 5 6 7 J206 1 2 1 2 3 4 J811 1 2 3 4 5 J812 2 1 1 2 3 4 9 8 2 3 4 5 6 1 7 J213 1 2 3 4 5 6 1 2 3 4 5 6 1 2 3 4 5 6 J5002 ...

Page 347: ..._CLK SD_DATA0 SD_DATA1 SA_DATA2 WRITE_PROTECT GND CARD_DETECT VBUS USB_DEV_DM USB_DEV_DP PK WH WH UL3725 26 PK USB DEVICE External device External device SERIAL CARD READER Option cable 5 4 3 2 1 J6036 1 2 3 4 5 J8119 5 4 3 2 1 J6023L 1 2 3 4 5 J6023D J6023LH 1 2 3 4 5 6 7 J8117 2 1 J9102 J6021LH 9 8 2 3 4 5 6 1 7 J8118A 1 2 J8140A 1 2 3 J8133 1 2 3 J720 1 2 3 4 5 6 7 J6035 7 6 5 4 3 2 1 J6021L 7 ...

Page 348: ... 4 3 2 8 9 10 11 12 J8120 SOLD11 4 3 2 1 J8121 1 2 3 4 J5015D J8114 J202A USB J205A J8103 USB FT8155 187 3 2 1 J719 6 5 4 3 2 1 J6034 1 2 3 J717 1 2 3 J5014L 3 2 1 J5014D 1 2 3 4 J8131 J201B J105A J5015LH 1 J5021M J102A J103A 1 2 3 4 5 6 J2 1 2 3 4 5 6 J8128 J5014LH 2 3 4 1 J5015L 2 3 4 1 J6032 7 6 5 4 3 2 1 J8151 J1 1 2 3 4 5 6 7 J3 1 2 3 J8123 J8124 1 2 3 4 4 3 2 1 2 1 J6033 1 2 4 1 2 3 5 6 7 8 ...

Page 349: ......

Reviews: