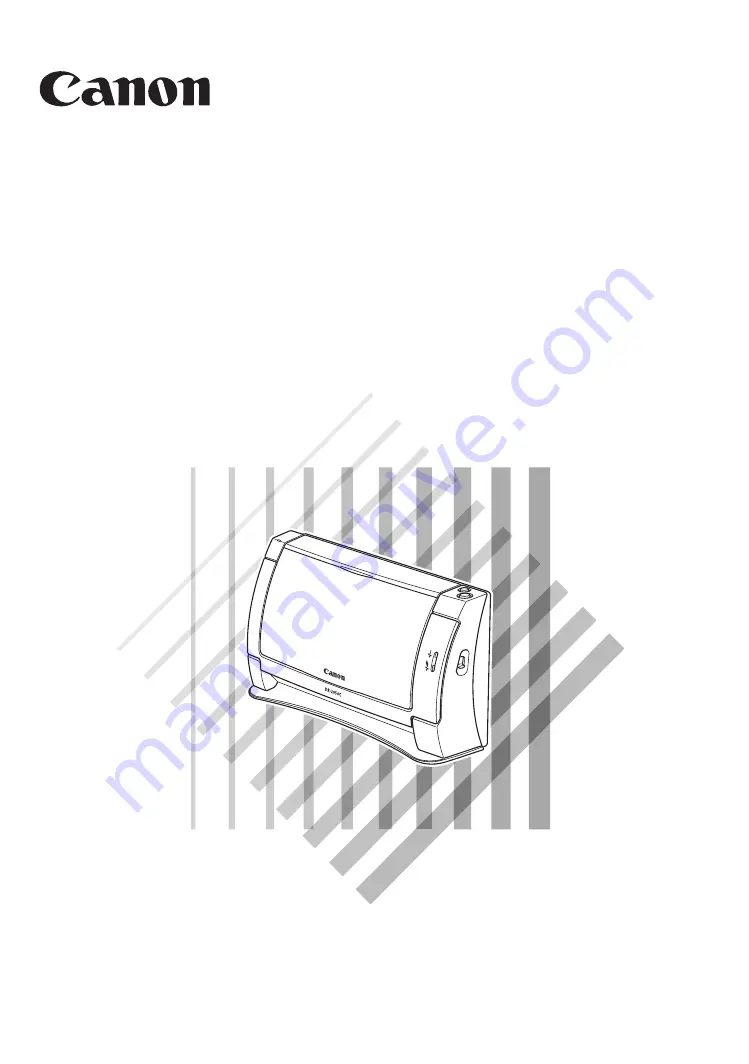
background image

Document Scanner

User’s Guide

DR-2050C
DR-2050SP

Please read this manual before using this unit. After you finish
reading this manual, keep it in a safe place for future reference.

To customers who have purchased a Canon DR-2050SP 
Document Scanner:

If you plan to use the document scanner in the Presentation mode,
you should read this manual together with the 

DR-2050SP User’s

Guide Presentation Mode Edition

.

Summary of Contents for imageFORMULA DR-2050C

Page 1: ... you finish reading this manual keep it in a safe place for future reference To customers who have purchased a Canon DR 2050SP Document Scanner If you plan to use the document scanner in the Presentation mode you should read this manual together with the DR 2050SP User s Guide Presentation Mode Edition ...

Page 2: ... the separation between the equipment and receiver Connect the equipment into an outlet on a circuit different from that to which the receiver is connected Consult the dealer or an experienced radio TV technician for help Use of shielded cable is required to comply with class B limits in Subpart B of Part 15 of FCC Rules Do not make any changes or modifications to the equipment unless otherwise sp...

Page 3: ...s from the date you purchased the same as evidenced by a receipt or otherwise The limited warranty does not apply if the failure of the diskette resulted from accident abuse or misapplication of the SOFTWARE and shall not extend to anyone other than the original user of the SOFTWARE CANON CANON S AFFILIATE THEIR DISTRIBUTOR OR DEALER DISCLAIMS ALL IMPLIED WARRANTIES INCLUDING ANY WARRANTY OF MERCH...

Page 4: ...re registered trademarks of Intel Corporation ENERGY STAR is a U S registered mark Adobe is the registered trademark of Adobe Systems Incorporated in the United States and or other countries Adaptec is registered trademark of Adaptec Inc OmniPage is registered trademarks of Nuance Communication Inc in the United States of America and or other countries Other product and company names herein may be...

Page 5: ...ing to use the scanner If you plan to use the DR 2050SP in Presentation mode you should read this manual together with the DR 2050SP User s Guide Presentation Mode Edition The following describes the manuals packaged with the scanner Before you start using the scanner be sure to read this User s Guide Easy Start Guide This manual describes the procedure for removing the scanner from its box throug...

Page 6: ... always pay attention to these warnings CAUTION Indicates a caution concerning operations that may lead to injury to persons or damage to property if not performed correctly To use the machine safely always pay attention to these cautions IMPORTANT Indicates operational requirements and restrictions Be sure to read these items carefully to operate the machine correctly and avoid damage to the mach...

Page 7: ...ocument Feed Tray 21 Using the Document Guide Adapter 22 Using the Feed Extension Plate 22 3 Placing a Documents 23 How to Feed with the Page Separation Mode 23 How to Feed with the Bypass Mode 26 Scanning Folio Folded Document 27 4 Scanning Documents 28 Using CapturePerfect 3 0 28 Using the Job Function 34 Setting the Event Function 37 5 Clearing a Paper Jam 42 6 Scanning Hints 44 7 Software Sett...

Page 8: ...nner Does Not Turn ON 72 The Scanner Is Not Recognized 72 Slow Scanning Speed 73 Scanning Is Not Performed 74 Documents Are Not Fed Correctly 74 Paper Is Not Ejected Correctly 75 Saved Image Files Do Not Open 75 Scanning Results Are Not as Expected 75 4 Uninstalling Software 78 Uninstalling the ISIS TWAIN Driver Job Registration Tool 80 Uninstalling CapturePerfect 3 0 82 5 Specifications 84 Specif...

Page 9: ...ortant Safety Instructions 6 Installation Location 6 Power 7 Moving the Scanner 7 Remote Control DR 2050SP only 8 Handling 8 Disposal 10 2 Features 11 3 Names and Functions of Parts 13 4 Installation Requirements 15 5 About the Setup Disc 17 ...

Page 10: ...ulates Avoid warm or humid locations such as in the vicinity of a water faucet water heater or humidifier and avoid locations where the fumes from ammonia paint thinner or other volatile chemicals may be present Avoid locations where ammonia gas is emitted Avoid locations near volatile or flammable materials such as alcohol or paint thinner Avoid locations that are subject to vibration Avoid expos...

Page 11: ... power cord while it is coiled Do not pull directly on the power cord When disconnecting the power cord grasp the plug and remove it from the outlet Keep the area around the power plug clear of objects so that the power cord can be disconnected easily in an emergency Use only the AC adapter provided with this scanner Also do not use the AC adapter provided with the scanner with any other electrica...

Page 12: ...r use alcohol benzene paint thinner aerosol sprays or any other highly flammable substance near the scanner Do not cut damage or modify the power cord or AC adapter Do not place heavy objects on the power cord or AC adapter and do not pull or excessively bend the power cord Never connect the power cord when your hands are wet Do not connect the scanner to a multi plug power strip Do not knot or co...

Page 13: ...scanner to overheat creating a risk of fire Never place small metal objects such as staples paper clips or jewelry on the scanner These items may fall into the scanner and cause a fire or electric shock Should such objects ever fall inside the scanner immediately turn the power switch OFF and disconnect the power plug from the power outlet Then contact your local authorized Canon dealer or service...

Page 14: ...ecutive holidays Do not wear loose clothing or jewelry that may get caught in the scanner while you are using it This may result in personal injury Be extra careful of neckties and long hair If anything becomes caught in the scanner immediately disconnect the power cord to stop the scanner Disposal When disposing of this scanner be sure to follow all local ordinances and laws or consult with the r...

Page 15: ...ngle sided double sided mode Single sheet dual feeding path Paper Size Detection The size of scanned documents is automatically detected and images of non standard size documents are saved with the unwanted margin around the document removed Folio Scan A folio folded in half document can be set for scanning as it is and the scanned images of both sides are combined as a single image See p 27 Deske...

Page 16: ...unction that automatically initiates scanning when a document is placed in the document feed tray Compatible with Carbonless Duplicating Paper The scanner is able to scan carbonless duplicating paper Energy Saving Mode This scanner is compatible with the International Energy Star Program and is designed to save power by using the energy saving feature except when scanning is being performed Presen...

Page 17: ...nning Feed Mode Panel Auto Scan Button Press to start document scanning Feed Selection Lever Use it to set the way the documents are fed To feed a multi page document one page at a time lower the lever Page Separation mode To feed bound documents such as invoices without separating them raise the lever Bypass mode Feed Indicator Indicates the Feed Selection Lever position Document Eject Opening Sc...

Page 18: ... one that supports Hi Speed USB 2 0 Power Connector Connect the AC adapter that is provided with the scanner Kensington Slot Used for anti theft measures Theft can be prevented by attaching a chain etc Ventilation Openings Power Switch Turns the scanner ON and OFF indicating page by page feeding of document Page Separation mode indicating multi page document alignment indicating document setting m...

Page 19: ...equal to USB 1 1 An ISIS compatible application or a TWAIN compatible application that is compatible with the above operating systems IMPORTANT If you do not know the requirements for your computer system contact the store where you purchased the computer or the manufacturer of the computer for more information Use the most recent version of the USB 2 0 driver provided by Microsoft Contact your lo...

Page 20: ...e recommended specifications the scanning speed may vary depending on the scan settings The ISIS TWAIN Drivers provided with the scanner do not necessarily operate on all ISIS or TWAIN compatible applications For details contact your application software retailer ...

Page 21: ...er recognition OCR software made by Nuance Communications Inc Note The following shows how the DR 2050 series setup disc is configured For instructions on how to install the software included on the setup disc see the Easy Start Guide For information on how to use OmniPage SE 4 0 contact Nuance Communications Inc Menu screen Typical Installation Read the manual Custom Installation All of the indic...

Page 22: ...18 Before Using the Scanner ...

Page 23: ... Documents 23 How to Feed with the Page Separation Mode 23 How to Feed with the Bypass Mode 26 Scanning Folio Folded Document 27 4 Scanning Documents 28 Using CapturePerfect 3 0 28 Using the Job Function 34 Setting the Event Function 37 5 Clearing a Paper Jam 42 6 Scanning Hints 44 7 Software Settings 49 ISIS Driver Settings 50 TWAIN Driver Settings 52 Job Registration Tool Settings 54 ...

Page 24: ...lean the rollers or scanning glass after scanning a document written in pencil Scanning documents with pencil written on them may soil the rollers or scanning glass cause stripes to appear in images or dirty other documents When scanning a two sided document that is printed on thin paper the image on the opposite side of each page may show through Adjust the brightness in the scanning conditions b...

Page 25: ...Preparing the Trays Prepare the document feed tray in accordance with the document size and type Setting Up the Document Feed Tray Pull the document feed tray towards you to open it In the case of a short document open the upper cover ...

Page 26: ...n the illustration Insert the legs of the document guide adapter as far as they go into the document guide Note If document skew is not remedied by installing the document guide adapter set deskew to on in the ISIS TWAIN driver settings See p 49 Using the Feed Extension Plate Under the following conditions install the document guide adapter set the document in the scanner and then pull out the fee...

Page 27: ...a document check to make sure it does not contain paper clips staples or other small metal objects These objects may damage the document or cause a paper jam or scanner malfunction Do not wear loose clothing or jewelry that may get caught in the scanner while you are using it This may result in personal injury Be extra careful of neckties and long hair If anything becomes caught in the scanner imm...

Page 28: ...e document tray 3 Fan the stack of documents to be scanned and then angle the stack as shown in the illustration so the top edge of the first page is the lowest Set the document in the scanner with the top edge of the document facing downwards CAUTION Handle the document carefully when setting it in the scanner The edges of the paper can unexpectedly cut your hands 1 2 3 4 1 2 3 4 A B C A B C ...

Page 29: ...te Before scanning make sure that the document is loaded in the scanner correctly Scanning a curled document or a creased document can damage the document 6 Start scanning from the application IMPORTANT If the paper feed operation stops due to a system error or a paper jam while the scanner is scanning resolve the problem make sure that the scanned image of the last page that was fed has been stor...

Page 30: ... scanner with the back of the document facing forward and its top edge facing downwards The document is scanned as it is detected IMPORTANT When scanning documents that are fastened together such as invoices set the edge that is fastened together as the leading edge After you finish scanning close the document feed tray and the upper cover to prevent damage to the scanner while it is not being use...

Page 31: ... document that is folded in half set scanning side in the ISIS TWAIN driver to Folio ISIS Driver Settings g on p 50 TWAIN Driver Settings g on p 52 Combined images can be a maximum of A3 size To use folio scan to scan non standard size documents set Page size to Auto detection IMPORTANT When folding documents align the left and right edges and crease the document at the fold The way the document i...

Page 32: ... Select the desired scan mode from the scan menu to perform scanning Scan Batch to File Documents are scanned with the preset scanning conditions and the image file is saved to the specified folder Scan Batch to Print Documents are scanned with the preset scanning conditions and the scanned image is printed on the specified printer Scan Batch to Mail Documents are scanned with the preset scanning ...

Page 33: ... and the scanned image is displayed at full size on the screen Note For instructions on how to use CapturePerfect 3 0 see the CapturePerfect 3 0 Operation Guide and CapturePerfect Help Be sure to read the CapturePerfect 3 0 Operation Guide and CapturePerfect Help before you use CapturePerfect 3 0 CapturePerfect 3 0 Operation Procedure This section describes how to start up CapturePerfect 3 0 selec...

Page 34: ...30 Using the Scanner CapturePerfect 3 0 starts up 2 Follow the procedure below to select the Canon DR 2050C document scanner as the scanner to be used 1 On the Scan menu click Select Scanner ...

Page 35: ... the ISIS TWAIN driver See Step 3 Installing the Software in the Easy Start Guide 3 Set the Default Page Size Note This dialog box is displayed only when you select CANON DR 2050C for the first time and you click the OK button or when you click Settings on the Select Scanner 3 On the Scan menu click Scanner Setting Driver basic setup dialog box opens ...

Page 36: ... Set the scan settings For details setting the scanning settings see ISIS Driver Settings on p 50 and ISIS TWAIN Driver Help 5 Place your document See Placing a Documents on p 23 6 On the Scan menu select Scan Batch to File ...

Page 37: ...and click Save to start scanning For details on the available settings in the Scan Batch to File Setting dialog box see the CapturePerfect Operation Guide and CapturePerfect Help 8 When there are no more document sheets to scan scanning stops and the Continue dialog box is displayed To continue scanning click Continue scanning and to stop scanning click Stop scanning 9 After scanning is complete s...

Page 38: ...pecified folder Print Scanning is performed according to preset scanning conditions and image files are output on a specified printer Attach to E mail Scanning is performed according to preset scanning conditions e mail software is started up and scanned images are attached to a new e mail Launcher The application selected by Setting the Event Function See p 37 is started up Save as file Image fil...

Page 39: ...ol Help When Launcher is selected events must be set See Setting the Event Function on p 37 1 Click the Start button and then click Programs All Programs if you are using Windows XP Æ Canon DR 2050C Æ Job Registration Tool The Job Registration Tool starts up Note Job Registration Tool is a TWAIN compatible application that is installed with the ISIS TWAIN driver You can register jobs for numbers 1...

Page 40: ...events See Job Registration Tool Settings on p 54 3 Use the scan button to select the job you want to execute from the registered jobs and then click the icon in the No frame When you click the icon of the No to which a job is registered the icon appears colored Note The job with the colored icon is executed when the scan button is pressed 4 Click Close to close the Job Registration Tool 5 Place t...

Page 41: ...on the Monitor for DR2050C 8 Click Close to close the Monitor for DR2050C Setting the Event Function By setting Events you select the application to be started up when Launcher is selected in Job Registration Tool 1 Use the following procedure to open the Event settings dialog box 1 Click the Start button and then click Settings on the Start menu Æ click Control Panel For Windows XP click the Star...

Page 42: ...or Windows XP switch the Control Panel to Classic View or select Printers and Other Hardware in the working field 3 Click Scanners and Cameras Printers and Other Hardware Control Panel category view Control Panel classic view ...

Page 43: ...Using the Scanner 39 Chapter 2 4 Select CANON DR 2050C USB and then click Properties 5 Click the Events tab ...

Page 44: ...he Scanner events drop down list 3 At Send to this application unmark the applications that are not to be started up and click Apply 4 Click OK to close CANON DR 2050C USB Properties 5 Restart Windows to enable the new settings for the event function ...

Page 45: ... this application the application selection dialog box will be displayed when Launcher in the Job Tools dialog box is selected and the Scan button is clicked Certain applications may not run normally when started as an event To disable use of events mark the Disable device events checkbox ...

Page 46: ...e to clear them CAUTION When removing jammed paper take care not to cut your hands on the edges of the paper 1 Remove any documents from the document feed tray 2 Pressing the OPEN knob from both sides a pull the front unit forward to open it b 3 Remove the jammed document from the feed side or the output side ...

Page 47: ...ld the paper tear make sure to remove any torn pieces remaining in the scanner 4 Gently press the left and right sides of the top of the Front Unit Be sure that the upper unit is completely closed by pushing on both edges with both hands until you hear a click Note After removing the jammed paper check to see if the last page of your document was scanned correctly and then continue scanning ...

Page 48: ...ze document is scanned with a standard size specified a black margin around the scanned image If you want to scan nonstandard size documents set Page Size to Auto detection The size of the document is automatically detected See ISIS Driver Settings c on p 50 and TWAIN Driver Settings c on p 52 I want to register non standard size documents A non standard document size can be registered as a Custom...

Page 49: ...ngs h on p 52 I want to divide up scanned images by individual document stacks to save as separate files Set the Feeding Option to Automatic Feeding or Panel Feeding and set Batch Separation to Auto ISIS driver only See ISIS Driver Settings h on p 50 and ISIS Driver Settings i on p 50 I want to scan a document one sheet at a time Set the Feeding Option to Automatic Feeding or Panel Feeding to scan...

Page 50: ...her Ratio of black pixels value adjust the slider towards the right If a low Ratio of black pixels value is set blank sheets are sometimes not skipped due to the background color or dirt on the document Documents full of text are skipped as blank sheets Set a lower Ratio of black pixels value adjust the slider towards the left If a high Ratio of black pixels value is set even documents full of tex...

Page 51: ...dpi or less and at 256 shade grayscale or 24 bit smoothing colors This averages the image to suppress moire See ISIS Driver Settings b on p 50 and TWAIN Driver Settings b on p 52 I want to skip specific colors Specify the color to skip during scanning in Color drop out See ISIS Driver Settings o on p 50 and TWAIN Driver Settings o on p 52 I want to enhance shadows from stamps Select Red Enhance at...

Page 52: ...nd ISIS Driver Settings n on p 50 Registering Settings I want to use preset scanning conditions again Assign a name to the scanning conditions and register them as a user preference If you select the name of an already registered user preference the conditions you set overwrite the settings of the selected user preference See ISIS Driver Settings a on p 50 and TWAIN Driver Settings a on p 52 With ...

Page 53: ...ool For a more detailed description read the Help files for each item ISIS Driver Settings P 50 TWAIN Driver Settings P 52 Job Registration Tool Settings P 54 Note A Quick Guide containing the same content as this section of the PDF file version of the User s Guide is available on the setup disc Print this guide and keep it near the scanner as a reference ...

Page 54: ...ion Page Size Skip blank page Scanning Side and Deskew options are not available and Brightness and Contrast are set automatically Scanner Adjustment is a function used to adjust the reference values of the scanner when abnormalities occur within the scanned images Do not execute when the scanner is functioning properly Area setting is not available when the Auto detection Page Size is selected Sc...

Page 55: ...uments can be scanned as separate batches When Auto is selected batch separation is performed when scanning with Panel Feeding or Automatic Feeding starts When Panel is selected batch separation is performed when the batch separation button in the Scan Panel is clicked j Deskew When a document page feeds at a slant the scanned image is straightened k Prescan When scanning starts a page of the docu...

Page 56: ...cted The Smoothing mode options are not displayed when 600 dpi Dots per inch is selected Blank pages for skipping are determined using the Ratio of black pixels value selected The Delay setting is available when the Automatic Feeding Feeding Option is selected Area setting is not available when the Auto detection Page Size is selected Scanning of the specified area may be shifted when Deskew is en...

Page 57: ...ment page feeds at a slant the scanned image is straightened j Prescan When scanning starts a page of the document is scanned and its image is displayed in the Prescan window k Scanning Option Specifies operation during scanning Standard after one page has been scanned and ejected the next page is scanned Scan Ahead scans document pages continuously Scan Single Page Scanning Side is set and fixed ...

Page 58: ... OCR File type Print Attach to E mail Launcher PDF TIFF Settings Access setting Windows 2000 XP Copy Dialog Box Dialog box contents will differ depending on the selected function Save as file New Editing Dialog Box The Setting button is enabled when PDF or TIFF is selected a f g h i j k n o p q r s t u v w x y z b c e d l m ...

Page 59: ... printed at actual size p Save Image Select this check box to save images scanned using Attach to E mail q Launcher Starts applications set with the Windows event function See the user s guide for detailed information PDF TIFF Settings r Compression rate Selects Normal or High Compression rate High Compression reduces the file s size but also reduces the image quality slightly High Compression is ...

Page 60: ...56 Using the Scanner ...

Page 61: ... Feed Roller 65 Removing and Attaching the Retard Roller 68 3 Troubleshooting 72 The Scanner Does Not Turn ON 72 The Scanner Is Not Recognized 72 Slow Scanning Speed 73 Scanning Is Not Performed 74 Documents Are Not Fed Correctly 74 Paper Is Not Ejected Correctly 75 Saved Image Files Do Not Open 75 Scanning Results Are Not as Expected 75 4 Uninstalling Software 78 Uninstalling the ISIS TWAIN Drive...

Page 62: ...l or other organic solvents to clean the scanner Such solvents can damage or discolor the exterior of the scanner or create a risk of fire or electric shock Cleaning the Scanner Moisten a cloth with plain water wring out the excess water and then wipe the exterior of the scanner to clean it Cleaning Inside the Scanner Dust or paper particles inside the scanner can cause lines in scanned images Use...

Page 63: ...it b 3 Use a blower to keep the interior of the scanner free of dust and paper particles 4 Use a clean dry cloth to wipe dirt off the scanning glass Wipe both the top and bottom scanning glasses CAUTION Do not use spray type cleaners to clean the scanner Precision mechanisms such as the light source may get wet which will cause a malfunction IMPORTANT Scratches on the scanning glass may cause mark...

Page 64: ... p 66 p 69 IMPORTANT After removing the feed roller and retard roller clean them and then return them to the scanner 7 Wipe the removed rollers with a firmly wrung cloth moistened with water 8 Attach the rollers that were removed See p 67 p 70 9 Gently press the left and right sides of the top of the front unit Return the unit fully to its original position until you hear it click into place Feed ...

Page 65: ...ime to rotate the metal rollers in small increments CAUTION There are two metal rollers one for the Front Unit and one for the scanner Be sure to wipe both of them Do not spray water or neutral detergent directly on the metal rollers Doing so can damage precision mechanisms such as the light source Moisture on the scanner or your hands also creates the risk of electric shock Scanner power needs to...

Page 66: ...xceeds 30 000 a roller replacement message will appear when the computer is started When you are using the DR 2050SP in the Presentation mode a message prompting you to change the rollers is displayed after the opening screen when the scanner s power is turned ON Buy an exchange roller kit and replace the feed roller and the retard roller IMPORTANT If misfeeds happen often check the rollers for we...

Page 67: ...n the Counter setup dialog box 1 Click the Start button Æ click Settings on the Start menu Æ click Control Panel For Windows XP click the Start button Æ click Control Panel 2 For Windows XP switch the Control Panel to Classic View or select Printers and Other Hardware in the working field Printers and Other Hardware Control Panel category view Control Panel classic view ...

Page 68: ...64 Appendices 3 Select CANON DR 2050C USB and then click Properties 4 Click the Counter tab ...

Page 69: ...er Follow the procedure below to remove and attach the feed roller for cleaning or replacement Note When attaching the feed roller during installation operate the roller fastening lever according to the removal procedure and then attach the feed roller CAUTION Do not use excessive force when removing or attaching the feed roller Doing so may damage them ...

Page 70: ...sing the OPEN knob from both sides a pull the front unit forward to open it b 2 Open the roller cover on the scanner side Insert a finger into the depression in the cover and open it 3 Raise the roller lock lever a and then slide it to the left b ...

Page 71: ... shaft and then remove it Attaching the Feed Roller 1 Set the feed roller into the hollow inside the roller cover and align the notch in the roller with the scanner shaft 2 Slide the roller lock lever to the right and then insert the shaft into the hole on the left side of the roller ...

Page 72: ...s of the top of the Front Unit Return the unit fully to its original position until you hear it click into place Removing and Attaching the Retard Roller Follow the procedure below to remove and attach the retard roller for cleaning or replacement Note When attaching the feed roller during installation operate the roller fastening lever according to the removal procedure and then attach the feed r...

Page 73: ...ollers Doing so may damage them Removing the Retard Roller 1 Pressing the OPEN knob from both sides a pull the front unit forward to open it b 2 Holding the edges of the roller cover on the inside of the front unit open the cover 3 Raise the roller lock lever a and then slide it to the left b ...

Page 74: ...from the shaft and then remove it Attaching the Retard Roller 1 Position the retard roller so the notch in the roller is facing the scanner s shaft 2 Slide the roller lock lever to the right and then insert the shaft into the hole on the left side of the retard roller ...

Page 75: ...roller in place 4 Attach the roller cover Be sure that the upper unit is completely closed by pushing on both edges with both hands until you hear a click 5 Gently press the left and right sides of the top of the front unit Return the unit fully to its original position until you hear it click into place ...

Page 76: ...f the scanner does not turn on Is the power cord connected correctly Is the power cord connected securely Is the power cord inserted into the power outlet For details on connecting the power cord see Step 4 Connecting the Scanner to Your PC in the Easy Start Guide The Scanner Is Not Recognized The following are possible causes of the PC failing to recognize the scanner Check each possible cause Pr...

Page 77: ...ications that are running Problem Resident applications such as anti virus software are draining memory resources Solution Quit all resident applications Problem Temporary files cannot be created in the TEMP folder as there is not enough free space on the hard disk Solution Delete unwanted files on the hard disk to increase free space on the hard disk Problem The USB port you are using does not su...

Page 78: ...estart the computer When scanning continues make sure that the last document scanned was scanned correctly Documents Are Not Fed Correctly The following are possible causes when documents are not fed correctly Problem Static electricity etc is causing the pages of the document to stick together and they cannot be separated correctly by the scanner Solution Before you place your document thoroughly...

Page 79: ...ations Problem The application you are using to open the TIFF file does not support multi page TIFF files Solution Open the file with an application that supports multi page TIFF files Symptoms A TIFF file saved in CapturePerfect 3 0 cannot be opened by other applications Problem If the TIFF file saved in CapturePerfect 3 0 has been compressed the application you are using to open the TIFF file do...

Page 80: ...ng Side to Double sided Symptoms A black margin appears around the scanned document Problem A document smaller than the preset paper size has been scanned Or the loaded document has shifted out of position Solution Set Paper size to Auto detection Or set Border Removal to on Symptoms The scanned image is skewed Problem The document has been fed at an angle skew Solution Use the document guide adap...

Page 81: ... the Scanner To adjust the scanner set the supplied Adjustment Sheet Shading Sheet in the scanner Orient the adjusting sheet in the direction indicated by the arrow when setting it in the scanner After setting the Adjustment Sheet in the scanner click the Windows Start button and then click Programs All Programs in the case of Windows XP Æ Canon Document Scanner and then DR 2050C 2080C Adjustment ...

Page 82: ...etup disc See Step 3 Installing the Software in the Easy Start Guide IMPORTANT Be sure to log on as an administrator when using Windows 2000 Professional or Windows XP 1 Click the Start button Æ click Settings Æ Control Panel Note For Windows XP click the Start button Æ click Control Panel The Control Panel window appears 2 Double click the Add Remove Programs Note If you are using Windows XP doub...

Page 83: ...ove Programs dialog box appears 3 From the list in the dialog box select the application you want to delete Æ click Change Remove For more information on uninstalling each application see the following See Uninstalling the ISIS TWAIN Driver Job Registration Tool on p 80 See Uninstalling CapturePerfect 3 0 on p 82 ...

Page 84: ...ms list in the dialog box select Canon DR 2050C 2080C Scanner Driver or DR 2050C Job Tool Æ click the Change Remove button 2 The Confirm File Deletion screen appears Click the Yes button The Remove Shared File dialog box appears 3 Click the Yes To All button A confirmation message appears ...

Page 85: ...Chapter 3 4 Click the Yes button to start the uninstallation Note All deleted shared files can be reinstalled by installing the software again 5 After uninstall is complete click the OK button to exit the uninstaller ...

Page 86: ...ices Uninstalling CapturePerfect 3 0 1 Select CapturePerfect 3 0 from the list in the dialog box Æ click the Remove button 2 The file delete confirmation screen appears Click the Yes button Uninstallation starts ...

Page 87: ...Appendices 83 Chapter 3 3 After uninstallation is complete click the Finish button to exit the uninstaller ...

Page 88: ...mm Document Feeding Method Automatic Scanning Method Contact image sensor Light Source LED Scanning Side Simplex Duplex Scanning Modes Black and white Text Enhanced Advanced Text Enhancement II Error diffusion 256 level grayscale 24 bit color Scanning Resolution Primary Scan Lines Secondary Scan Lines 100 100 dpi 150 150 dpi 200 200 dpi 240 240 dpi 300 300 dpi 400 400 dpi 600 600 dpi Scanning Spee...

Page 89: ... D 298 mm 197 mm 100 mm W H D Dimensions with trays open 11 7 12 7 5 2 W H D 298 mm 323 mm 132 mm W H D Weight Excluding the AC adapter Approximately 5 5 lb 2 5 kg DR 2050C Approximately 5 7 lb 2 6 kg DR 2050SP Power Supply DC 16 V 0 8 A AC adapter used Power Consumption Maximum power 13 W DR 2050C 16 W DR 2050SP Low power mode 4 W Power SW OFF 0 4 W Noise 66 dB or less Operating Environment Tempe...

Page 90: ...86 Appendices External Dimensions 7 7 197 mm 11 7 298 mm 3 9 100 mm 1 3 32 mm 12 7 323 mm Document Tray is open ...

Page 91: ...lation Location 6 Installation Requirements 15 Introduction 1 ISIS Driver 49 J Job Function 34 Job Registration Tool 35 49 K Kensington Slot 14 M Manuals for the Scanner 1 Moving the Scanner 7 N Names and Functions of Parts 13 O OmniPage SE 17 OPEN Knob 13 operating systems 15 P Page Separation Mode 23 Paper Jam 42 Placing a Documents 23 Power Connector 14 Power Indicator 13 Power Switch 14 Prepar...

Page 92: ...88 Index TWAIN Driver 49 U Upper Cover 13 USB Connector 14 V Ventilation Openings 14 ...

Page 93: ......

Page 94: ...NADA CANON EUROPA N V BOVENKERKERWEG 59 61 P O BOX 2262 1180 EG AMSTELVEEN THE NETHERLANDS CANON LATIN AMERICA INC 703 WATERFORD WAY SUITE 400 MIAMI FLORIDA 33126 U S A CANON AUSTRALIA PTY LTD 1 THOMAS HOLT DRIVE NORTH RYDE SYDNEY N S W 2113 AUSTRALIA CANON SINGAPORE PTE LTD 1 HARBOUR FRONT AVENUE 04 01 KEPPEL BAY TOWER SINGAPORE 098632 CANON HONGKONG COMPANY LTD 19TH FLOOR THE METROPOLIS TOWER 10...

Reviews: